

We got dirty with XTC-3D, a 3D print smoothing resin. The results are very shiny.
Acetone exposure has long been the go-to method for smoothing 3D prints in ABS, but it does not work on other popular 3D printing plastics, such as PLA. For PLA users, this meant long periods of tedious sanding and painting to smooth prints, or simply suffering with the layered look of a raw 3D print.
XTC-3D, an epoxy resin made by Smooth-On, is a product specifically targeted towards 3D printing. It’s a clear, sticky resin that when dry produces a smooth, shiny finish on your 3D prints, or at least that’s what they said it would do. We decided to give it a field test.
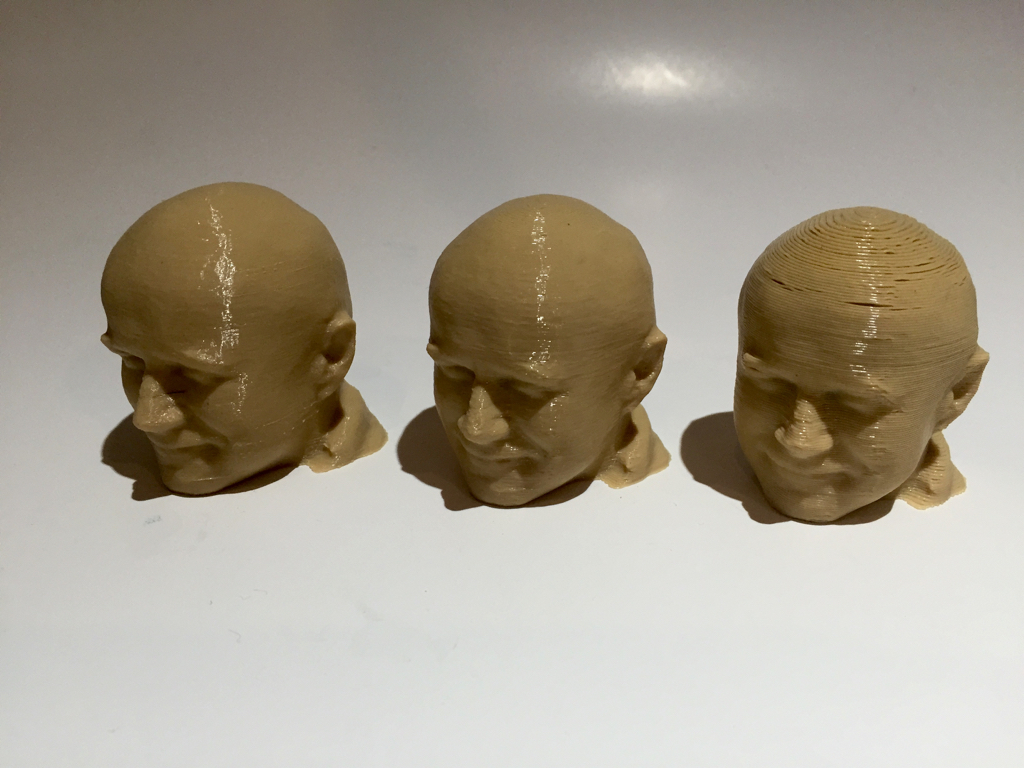
We began by printing a PLA test object, in this case a Robert Head, in three different layer sizes: 0.4, 0.2 and 0.1mm. Obviously, the 0.1mm print was smoother right from the printer, but it was not shiny nor smooth to the touch. The others, especially the 0.4mm item, were worse. The 0.4mm item in fact came out quite awful, but that’s good for this test.
XTC-3D is an epoxy, meaning it is made from two stable resins, which when mixed become a temporary liquid for application. You’ll have around ten minutes before it begins to solidify, so you’ll have to plan your painting process carefully. You may have to organize your painting into sections. They say after 2-4 hours, the resin dries completely, but we found it can take quite a few more hours than that.
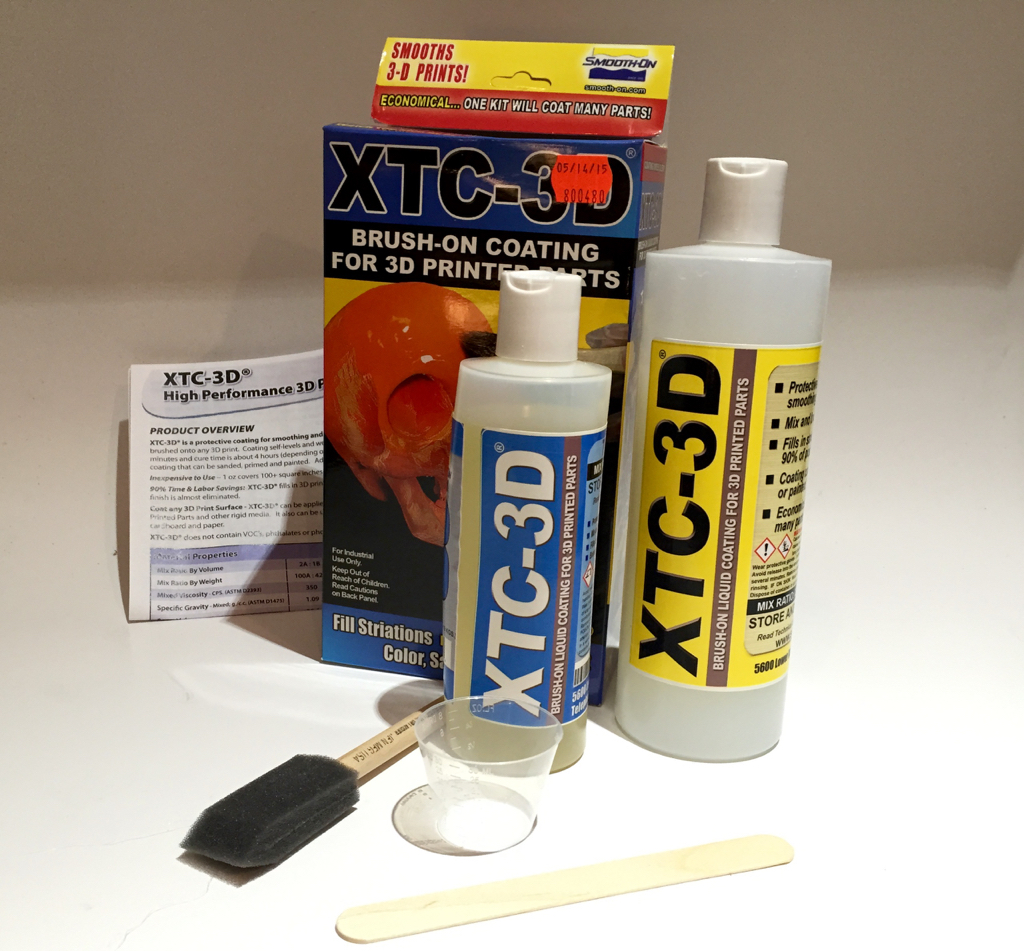
XTC-3D comes as a kit, including two stable resins, Part “A” and Part “B”, a small plastic mixing container, foam brush, mixing stick and instructions. You’ll also need a painting surface and something to suspend your print during painting if required.
Caution: XTC-3D has a very fun MSDS listing, so you should ensure you do your application in a very well-ventilated area, especially if you’re doing a lot of applications.
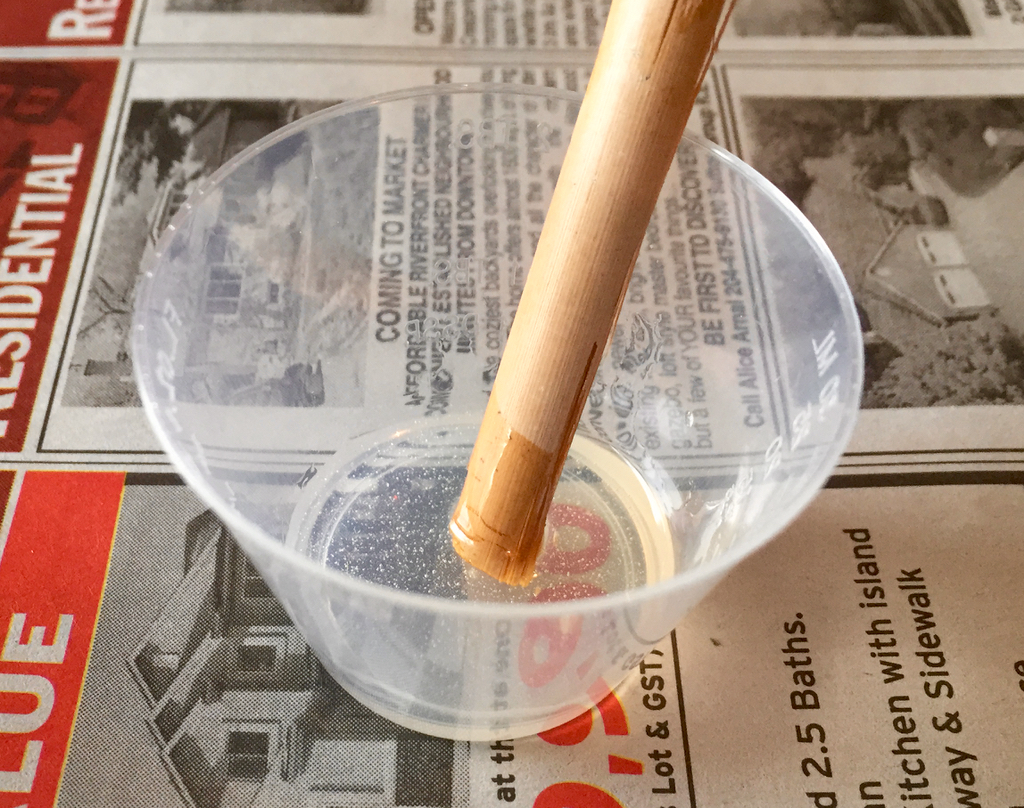
Part “A” is a very thick white substance, reminiscent of shampoo, while part “B” is a thin clear fluid. After a moment of mixing you get a slightly viscous clear fluid as seen here. Note that this an exothermic reaction: it generates heat, proportional to the amount of material. Therefore, use small quantities only.
Mixing the two must be done quite precisely. One mix we prepared simply did not dry properly even after several days! You absolutely must measure two exactly equal quantities for this procedure to work properly.
Application is straightforward, and you really don’t need very much to cover an object. Smooth-On says 1 ounce of resin can cover 101 square inches (28.3g covers 651 sq. cm). For our test with the three Robert Heads, the small plastic mixing container provided in the kit was filled only for a few mm (which likely explains why we had trouble getting the mixing ratios right).
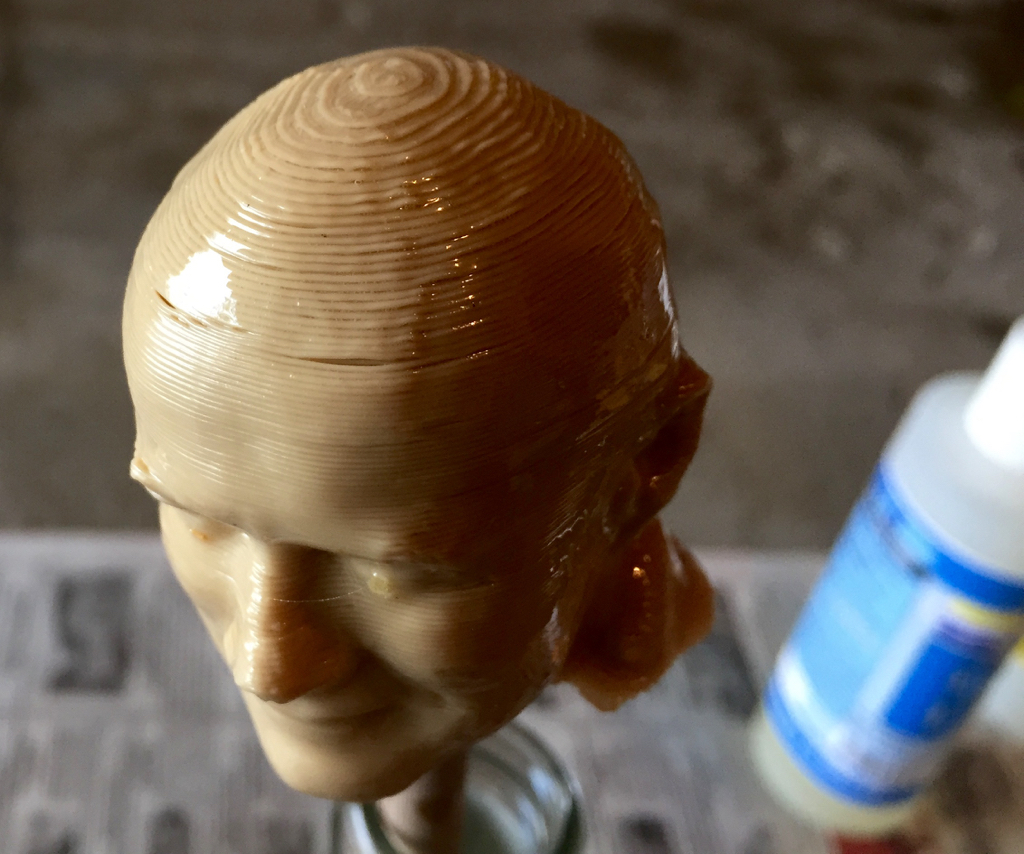
We first applied XTC-3D to the 0.4mm Robert Head, in hopes of seeing instant magic with the rather coarse print. Unfortunately, this was not the case, as you can see here, the layers are still clearly visible. But there’s more to the story as you will see.
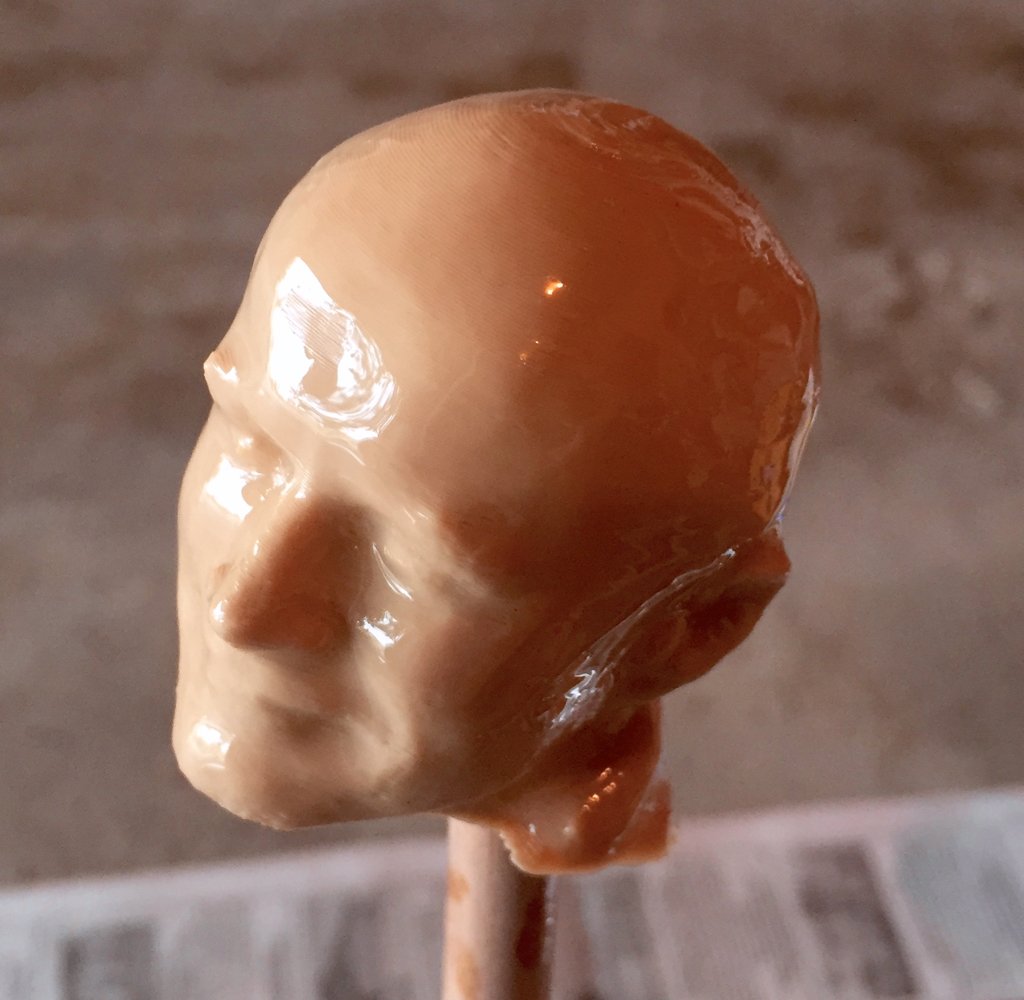
The other more finely printed heads came out far better and immediately looked better upon application of XTC-3D. Here we see the 0.2mm Robert. Looks good!
We noticed that you seem to use a lot less XTC-3D when painting the finer resolution prints, perhaps because the layer gaps are of smaller volume; the 0.4mm Robert used up almost as much resin as the other two combined!
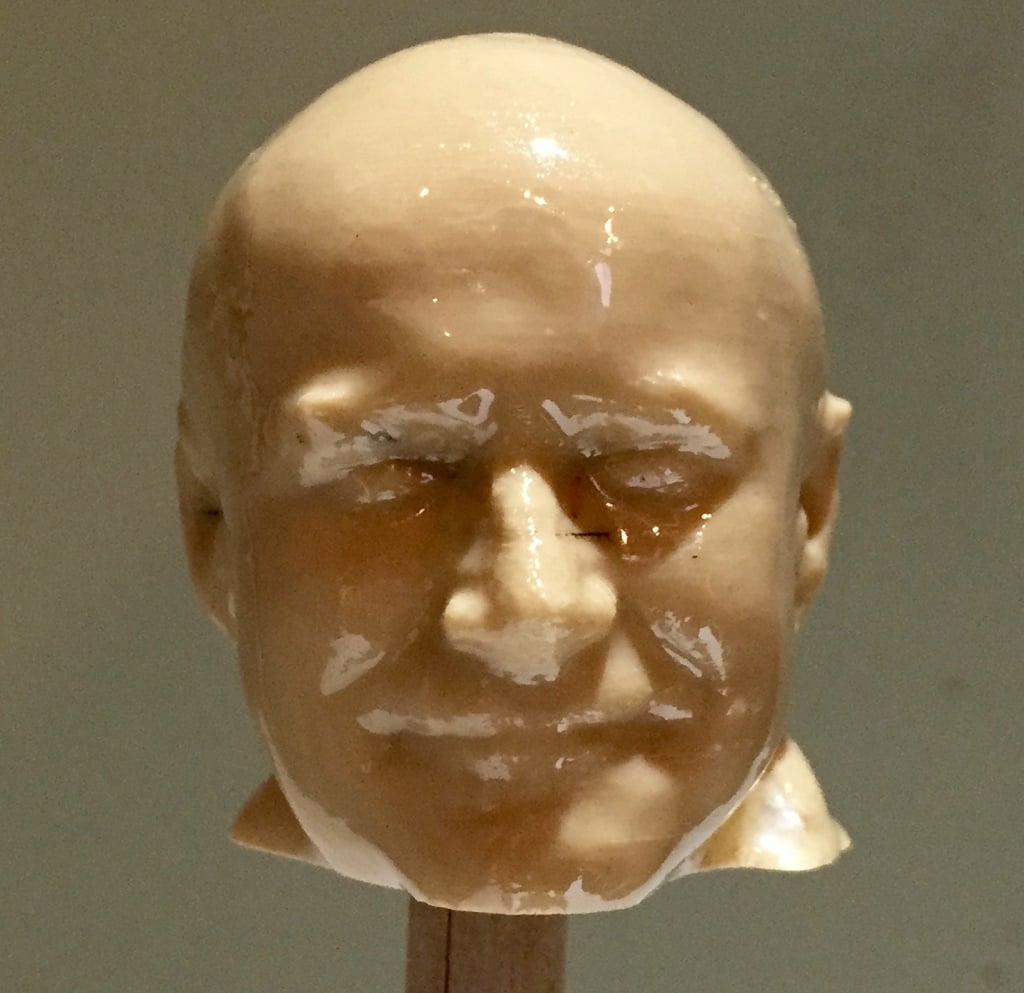
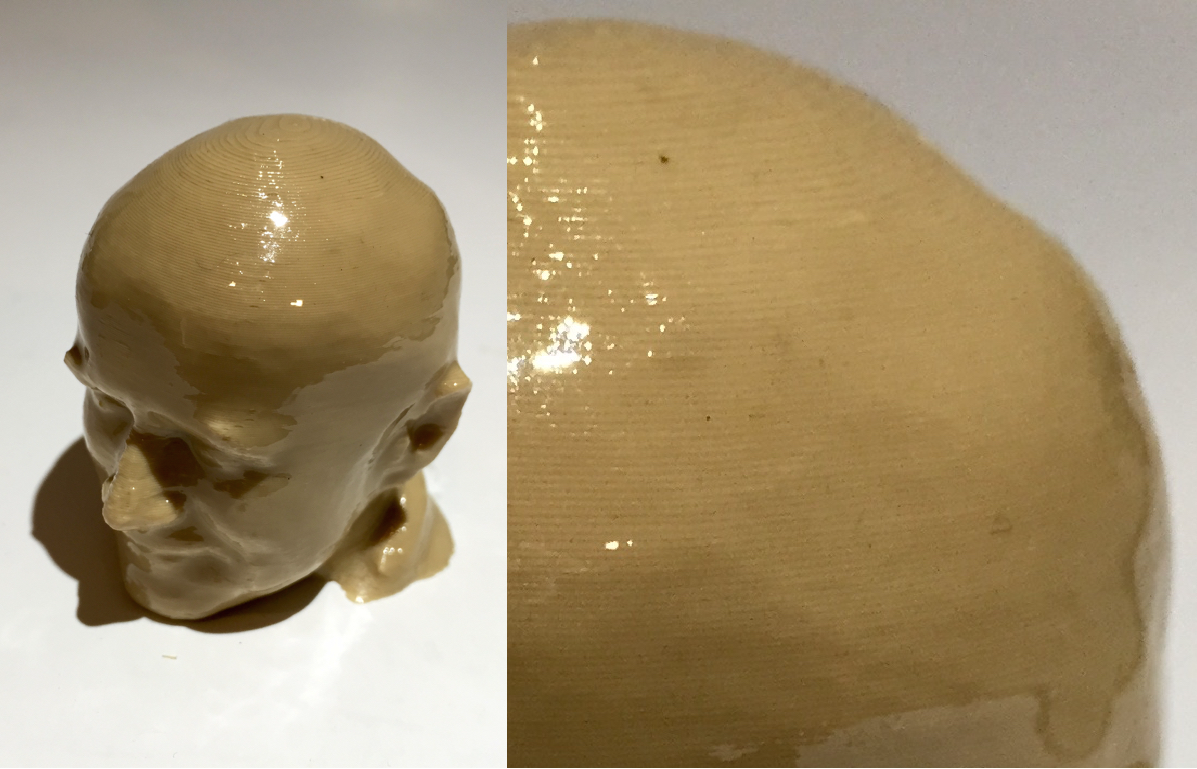
After a suitable drying period, the XTC-3D smoothed prints were ready for inspection. Here we see the 0.1mm head, and you’ll probably agree it’s almost perfectly smooth. And shiny.
The 0.2mm Robert was almost as good, although you can see more of the layer lines.
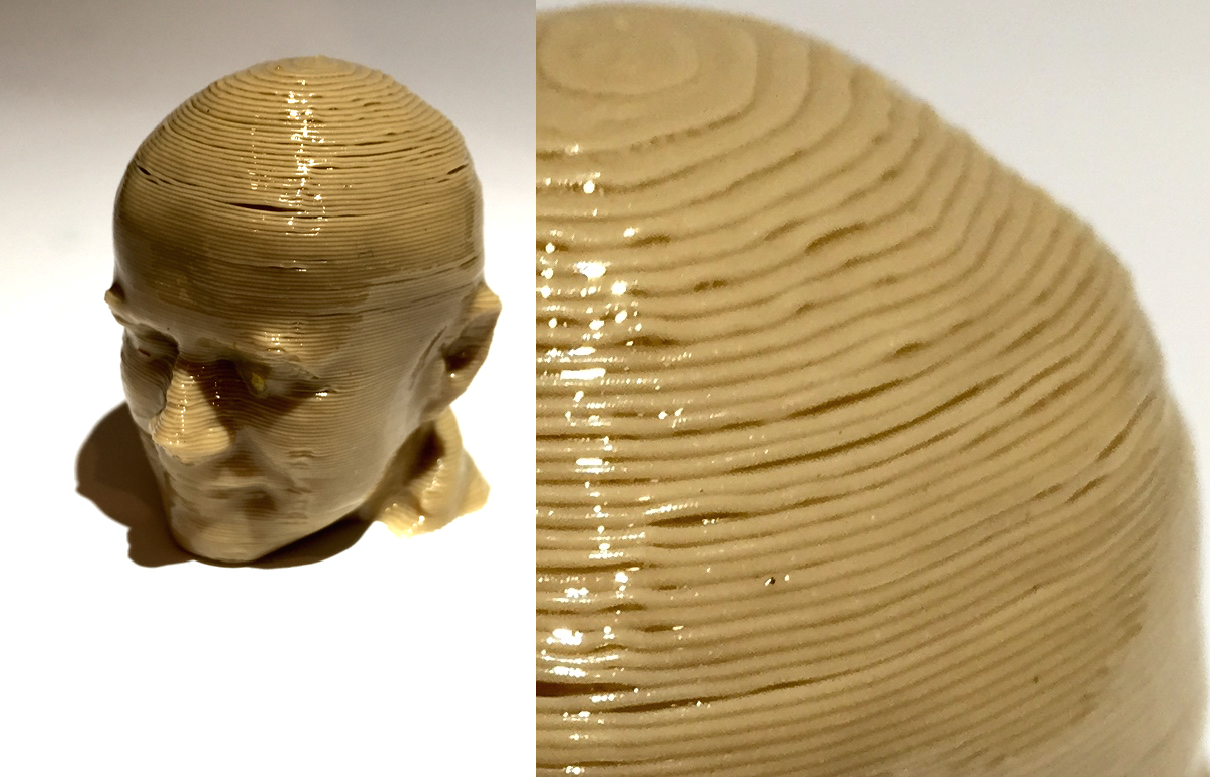
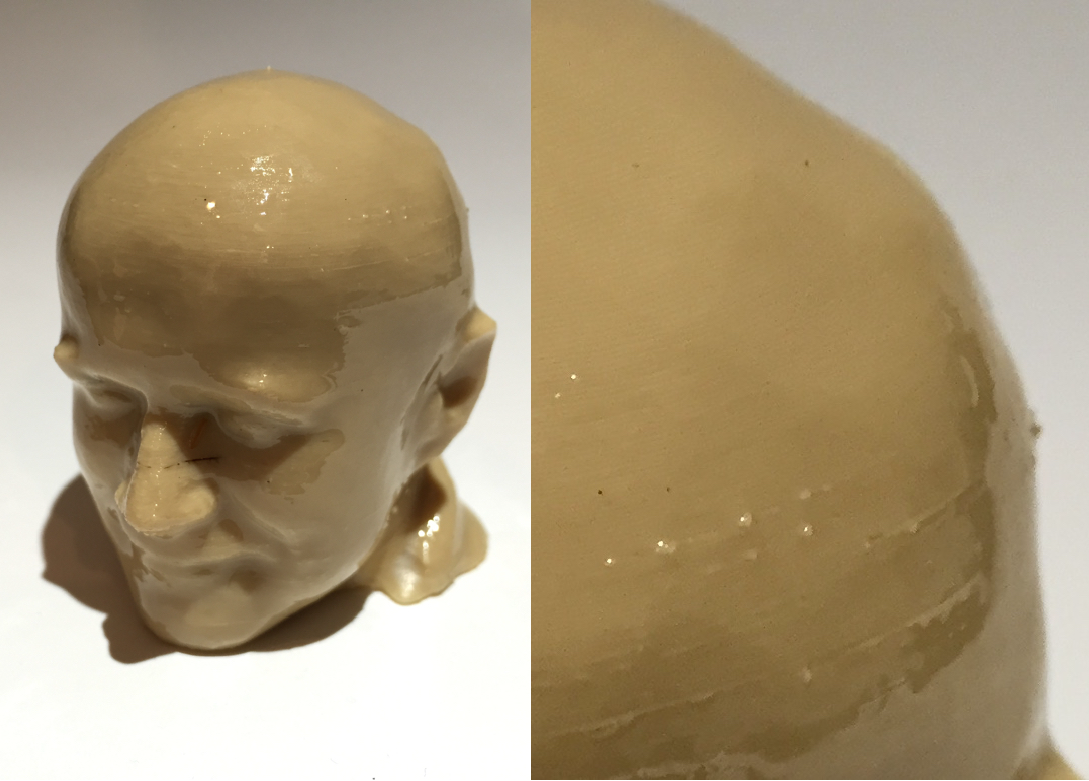
Finally, the 0.4mm Robert did not seem to be affected at all, at least visually. But here’s the thing: it is actually smooth! Since XTC-3D is a clear substance, you’re actually looking THROUGH the smooth surface to see the now-underlying coarse layers.
This means you can now paint (with colors) on top of the now smoothed surface to produce a model that should look very close to one that was printed in finer layers. The implication: you can print fast in coarse layers to save print time, but still get a smooth model by using XTC-3D afterwards.
XTC-3D is not always appropriate: you may have certain 3D models that, for example, require very precise sizing. The dimensions of the parts may expand slightly when applying a layer of XTC-3D and they might not fit together. But for many other prints, particularly decorative items or jewelry, XTC-3D is just what you need.
The product is available in a kit for the incredibly low price of USD$24. This kit should provide sufficient resin to smooth around 17 square feet of model surface. If you expect to do a lot more smoothing, you can also acquire a huge “gallon unit” for USD$130.
Smoothing prints is very easy with XTC-3D. If you haven’t given it a try, you should definitely do so, especially at this price.
Via Smooth-On