
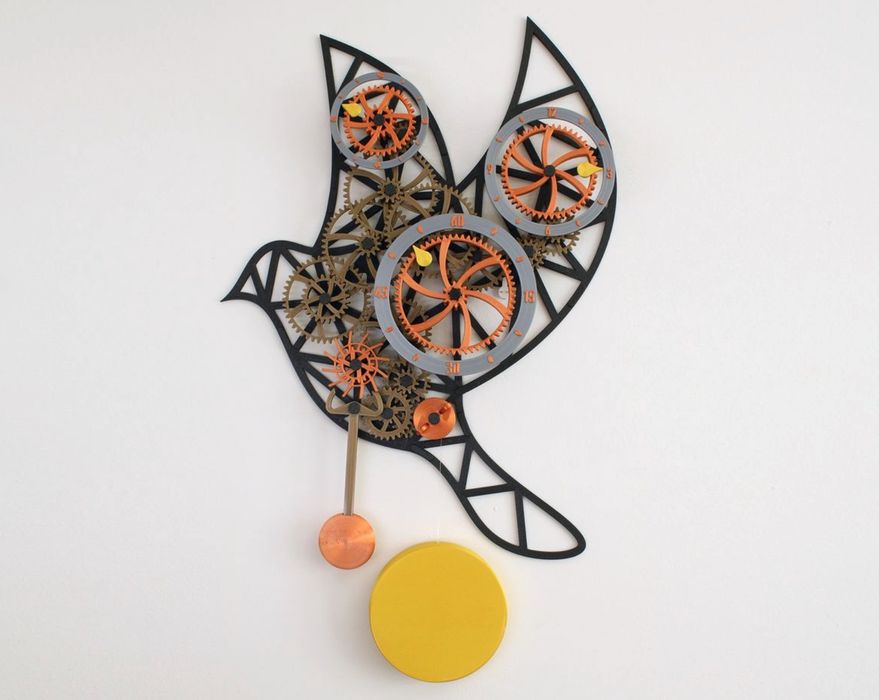
This week’s selection is the Mechanical Wall Clock by designer Harald Andersson.
This item is, as it seems, a fully 3D printed wall clock in the shape of a bird. I’d like to emphasize “fully 3D printed”, because that’s precisely the case here: there are no motors or electronics in this project.
The clock operates in the historical manner: a pendulum swung by gravity. The eco-friendly clock uses a masterful mechanical design to transform that swinging motion into precise clock steps, just as traditional pendulum clocks work. The difference here is that all parts are 3D printed.
There are only four non-3D printed items required for this project:
- A string or fishing line for the weight
- Silicone spray or other suitable (non-greasy) lubricant for the moving parts
- Something to fill the weight with, e.g., rice or sand
- Glue if the press fits are not tight enough
That last point is important. The first step of Andersson’s very extensive instructions ask you to 3D print a tolerance benchmark. This allows you to determine whether you’ll require glue for assembly, or if friction fit is possible. In other words, the benchmark explores the dimensional tolerance of your 3D printer to help decide on the assembly method.
There’s also a rotational tolerance test that allows you to choose which size of rotational component to choose. Again, 3D printers differ in how they print parts — the dimensions, particularly of internal holes, may vary. The rotational test is a way to avoid the usual problem of “it doesn’t fit in the hole!”
The assembly itself is of many steps, as you might suspect from the number of parts required. There’s also a precise sequence these must be applied in order to build the mechanical gearing and expect it to work properly.

Andersson explained that lubrication is mandatory on this model, otherwise the gearing will not operate smoothly. He provides a detailed diagram of where the lubrication should be applied, and how to do so.
While the assembly instructions are among the most detailed I’ve seen for a 3D printer project, Andersson also includes instructions on how to make adjustments to the clock. For example, if it’s running too fast, its speed can be slowed down.
If you’re up for this incredible project and are able to print and assemble all the parts correctly, you’ll end up with a wall clock that operates like this:
But be warned: this project includes many, many parts.
Via Prusa Printers (Hat tip to SJ)