

Want to know a trick that could make your 3D prints a lot more useful? It’s called embedding.
It’s a way to include alternate materials in your 3D print and it works on almost any 3D printer. It’s so easy you’ll wonder why you didn’t figure it out yourself. You simply stop the print mid-way through your job and while stopped, insert materials into the print. Then restart the print and let it complete
A common embedding example is to include a nut for a bolt deep inside a 3D printed part. Here’s how it would work:
- Design your part so that it includes a hollow of a size suitable to hold the required nut. Make the hole very slightly larger than the nut otherwise you’ll have trouble inserting later.
- Start the print as normal, but ensure that the plane of the “nut chamber” is horizontal.
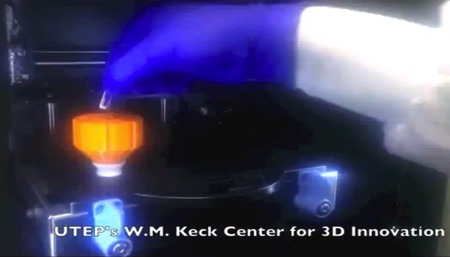
- Now the tricky part. Watch the print operation and pause the print just as it completes the top wall of the nut chamber. Sometimes this is difficult to detect by eye, so you could add a structure (perhaps temporary) to your object that first appears on the layer where you’d like to pause. Then just watch for that.
- Insert the nut into the chamber. It must be COMPLETELY below the plane of printing. If it sticks up any higher, you’re probably going to have a catastrophic incident for which we take absolutely no responsibility.
- Resume the print job. Your 3D printer should then cover over the nut chamber and leave a cylindrical hole for the bolt to use. (You did design a hole for the bolt, didn’t you?)
- Remove the completed part from the printer.
You’ll have to make sure no stray plastic got into the hole, but if you did this correctly you should be able to thread a bolt into your part.
The embedding technique can be used in a variety of ways to lay items inside your print. What ever you try, just ensure the following:
- The inserted item never rises above the plane of printing
- You don’t dislodge the partial print from the print bed
- You don’t interfere with the moving extruder (remember it is quite hot)
- You don’t restart the job instead of resuming the job; a full restart would create some rather interesting collisions
You can see an extreme example of this approach in the video here, where an electric motor is 3D printed with various metal components installed during the print operation. It really works, too!