

We managed to acquire a test flexible printer plate from PRINTinZ and performed many test prints with it.
The concept of the plate is straightforward: manufacturers’ print surfaces have inconsistent (or terrible) sticking and release properties and procedures, so strap one of these plates on top of your normal surface and continue printing with a greatly simplified workflow.
The advantages are substantial:
- No glue, tape or other sticky concoctions ever required
- Easy release of stuck models by simply twisting the plate
- Excellent smooth bottom surface finish that isn’t polluted with bits of tape or other materials
- No cutting your fingers with sharp instruments trying to scrape a stuck print off the bed
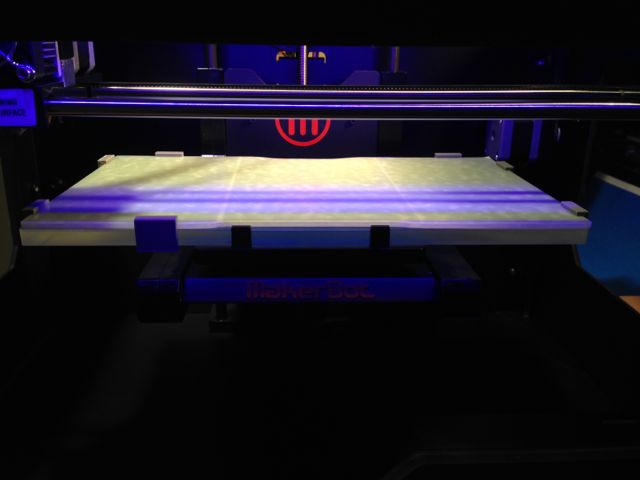
We used a PRINTinZ plate specifically designed to fit our lab’s MakerBot Replicator 2, which prints in PLA. We’re told the plate also works well for ABS printing.
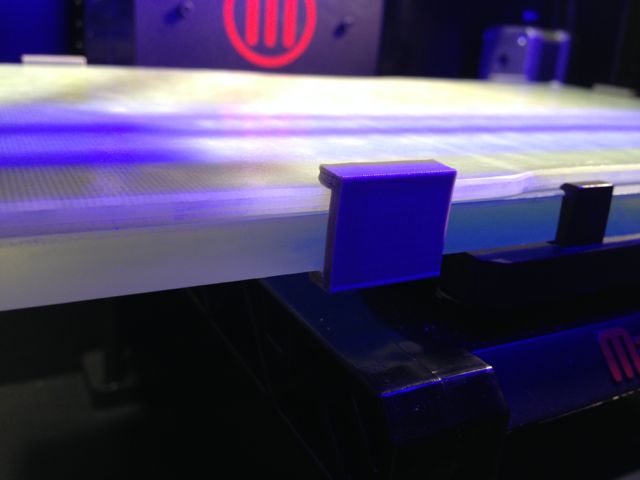
Installation of the plate is straightforward. You position the plate on the bed, carefully ensuring the edges match. It’s attached by means of these easy-to-print clips. PRINTinZ recommends using many, but we found that you could get away with only a few. Normally we use up to six, but your configuration may vary depending on the size and shape of your print bed.
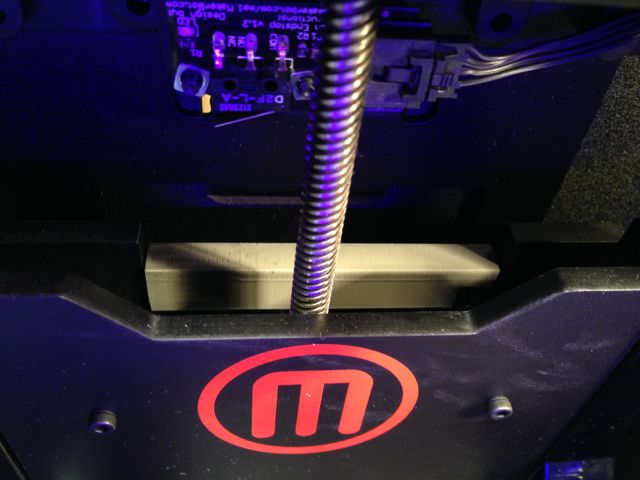
One other key modification required is to account for the loss of Z-height due to the thickness of the new plate. A small spacer block is printed and placed on the Z-axis so that it hits the Z-limit switch a bit sooner than normal. While we used the pre-made Rep2 pieces for this function, you may have to invent a similar mechanism for your machine.

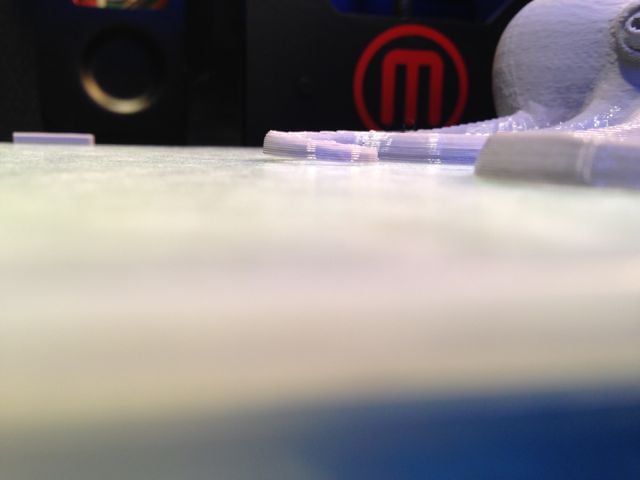
We started by printing something straightforward: these pretty feather earrings. They’re very thin, but do offer a long shape. They printed just fine.
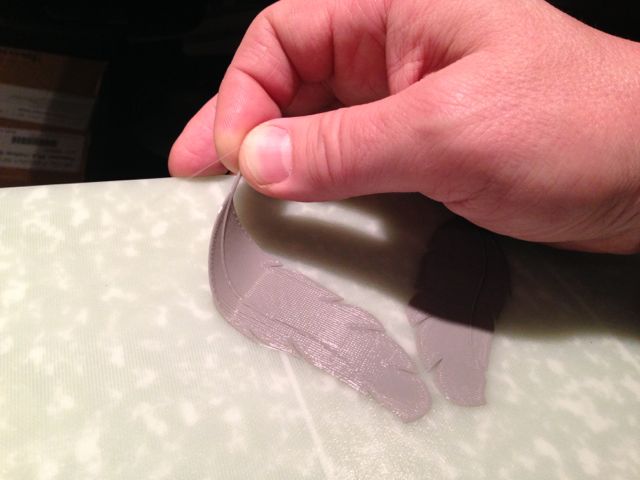
In fact, they were so flexible we could not remove them by twisting the temporarily removed plate; they flexed just like the plate! Instead we had to peel them off by hand. However, you must be careful doing so, because you might put a fold in the object if your pull is too aggressive.
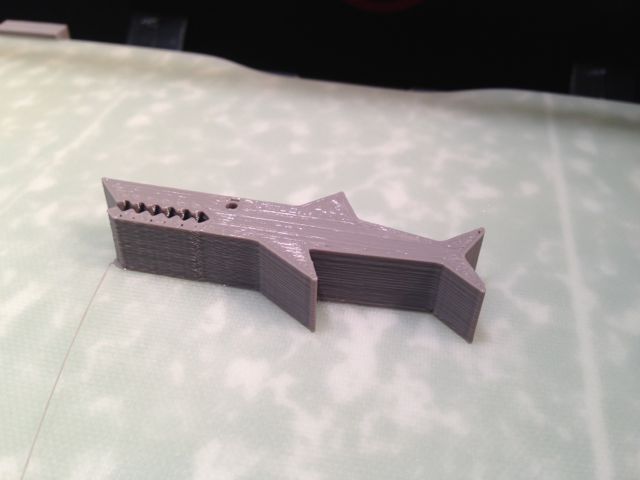
We tried a more substantial object, in this case, “Mr. Jaws”. It printed just fine. Note that we’re not using ANY surface preparation. PRINTinZ recommends wiping the print plate with isopropyl alcohol before EACH print. We were lazy and did not – as we wanted to see what happens if you don’t. Mr. Jaws popped off when the print plate was twisted, just like a cube from an ice cube tray.
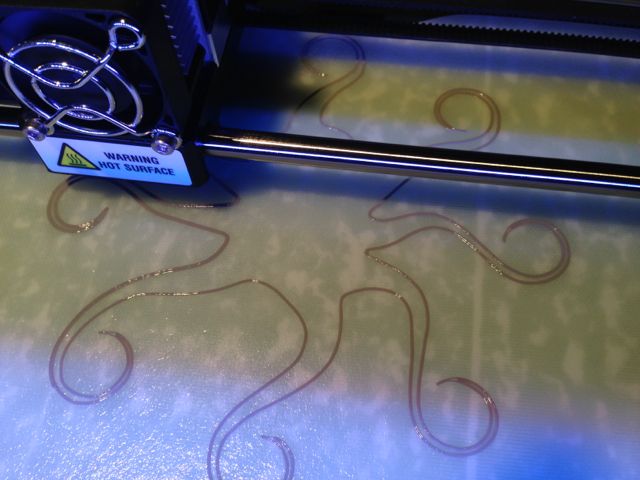
On to a more pathological print: the dreaded Octopus, sized to take up almost the width of the print bed. Things started very well.
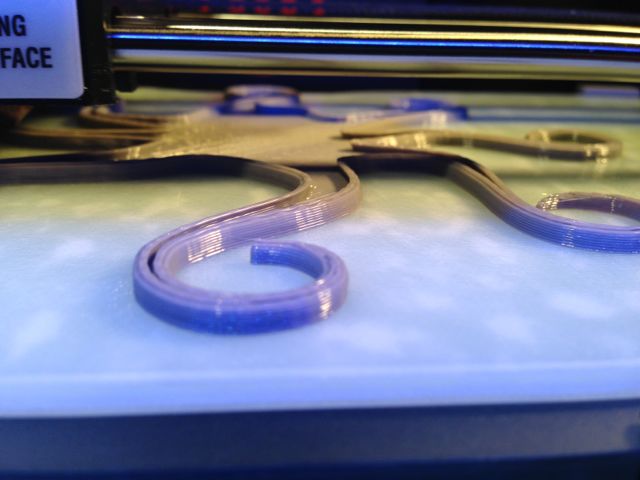
And they continued most excellently through the print.
We did notice a very slight lift by the end of the print. We suspect this is what happens when you don’t wipe with alcohol before the print. The other tentacles were all stuck very well.
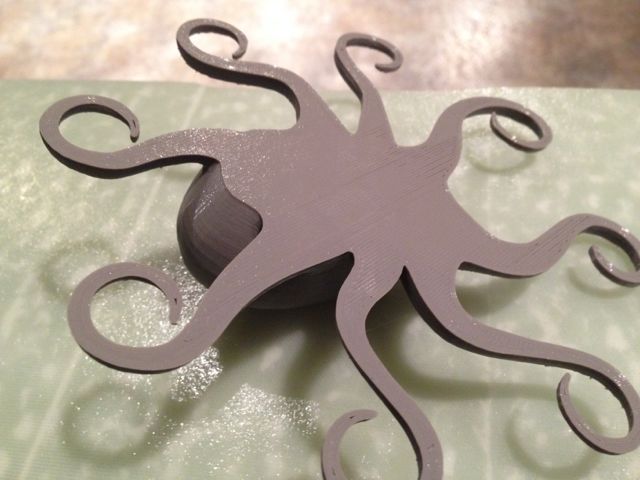
Flipping the completed octopus over you can easily see the very smooth finish provided by PRINTinZ’s plate. And NO bits of blue tape to extract and bonus: no bandages required!
After several days using the print plate, we must ask why we would ever use anything else? The plate is so straightforward to install and use, with hugely improved results it has become essential in our Rep2. For the price of between USD$30-100, it’s a steal.
Via PRINTinZ