

This week we had the chance to test out Afinia’s ES360 tabletop 3D scanning system.
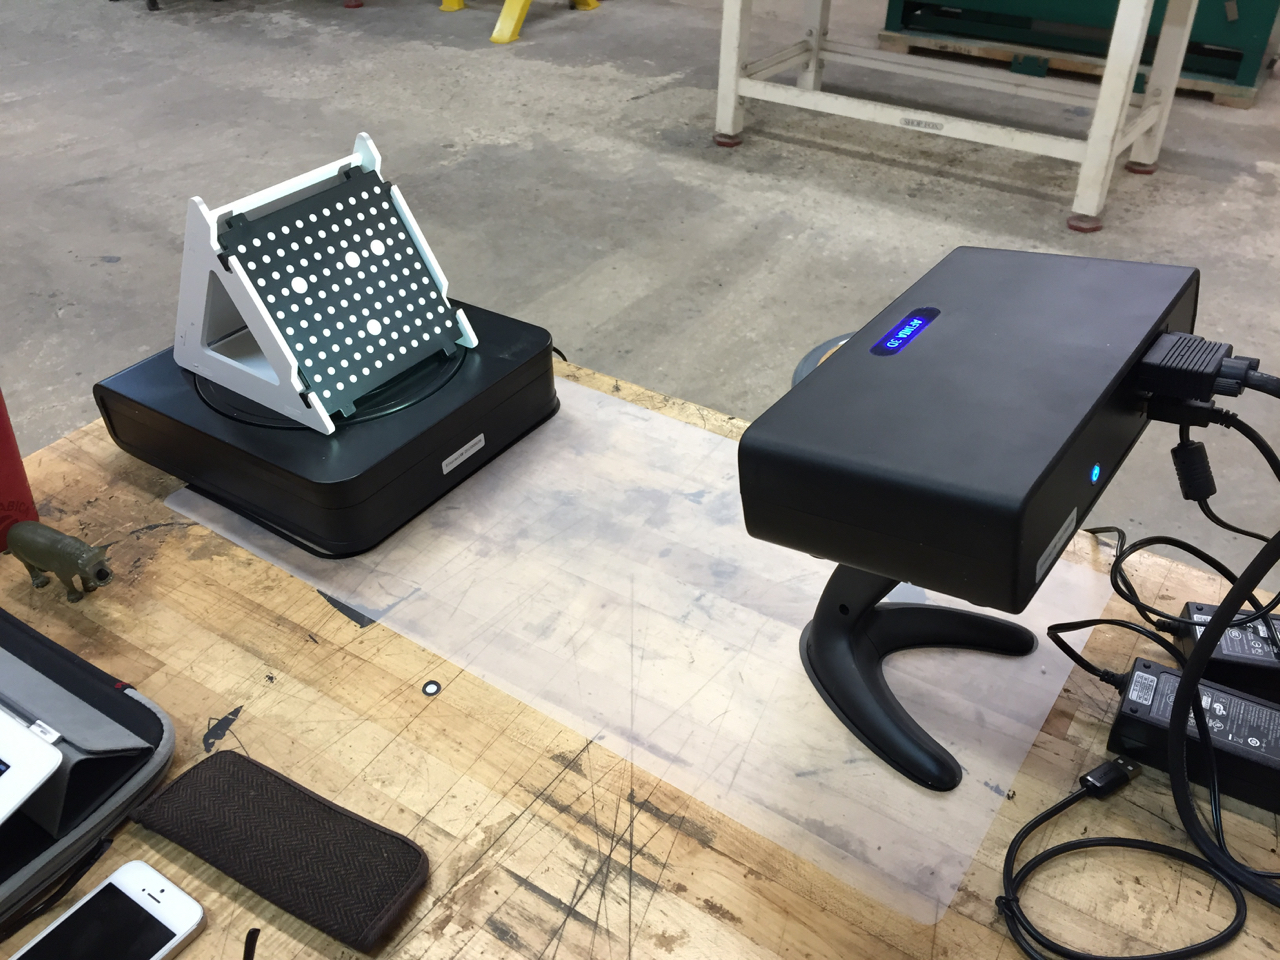
The device is a turntable design, where a camera system observes an object while it spins around a turntable. The ES360 uses a structured light approach to derive a representation of the object’s 3D structure.
Structured light is one of several approaches used to achieve 3D scanning. It works by displaying a known pattern of light on an uneven 3D surface and observing the deviations from the expected pattern. The ES360 does so by displaying a series of thick and thin vertical bands, marching them progressively across the object.
The system is best used to produce 3D models from smaller objects that can fit on the turntable. And they shouldn’t be excessively heavy, either, as the turntable motor might bog down. The turntable capacity is objects up to 215 x 215 x 200mm. There’s also a “free scan mode” where you can capture objects up to 700 x 700 x 700mm.
The scanner can work reasonably fast, as it can complete its automatic scan cycle in only three minutes. Some competing turntable scanning systems can take much longer. However, the three minutes is only for the mechanical portion of the scan; processing and conversion to a proper 3D model takes a bit more time. The good news is that the process can be automated, and you can literally push the start button and walk away to do other work while the scanner works.
Setup of the ES360 scanning system is a bit of work. As you can see here, there are many pieces that must be assembled and plugged in.
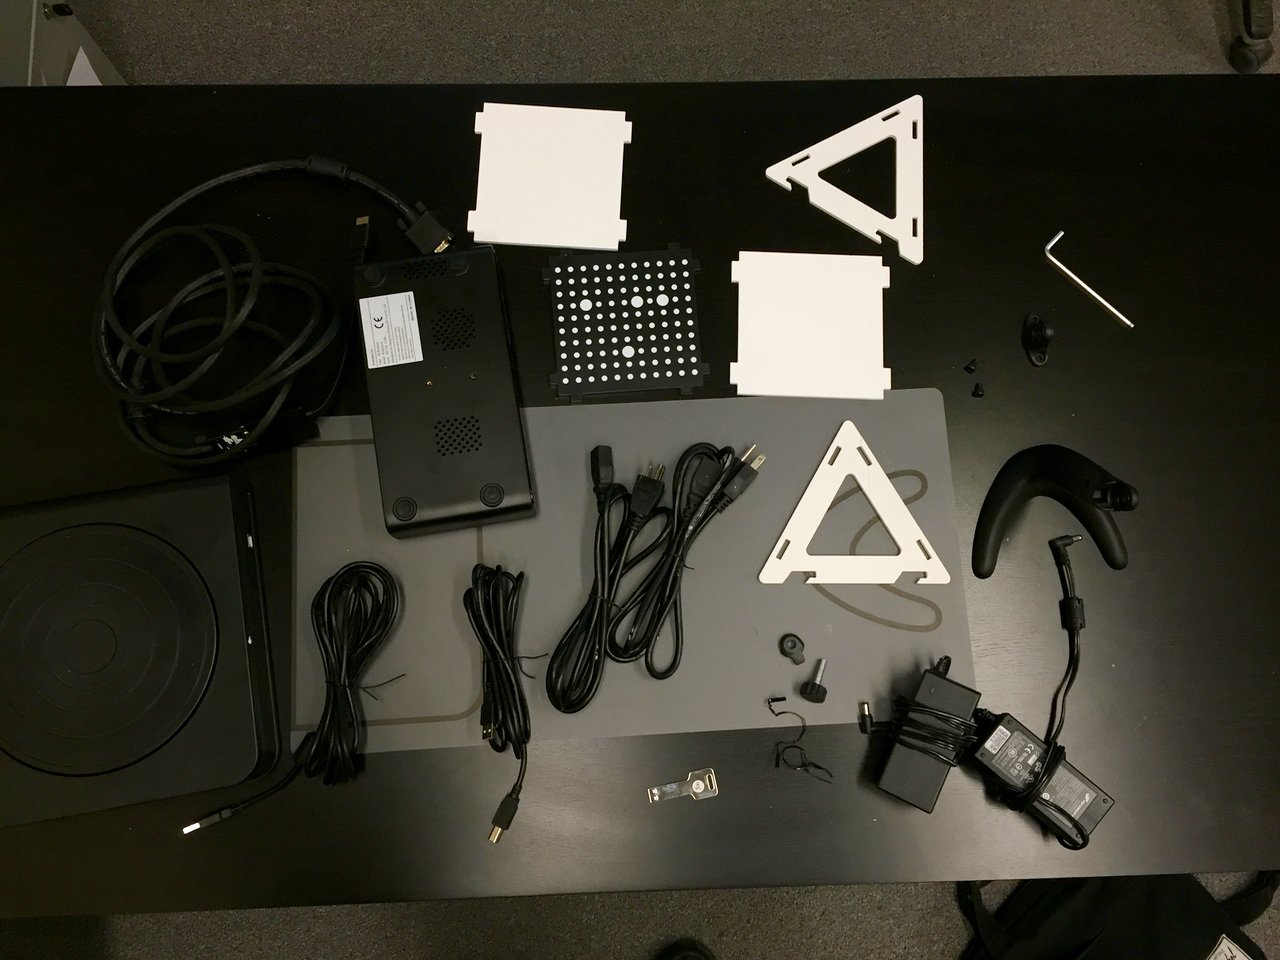
There are a substantial number of cables to plug in, connecting the cameras, projector, turntable and PC running Afinia’s software. Best to have an empty table to setup all this stuff.

When you’re done assembly, it’s a bit of a cable jungle. While the ES360 is more or less portable, you probably want to set it up permanently on a table to avoid the effort of setting things up.
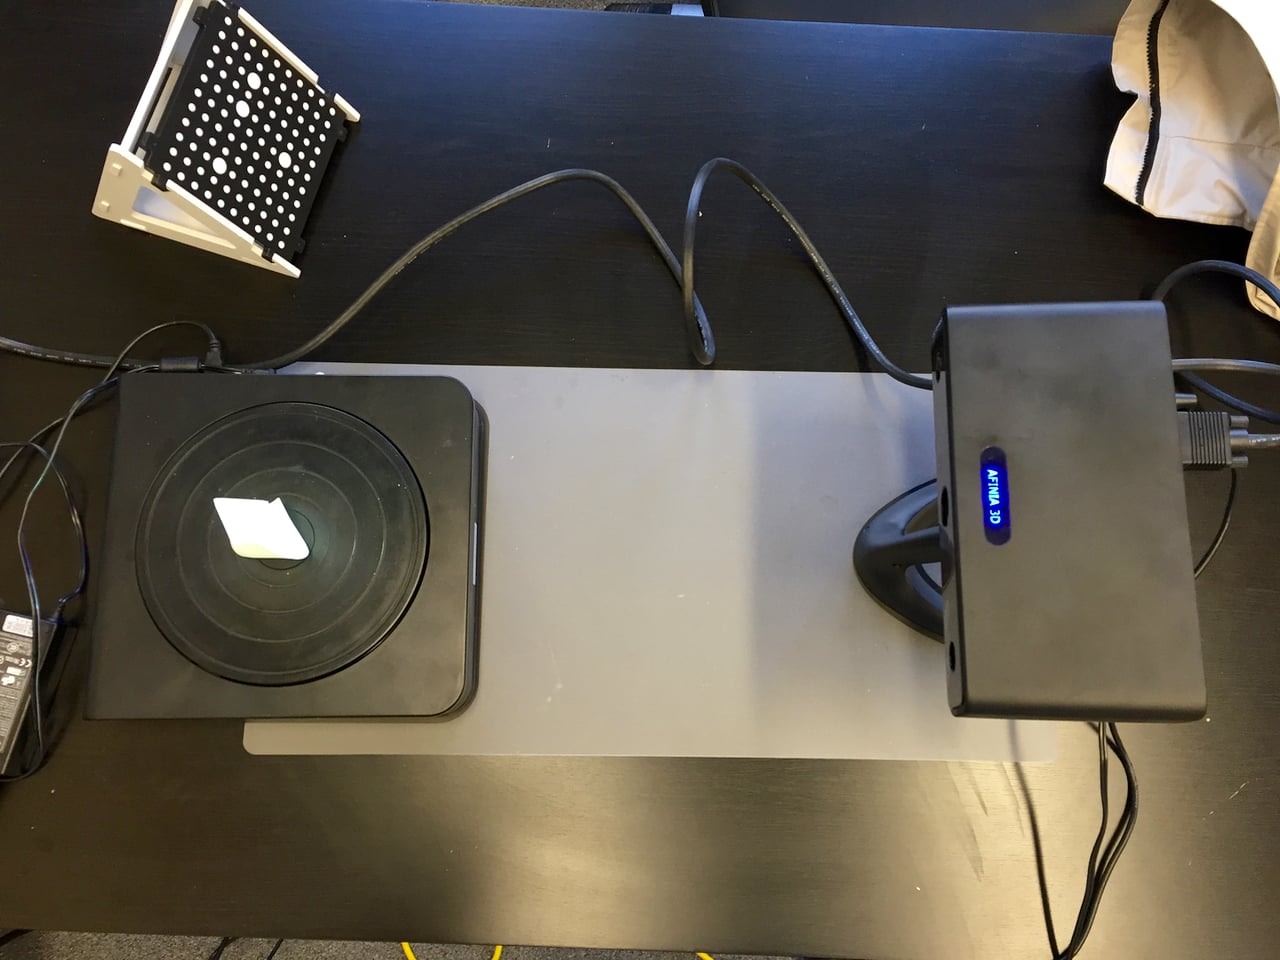
Once you’re set up – and by set up I mean you’ve correctly cabled everything and placed the ES360 projector/camera unit precisely on its marks on the supplied sheet, you’re ready to get scanning.
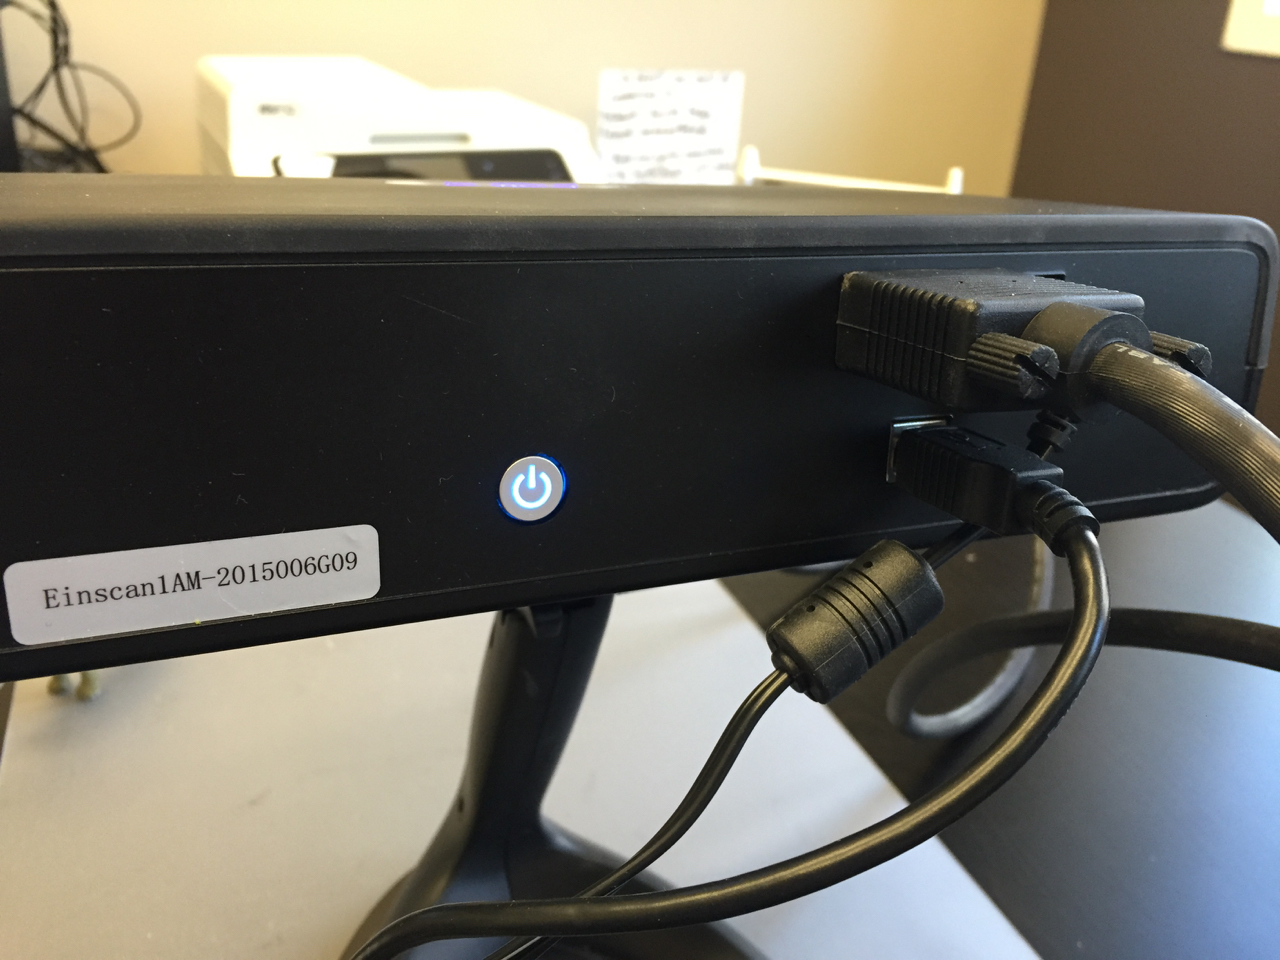
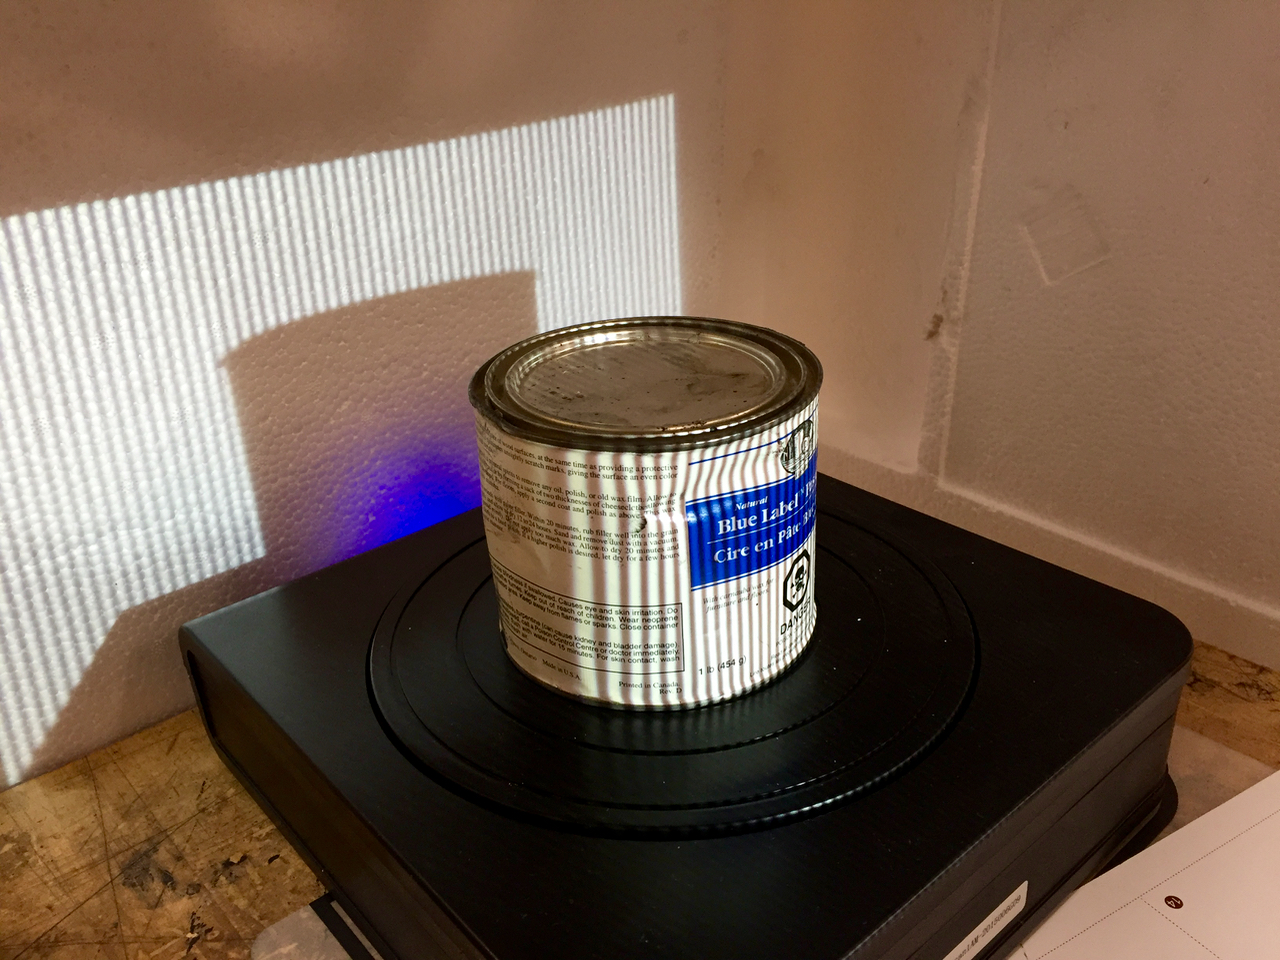
Well, almost. There is one very peculiar problem I noted during my first attempts to use the scanner. For some reason, the scanner would not project the structured light pattern on the object. Eventually, after a call to the very helpful Afinia support line, it was determined that this button was the problem. It’s the power button for the projector, and it’s illuminated with a blue LED – whether it’s OFF or ON! When you first power up, the button shines blue, but it is actually OFF! You must press the button to light up the projector. And of course, it remains blue throughout.
You’ll also need to install the ES360 Afinia software on your computer. This is a straightforward process, although you must provide a license key that comes with your equipment.
I must say, however, that the software is for Windows only and there are no versions for other platforms. No problem, I thought, I’ll just boot Windows natively on my MacBook.
Well, it turns out this does not work. In spite of valiant efforts by myself and Afinia support, the relatively current MacBook was unable to be able to run the Afinia software properly, having many problems with the HDMI interface. My recommendation: Do not attempt to use the ES360 unless you have a non-Mac Windows PC handy. Once moved onto a current Windows PC, the software worked perfectly and instantly.
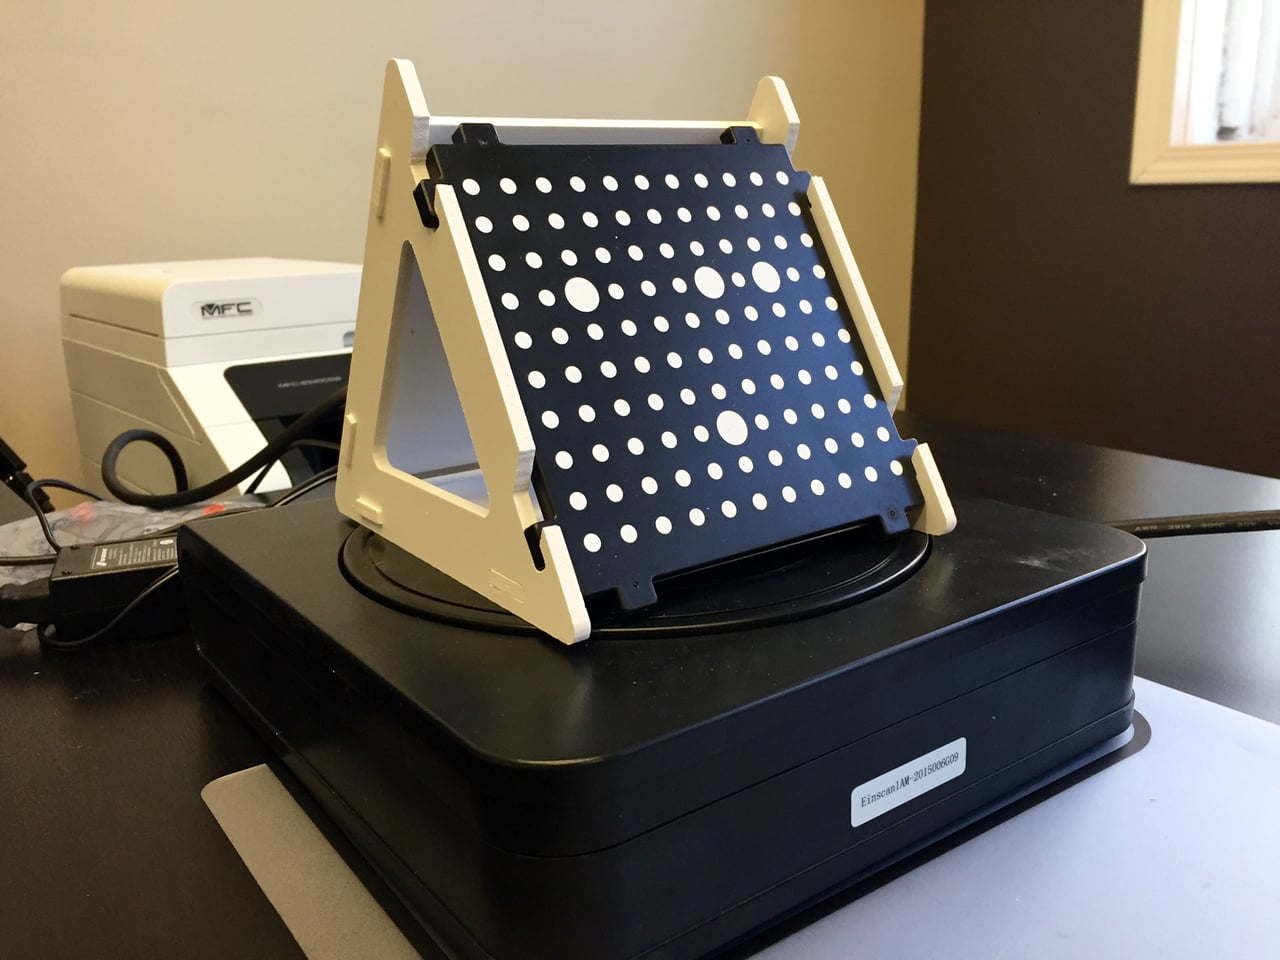
The most important activity to do before scanning is calibration. This function ensures that the hardware and software is in tune with the imprecise positioning of the two components comprising the ES360. Calibration involves placing this marker board on the turntable in several positions while running the calibration routine. It’s pretty simple and takes only a few minutes. You must do this any time you move any of the hardware components.
If you don’t do the calibration correctly, your scans will turn out extremely distorted.
Now you’re ready to scan an actual part. I’ve found the best results occurred with light-colored objects.
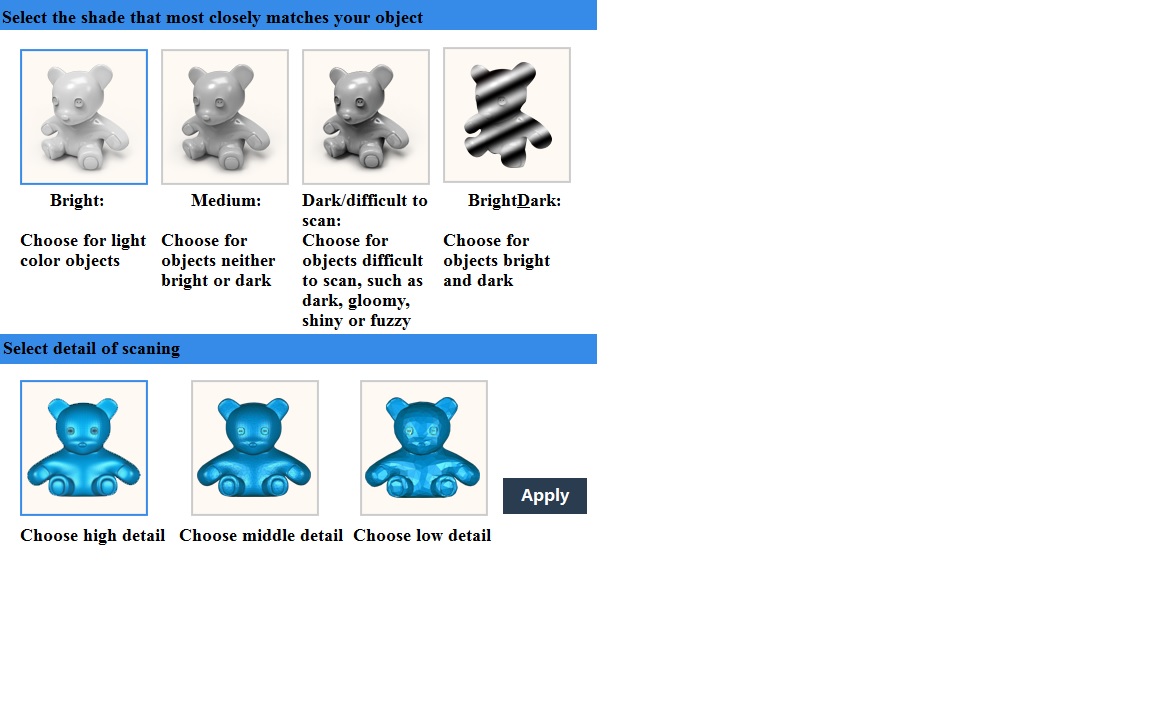
You’ll have to give the system a hint about this by picking one of these options. Basically, you’re trying to ensure the cameras can pick up the structured light patterns by playing with the brightness.
Once the scan starts, the turntable presents several views to the camera and projector, which display the structured light patterns. It takes about three minutes to circumnavigate the object and a couple more minutes to develop the 3D model.
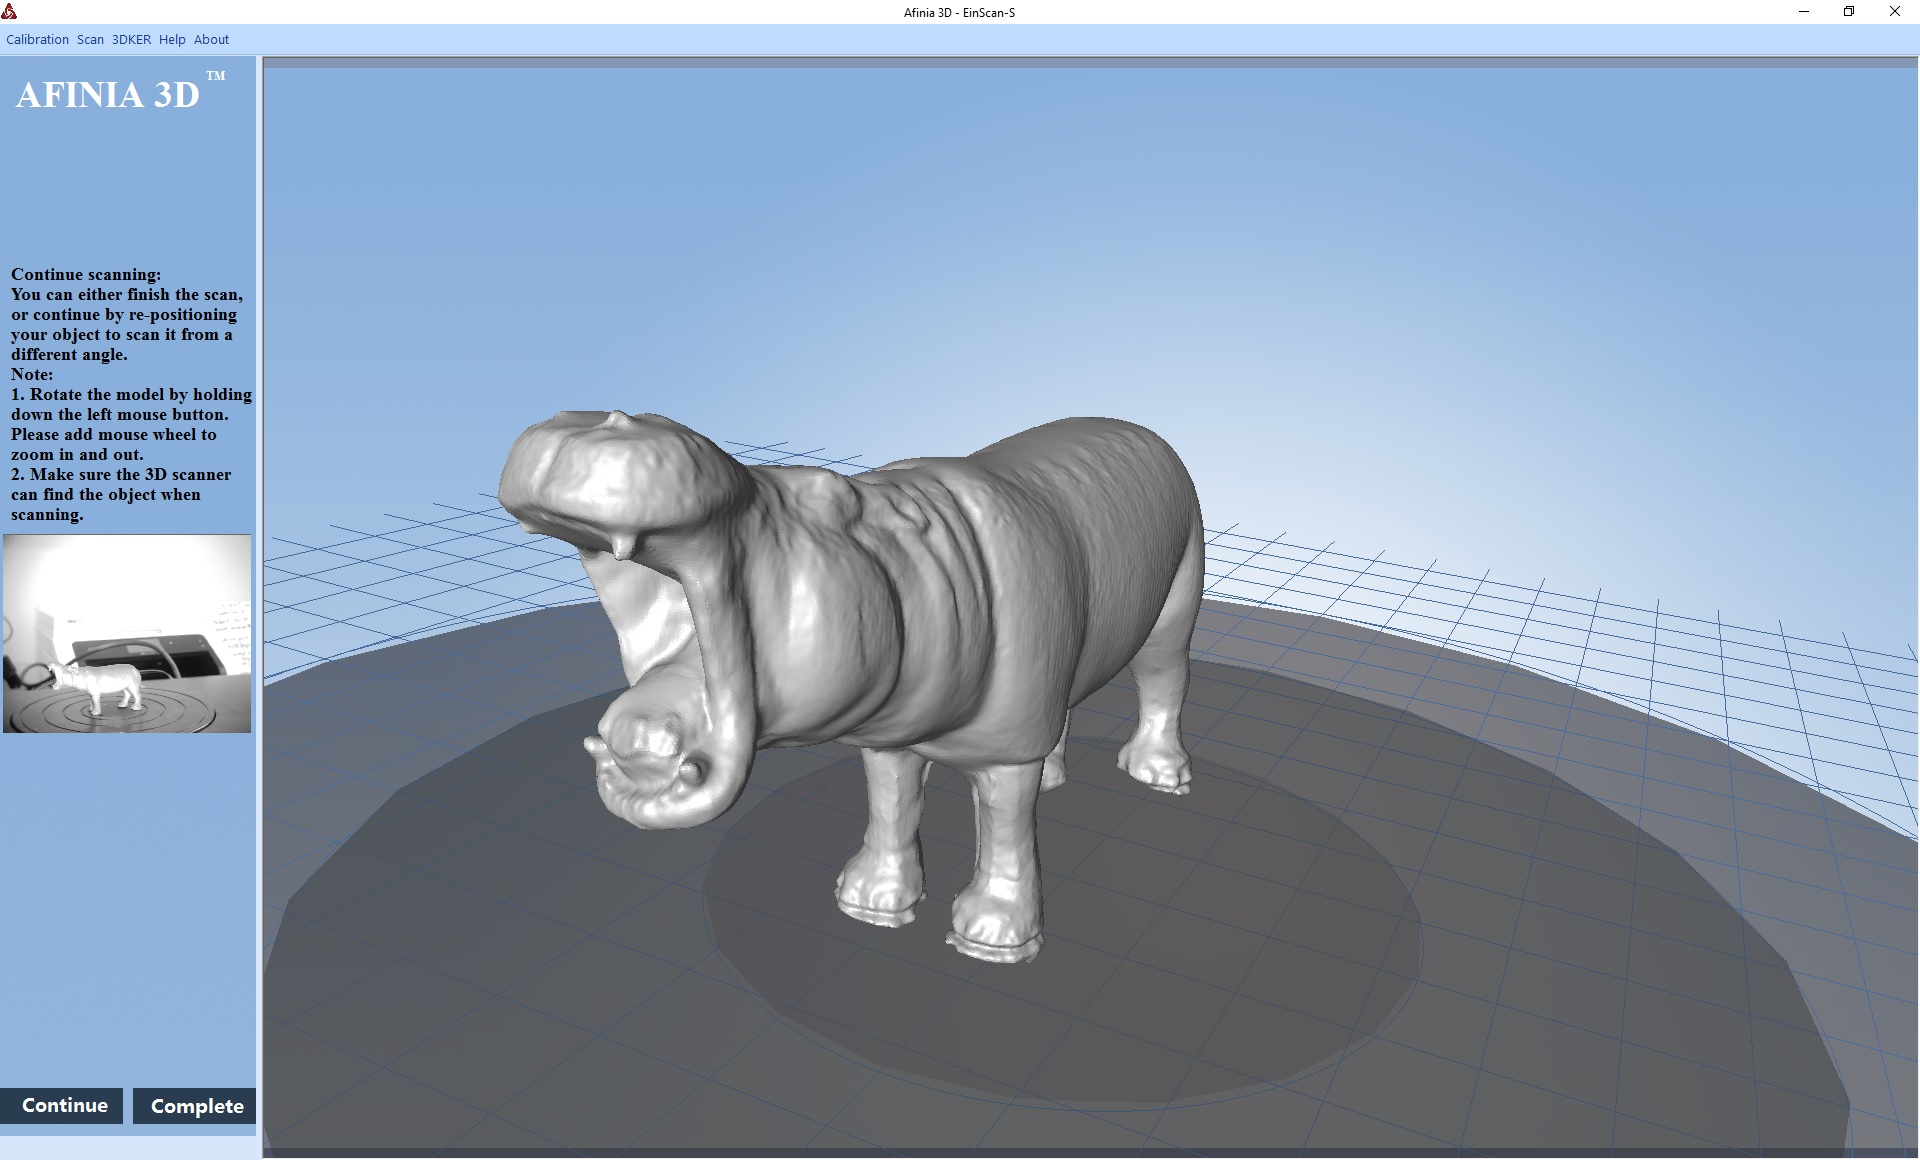
Results can be quite good if you have everything set up right, as I achieved with this scan of a friendly hippo model.
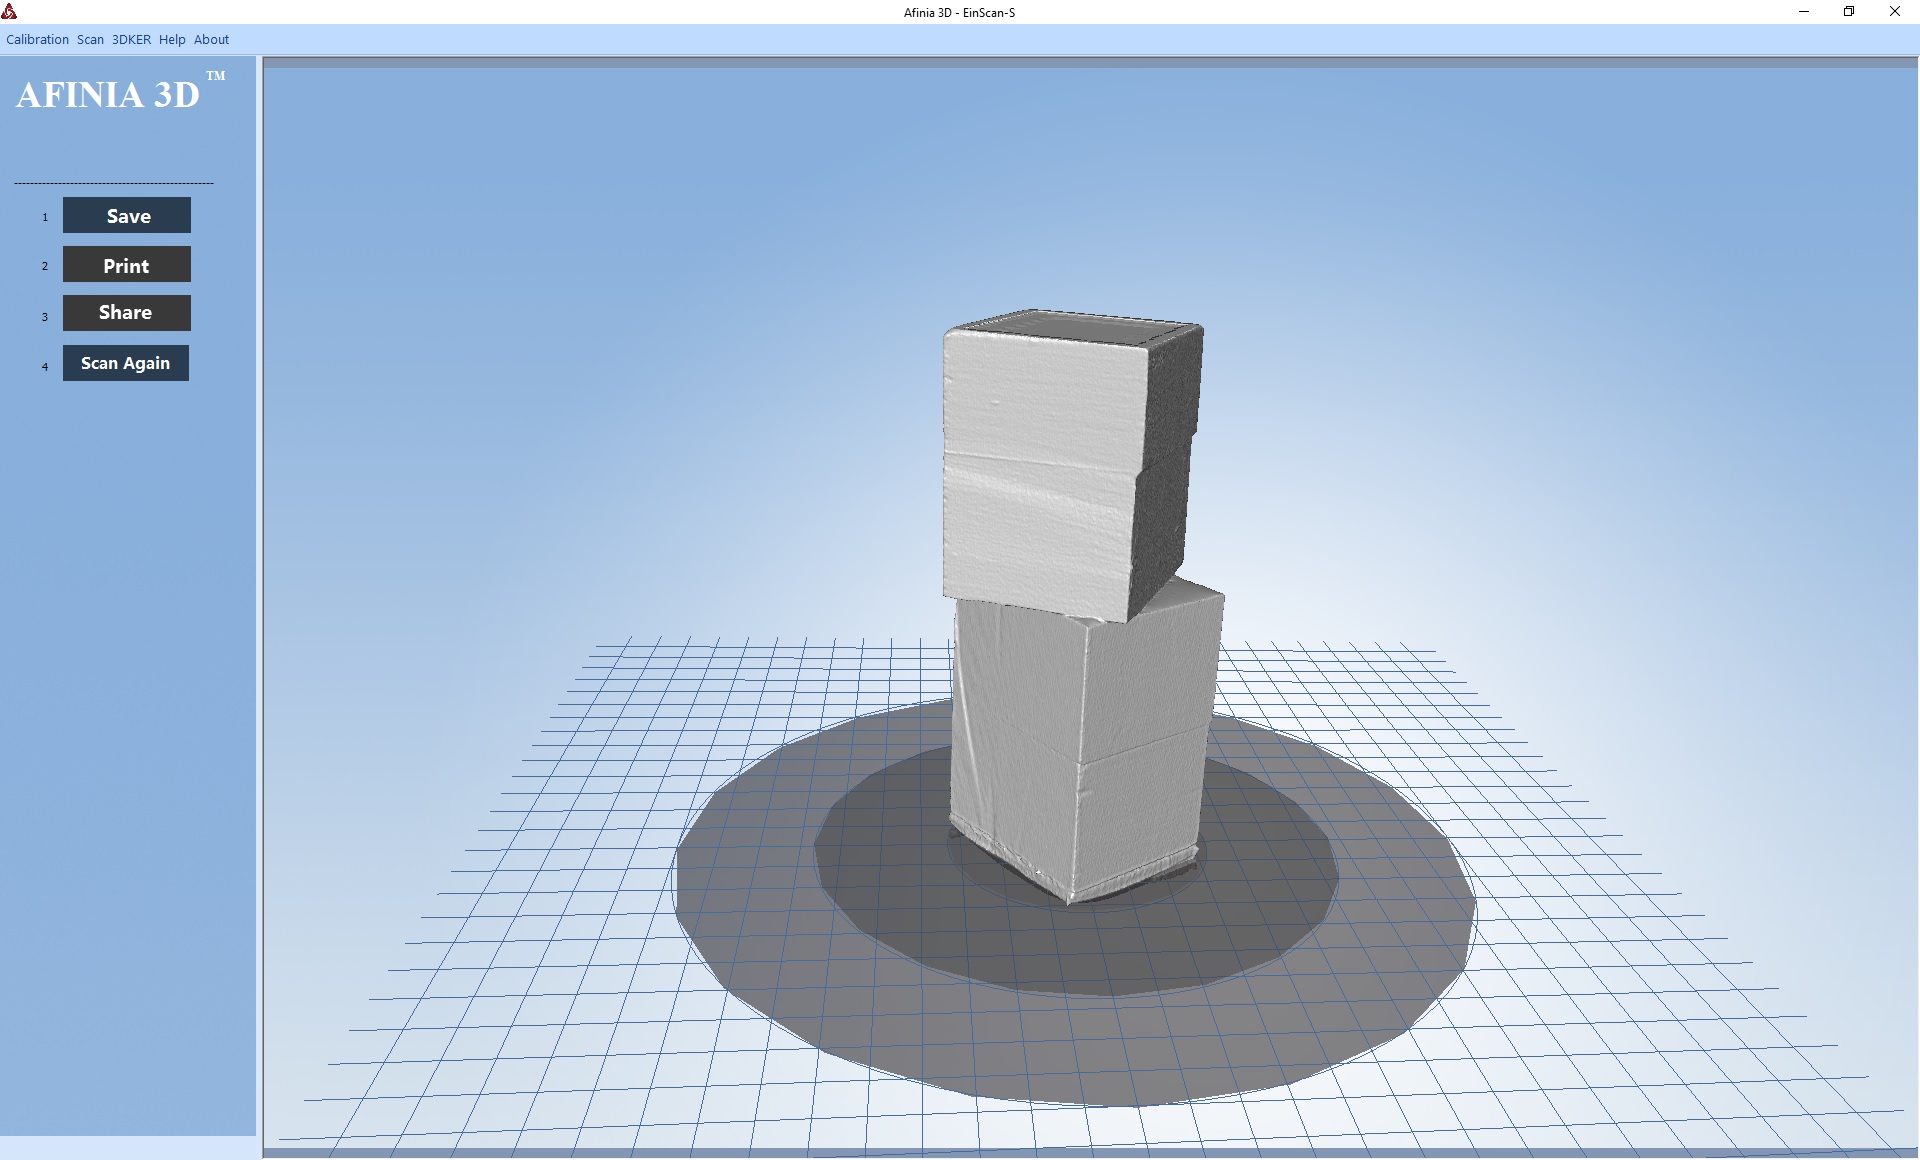
Simple objects scan very well, such as these stacked wooden blocks.
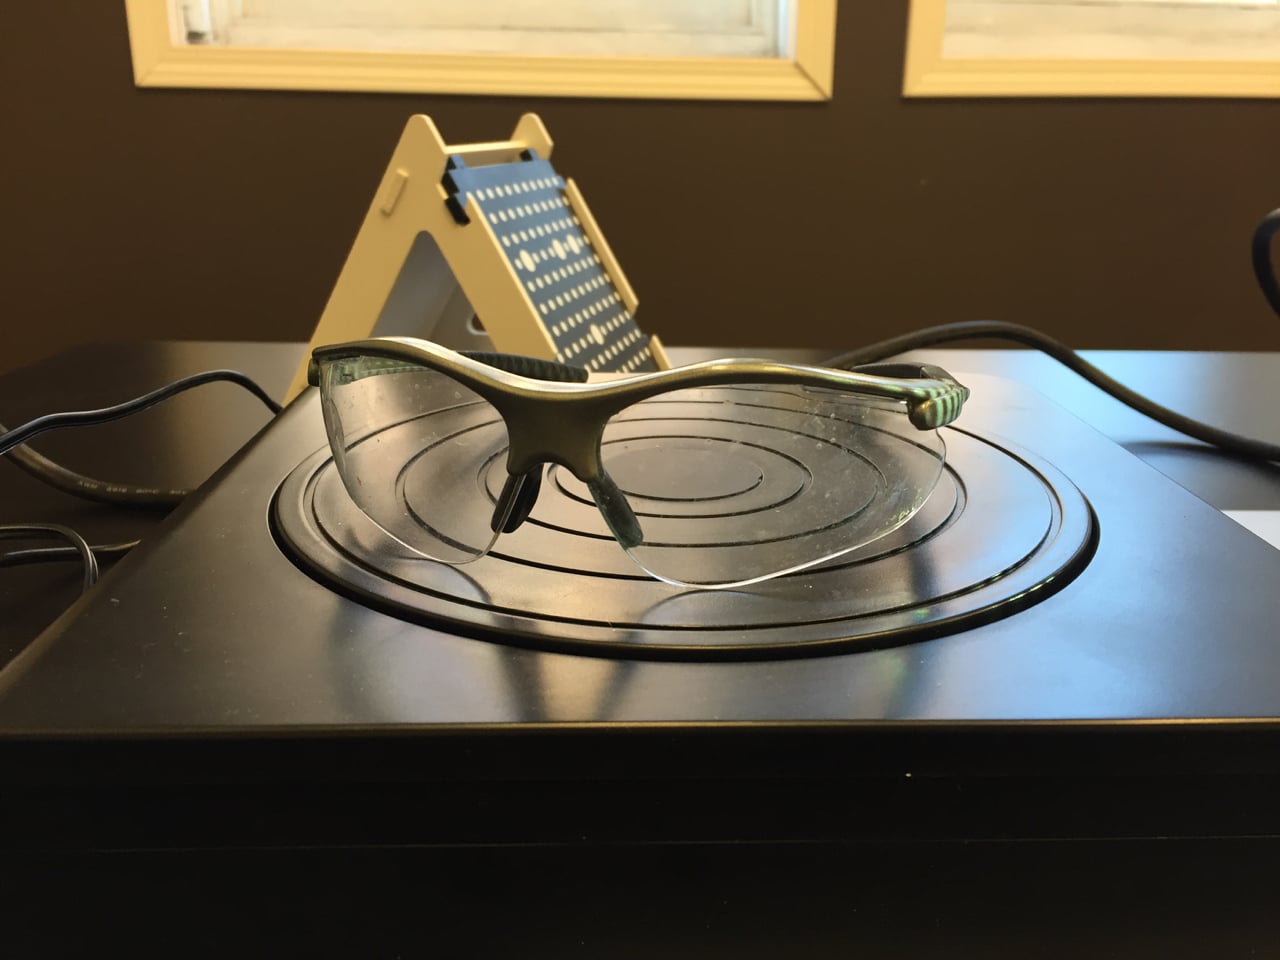
But I must say that there are plenty of objects that are challenging to scan, such as these clear eyeglasses. The light patterns pass through the lenses and cannot be seen.
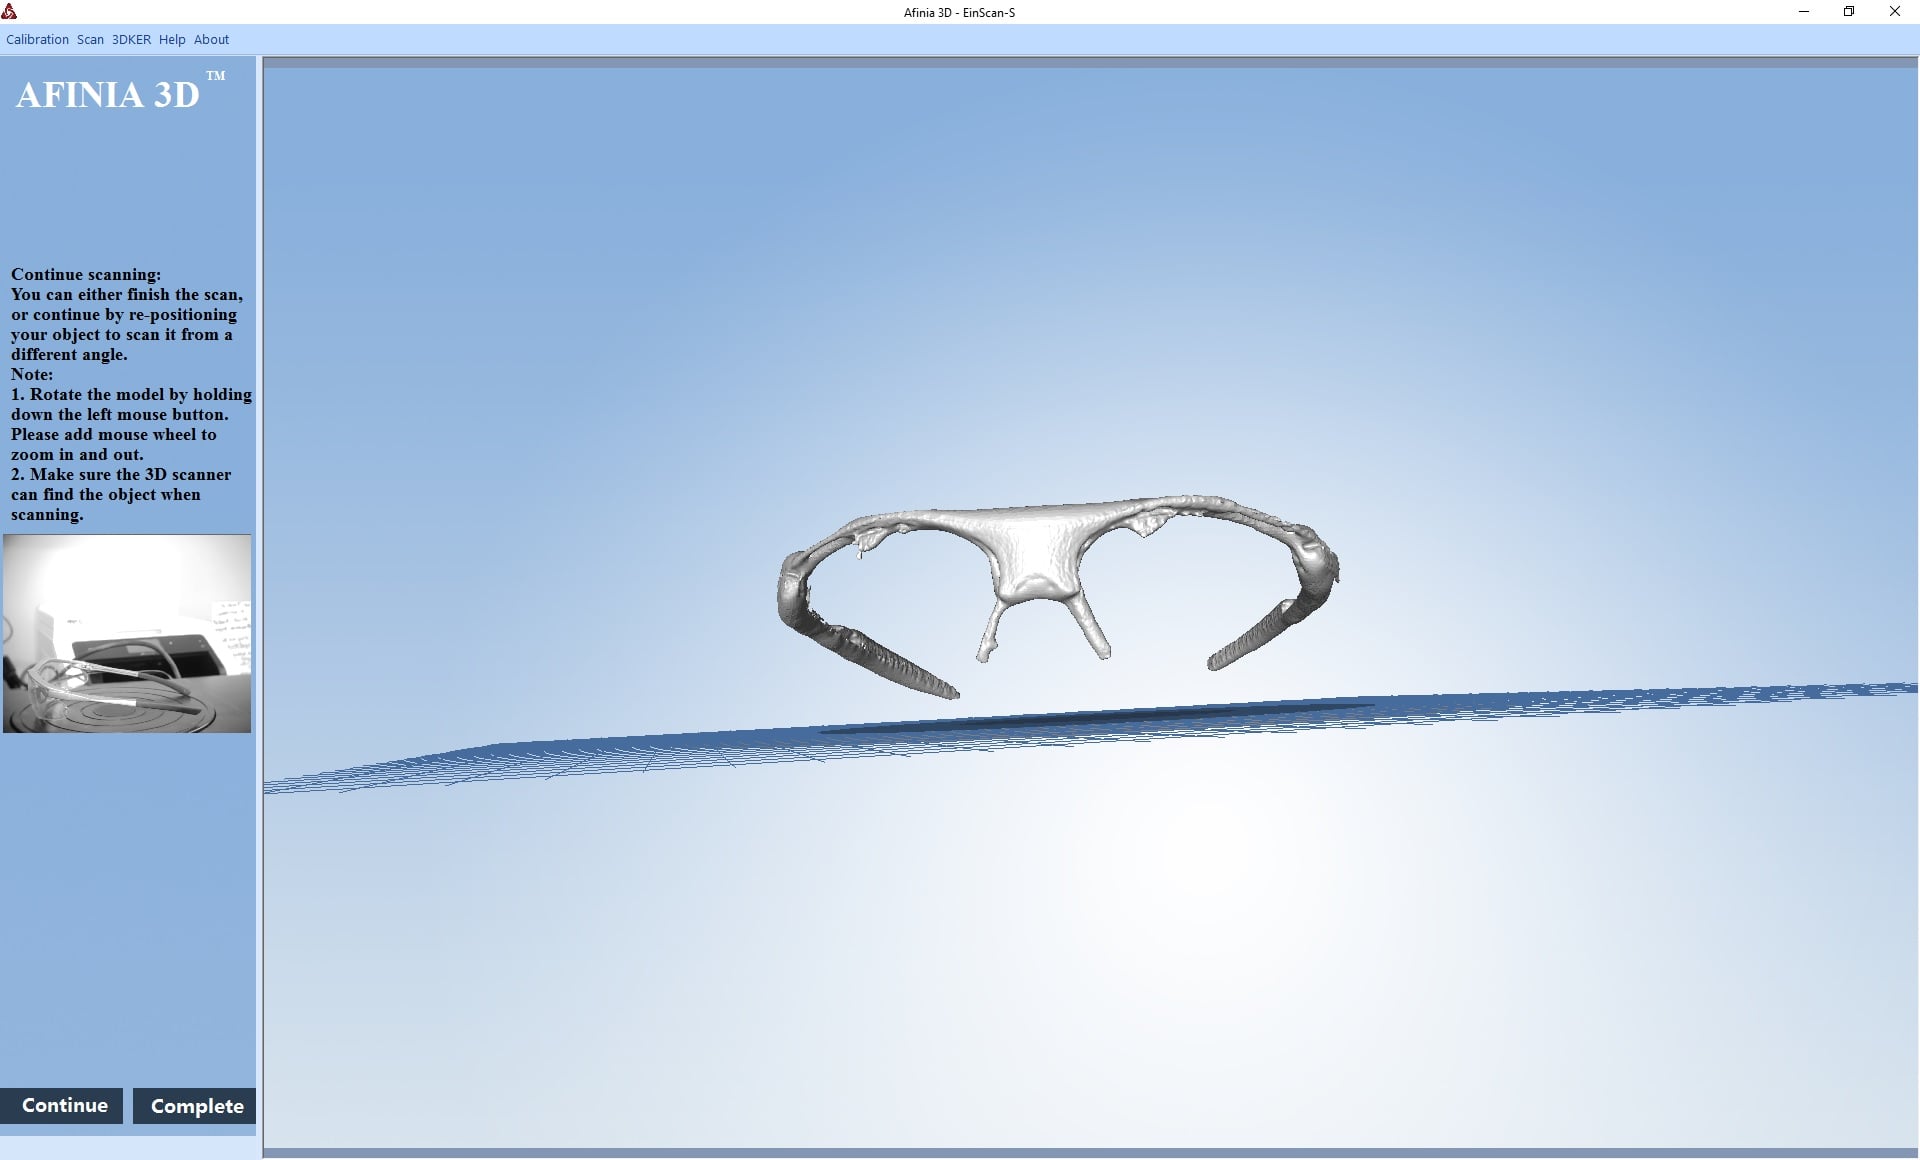
You end up with something like this. Not good, but you cannot expect to be successful scanning clear objects.
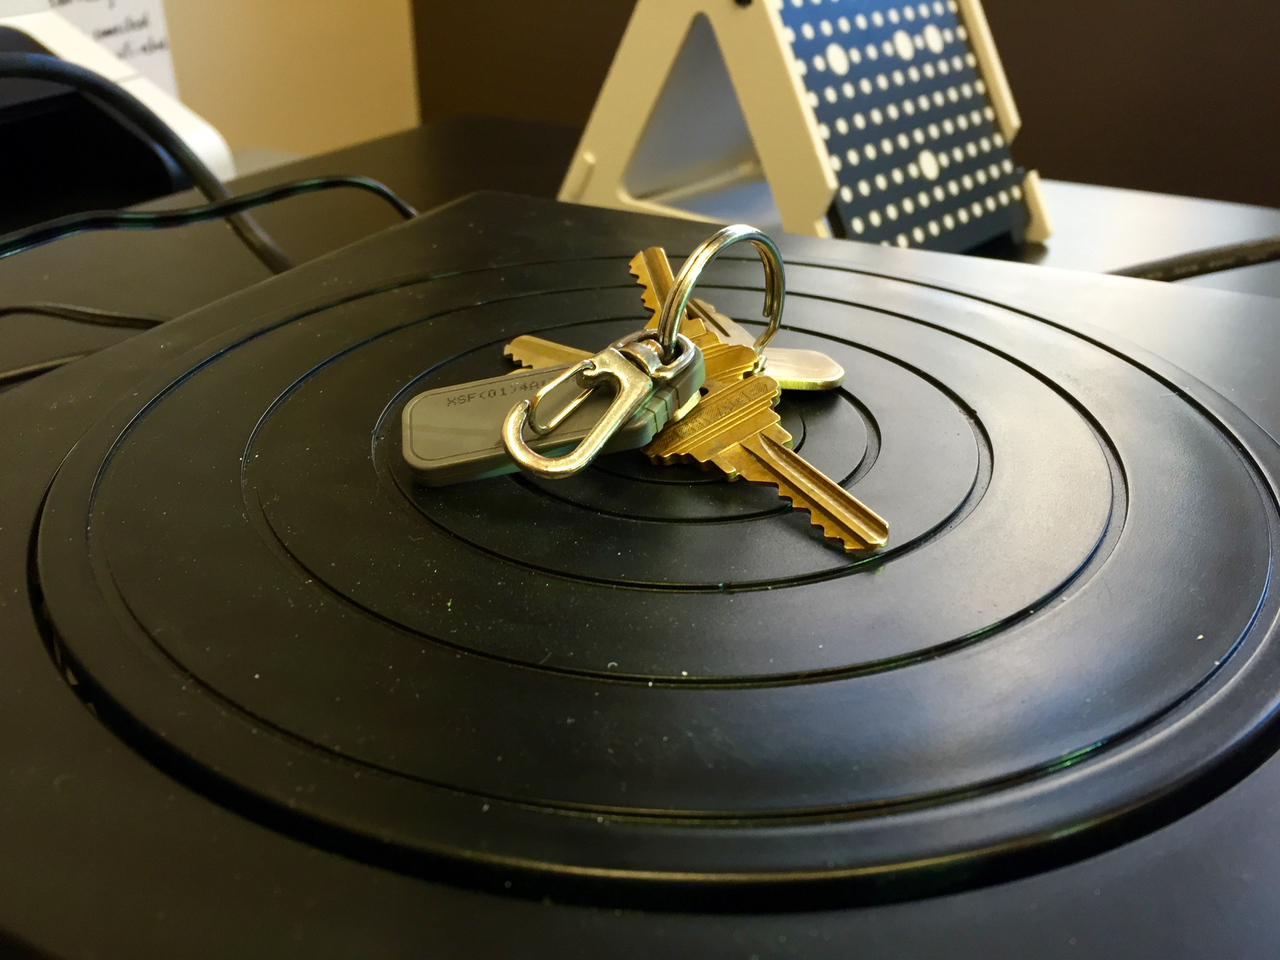
Another pathological scan object would be this set of keys, which presents not only very complex (and partially hidden) geometry, but it’s also shiny, which also prevents the light from landing on the object surface.
Yes, the key scan failed miserably.
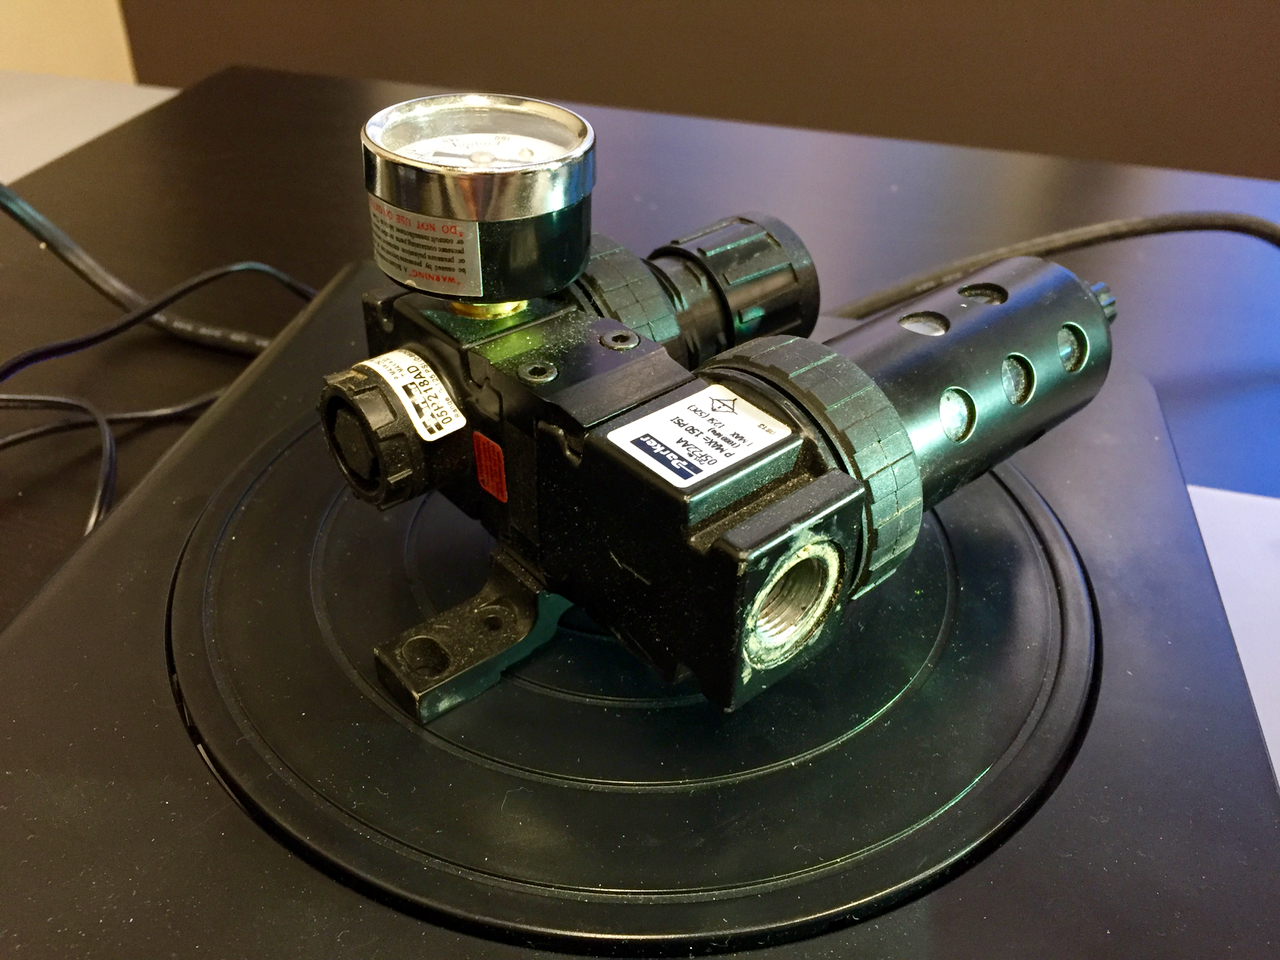
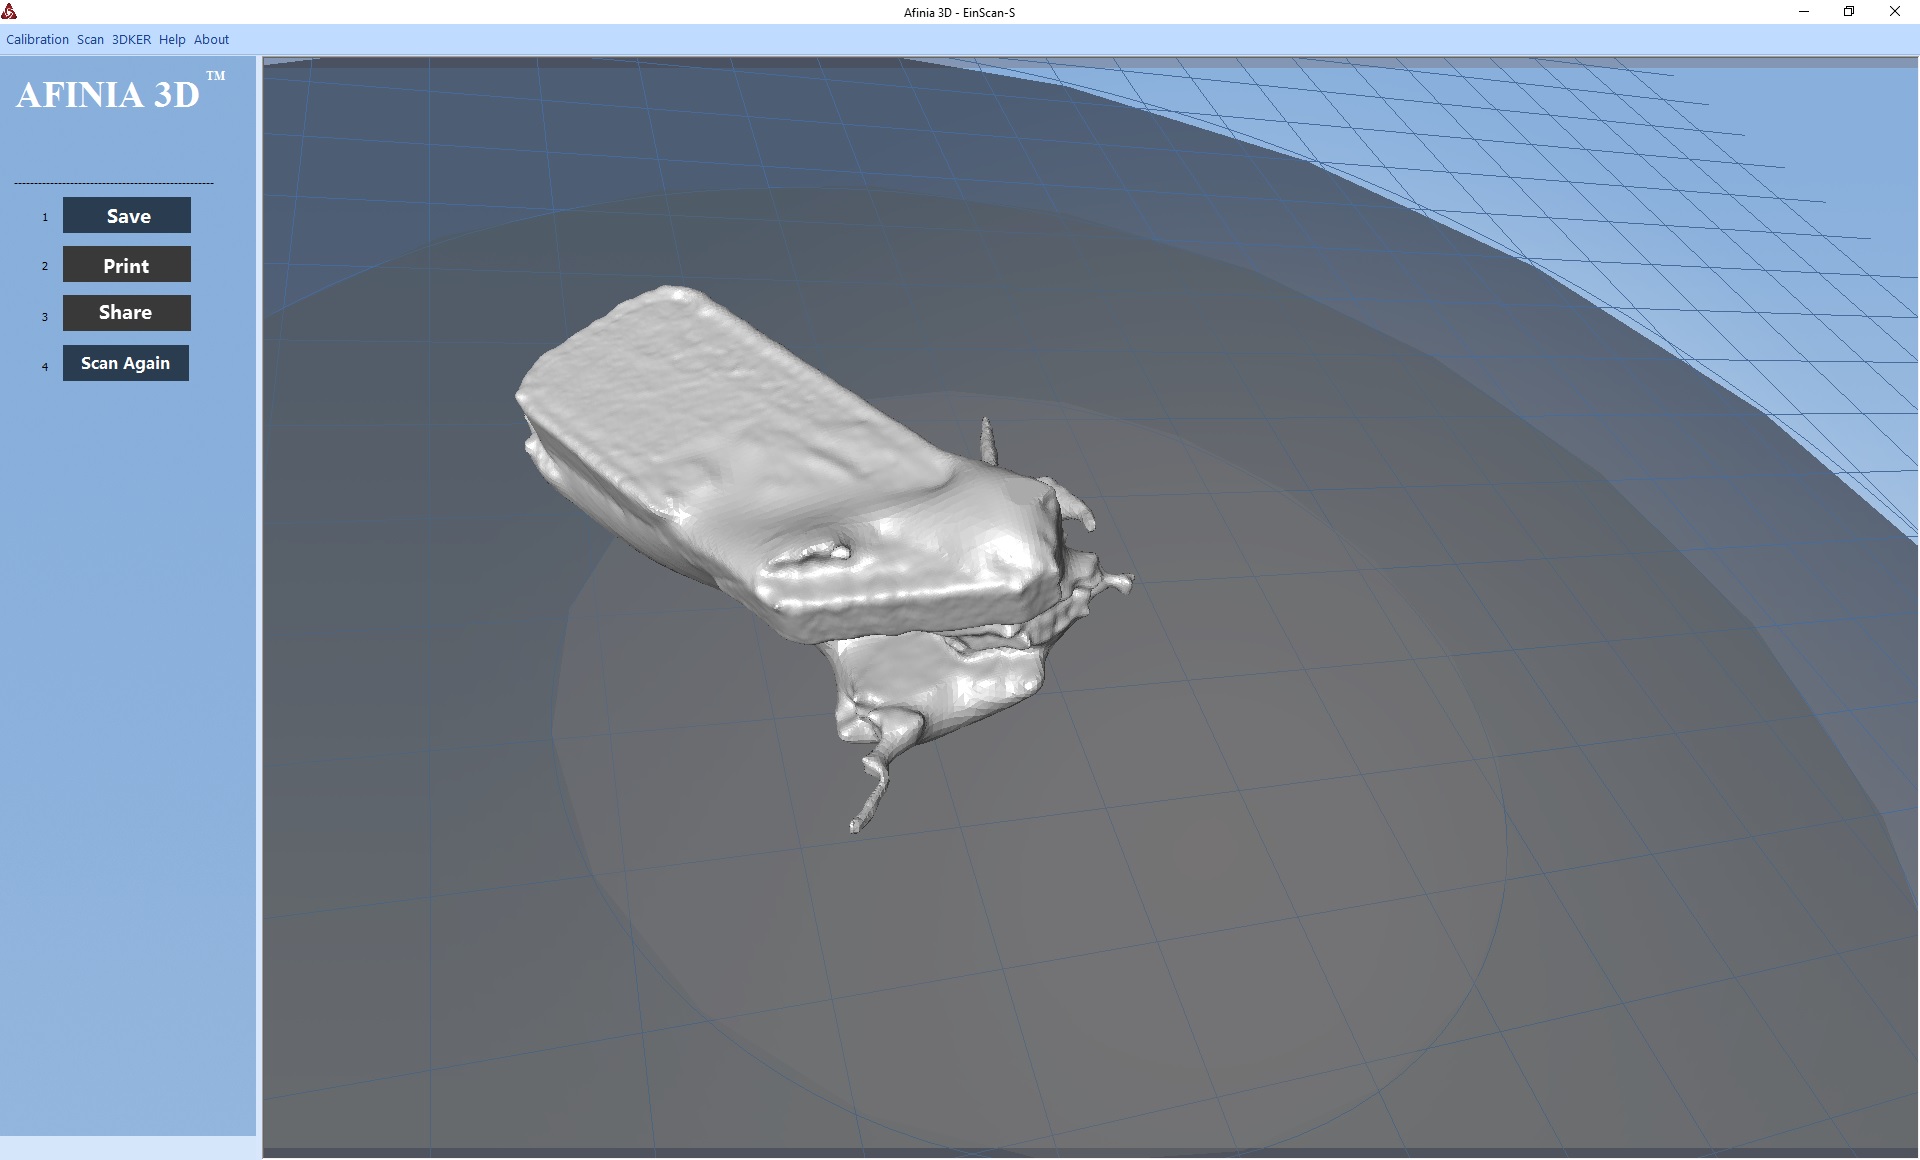
This is a more reasonable, but still complex part I attempted to scan. It’s a pressure gauge of some sort.

The result is partially good, but I suspect it could have been affected by the somewhat shiny surface. In such cases, it may be reasonable to spray the object with a removable non-shiny substance, such as one of those foot powder sprays.
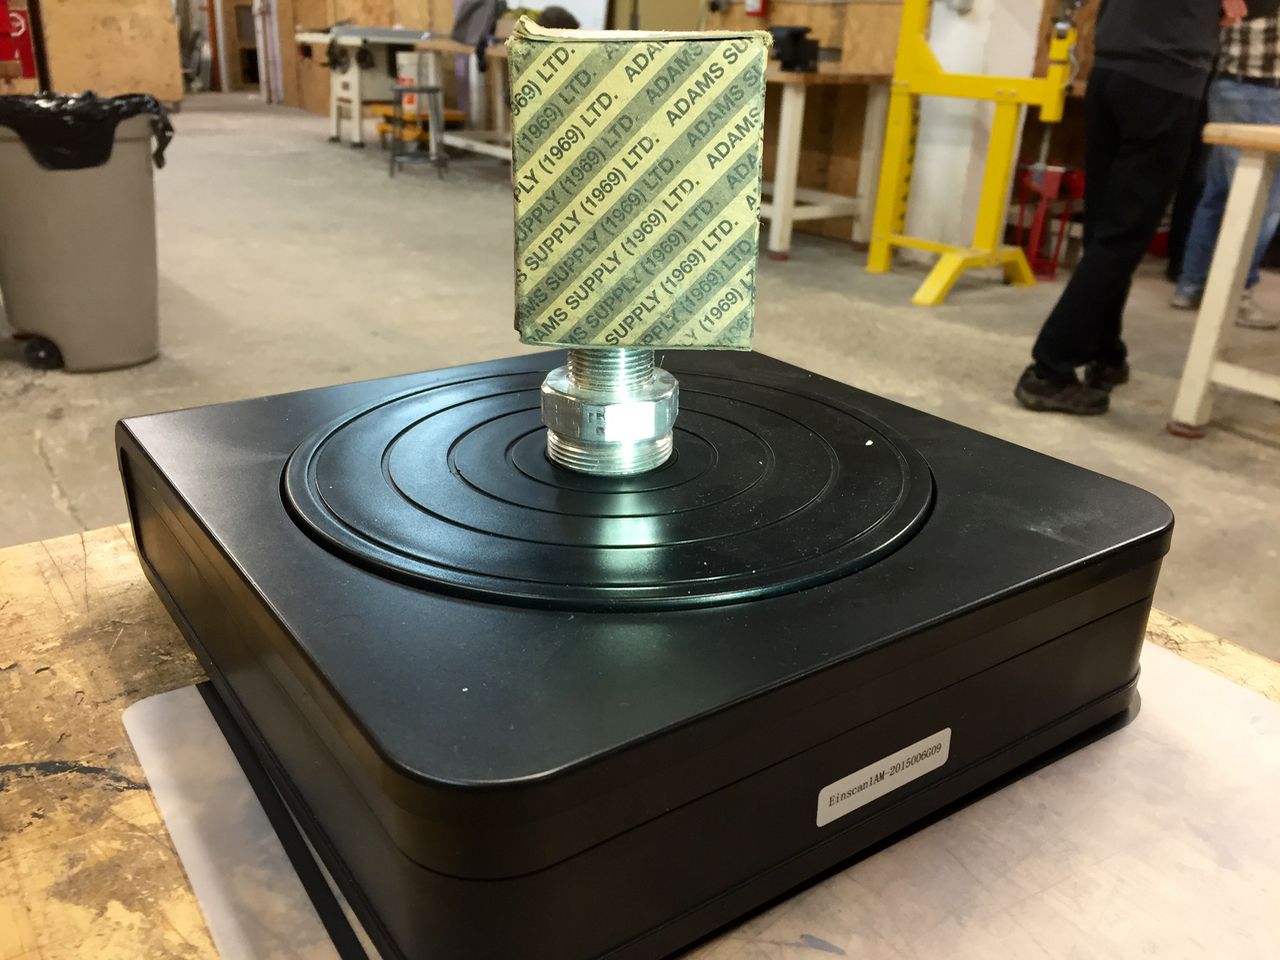
Another tip is to raise the part higher to ensure you properly capture the bottom of the object. Here I’ve propped up the part, which can be clipped out of the scan later.
I should mention that Afinia’s ES360 is actually a rebranded Einscan-S from Shining 3D. However, remember that Afinia provides generous and helpful support for the device that you might not be able to match if you purchased a scanner directly from Shining 3D.
To sum up, the ES360 can be a very useful 3D scanning device for certain types and sizes of objects, as long as you have an appropriate PC to drive it. If you need to scan much larger objects, you should pursue a different solution.
The ES360 is available from Afinia today at a cost of USD$999.
Via Afinia