

I saw a unique method of embedding nuts and bolts into your 3D print that I had not considered, one that you definitely should.
A three years ago I wrote a story on how you could embed bolts into your 3D prints, Three Ways to Embed Bolts in Your 3D Prints.
The three techniques involved either designing 3D space for the bolt to rest within, or pausing the 3D print job in mid-print to lay a bolt within an interior space, which would then be covered over by the continuation of the 3D print job.
All of those techniques work very well and can be still considered for use in your mechanical designs.
But this week I noticed yet another method: heat-and-sink.
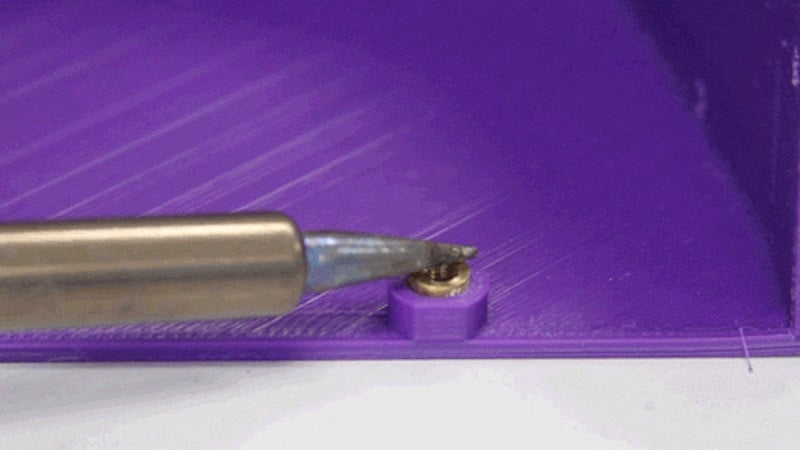
Posted by 3D Hubs, the approach involves designing a space for the bolt (or nut in this case) that’s slightly smaller than the metal bolt.
The bolt (or nut) is placed above the cavity and then carefully heated with a handy soldering iron. Eventually the heat transfers through the surface of the bolt and slowly softens the perimeter of the cavity, causing the nut to gently sink into the body of the print.
After removing the heat, the plastic quickly solidifies and leaves the nut securely mounted on the print.
While this approach looks neat and tidy, there are some concerns:
If you don’t pay attention and allow too much heat transfer to take place, the cavity will become too large and you’re basically screwed. Print another one and try again.
If you’re holding the soldering iron tight to the nut to maximize heat transfer, it may slip off and carve a trench in the rest of your print. Be very careful!
Nuts and bolts must be perfectly aligned to work correctly, and a big challenge with this approach is to ensure the nut and bolt are mounted at the precise angle required. If not, you will have trouble screwing them together. It may be advisable to develop a jig to hold the bolt (or nut) in the proper orientation when doing this.
And if the heat-and-sink approach isn’t for you, then use one of the other approaches I listed in the earlier post.