

MakerBot announced a very intriguing feature to their slicing program, “MinFill”.
The new option is a clever type of internal fill algorithm that should have been invented by someone eons ago. Maybe it was, but if so, it hasn’t appeared in popular slicing programs that I am aware of.
The need for internal fill is two-fold.
First, the amount of internal fill must match the functional usage pattern of the printed part. For example, a lever in a machine that takes some mechanical stress would likely require more internal fill than an idle figurine sitting on a desktop. The added infill would provide additional strength in some situations.
The second reason for using internal fill at all is to ensure the print completes successfully. There are many geometries in which there is a kind of “roof” that would otherwise collapse unless there is something underneath it when it is built. It’s like support material, except on the inside.
The problem has always been when you need such internal support the only option is to use infill. And in many cases the infill, when turned on, adds far more material than you’d ever need to fulfill the internal support need.
If only someone would develop an intelligent slicer that would determine such situations and act appropriately.
Well, it seems that MakerBot has done so with their new MinFill option.
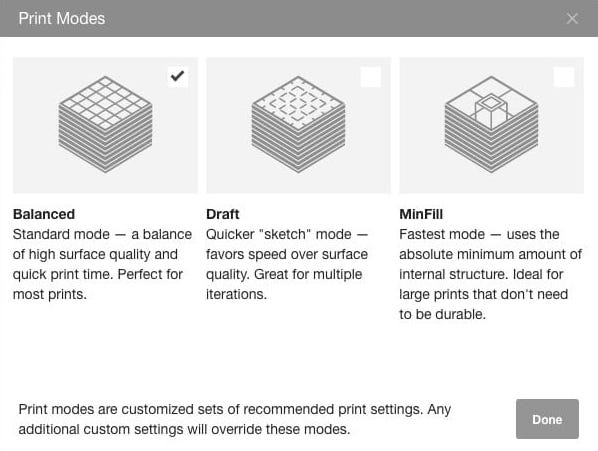
In their increasingly well-thought out slicing program, MakerBot Print, there is a new option to select besides the basic “Balanced” and “Draft” options. “MinFill” provides an intelligent analysis of the internal structure of the object and develops a custom designed infill pattern that provides the necessary “roof” support.
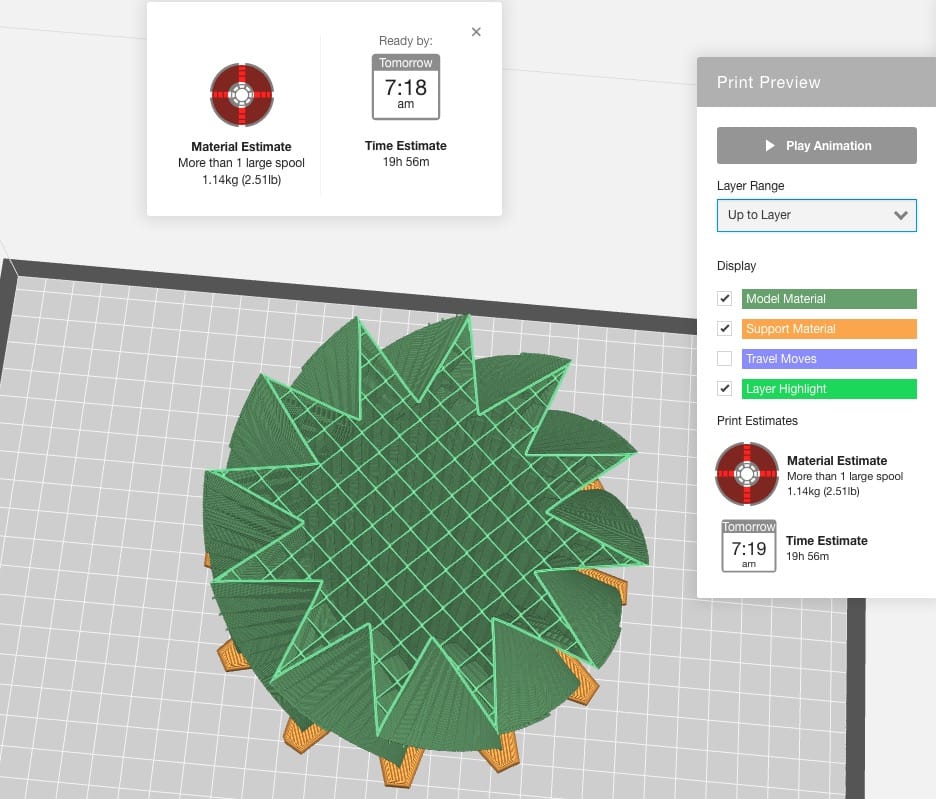
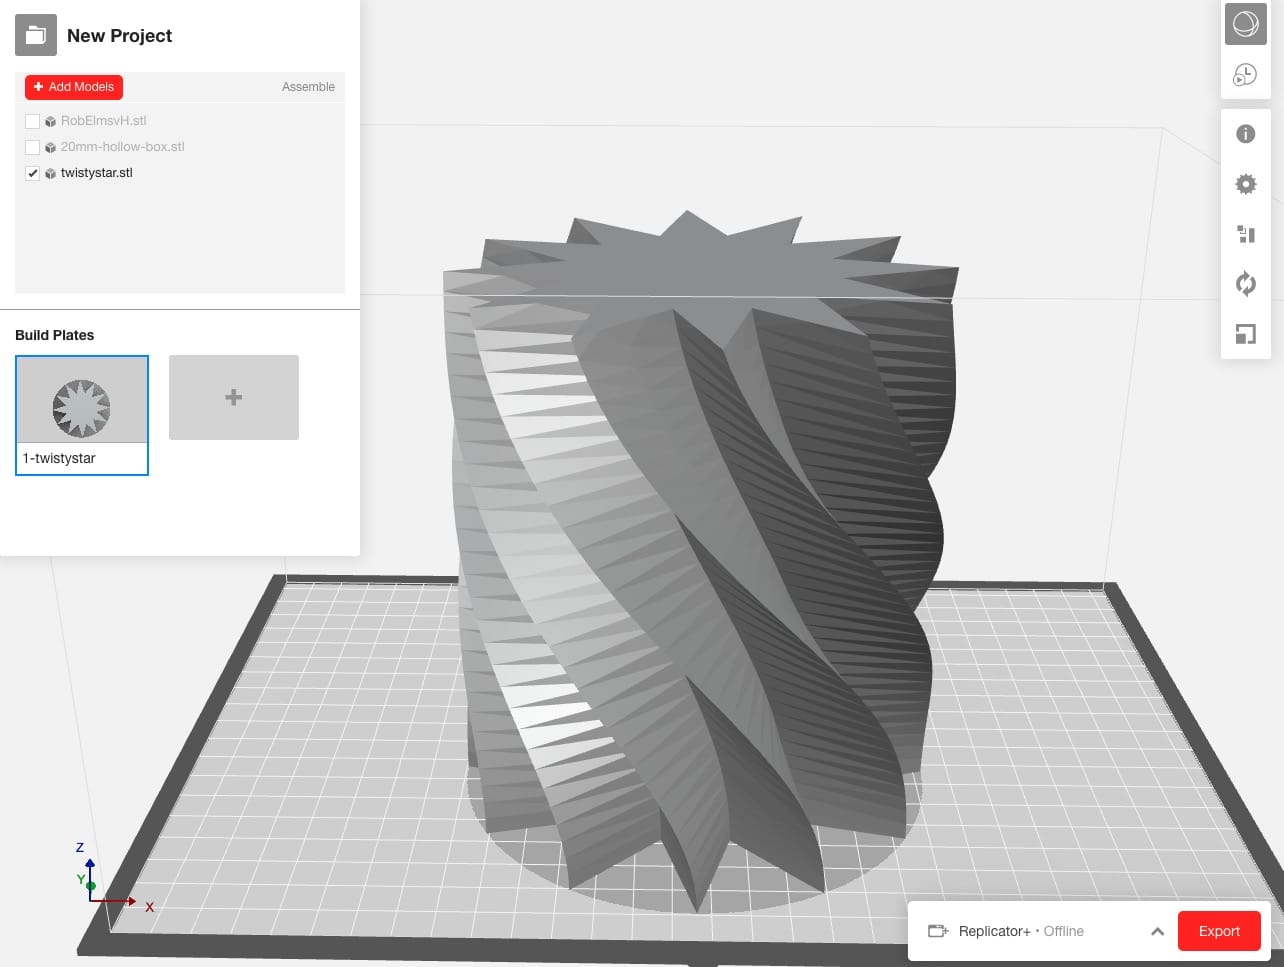
In this example, we can see my enormous twisty star object has used “Balanced” in which the infill is a standard grid patter that assumes the entire interior of the object.
Here we have the same object, except sliced using the MinFill option. As you can see, the infill patter is simply a stabilized tower that supports the roof.
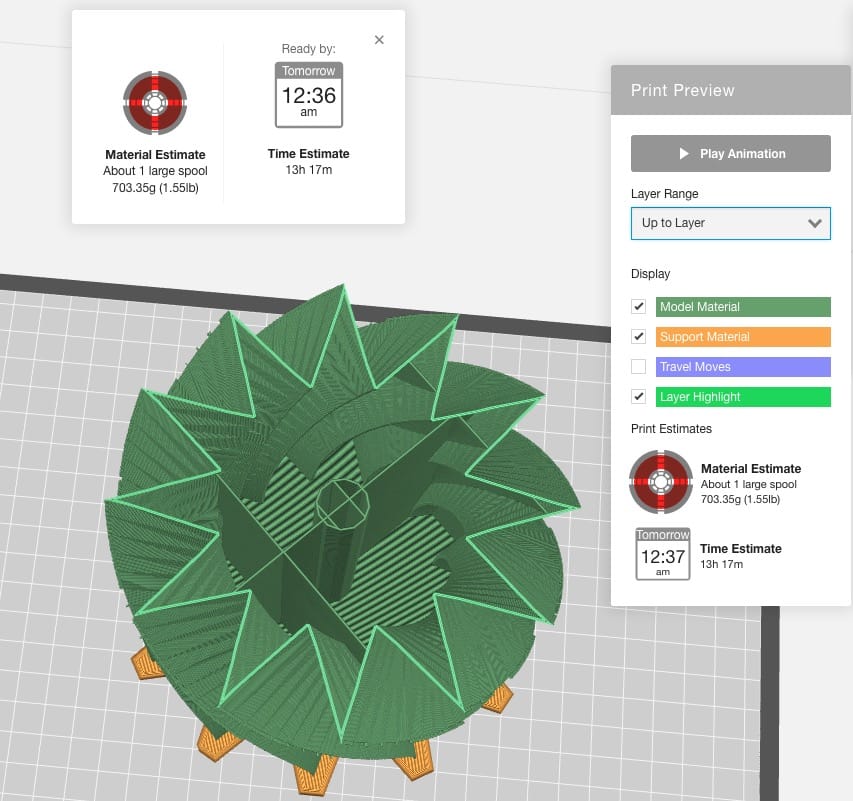
The best part is that there is quite a bit less material used, and a corresponding reduction in the print time, from about 20 hours to only 13. That’s very significant.
Of course, you can twiddle with the infill settings manually, by selecting the style of infill pattern and the density in MakerBot Print as well as most other slicing programs. But that is quite different from the intelligent support structure designed by the MinFill algorithm.
It’s a very useful feature that should be implemented on EVERY slicing program, not just MakerBot’s.
Good job by MakerBot here, as they’ve likely saved their clients a great deal of time and money on plastic.
Via MakerBot