
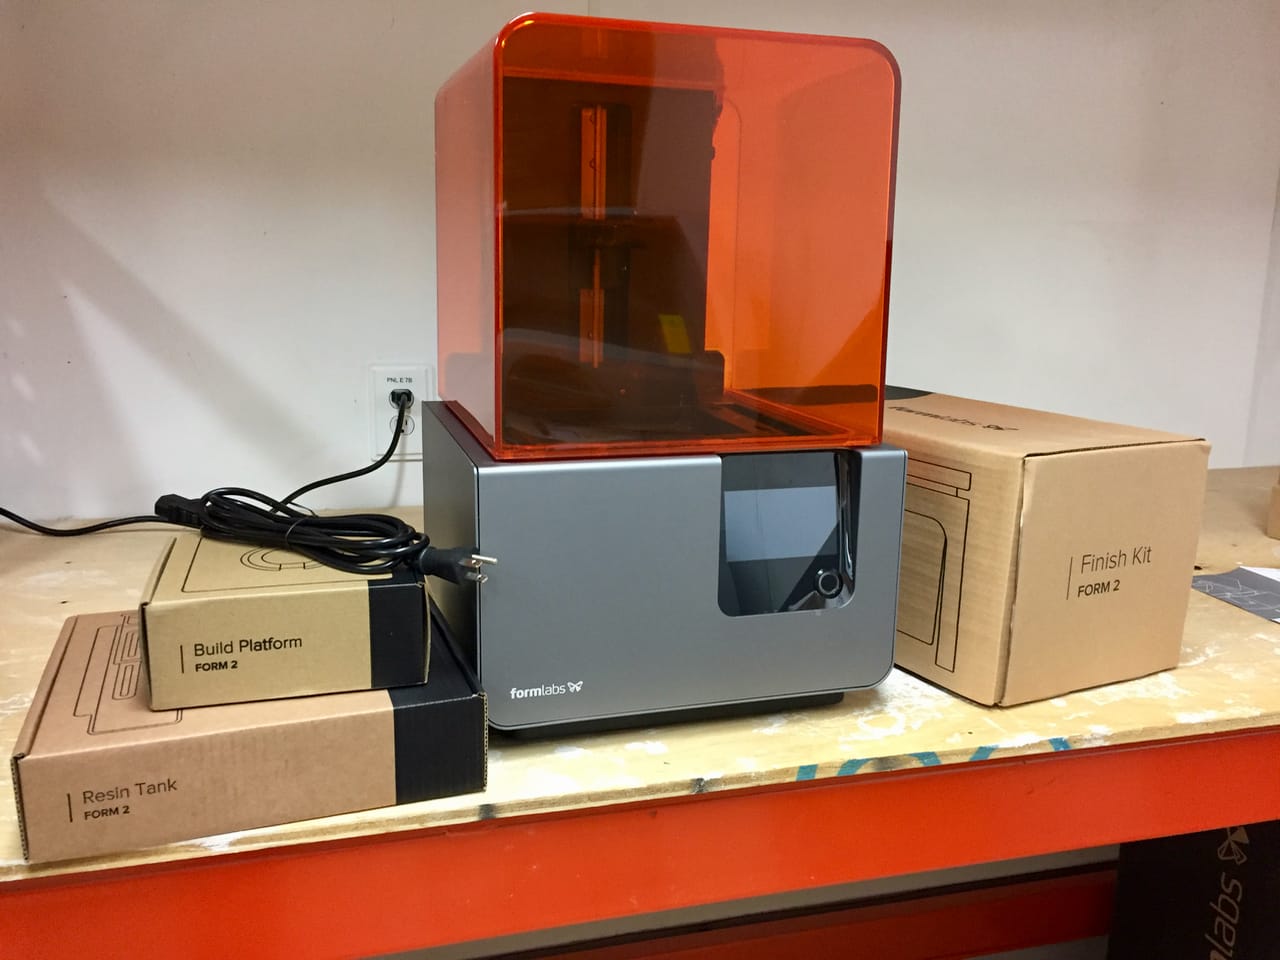

Our lab finally got our hands on the Formlabs Form 2 desktop 3D printer and I’d like to tell you about our experience.
Actually, we received two units, but the experience with each was the same. And it was pretty good!
First, the packaging. In my experience, packaging is actually quite a critical feature for small desktop 3D printers, as the devices can easily be damaged if not using a proper package design. In fact, in one case I had to go through three shipments to finally receive an undamaged unit, but that’s another story.

Formlabs has packaged the Form 2 very well. It’s well surrounded by thick foam that should be impervious to all but the most outrageous courier maneuvers.
The first interesting packaging aspect we noticed was a very well designed lift system for pulling the unit out of its box. These handles are easily grabbed and the Form 2 unit slides easily upwards. Nicely done!

Inside the box there actually isn’t a great deal of pieces, aside from the printer itself and a USB cable. We received most of the other components, such as the power cables, in a separate box containing the cleaning kit.
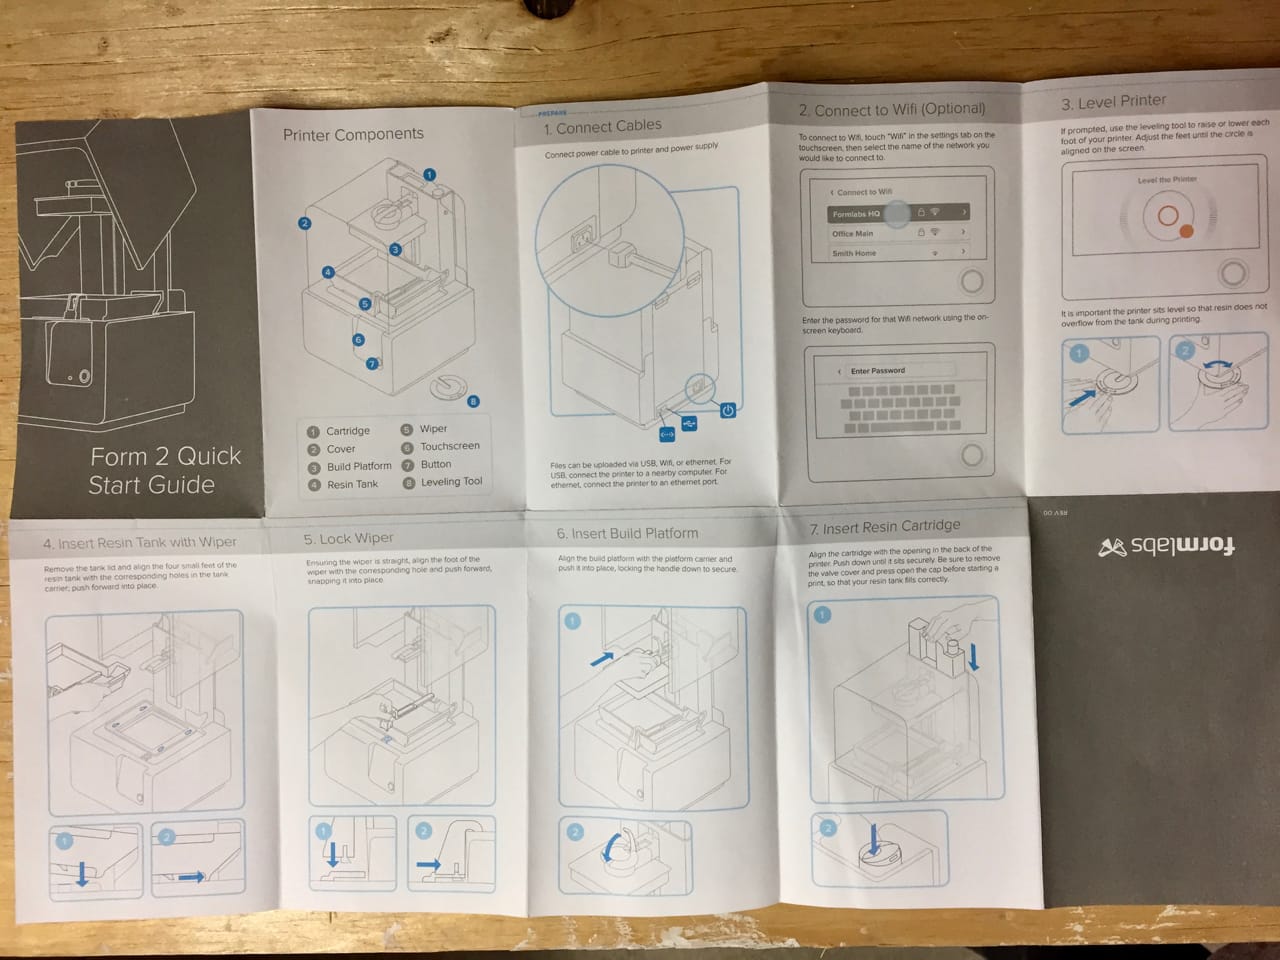
The machine included a very easy to follow set of instructions that we had no problems executing.
Resin was shipped separately in a third box, and I suspect the reasoning for doing so is that each Form 2 order may have a different combination and quantity of resin cartridges, so they must use different box sizes.
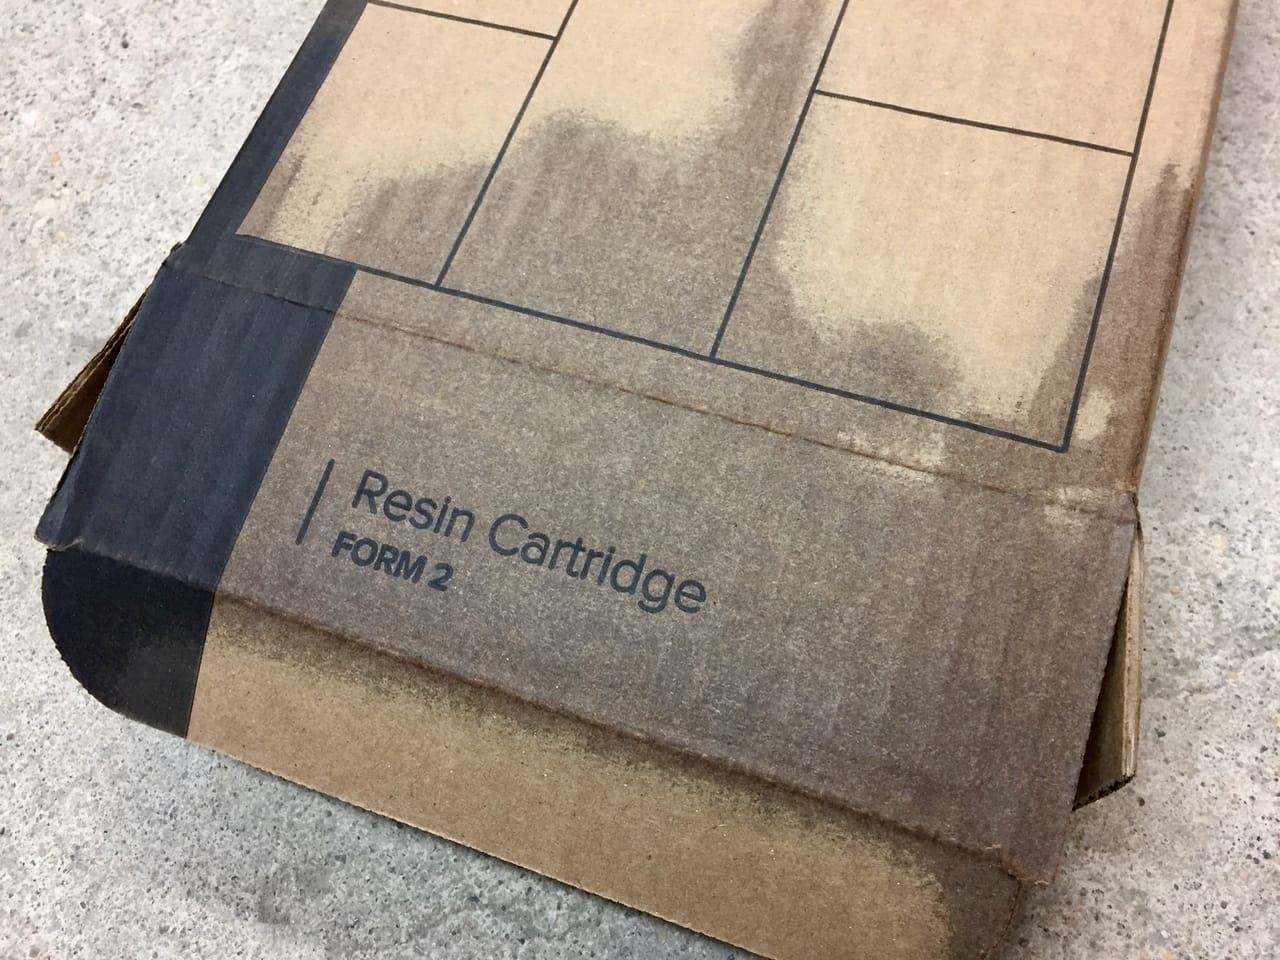
The one problem we encountered with the shipment – and indeed the entire Form 2 experience – was that the shipped resin was damaged. A very wet-looking box contained our cartridges, but evidently one cartridge was cracked open, leaking photopolymer resin all over. But the good news was that Formlabs immediately dispatched replacements without issue. However, they might want to look at the resin package design to reduce the frequency of this scenario.
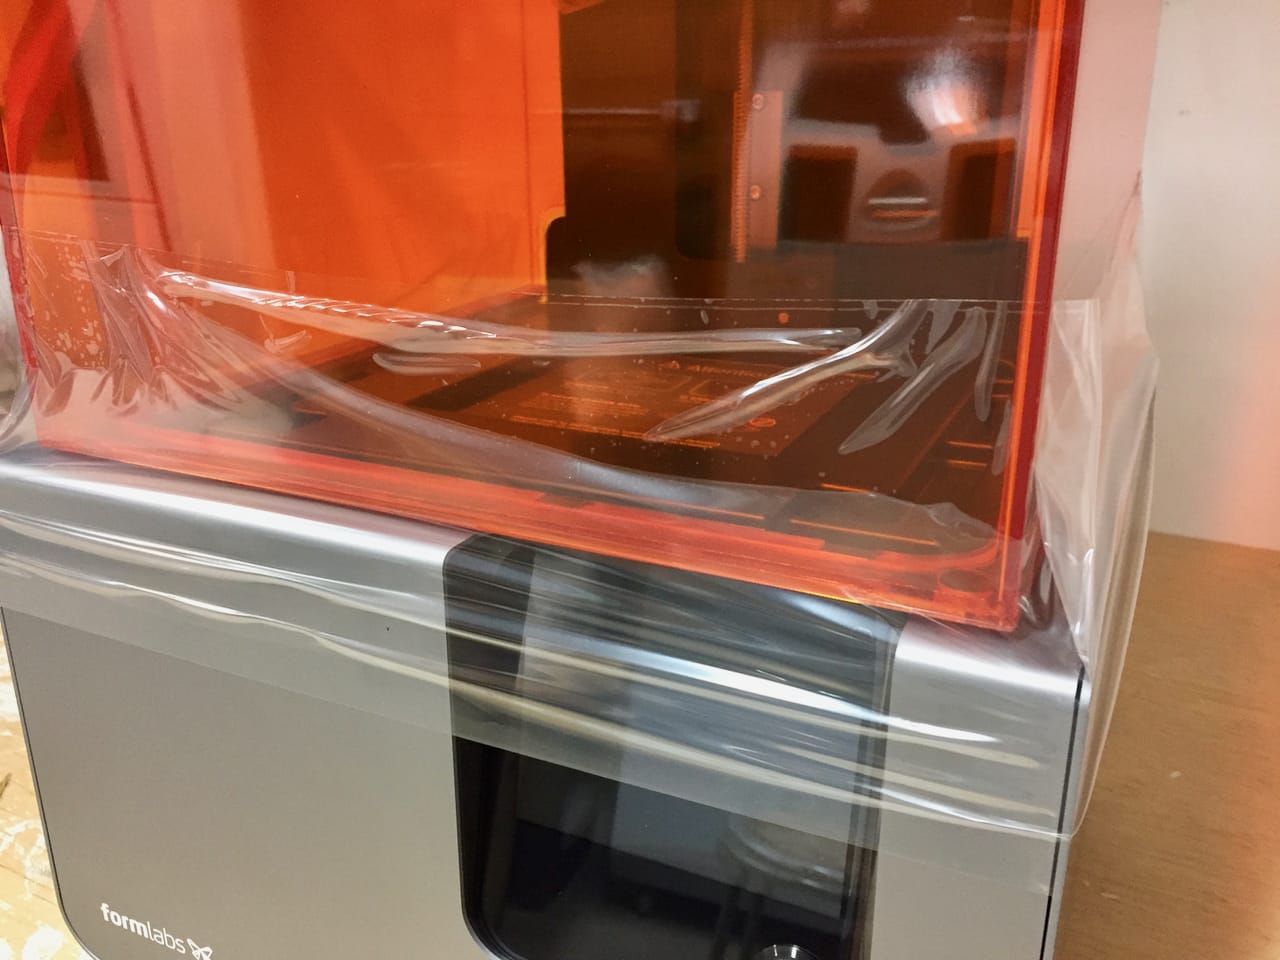
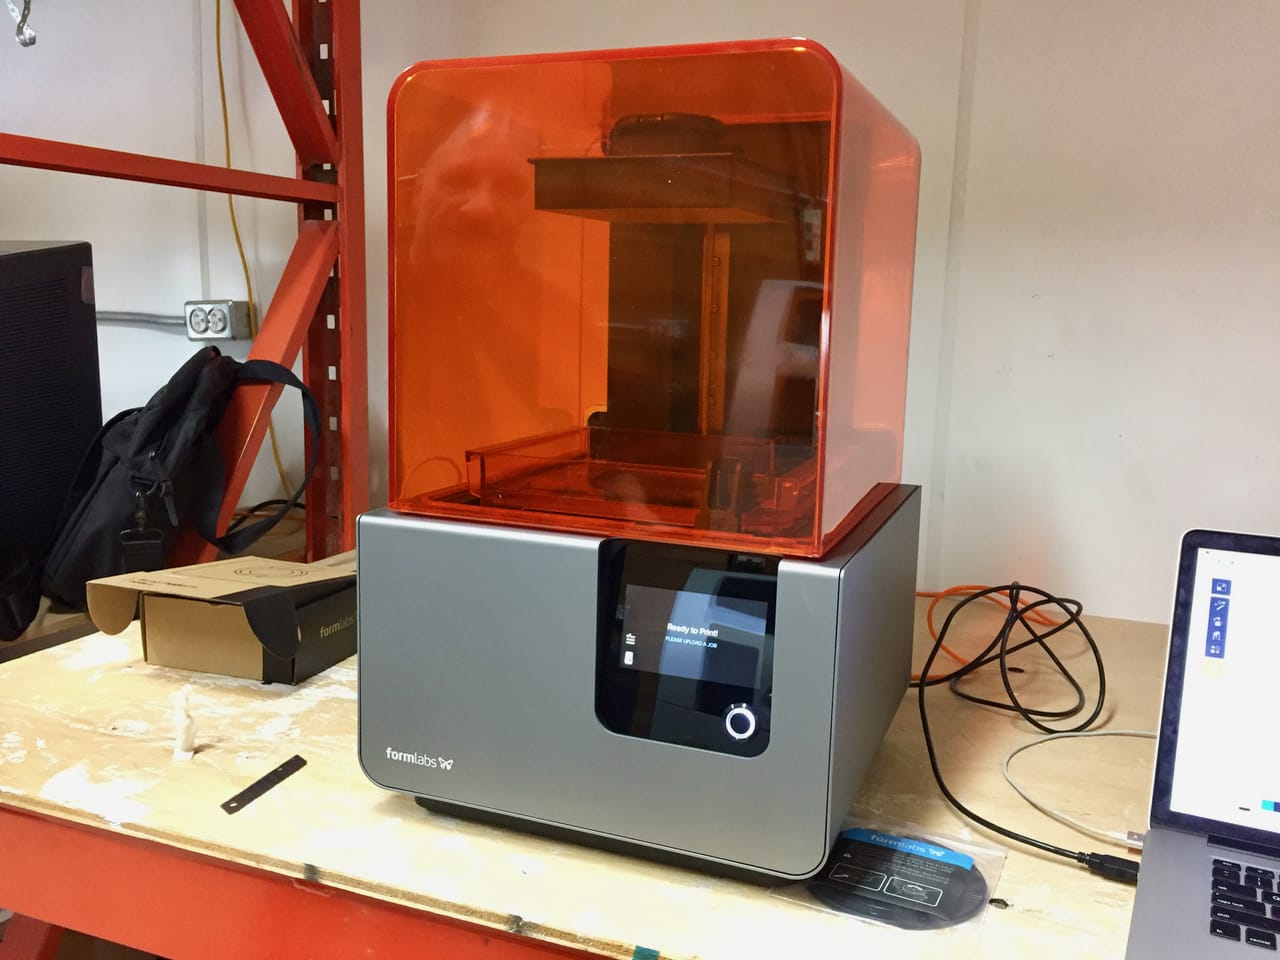
Setting up the machine is ridiculously easy. After removing the enclosing plastic bag and a large band of tape holding the UV cover secure, you simply plug it it. You don’t even need to power it on, as it does so immediately by itself and boots up. After a moment to bring itself to life, the machine shows itself ready to print.
Of course, it really isn’t ready to print as we had to install a resin cartridge and tank. But the machine would not let you attempt to print without them in any case.
You should connect your Form 2 to your network, which can be done by ethernet or WiFi. It’s also possible to drive the machine from a directly attached USB cable, but a network connection is far more useful. Of course, at this point we discovered our WiFi was out, so things had to proceed using the ethernet cable. A wired connection is more reliable than WiFi anyway.
One very strange and fun feature is the machine serial number. Normally this is either a consecutive series of digits or a weird alphanumeric combo, but Formlabs instead uses a pair of words, which sometimes results in unusual combinations. The first machine we installed had a serial number of “DomineeringPig”. Ok, sure!
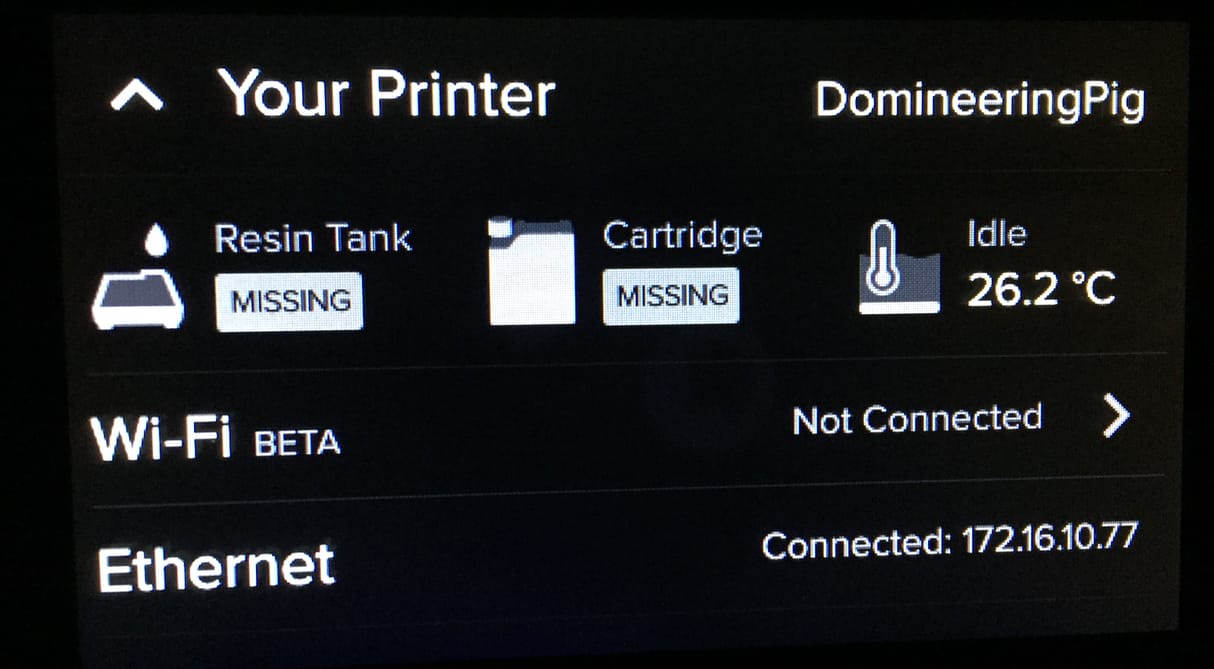
The machine status screen is interesting. Here you can see that the machine “knows” it has neither a resin tank, nor a resin cartridge. These are both chipped items that the machine understands when they are inserted so that it can track machine operations.
The reasons for such tracking are to ensure proper operation. Since the machine knows the type of resin currently installed, it can adjust machine performance parameters appropriately to match. But why track the resin tanks?
It turns out that the tanks, after first use, must be continually used for that same material. Fortunately, the tanks are recognized by the Form 2 so you cannot make a mistake.
While you can insert the resin cartridge, which slides easily down a slot in the back from the top, not much happens until you attempt to start a print.
The printing is initiated from PreForm, Formlabs’ specialized print management software. It’s installable on most platforms and runs identically in each.
Like other slicing programs, PreForm shows a 3D representation of the 3D model in the build volume. You can re-orient and reposition it as necessary, as well as selecting the desired degree of resolution.
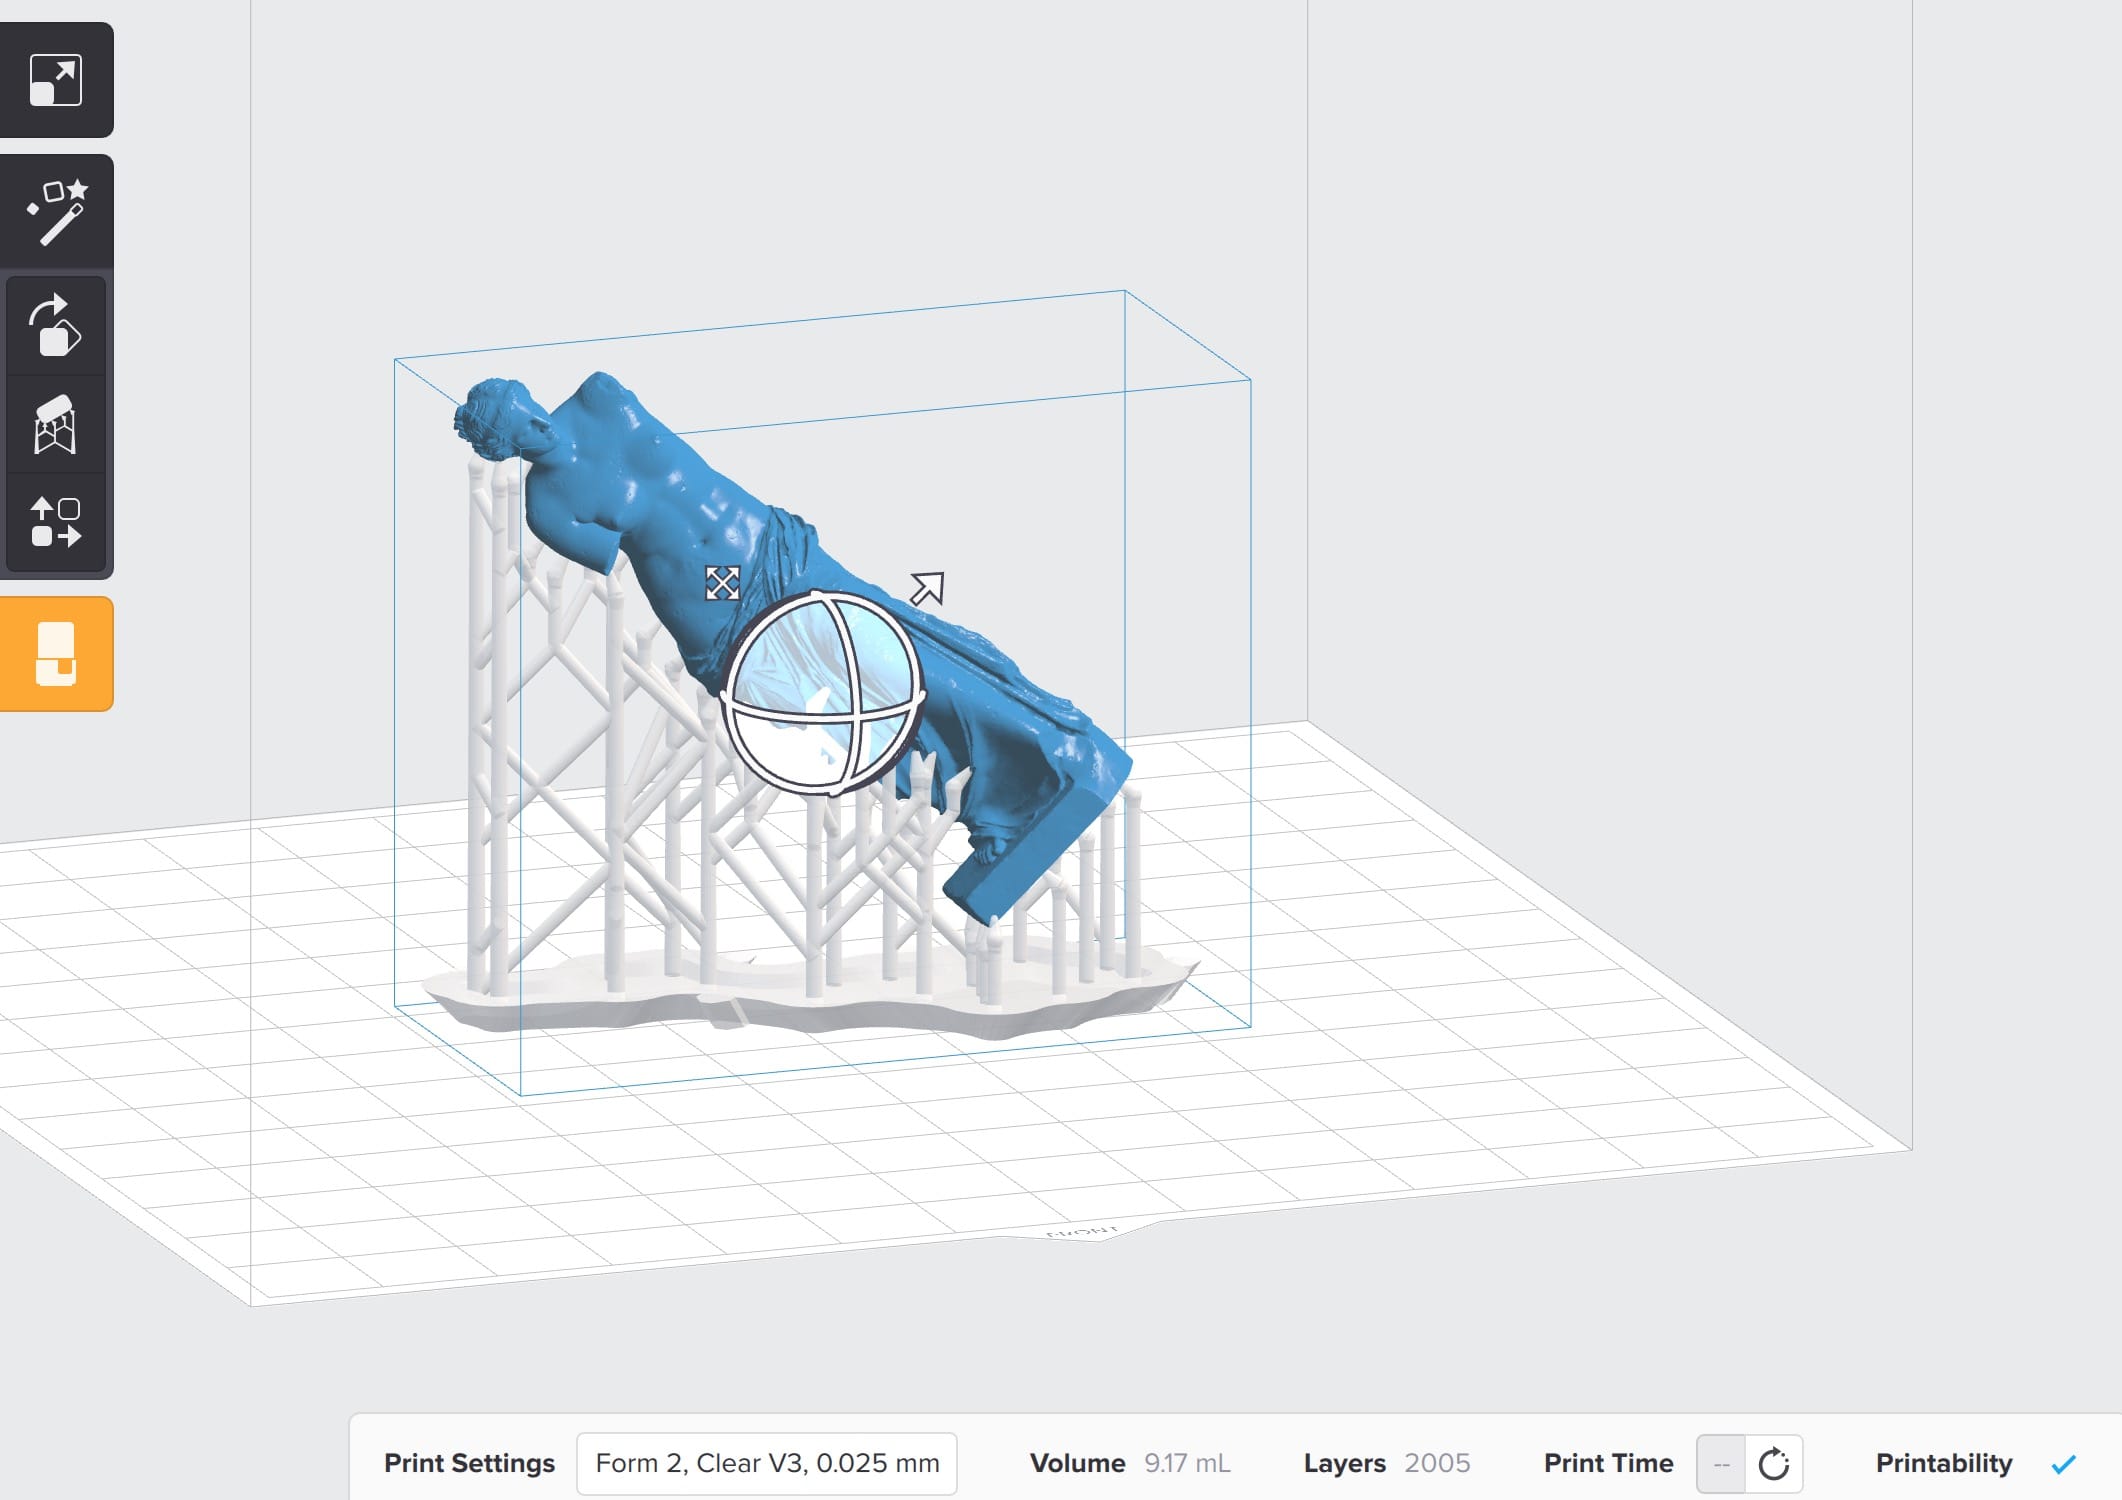
The Form 2 prints in three modes: 0.100mm, 0.050mm and 0.025mm layers. Of course, more layers means more printing time, so choose carefully. We found that the 0.100mm select did produce very high quality results, far better than you’d get from an extrusion-based 3D printer at the same resolution.
The basic workflow is pretty simple:
- Load the 3D model(s)
- Orient them
- Position them on the build plate
- Slice the 3D model
- Transmit the GCODE to the Form 2 for printing
- Hit the start button on the Form 2
If that isn’t simple enough, Formlabs has made it even simpler: their “One Touch Print” feature does ALL of the above in one touch, aside from hitting the start button on the printer. But if you do that, make sure you have your resolution set correctly first!
When a print is attempted, then interesting things happen.
But we’ll save them for Part two of this series.
Via Formlabs