

There’s a peculiar problem that exists on a great many 3D printers that could be avoided by a simple software fix.
The problem is that in many systems, the print plate is not a permanent fixture; it eventually wears out as prints occur. Each print strips a few molecules away from these print surfaces, eventually compromising the flatness and adhesive qualities of the component.
Of course this does not occur in all systems. Some desktop 3D printers use a glass surface that is essentially permanent; I’ve even seen granite rock print plates on higher-end equipment. There are also systems in which the print surface is literally disposable after only a single print run, such as is done on Stratasys’ Fortus equipment, where a plastic sheet is applied before printing. In a few machines, such as the Stratasys Connex series, a permanent metal plate is used.
These are not machines affected by this issue. I’m instead referring to those with acrylic beds, or those with a semi-disposable surface applied. A popular surface adhesion treatment is a sheet of PEI, which has the tremendous property of being able to stick very well to PLA, ABS and other commonly used thermoplastics, but does not permanently bond with the print, allowing easy removal.
These surfaces tend to eventually wear out, and most often they wear out in the exact center of the print bed.
Why is that? There is a very simple reason: almost all 3D printer slicing software will, by default, place your 3D model in the center of the print surface. As a default, most people simply accept this and hit “print”.
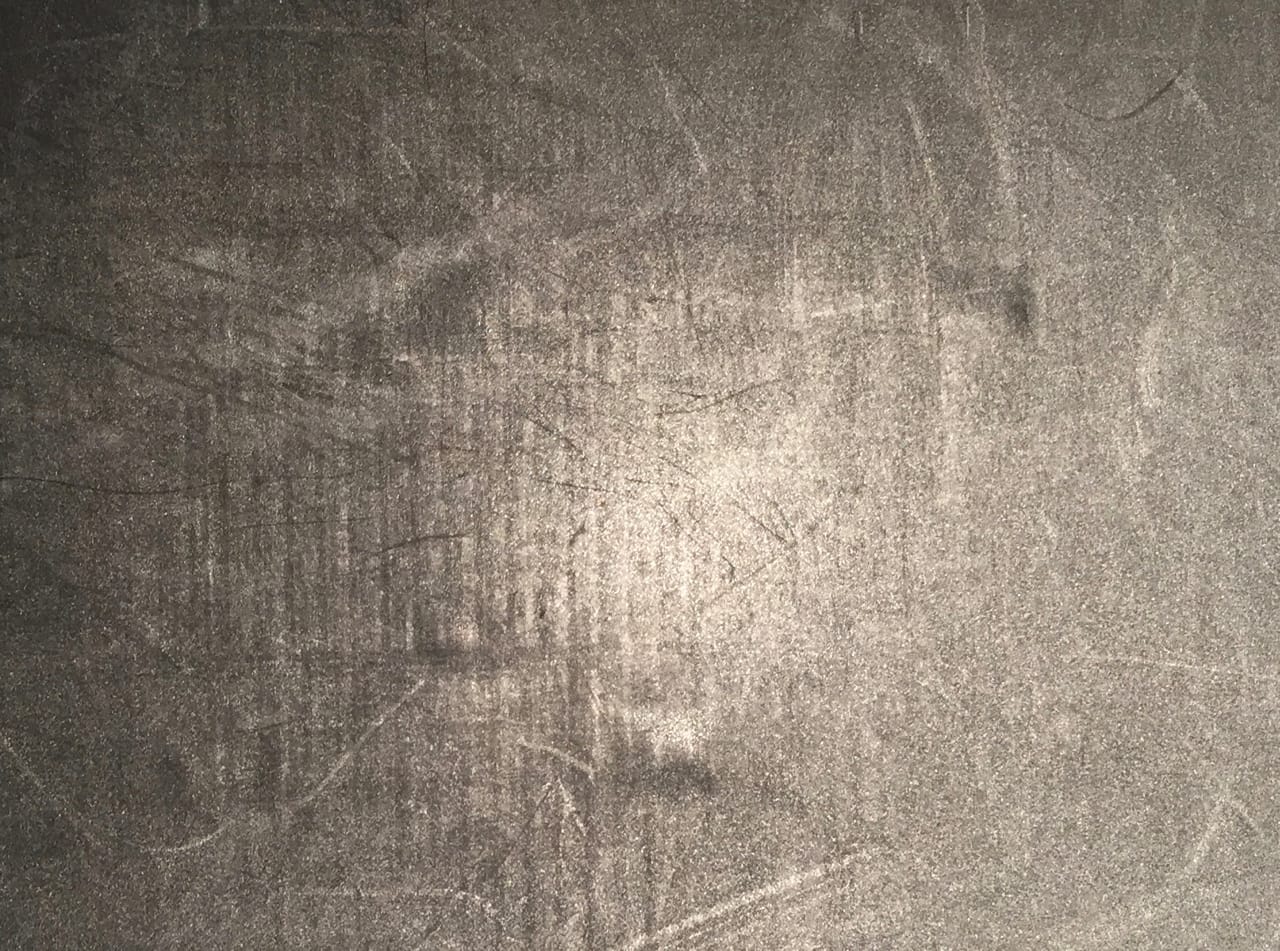
However, repeated iterations mean that the center of your print surface gets pretty bead up, as shown above.
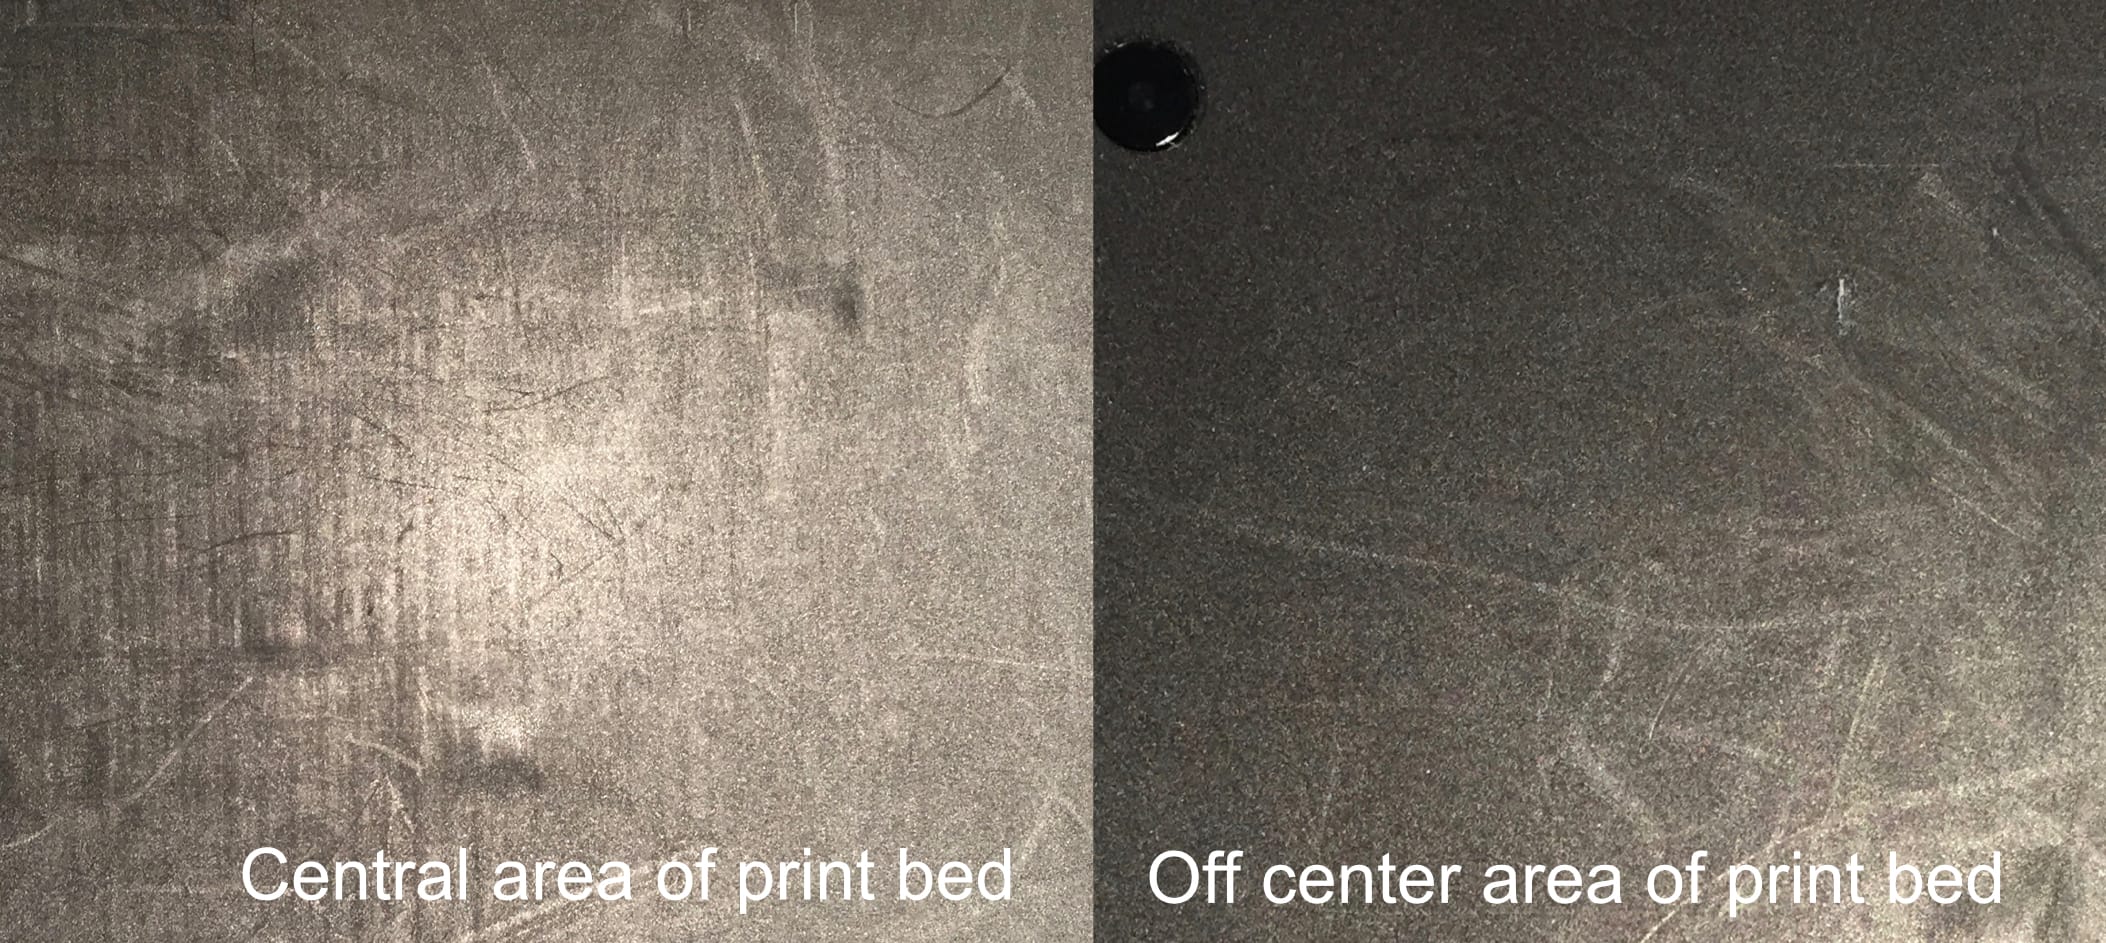
Here you can see the difference between the heavily used center portion of a MakerBot Replicator+ print bed, compared with the relatively unused side area.
People will tend to use the print surface until it doesn’t work any longer, and then replace it. Some will detect the wear and actively try to manually position new prints on bed areas that are less worn to ensure adhesion. But these are not optimal solutions.
A feature I’d like to see is one that randomly places your print in different surface areas. In this way the bed should theoretically wear more evenly and last longer.
However, such a feature assumes that your 3D printer would print equally well on any portion of the print surface, and that’s not always the case. Some 3D printers have slightly non-flat build plates, and thus there is a “sweet spot” on the bed that is best for adhesion. 3D printer operators often “know” where these spots are and act accordingly.
But for the majority of current technology 3D printers, the beds are flat and more often than not these days includes an automated bed leveling procedure to account for tippy plates. For these a randomized placement procedure would be terrific.