

I’m watching a video from the folks at DIY3DTECH, where they show a comprehensive air system.
The problem they’re trying to solve is the emission of noxious nanoparticles during 3D printing. While in solid state, most commonly available 3D print materials are quite safe. However, when they are heated they tend to emit nanoparticles.
The problem is that some of these materials contain substances that, if ingested or breathed, could cause toxic effects. The nanoparticles emitted during heated operations invariably become airborne due to their low weight and ambient air currents, where they could make their way onto your skin and into your lungs.
That is, if they aren’t dealt with in some way.
Some 3D printing equipment now includes filtration systems that are effective to one degree or another, but the majority of desktop 3D printers sold today include absolutely no air safety features. Indeed, many machines are “open style” and have no case that might hold loose particles within a chamber.
For those that care there are plenty of possible solutions, with the most common being a room ventilation system. In this approach the room is considered to be the receptacle of particles, and its entirety is evacuated to the outside, and replaced with fresh incoming air. This is usually more effective than an in-machine air filtration system because ALL particles are dealt with, not simply the ones that are captured by the specific filters involved.
Such “full room” ventilation systems can be expensive, as the air moving equipment is sized based on the volume of air to be changed, and the frequency of that change. To change the entire contents of a room four times per hour, for example, you’d need a specific volume capacity for your air ventilation system. That can get quite expensive, as workshops can often be quite a bit larger than a 3D printer.
Ideally you’d want to vent only the air within the 3D printer and assume the remainder of the workshop is “clean”. That requires a more specific air system setup.
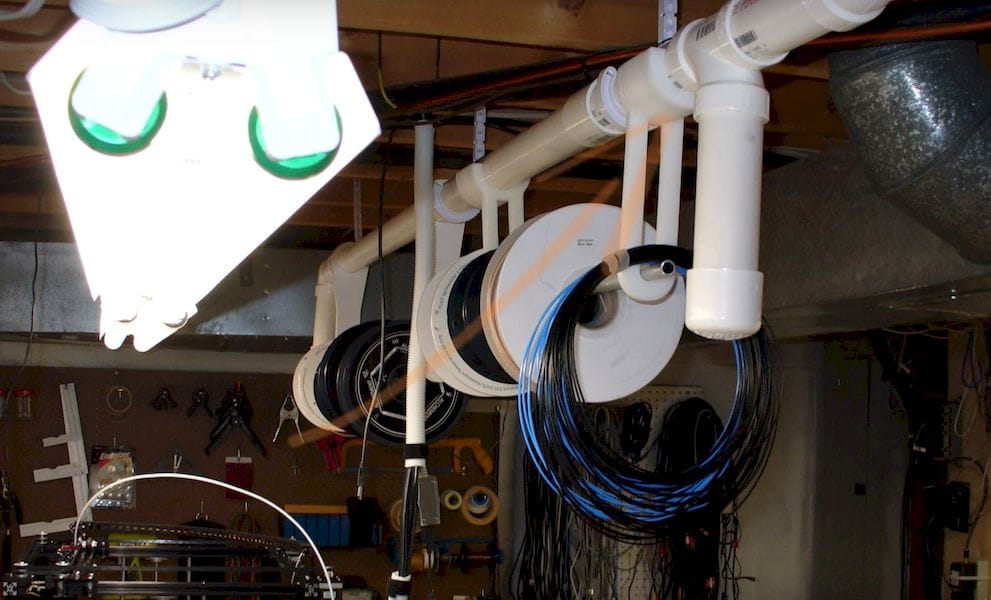
And that’s exactly what DIY3DTECH did. They constructed a purpose-built ventilation system made from 1.5inch PVC pipe that directly leads polluted air from the sealed 3D printer’s build chamber to the outside.
Using a commonly available HVAC booster fan, the system pulls moderate but still more than sufficient volumes of air from the 3D printer and safely vents it outside.
In this particular workshop there are several 3D printers, each of which may require ventilation. The air system includes valves to cut off suction to unused drops, where unused 3D printers might otherwise needlessly use up suction power.
It’s a terrific solution, but obviously requires some effort to design and build. The good news is that this is not magic: all components and tools are readily available at any hardware store and could be assembled by any reasonably competent hardware person.
That said, I expect the majority of desktop 3D printer to continue to avoid the use of ventilation systems, simply because it’s extra effort. People buy 3D printers because you can make stuff at the touch of a button – but you can’t get a custom ventilation system at the touch of a button.
My hope is that someone might make available a 3D print-focused ventilation system that could be more easily deployable by those wishing to do so. Perhaps it could include the major mechanical components, like printer attachments, fans & electronics, and refer users to purchase the required piping and glue from local sources to keep costs down.
Meanwhile, consider examining your ventilation setup and ensure it’s sufficient for your operations.
Via DIY3DTECH