


As 3D printing becomes more of a requirement for industries, costs become a higher factor in production.
Reducing 3D printing costs can help maximize your return on investment (ROI). While you can always cut expenses indiscriminately, you’ll get the most from your money by considering these guidelines to reduce your 3D printing costs without sacrificing quality.
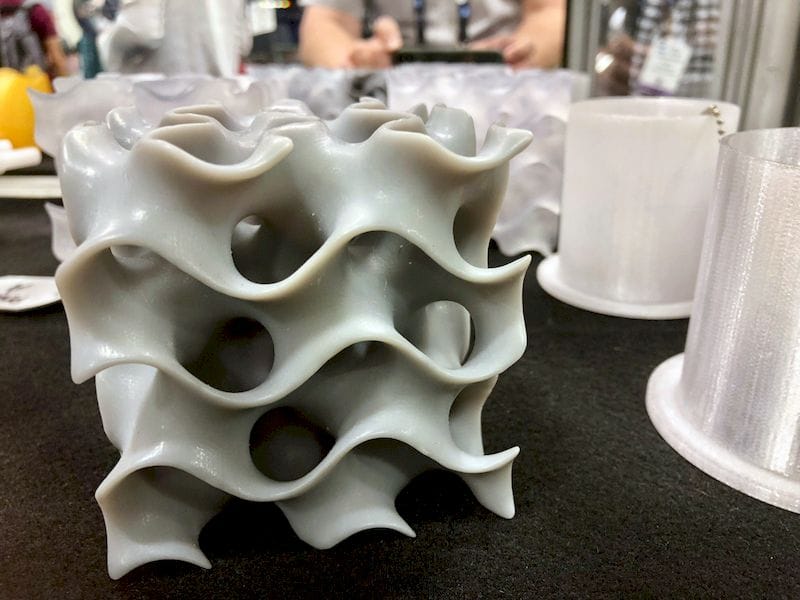
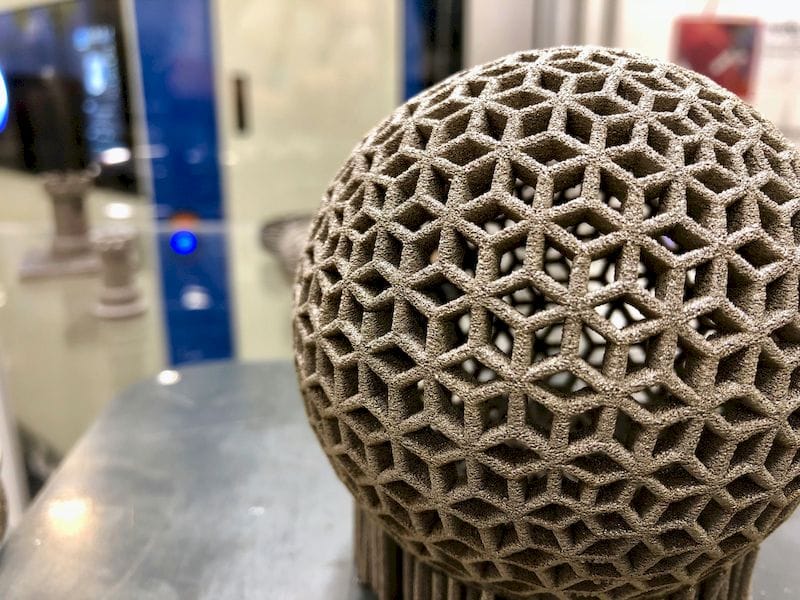
Become Holey
When 3D printing every added feature requires more material. Cut down on these by creating designs with sparse honeycomb or matrix designs. Holes in 3D printed objects reduce the infill of objects, which makes the finished products lighter in weight and cheaper to produce. And your holes don’t have to be circular. Any geometric shape will do.
It’s also possible to use Finite Element Analysis (FEA) tools to automatically generate these sparse geometries in ways that still provide the required strengths.
Hollowing out your design will also lower the amount of material required. How much you save will depend on the wall thickness you leave in your design. Titanium must have a minimum thickness of 0.2 millimeters, whereas plastics and ceramics must have a thickness at least between one and three millimeters.
Improve Your Models
Reducing the amount of material in your 3D printing starts with altering your models. Try to change them to eliminate overhangs steeper than 45 degrees. This measurement is the angle where you must include supports to prevent collapse – and often failed prints. The fewer supports you use, the less material your design requires. Additionally, you’ll save on post-production time and costs since you won’t need to remove these supports and smooth their attachment points by sanding.
Using 3D-printed objects instead of machined products can reduce manufacturing time, especially with models that require little post-printing finishing. Many companies have used 3D objects to cut time and money from their manufacturing processes. For example, Raytheon cut the manufacturing time for its rocket components from days to hours using 3D printing. In most cases, the less time required for production, the higher the ROI, especially when transitioning from traditional machining to printing.
Prevent Print Failures
The more problems you encounter while printing, the more your project will cost because re-prints usually cost as much as the failures, potentially doubling, or even tripling your costs. Issues eat into your profits, reducing your ROI. Print a smaller test model first. Doing so ensures you have the correct materials, orientation, design and print parameters before producing your final product. The process of creating a smaller prototype is like printing a test copy on a copier before setting the machine to produce hundreds of copies.
Additionally, you’ll want to ensure your printed materials can withstand the stresses of their intended use. To avoid costly production of parts, print out a test piece that will be used to determine the strength and flexibility of the design during its use. This process is especially important if you print components for manufacturing, which often require more precision in their designs to properly fit with other parts and operate under strain.
Balance Layer Height and Functionality
While you can shrink your print time and costs with thicker layers, you’ll sacrifice a perfectly smooth finish. Some changes in layer height will have less of an impact than others. For instance, doubling a layer height from 0.100mm to 0.200mm will cut the print time in half. But because the layer height is so small, the visible difference is usually indiscernible. However, in some cases the surface finish doesn’t matter for the particular application, in which you can print as thick layers as you can manage for speed.
Typical layer heights used will depend on the material and process. Don’t go outside the recommended parameters for your selected printing method. In designs that require precision, don’t increase the layer height. Make it as small as possible. Where you don’t need interconnecting parts or perfect products, raising the layer height makes it easier to print faster. This choice gets your printing done sooner, which usually increases your ROI.
Remember That Bigger Isn’t Better
If possible, make your final design smaller. Doing so further reduces the need for extra printing materials. Think of a cube. If you reduce its dimensions by 20 percent on each side — from 10 inches to eight inches — you’ll cut the volume almost in half, from 1,000 cubic inches to 512 cubic inches. This reduction means less material is required for a slight decrease in the size of your finished product.
While you may not be able to reduce the size of your finished product, consider printing a smaller version for your prototype. You’ll have a testable model faster and cheaper. Your prototype only verifies that you used the correct color, material and resolution during printing. You may also use it for stress testing later. As a test piece, your prototype does not have to be the same size.
Make the Most of Materials
The materials used for your printed piece make a significant difference in the final cost. Common materials, such as PLA and ABS plastics, can range from $19 to $175 per kilogram, about two pounds. Ceramic and metal materials, used in industrial applications, cost much more. Carbon fiber-capable 3D printers have been around since 2013. You can print up to 100 microns in resolution with this material, which is a non-metal, non-plastic alternative for industrial use.
Unless your prototype requires a stress-test, consider printing it from cheaper plastics. If possible use plastics in your final design, unless its function requires additional strength or heat resistance. Materials contribute significantly to final cost, and to improve your ROI, you should lower costs wherever possible.
The Future of Manufacturing
Though 3D printing is still new, the return on investment comes from saving time and labor over using machined parts. Additionally, making slight changes to the printing process can further boost your ROI to make using a 3D printer a financially smart option.