

With the recent increase in “auto leveling” features in desktop 3D printer these days, I had some thoughts about the process.
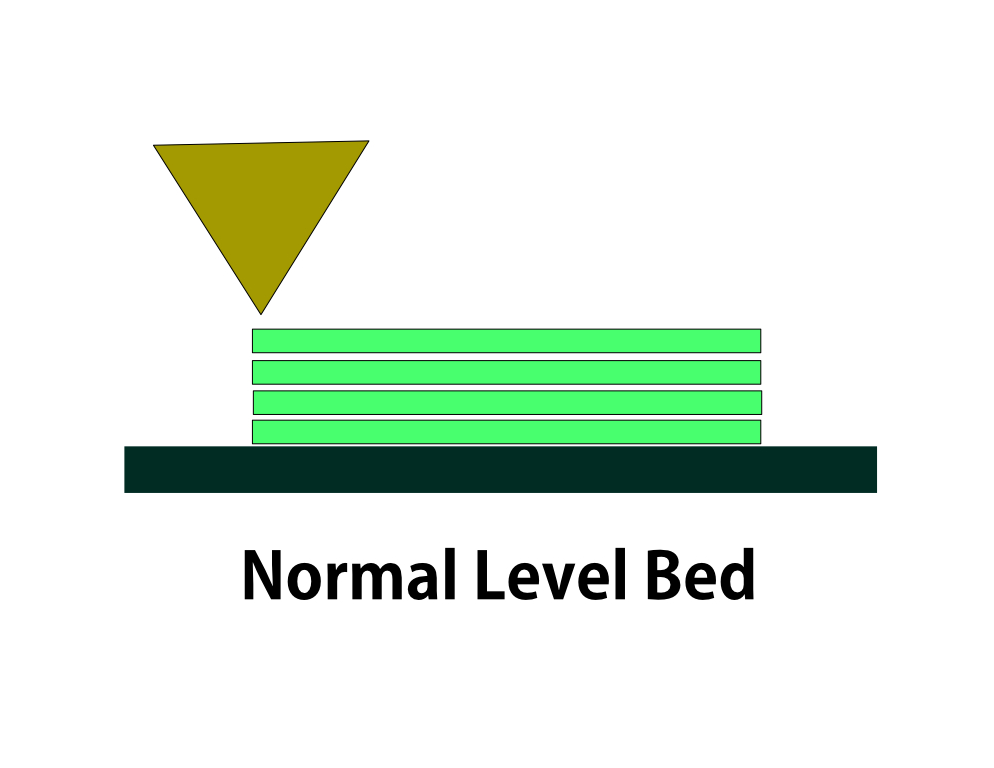
The ideal plastic extrusion 3D printer would be perfectly level, as shown at top. The extrusion would uniformly hit the build plate at precisely the optimum distance to adhere correctly. And by “correctly”, I mean not too loose, and not too tightly.
Alas, this perfect configuration is almost never the case.
Most typically, print beds do exhibit some amount of tilt or other irregularities that can corrupt the print job.
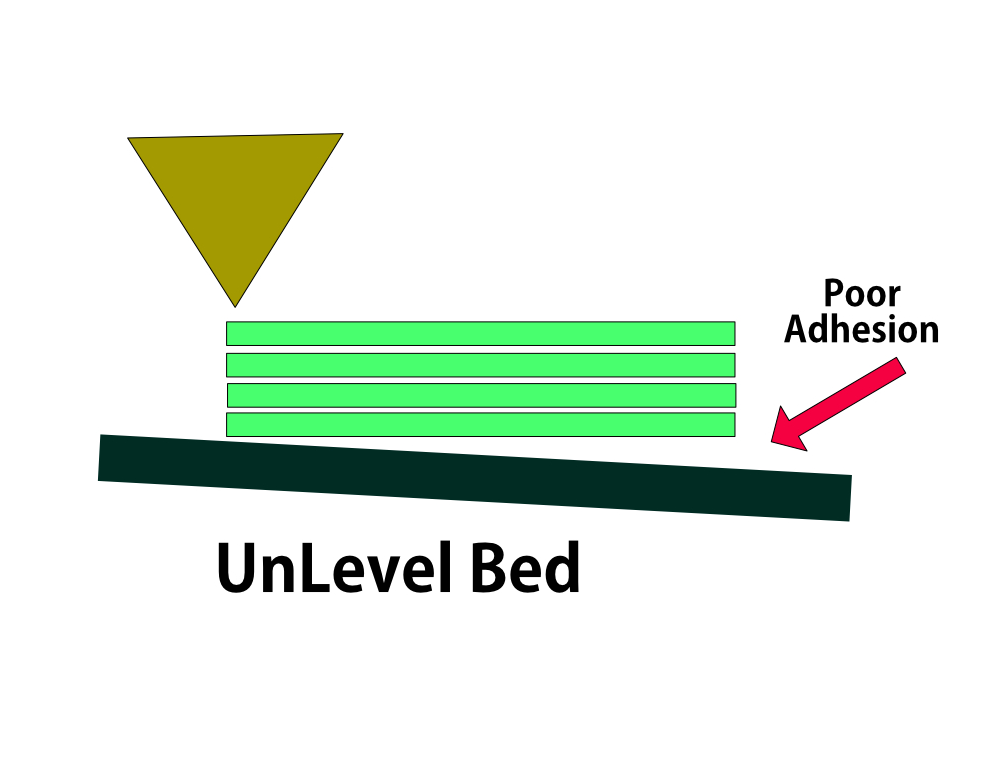
The typical failure is that part of the print doesn’t stick well to the surface and starts lifting, causing a curl in the final object. Even worse scenarios are possible, where the print completely dislodges from the bed, and gets tossed around by the moving nozzle causing all manner of damage.
Up until recently, almost all desktop 3D printers required a manual adjustment of the print surface to ensure it was at least close to level to prevent such problems.
While that worked very well, it was a cumbersome process for users, many of whom “just want to print” and don’t want to repeatedly do awkward calibrations.
Enter auto-leveling. This is most often a process involving a moving sensor that “maps” the build surface to determine not only it’s tilt but any other bends as well.
Here’s how it works:
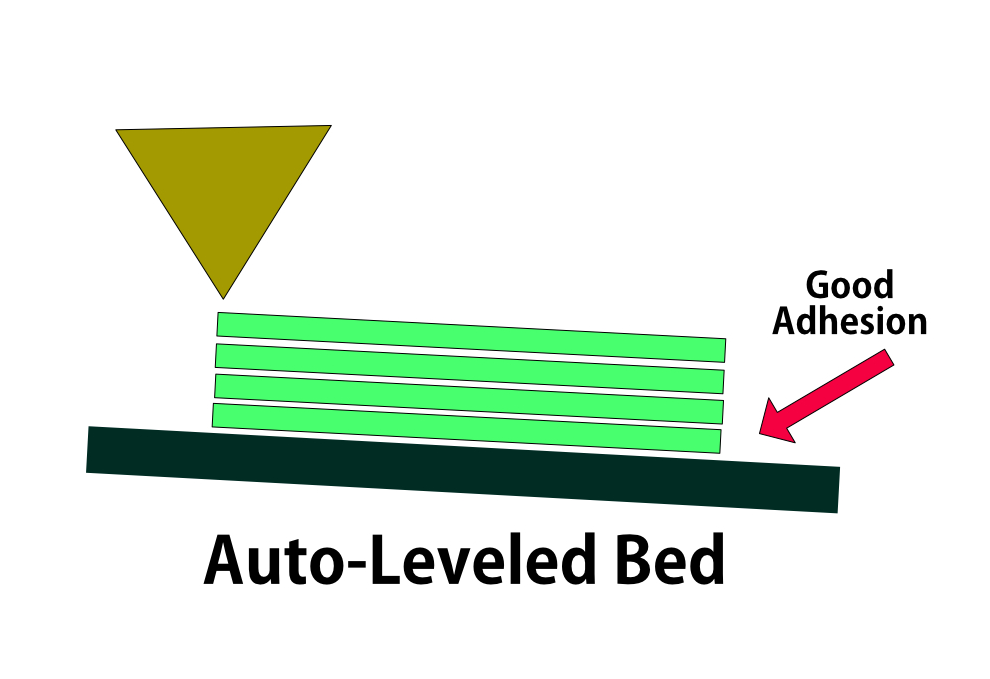
Because the system “knows” the tilt, it can adjust the z-height on the fly to correspond with where it thinks the actual tilted surface exists.
The print proceeds on a tilted basis, and should exhibit excellent adhesion throughout the operation.
A 3D printer manufacturer needs only to install a sensor near the nozzle and some software to make all this happen. And that’s what many are doing these days.
But there is one issue with this approach: it really works when the print bed is flat, but tilted. If the bed has other complications, such as a dip or bow – or many of them, it gets far more complex to solve.
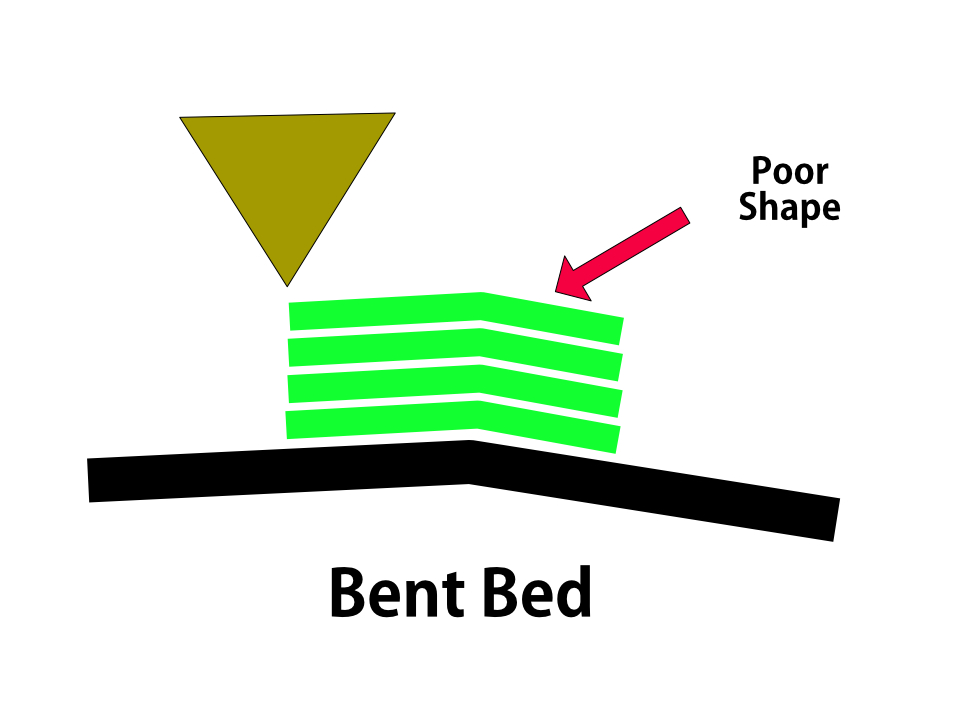
Some levelers seem to go up and down throughout the print as required, but that would seem to produce objects with wiggly extrusions. That’s not optimum.
Another approach is what I might call “Raft-Leveled”. In this approach the irregular surface is first blanketed with a raft of some thickness.
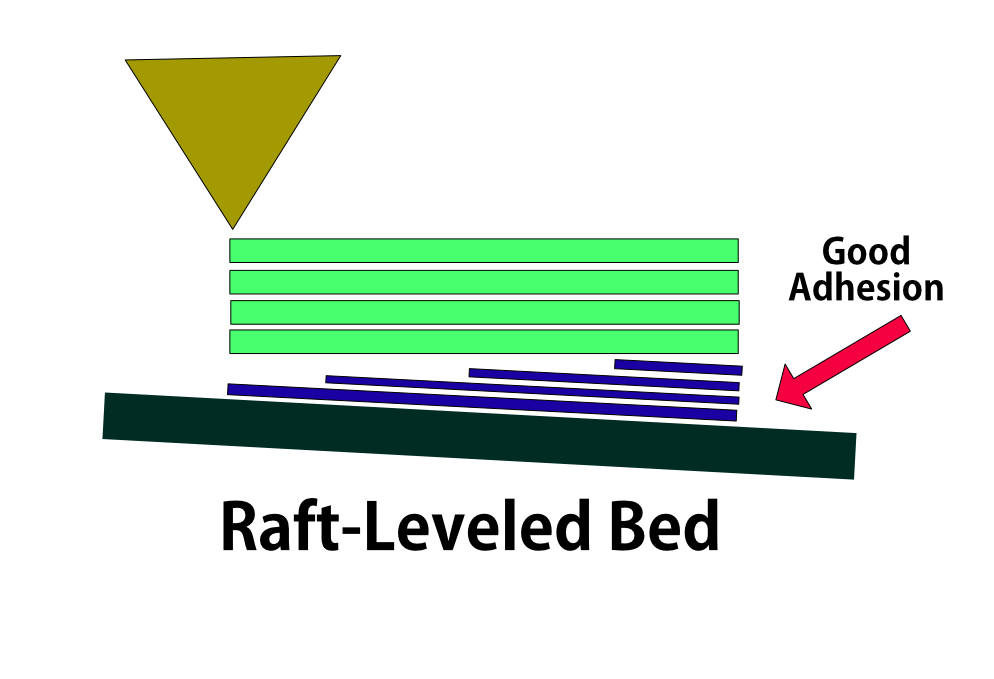
This raft gradually adapts back to true level as it proceeds, essentially producing a truly flat and level surface for the actual print to be constructed upon.
This way the object would most certainly achieve the closest representation to the original digital model possible. I suspect this is why Stratasys extrusion machines invariably use rafts.
There are more likely other approaches to auto-leveling possible, and certainly new methods will be developing in coming months and years. But regardless of how auto-leveling is done, you really need to ensure your equipment includes that feature.