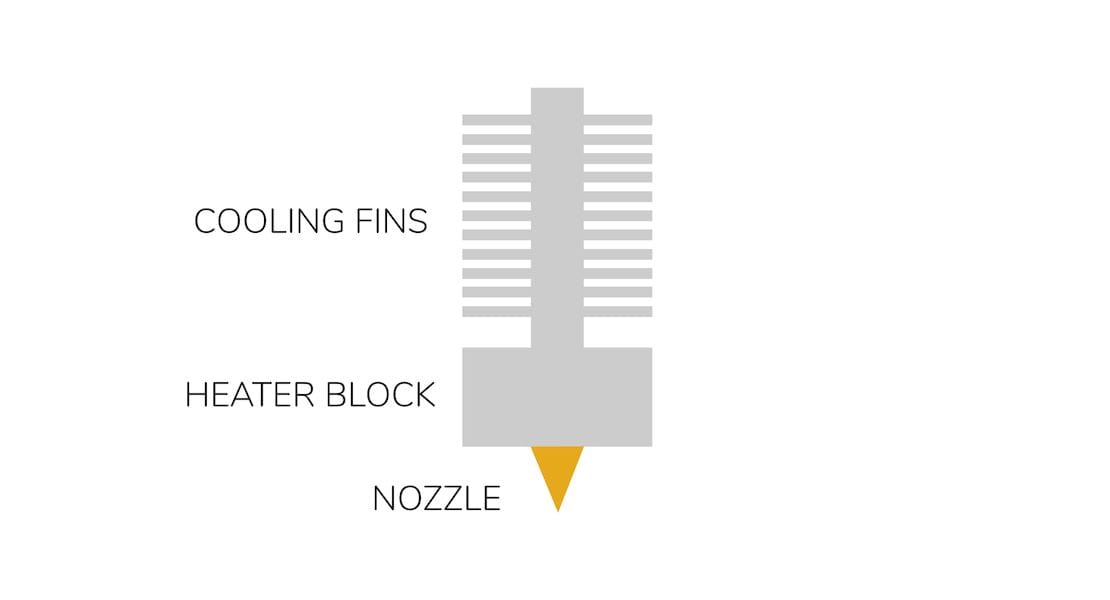
![The basic components of a desktop 3D printer hot end [Source: Fabbaloo]](https://fabbaloo.com/wp-content/uploads/2020/05/image-asset_img_5eb0a8c5a8ba2.jpg)
At the lab we’ve solved a mysterious 3D printing problem that you might also encounter.
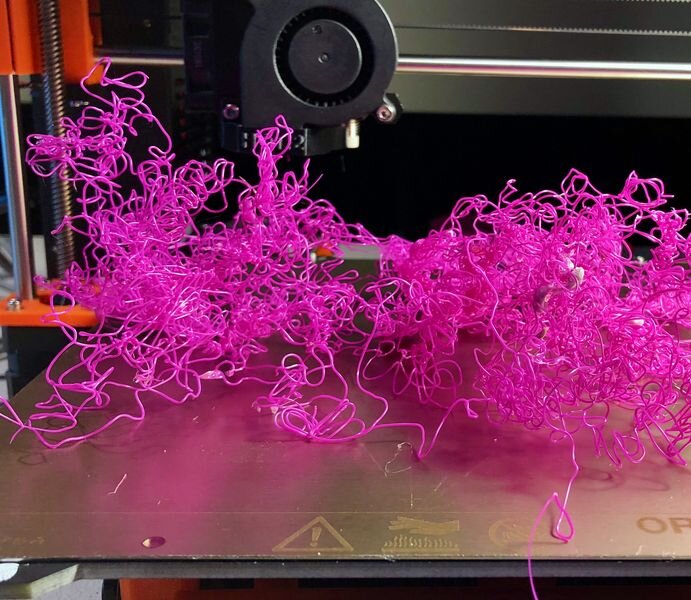
The problem was encountered on a Prusa i3, but it could occur on almost any plastic extrusion-style desktop 3D printer. It usually began with the discovery that the print had somehow become loose from the surface. Subsequent extrusions produced the traditional cloud of spaghetti.
![An example of the type of failure we were repeatedly encountering [Source: Fabbaloo]](https://fabbaloo.com/wp-content/uploads/2020/05/mysteryprobsymptom-1_result_img_5eb0a8c637de1.jpg)
The same scenario was occurring on multiple, well every, print. This series of print failures was generating a lot of frustration.
At first I thought this was a bed adhesion problem, which is a very common circumstance. I did the usual things:
- Releveled the bed
- Adjusted/Confirmed the Z-gap between the nozzle and the bed
- Cleaned the bed with IPA
- Raised the bed temperature a bit
None of these steps had any effect. I took more extreme steps:
- Increased the bed temperature even more
- Added a raft. A big raft
- Slowed the raft speed down significantly
Again, no effect. Finally, I noticed this:
![A small bit of foreign material sticking up above the print plane [Source: Fabbaloo]](https://fabbaloo.com/wp-content/uploads/2020/05/image-asset_img_5eb0a8c690c16.jpg)
It was a very small amount of material of a different color than the currently loaded filament. That seemed interesting. Where was it coming from?
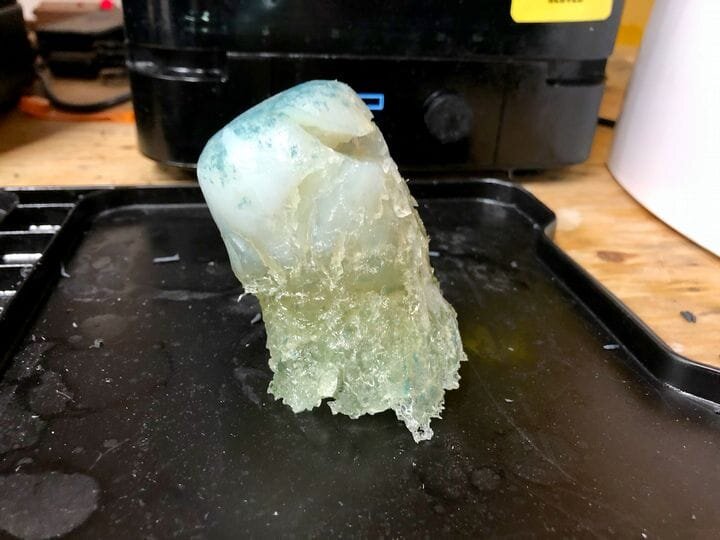
I had previously encountered a problem that resulted in a glob of material being attached to the hot end, something like that shown in this diagram:
![A typical 3D print failure where a glob of thermoplastic is stuck to the hot end [Source: Fabbaloo]](https://fabbaloo.com/wp-content/uploads/2020/05/mysteryprobglob_img_5eb0a8c6dca24.png)
Of course, I cleaned it off well by heating up the nozzle, then scraping material off the sides of the heater block. I even wiped the near-liquid material off with a rag to ensure it was properly cleaned.
But even after this seemingly extensive cleaning, there was still more of that colored material somewhere.
Eventually we determined what was really going on.
It turns out that the previous “glob” was not exactly as shown above. Instead, the glob was probably shaped like this:
![Sometimes the thermoplastic globs extend fully around the hot end [Source: Fabbaloo]](https://fabbaloo.com/wp-content/uploads/2020/05/image-asset_img_5eb0a8c772ee7.png)
As you can see, some material was deposited on top of the heater block. This area is near-impossible to see unless you disassemble the toolhead, something you don’t really want to do unless necessary. Thus after my “extensive” cleaning, the hot end and excess material was configured like this:
![A small amount of material remains hidden on top of the heater block [Source: Fabbaloo]](https://fabbaloo.com/wp-content/uploads/2020/05/image-asset_img_5eb0a8c806b54.png)
It seems that the problem would proceed as follows:
- Glob deposits material around the heater block
- Material is cleaned from sides of heater block, but not the top
- Material sits patiently on top, but is heated during print operations
- Eventually the top material is sufficiently heated to become “mobile”
- A sudden shift of the toolhead moves top material to the side
- It drips down the side and lands on the print
- It freezes solid because it’s no longer being heated
- It forms a rigid structure ABOVE THE CURRENT PRINT PLANE
- The extruder merrily moves about and eventually strikes the vertical protrusion
- This knocks the print off the bed
- Print fails, spaghetti, etc.
The moral of the story here is that when you eventually have a glob of thermoplastic attached to your hot end, make absolutely certain you’ve cleaned it all off – even from the hidden top of the heater block. If not, you will experience unpredictable print failures.
In my case I was very fortunate to have strikingly different colors involved in the situation. Were the filament colors the same it may have been terribly more difficult to diagnose the problem.
![Material can leak from a poorly attached heater block, leading to print failures [Source: Fabbaloo]](https://fabbaloo.com/wp-content/uploads/2020/05/image-asset_img_5eb0a8c87864e.png)
One more thing: there is another possibility for this type of issue: If the heater block is not quite fully attached and even the slightest gap is present, material under pressure will slowly leak in the same position, causing the same kinds of problems.
In that case you must screw in the heater block quite solidly, and this likely should be done when the block is heated.
My pain is your gain. Enjoy!