
How, exactly, does “bed leveling” work on a FFF 3D printer?
I recently encountered some novice 3D printer operators that didn’t quite understand what’s happening when the bed is leveled, so I believe it’s time for an explanation.
“Bed Leveling” is a term you’ll often hear when looking at FFF 3D printers, and that’s because it’s really quite important.
The goal is to ensure the first layer of the print sticks very well to the bed. If it does not stick sufficiently well, it could detach during printing, and that can not only cause the loss of the print, but also potentially damage the machine itself.
In the old days we would manually level the bed, usually by adjusting the tilt of the bed with bolts underneath. Sometimes there would be more friendly adjustment wheels that are more easily turned.
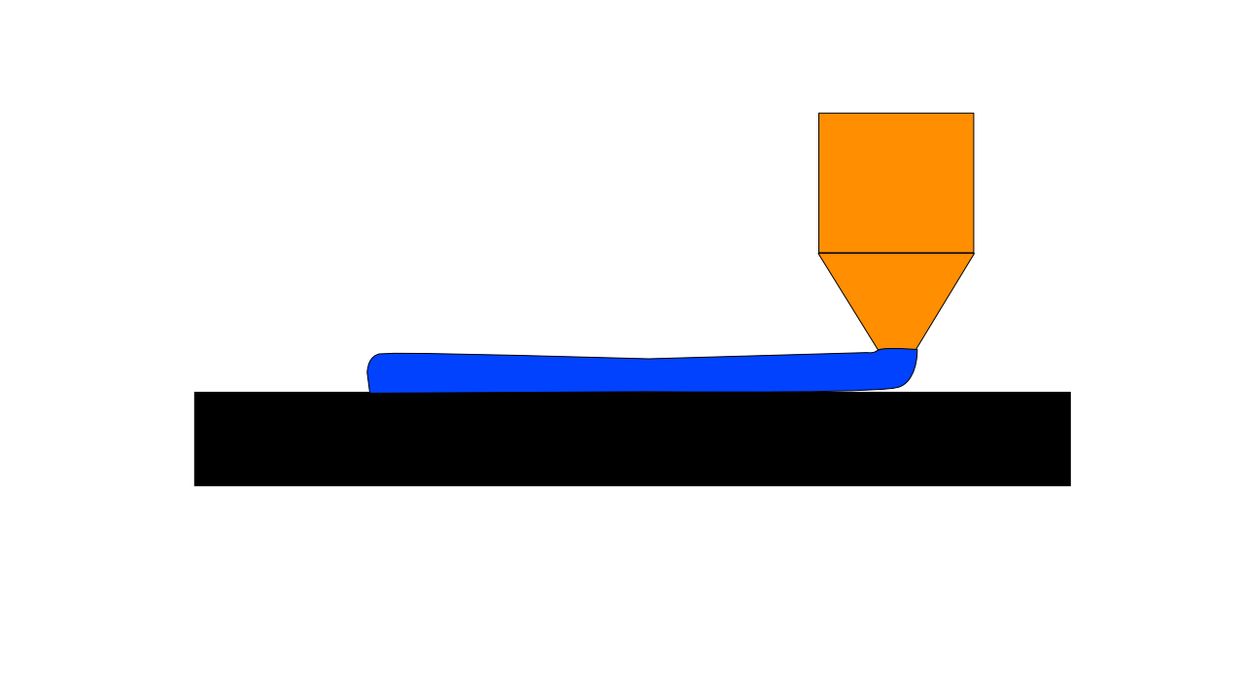
Why do this at all? The problem is that the X and Y axes of motion run perfectly straight. If their motion is not exactly parallel to the bed, then there will be a gap between the extrusion and the bed. That air gap is a weak spot for bed adhesion. If it is sufficiently large, then we risk detachment.
The manual leveling process places the two axes and bed perfectly parallel to each other. When that happens, you get a perfect extrusion as shown at top — assuming you’ve set your Z-gap correctly, but that’s a story for another day.
This is all good, but it’s not the end of the story. It turns out that in many cases the bed is not actually flat! While it may visually appear flat, there can be slight variations in the surface causing hills and valleys.
In a world where layer sizes get ever smaller for finer prints, those valleys are where we may again get air gaps, even when the surface and axes are perfectly parallel.
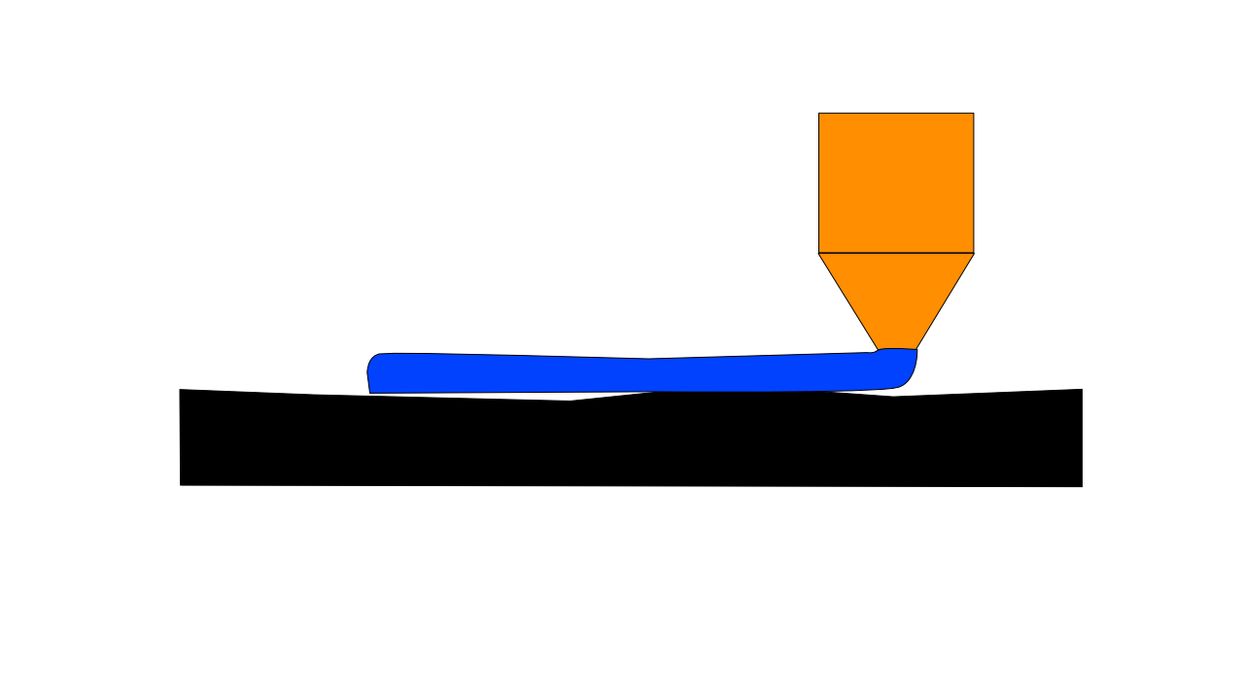
Here we can see that happening. The nozzle moves along its perfectly straight path, while the print surface wobbles up and down slightly underneath. This may seem like a minor issue, but depending on the geometry of the part and the particular locations on the print bed, this could be adhesion trouble.
Mesh leveling is the answer. In this automated process the FFF 3D printer uses a sensor of some sort (which differ by machine) to measure the differences in height of the print surface. These are collected together to form a “map”, which is three dimensional model of the surface.
The sensor collection is typically done as an array of points. Typically you’ll see a 5 x 5 set of 25 points collected. Sometimes it’s 6 x 6 or even 7 x 7. Either way the 3D printer will extrapolate between the points to estimate the height of the bed at any given point.
Some systems include more points, which can be more accurate. However, sensing those points can take longer to collect. Some systems calibrate the bed only once and then later only when you request it, while others check the leveling on each job.
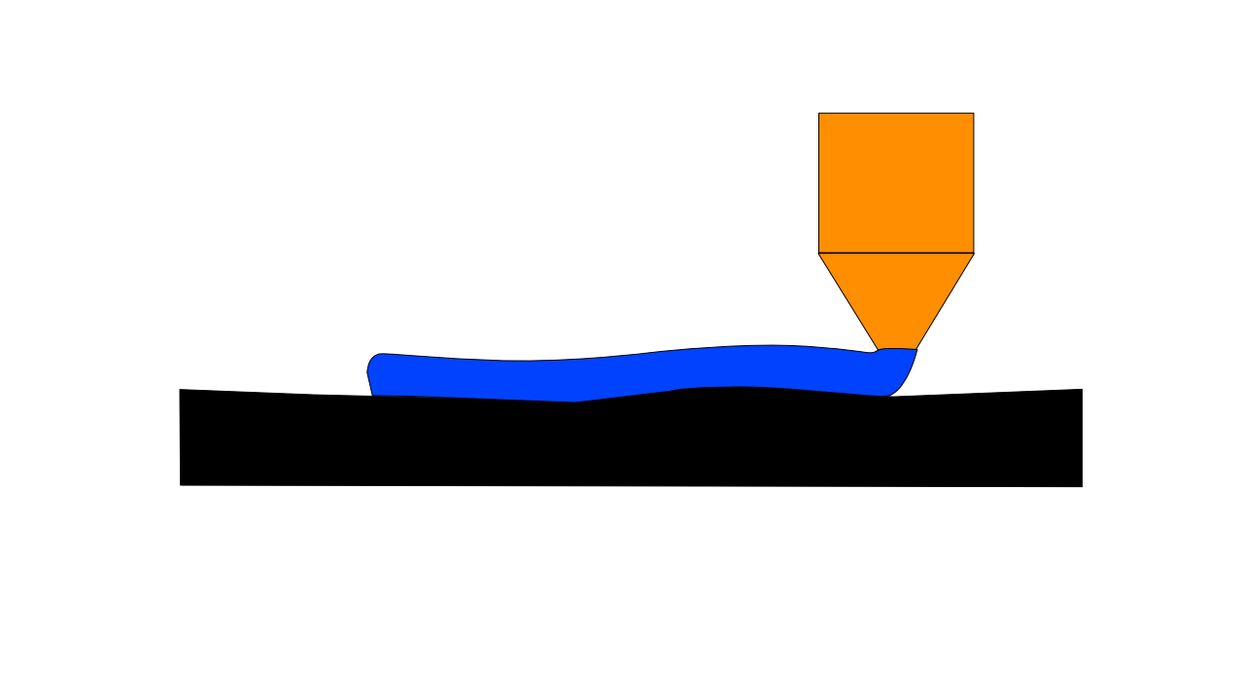
How does the 3D printer use this height information? It slightly adjusts the height of the nozzle as it passes along the print surface. If there’s a hill coming up, the nozzle is slightly raised, and vice versa. This allows the extrusion to perfectly follow the contour of the print surface and obtain the best adhesion possible.
Remember, the 3D printer cannot physically “flatten the bed”. What would you think happens? Does it bang the bed into the proper shape? Nope, the bed stays the same at all times. It’s just how it is used that changes.
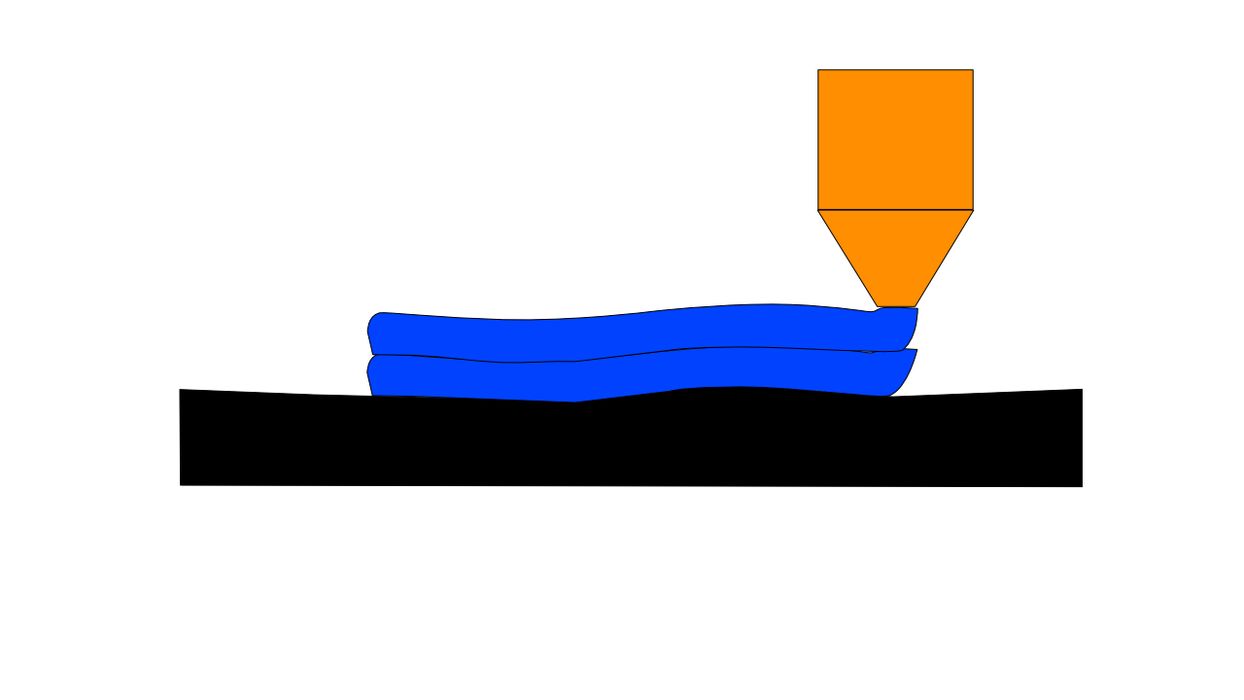
But what about the rest of the print? What happens? Here we can see that subsequent layers are built upon the wavy first layer. That’s ok because the variations are so small they don’t really matter: remember you couldn’t see the hills and valleys of the print bed with your eyes before calibration. You can’t really see the same in the print, either.
If you CAN see the variations, then there’s another problem: your print plate is so warped that it should not be used at all. If that’s the case, replace the plate with something more flat. Or, check underneath it to see if there is some debris causing an unexpected hill.
Leveling has mostly been perfected by desktop FFF 3D printer manufacturers these days, so you shouldn’t have to worry much about it. But it is also important to understand what’s really going on.