


Our lab has been testing Sindoh’s new 3Dwox desktop 3D printer, and it is a fundamentally different device that we think could be the first “real” 3D printer usable by consumers.
In part 1 of this series, we explained how to set up the 3Dwox, which turns out to be fantastically simple and takes only a few minutes. Today we’re looking at the printing capabilities of the machine.
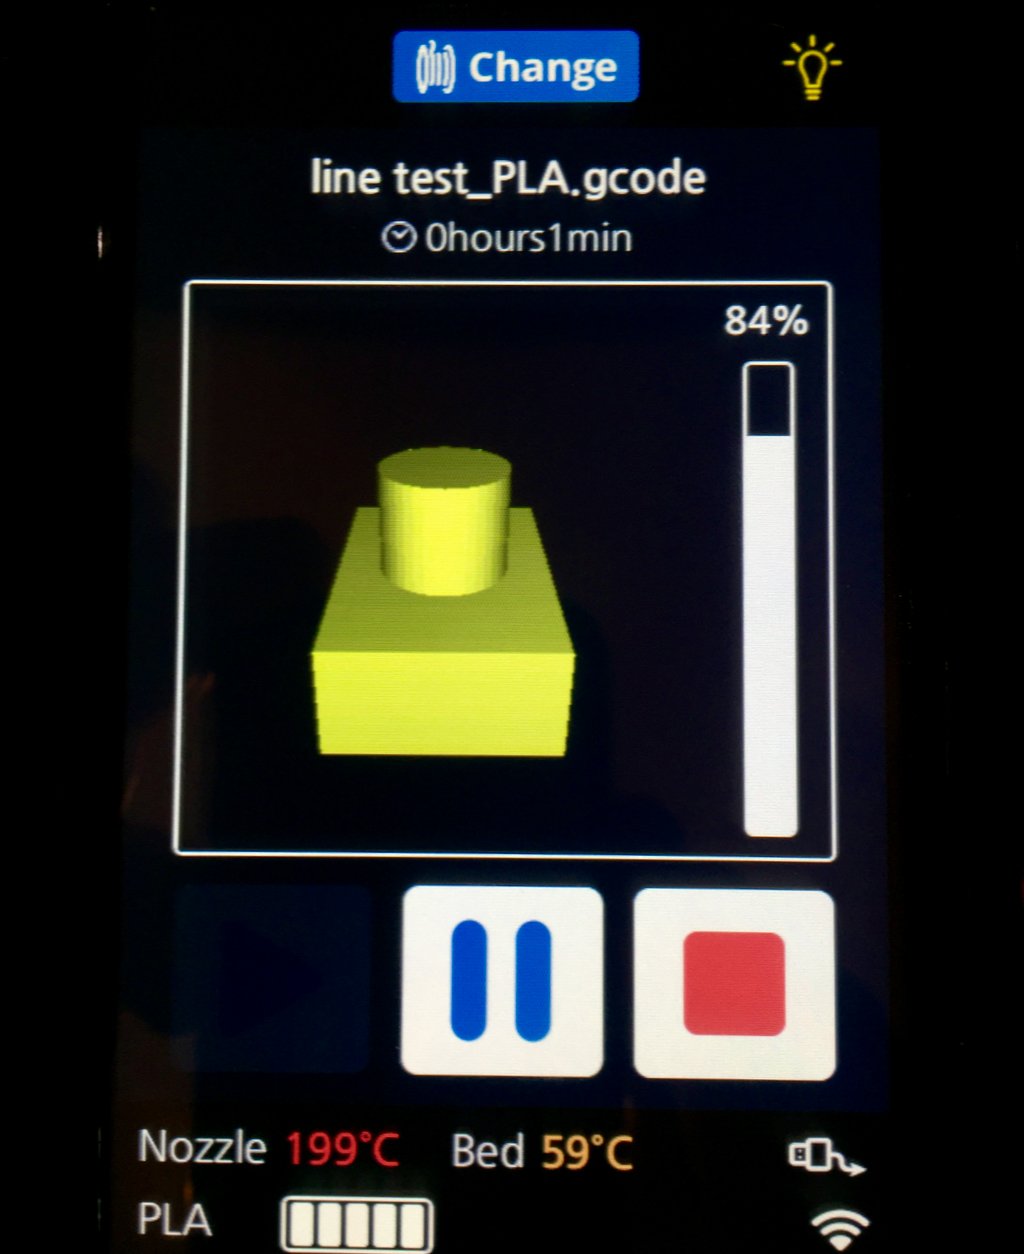
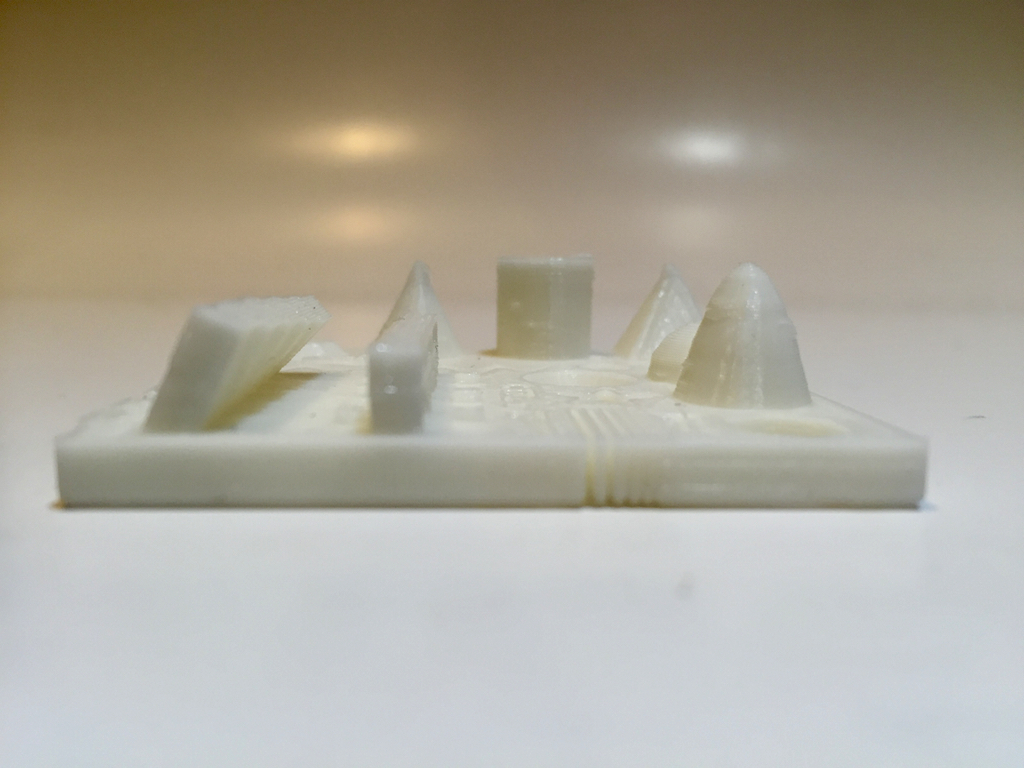
The 3Dwox includes a great feature: the printer itself contains a small standard test object, much like you’d see a “printer test page” on a 2D printer. It’s a small box with protruding cylinder, accessible from a “print test object” menu item. Here you can see the control panel while we printed one. Note the information you can see:
- Graphical representation of the object! (This works for ALL models, too!)
- Print progress vertical bar
- Pause and Cancel buttons
- Temperature status
- Remaining print time
- Filename
- Material loaded
- Ability to change the filament in mid-print
- Turn the interior lamp on or off
That’s about all you need to know.
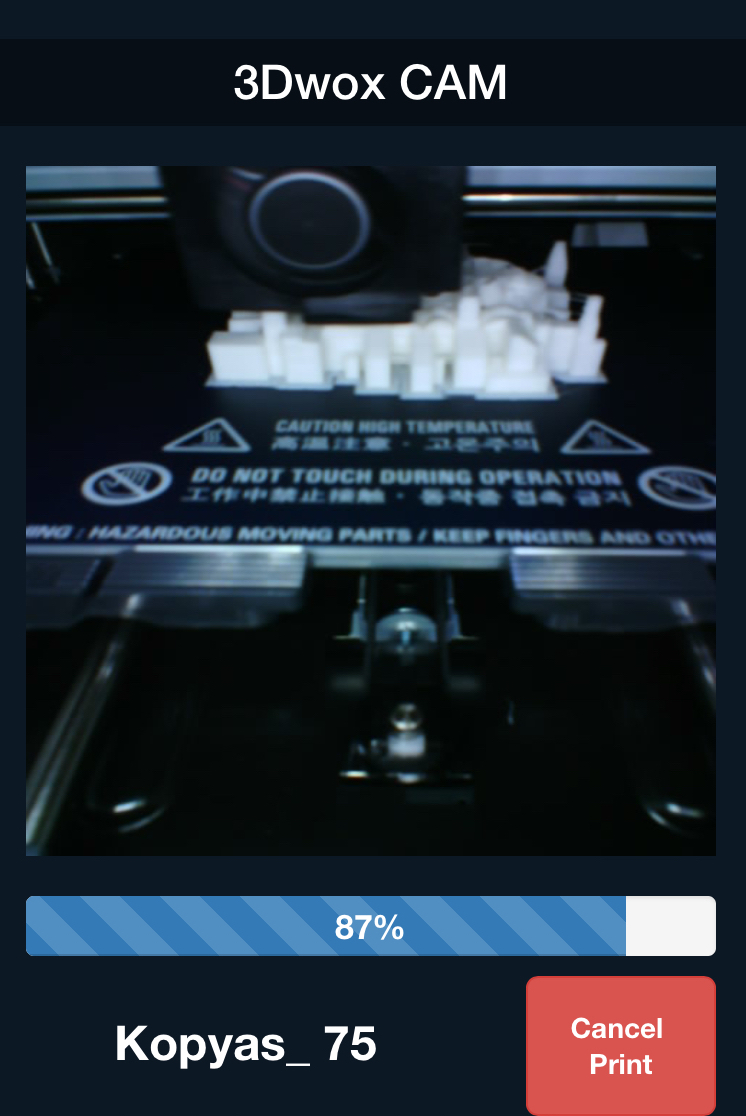
By the way, since the 3Dwox connects to your WiFi network and includes an integrated camera, you can actually view and control printing operations remotely as seen in this smartphone screenshot:
When the print is complete, the machine automatically lowers the bed. You open the front door panel and by touching two quick-release levers on the front of the bed, you slide it out completely, with the standard test print still attached in the center of the plate.
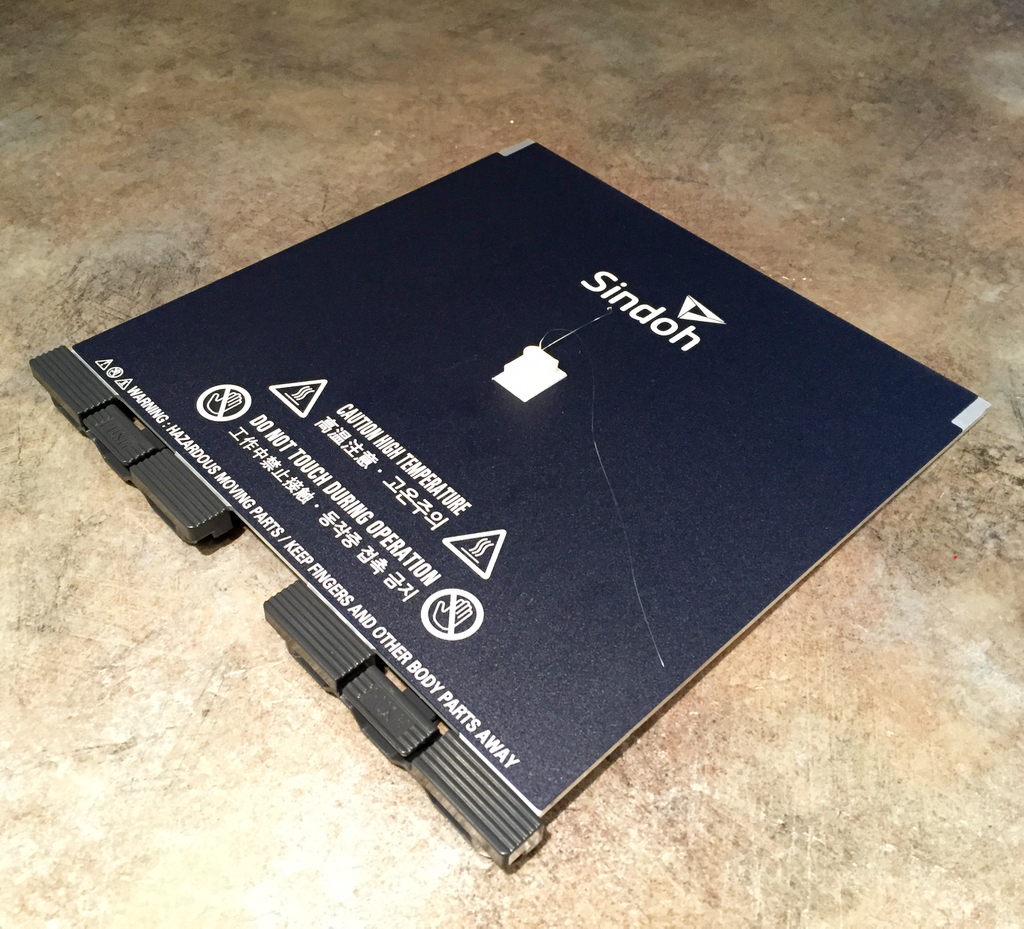
This print bed is actually an 8mm thick sheet of flat aluminum, with a permanent adhesive surface applied to the top. We found prints always stuck very well the print bed, sometimes making it challenging to remove them from the bed with the scraper. We prefer print surfaces that can twist off prints, but you won’t get that with the 3Dwox. We’re told the company is considering a flexible solution in the future, but for now they are trying to reduce print failures caused by non-sticking.
Small items come off cleanly with the scraper (once the aluminum bed cools sufficiently), but we advise operators to ensure the scraper isn’t going to land on your fingers. We’d also recommend ensuring the print will land on something soft, as sometimes the print pops off with enough force to fly through the air and possibly break on impact.
Removing larger prints is more difficult as the coated aluminum bed is very sticky. Our advice for large prints: print using a raft and the large object will sit on it. Then, when the print completes, use the scraper to separate the object from the raft, instead of separating the raft from the print bed: it’s a lot easier to remove. Once the object is released, the raft easily bends to come off the aluminum bed.
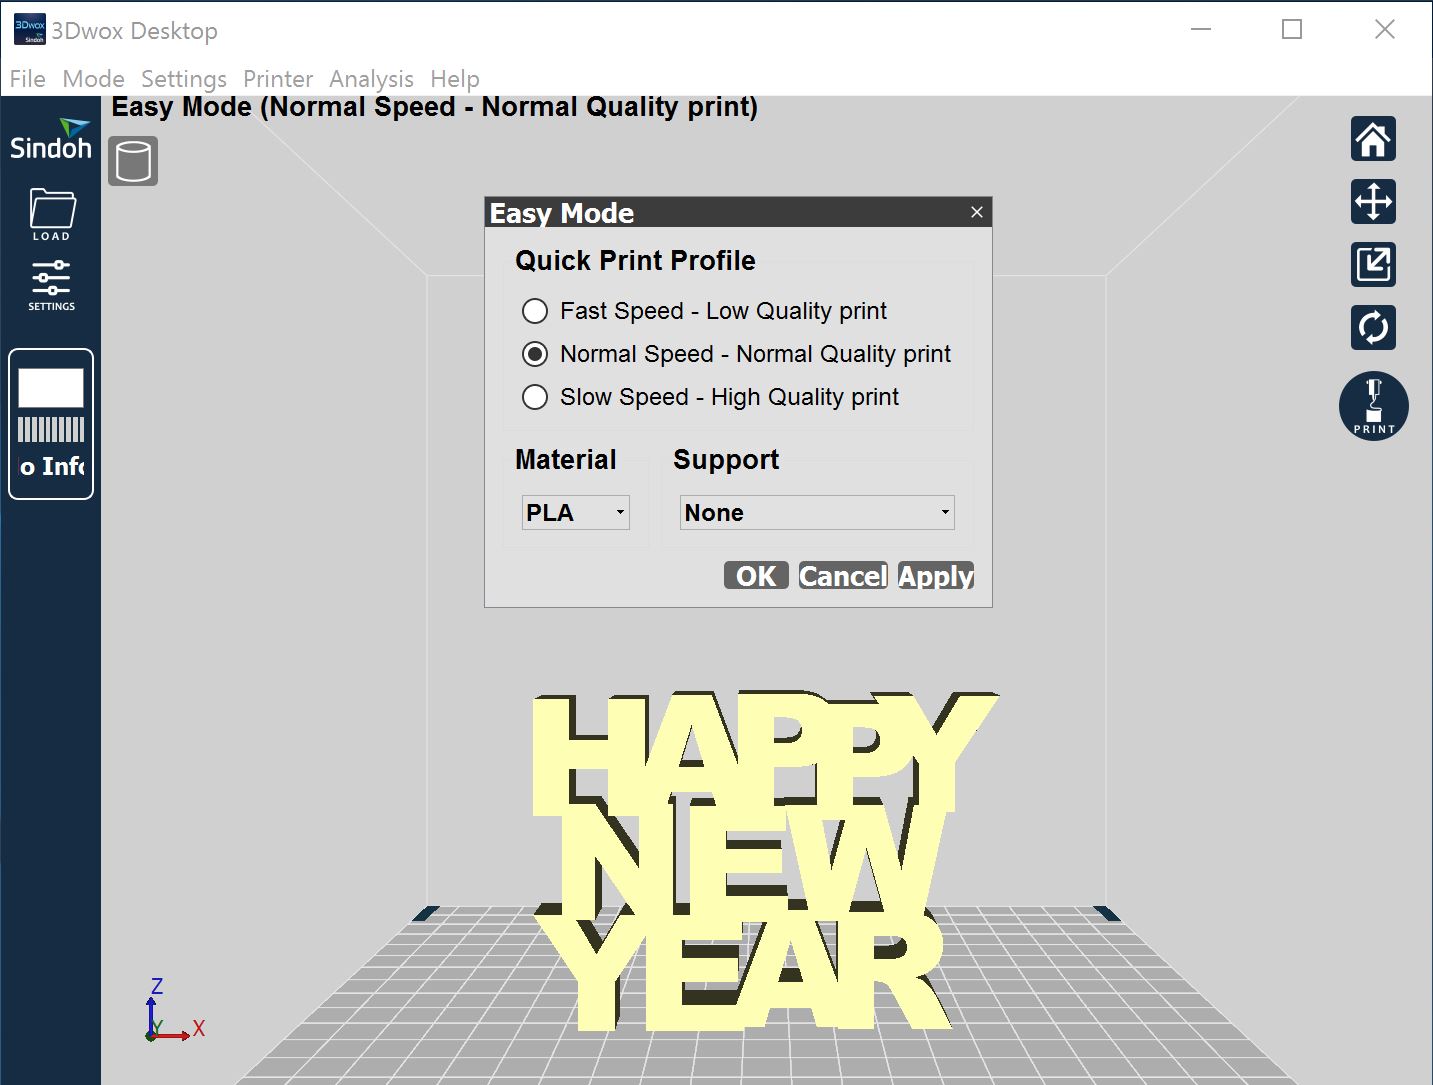
Print preparation is done with 3Dwox’s provided software, 3Dwox Desktop. It’s a complete, but basic slicing program that offers most of the standard operation features. Currently 3Dwox Desktop is available for Windows platforms only, but we have seen a beta version of the software for OS X that mostly works, but isn’t quite ready for public release yet.
3Dwox Desktop provides standard operations such as model orientation, placement and sizing, as well as specifying print parameters. It’s quite straightforward to use.
There’s an advanced mode where you can shift from the basic parameters to dig into the more detailed parameters for challenging prints. However, we’re not sure you’d need to do this as the basic settings seem to be able to print almost anything successfully already!
Support material generation options are a bit different, however. You can choose “none”, “all”, or “touching platform”. The “all” option puts support everywhere, while the “touching platform” option inserts supports only where the overhang is directly over the print plate with nothing in-between. Fortunately, you are permitted to edit the generated support structures to remove those elements that aren’t required.
Now for the print quality assessment. For an inexpensive desktop 3D printer, we were startled by the amazing quality of the prints. We tested prints on a number of increasingly difficult prints and found the 3Dwox was up to the job on all of them! Normally these would fail one way or another in most 3D printers, but not so with this device.
Here’s a shot of the standard CTRL-V test, and if you look closely you can see very good detail produced.
Of particular note is the excellent bridging.
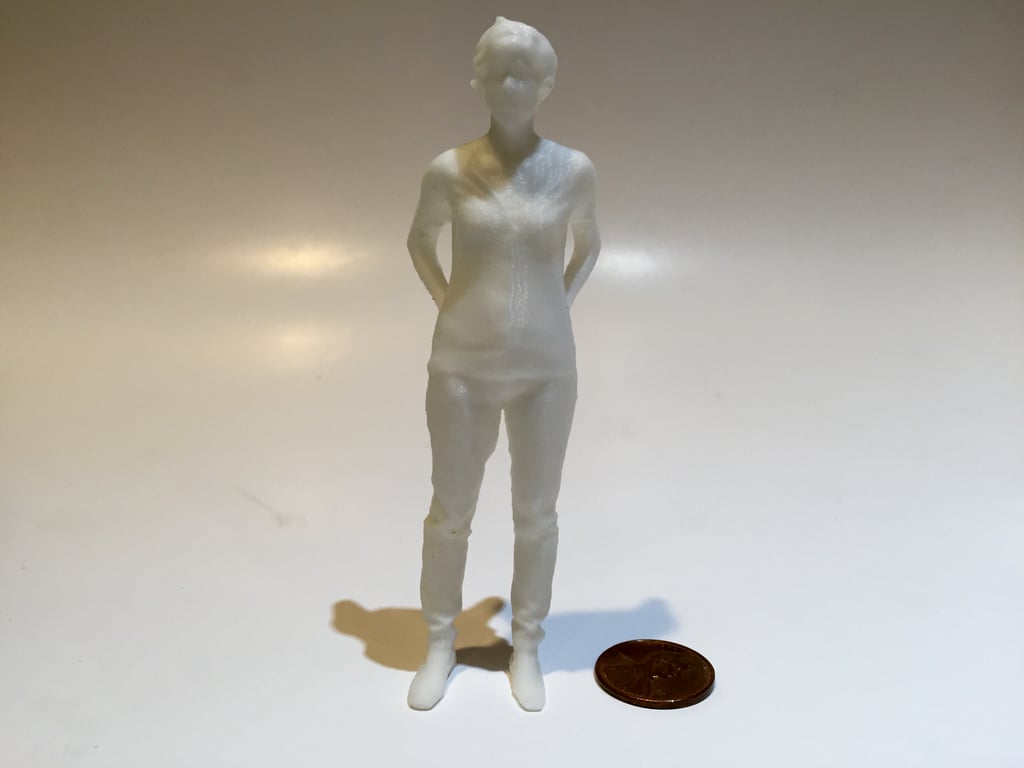
Here is a near-perfect print of a 3D-scanned figurine with 0.1mm layers. This print completed successfully even though it has a very limited “footprint”, which could come loose on other machines.
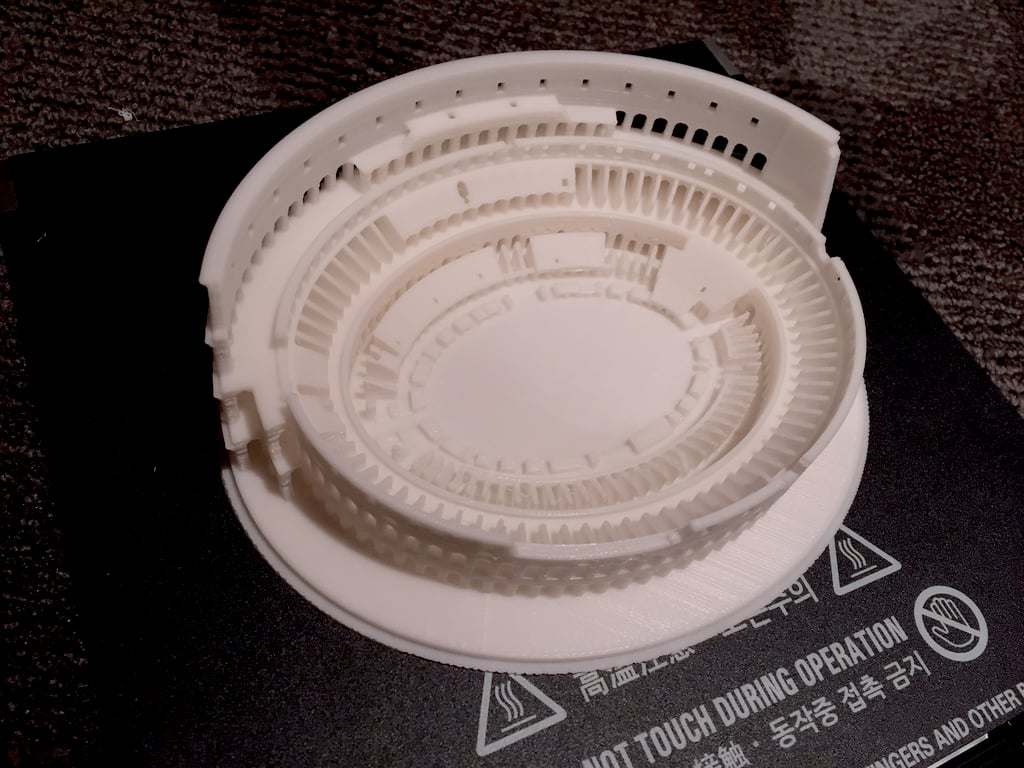
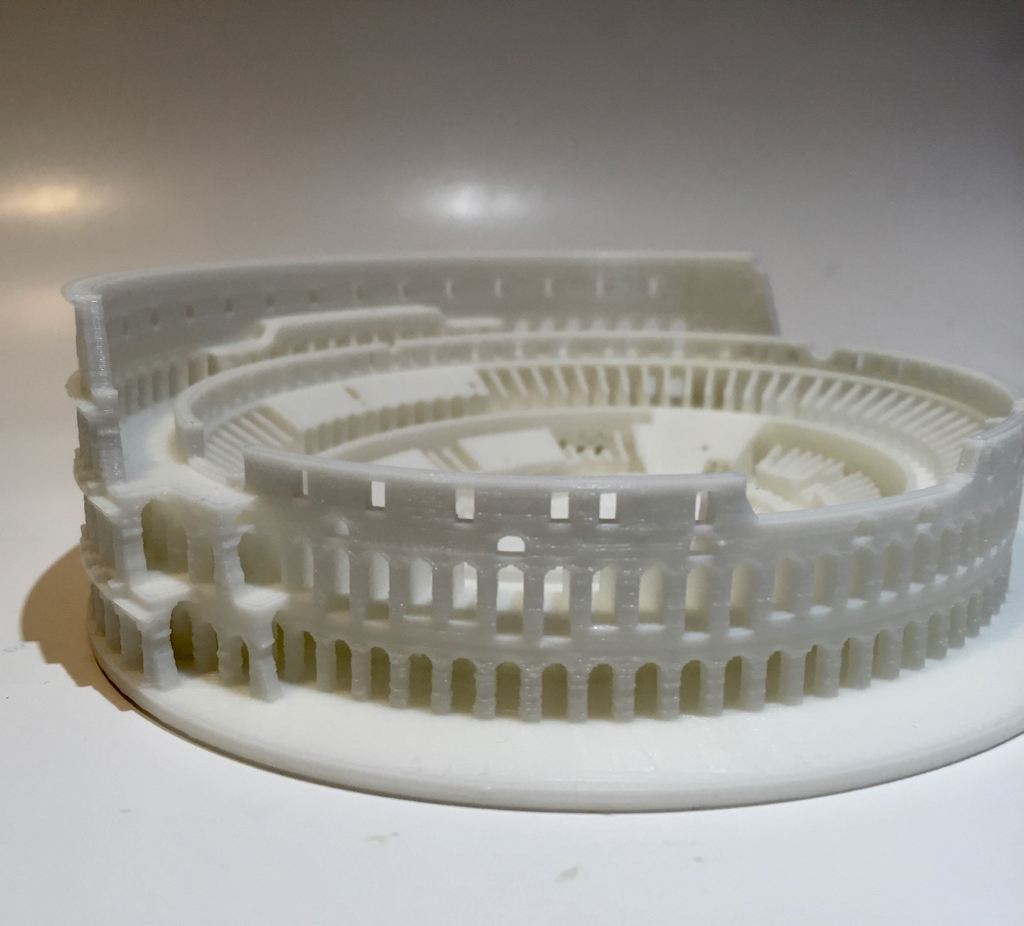
A more challenging print is the Colosseum, a recent favorite test print among several online communities. This one shows it still attached to the print bed.
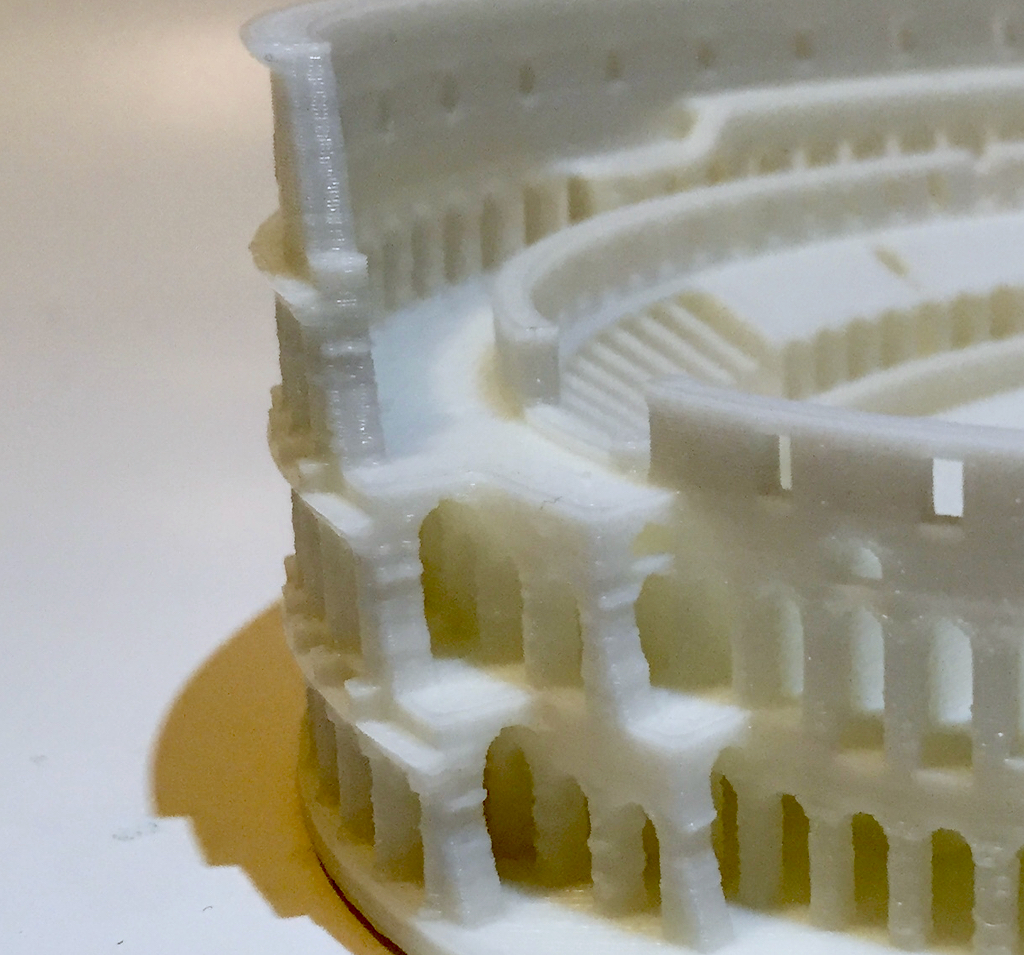
Here we see a closeup of the 0.15mm layers in this print.
What’s most amazing here is that we found no “stringies”, nor did the filament strip, even though this 3D model requires a large number of retractions to complete.
It’s a truly beautiful model.
Another often challenging print is the Subdivision Bracelet by Nervous System.
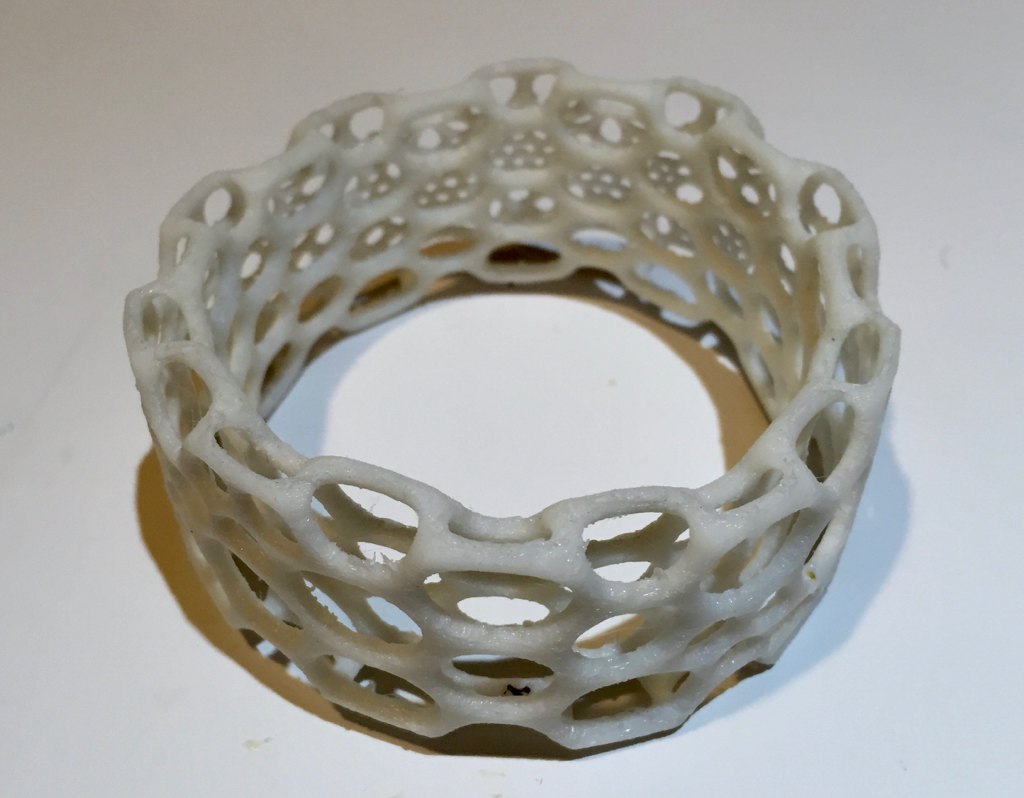
This item typically fails miserably on most extrusion-based machines, but as you can see here, the bracelet emerged near-perfect with only minor cleanup required!
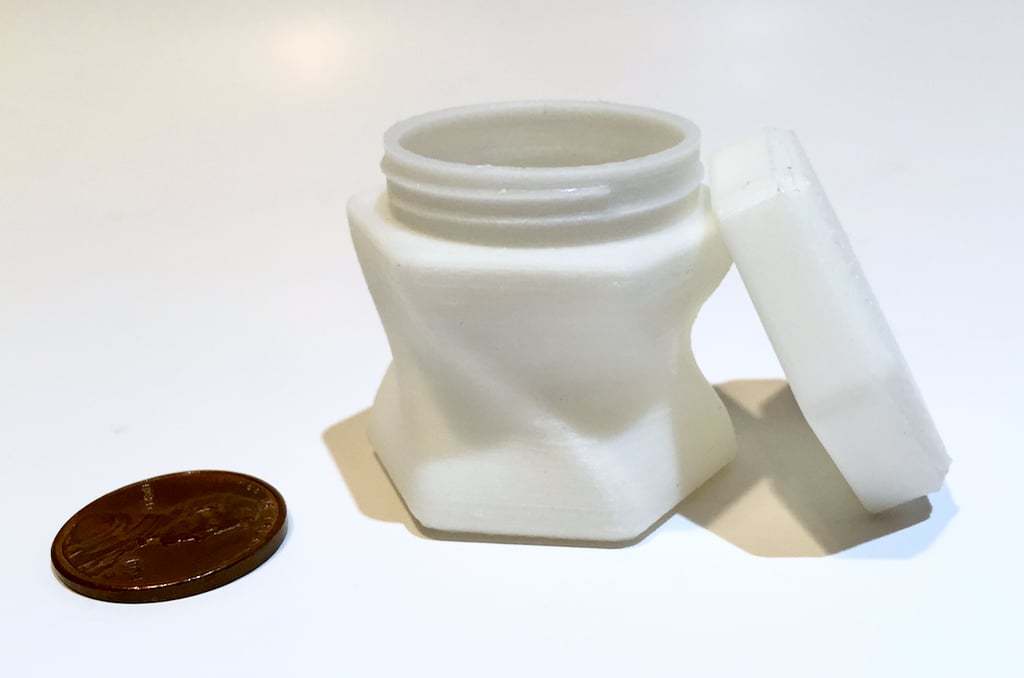
Here we pushed the 3Dwox to the limit by printing the standard twisted bottle 3D model in tiny 0.05mm layers. The result was almost perfect: the lid screwed on quite precisely.
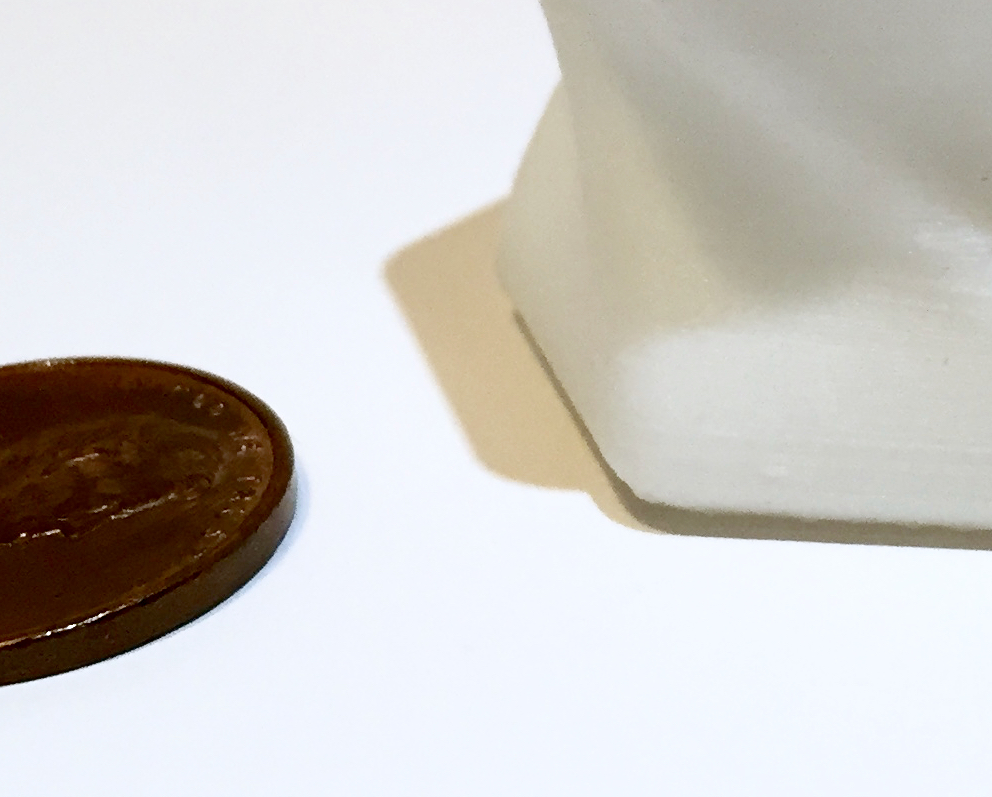
This is a detail shot of the twisted bottle with a standard US penny alongside. Those layers are almost invisible! The 3Dwox produces amazing output for such a low-cost device.
Stay tuned for Part 3 of this series, where we conclude our review. If you can’t wait and want to get one right away, the only way to get one today is to visit their Amazon page.
Other parts of this series: