
If it hasn’t happened to you yet, it will in the future: prints with not-quite flat bottoms.
We’ve had this occur multiple times and it’s a very annoying problem. The problem results from the need for prints to strongly adhere to the print surface. Non-flat-bottomed objects are typically printed with a lot of support material and possibly a raft, so they don’t fall into this particular scenario.
Many 3D models are designed with flat bottoms that serve this purpose. When printed, the large, flat first layer sticks well to the print surface.
Unless it doesn’t. There are times when the apparently flat bottom simply doesn’t print correctly, even after repeated attempts. What’s happening is that the apparently flat bottom of your 3D model isn’t actually flat. There are several possibilities:
The bottom is actually flat, but the model is very slightly tilted, so that only a portion of the bottom is being printed on the first layer.
A tiny portion of the model protrudes below the natural bottom plane, and it is printed as the first layer.
The bottom isn’t actually flat, although it may appear to be so, resulting in printing only a portion of the bottom.
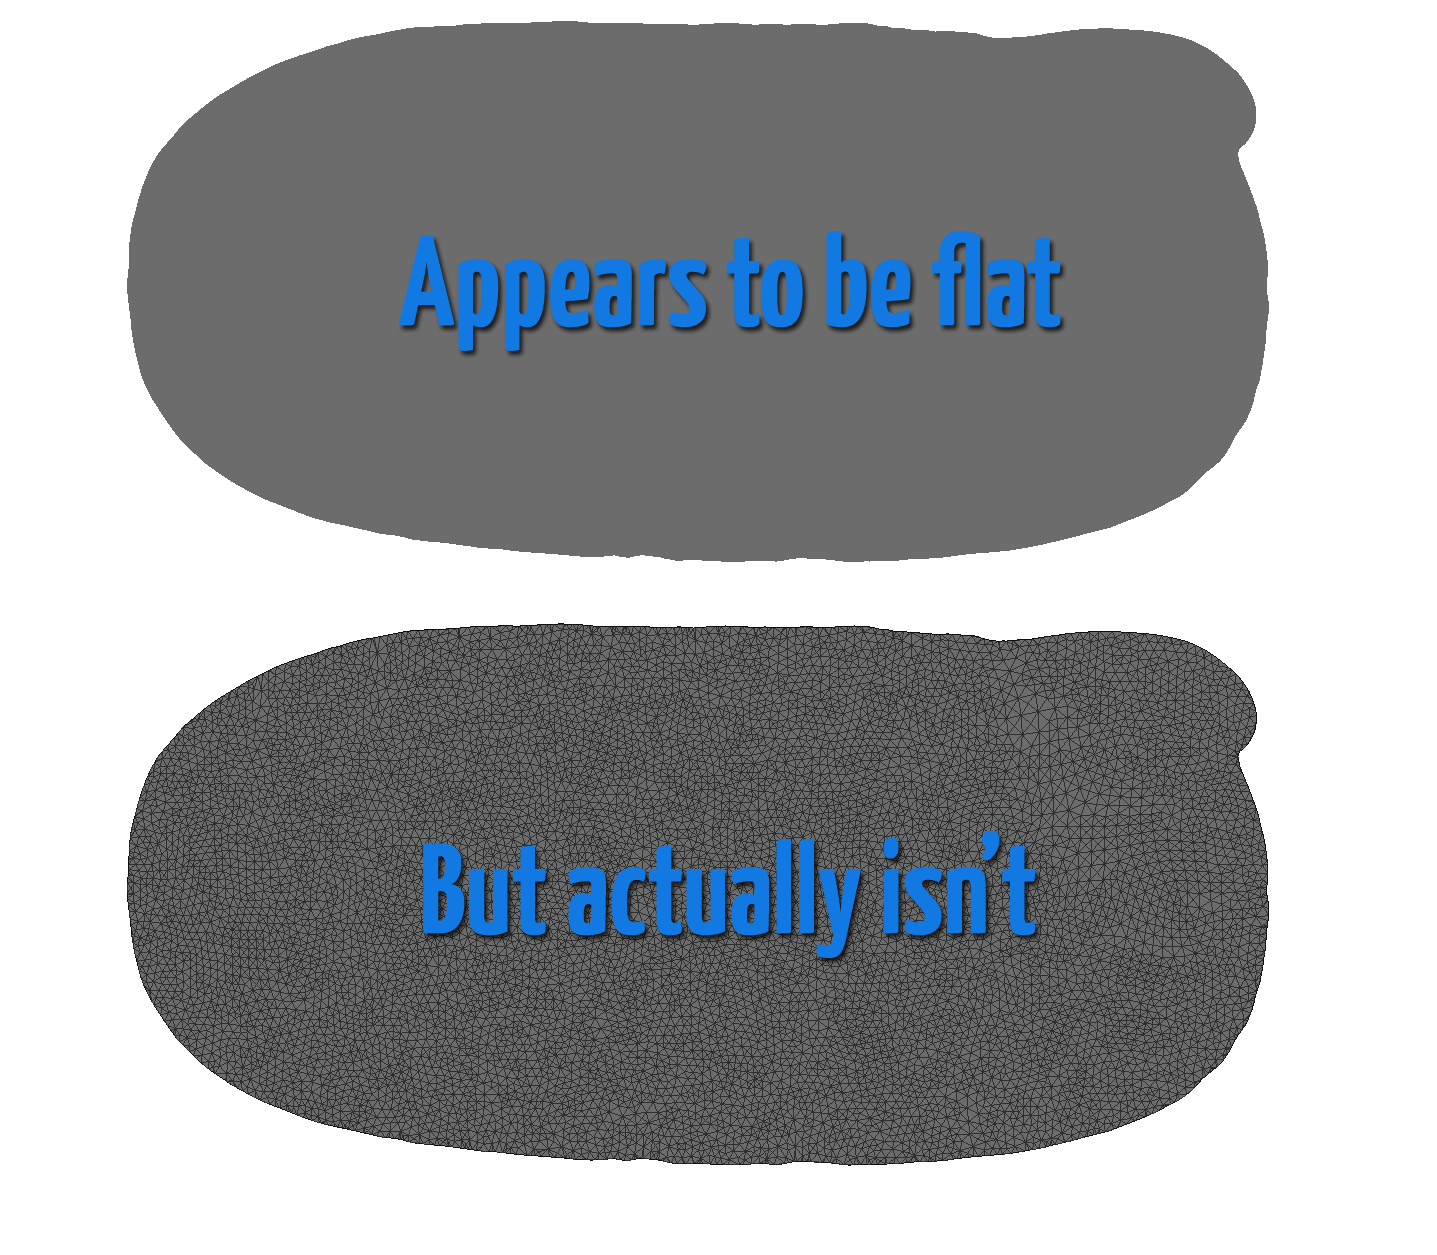
Usually this problem occurs when the model’s bottom visually appears to be flat, causing you to be misled. But you’ll soon realize your mistake when you see the first layer looking “wrong”. If the first layer of your print does not precisely match the bottom of the object, you have this problem.
The problem frequently occurs on 3D scans, because fixing the model sometimes has the side effect of altering the model’s base. This is what happened in the image above. A normal view of the 3D model (top portion) shows what appears to be a completely flat base. If you were to look at it on edge, you’d also see flatness. However, if viewed in mesh mode (lower portion) you can see the bottom is composed of thousands of small triangles. If any of these triangles has a single vertex off the bottom plane, you’ve got the problem. We did.
The fix is straightforward, if you have 3D modeling software. You’ll need to do either or both of these actions:
Tilt the model slightly to bring the bottom plane to true flatness.
Perform a “plane cut” to slice off extraneous bottom material and create a truly flat bottom.
Finally, check the bottom of your STL 3D model with a viewer that shows the 3D mesh. If it doesn’t look right, cut it again.