
Our review of the new Photon Mono M5S resin 3D printer from Anycubic concludes with a look at software, print results and final thoughts.
This is part three of a three part series, please read parts one and two.
Photon Mono M5S Software
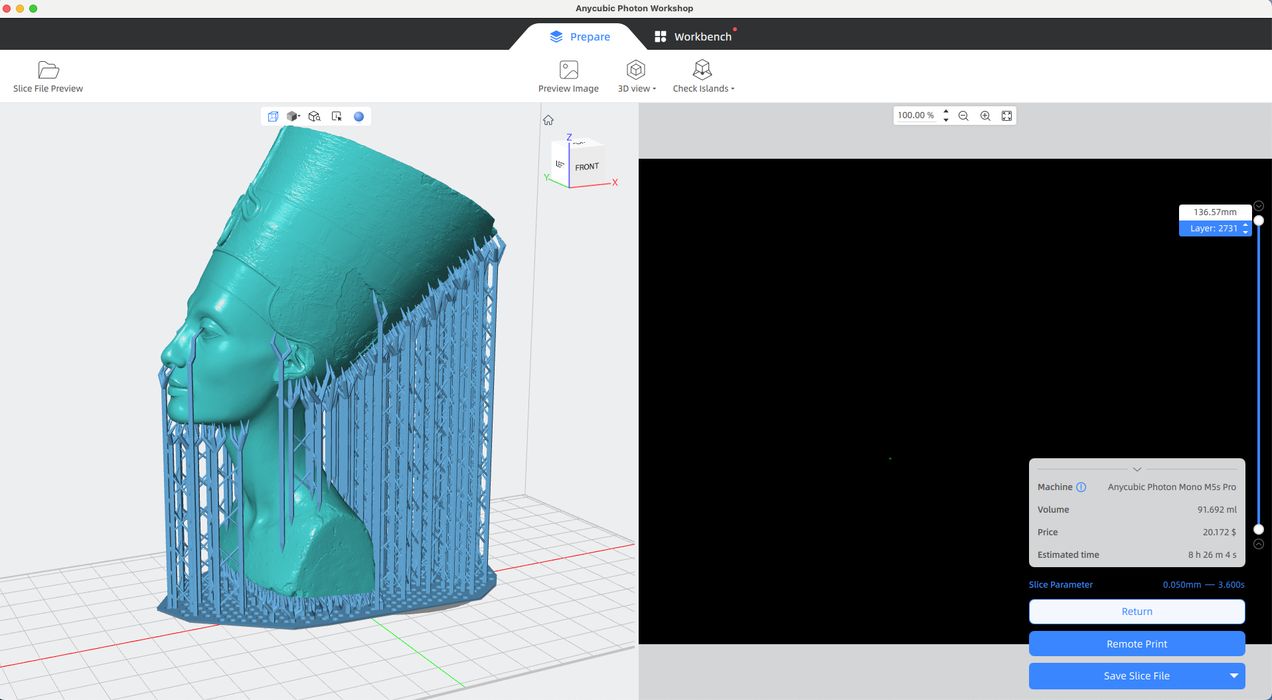
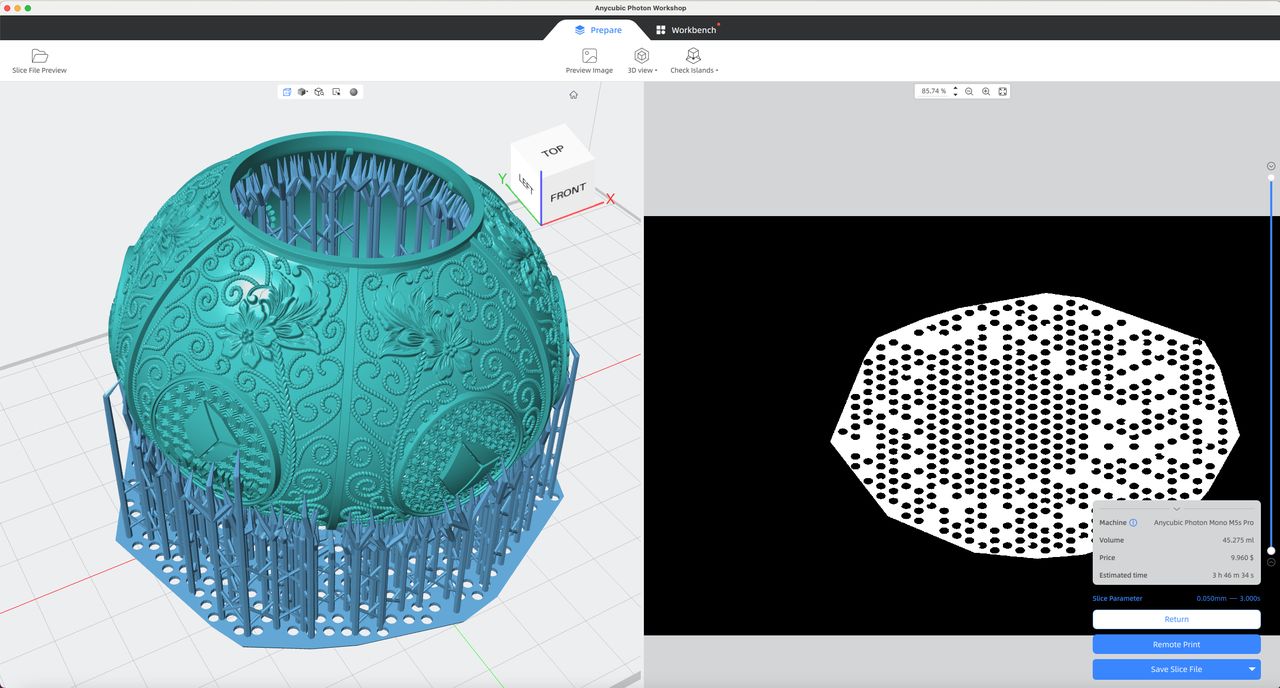
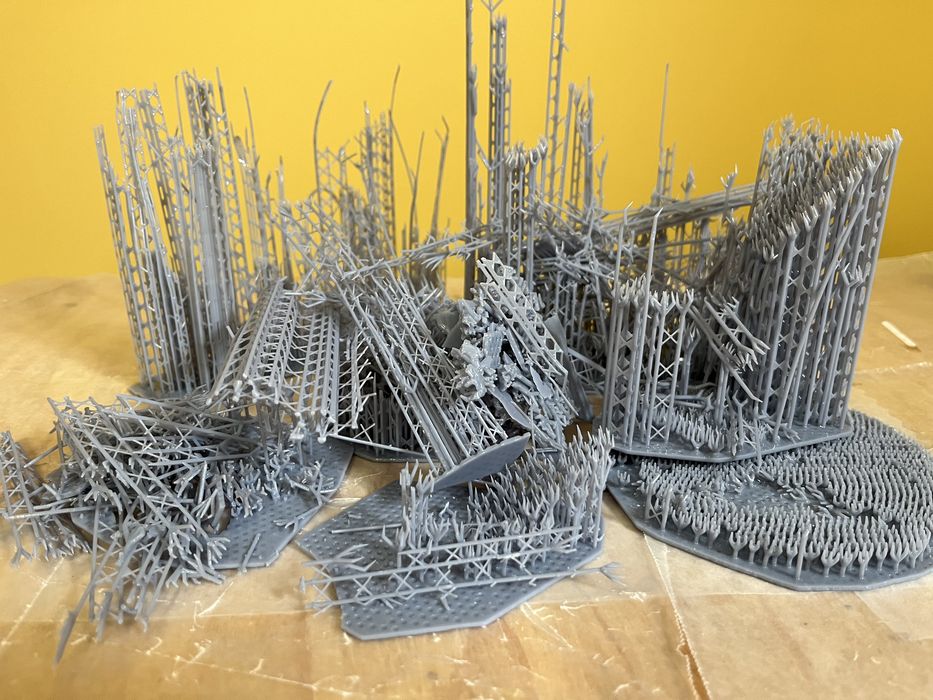
Our next print, “Nefertiti”, required more of the features in Photon Workshop in order to print properly, inluding: Rotate, Hollow, Punch, and Support.
We began by rotating the model slightly to offset it from the build plate to make peeling easier and then angling it just right so most of the supports being generated wouldn’t be on the face of the statue.
We hollowed the model and then punched some drain holes in a few inconspicuous locations to allow for resin draining and to prevent suction during print.

We went into the support settings and made our connection points to the model slightly smaller than default, as to reduce any surface marring. We generated supports automatically, paying attention to where they were placed and adding more manually where needed.
When we were happy we had enough support in the proper locations, we sliced our file and sent it to the printer, getting an estimated print line of 08:26:00 and using 91.692ml of resin.
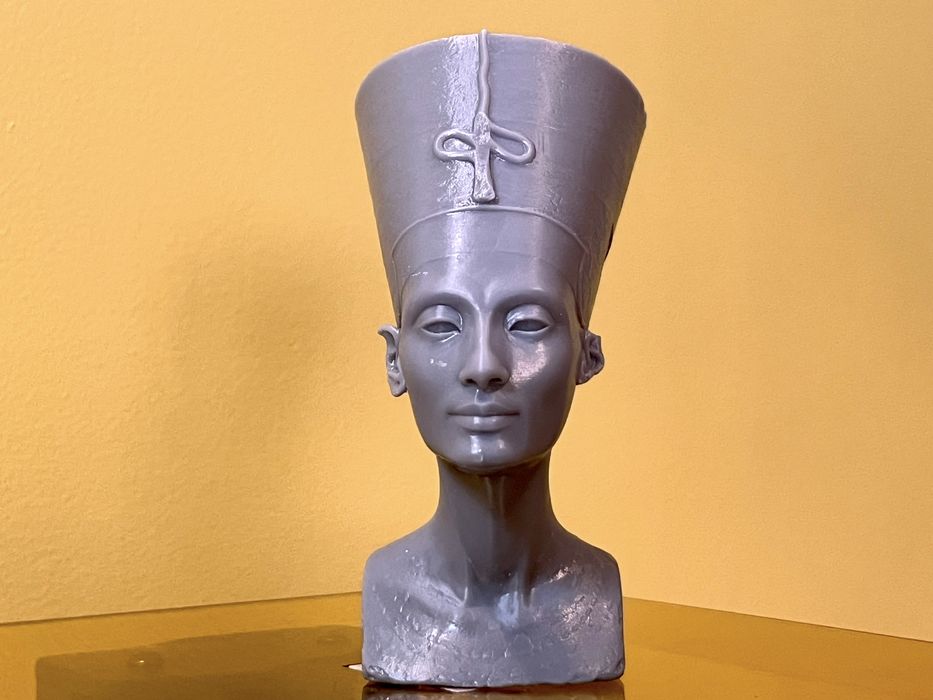
We had some minor issues removing some of the supports from the finished print, but it turned out quite well and had very good detail.
That said, near the end of the review we decided to slice a file with an alternate slicer, Chitubox, just to see how the support structure compared with Photon Workshop.

We downloaded the latest version of the Chitubox and were pleased to find that there already was a Photon Mono M5S printer profile present in the software. We noted there were some slight differences between the two slicers in the Resin Section, specifically that measurements units were different! Motion in Chitubox is measured in mm per minute while Photon Workshops uses mm per second.
When we checked the values against each other, we found that Photon Workshop was 6 mm/sec and Chitubox at 360 mm/min. Although these seem different, the functional value works out to be identical. We will discuss more about what happened later.
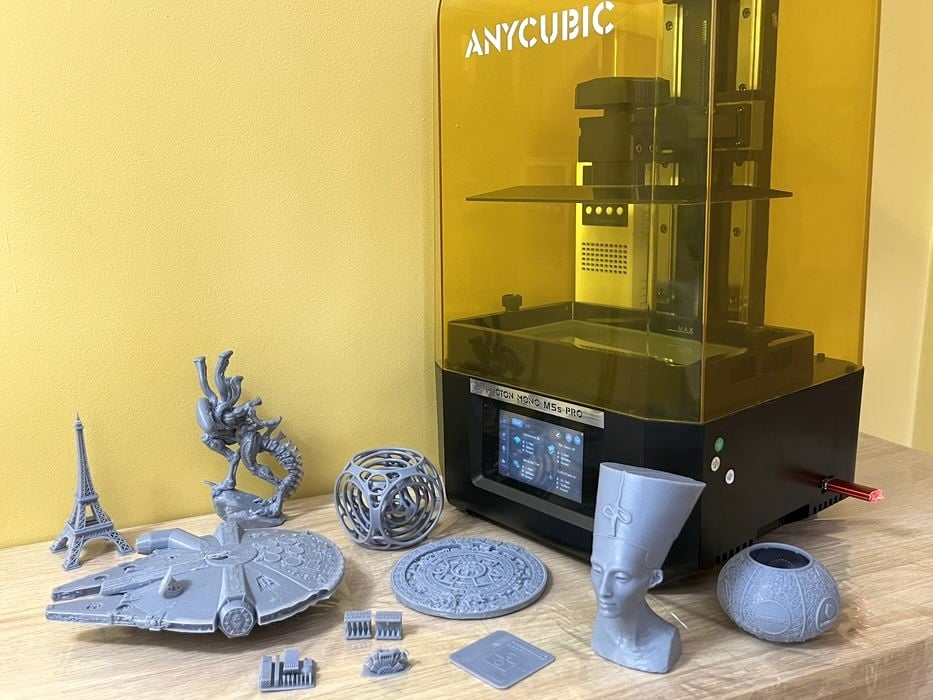
Photon Mono M5S Print Results
We adjusted our support structure in Photon Workshop to be a bit lighter and sliced the “Gyro Air” 3D model, getting an estimated build time 05:17:00 using 46.452ml of resin.
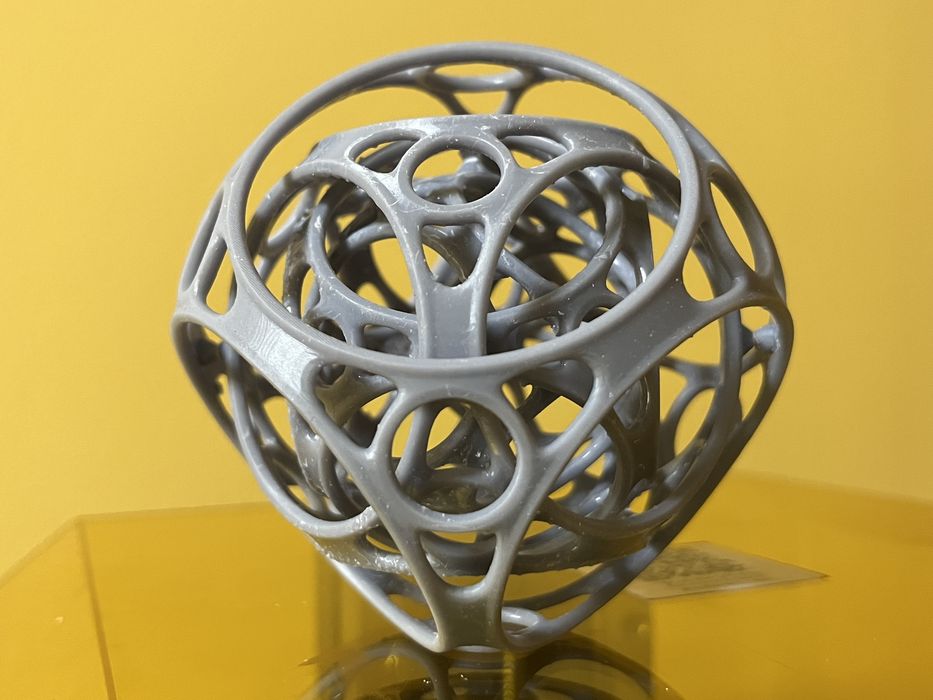
The finished print quality was very good and supports were much easier to remove, causing no damage during the process. Although we did manage to pop a few sections of the print out of place, but we were able to coax them back into the corresponding grooves and once in place the Gyro articulated as designed.
We printed the “Xenomorph Standing” 3D model fully solid, as it was tricky to hollow it out without needing to punch a lot of drain holes to avoid trapping resin.
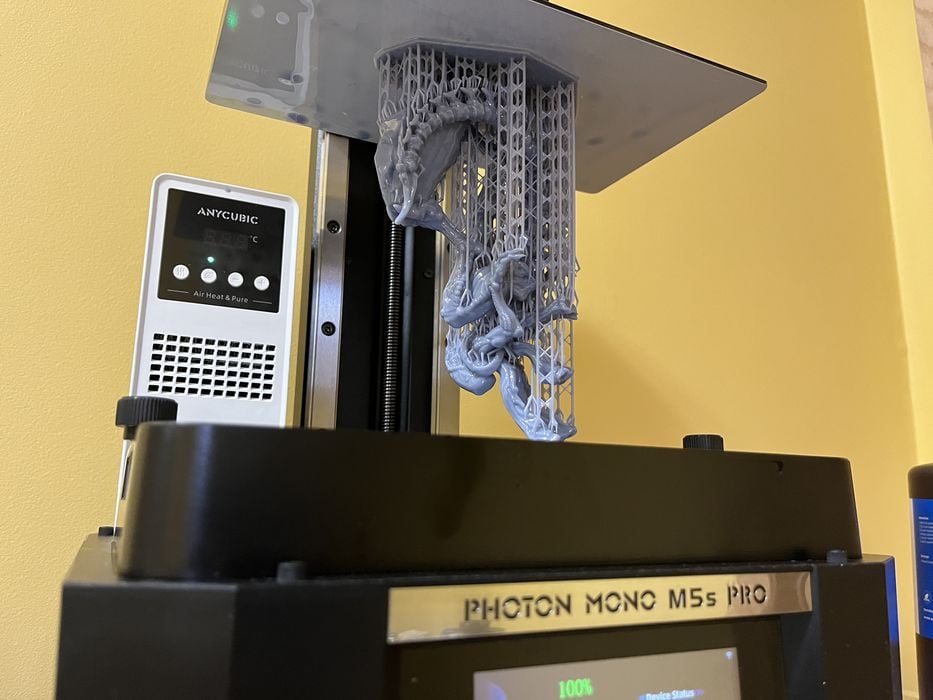
We used supports with small tips and when we sliced the file we got an estimated print time of 10:16:00 using 103.376ml of resin.
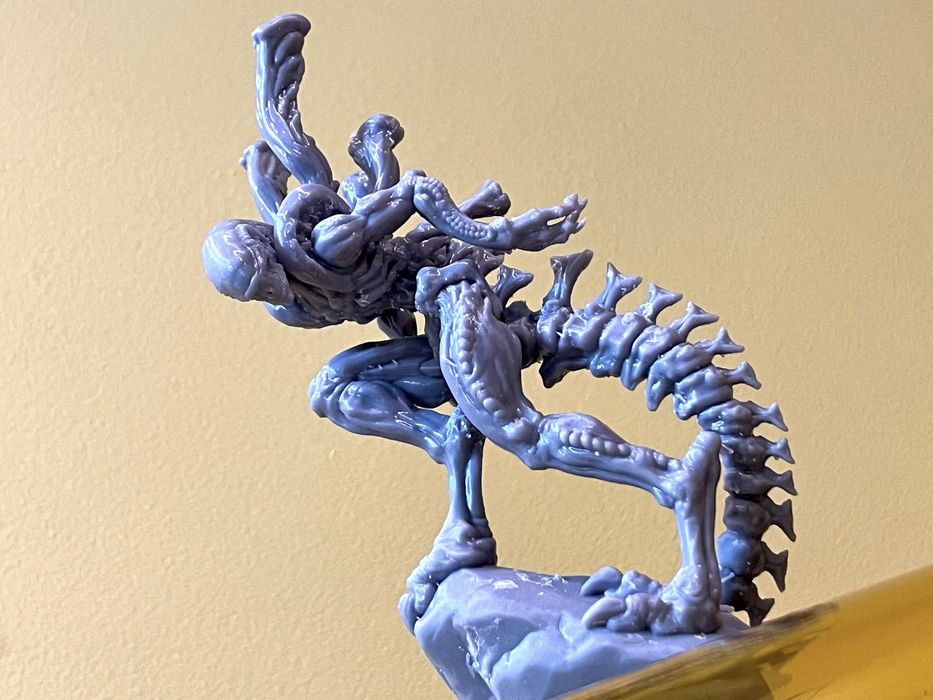
The print turned out excellent and with a high degree of surface quality. The smaller tip supports were easy to remove and caused no damage to the model, quite unlike the pre-sliced test job.
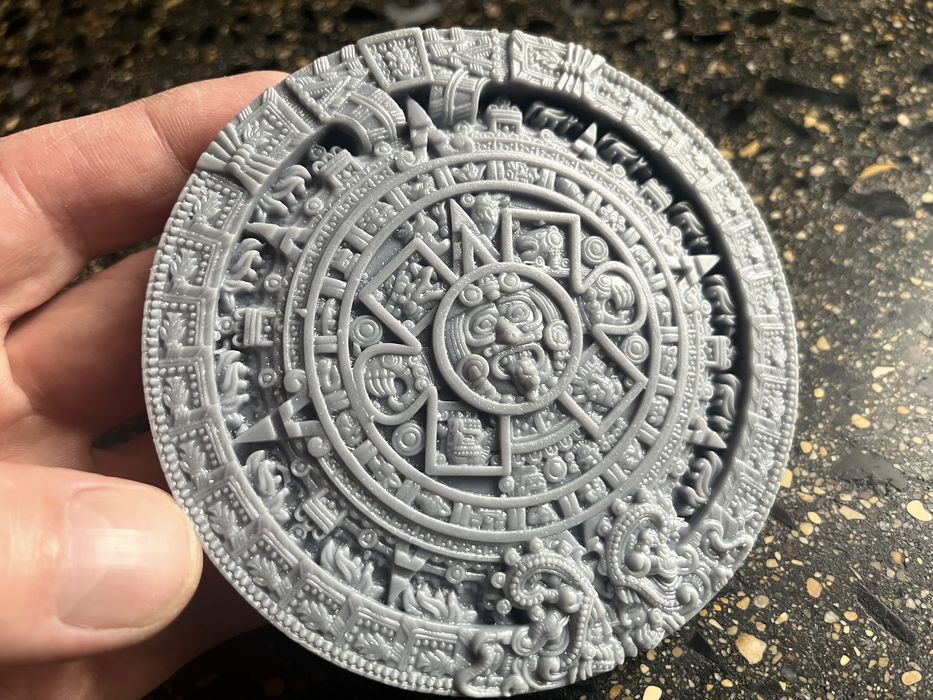
We kept settings the same and sliced the “Mayan Calendar” 3D model getting an estimated print time of 01:17:00 using a total of 104.648ml of resin. The print turned out absolutely terrific and with an impressively high level of detail.
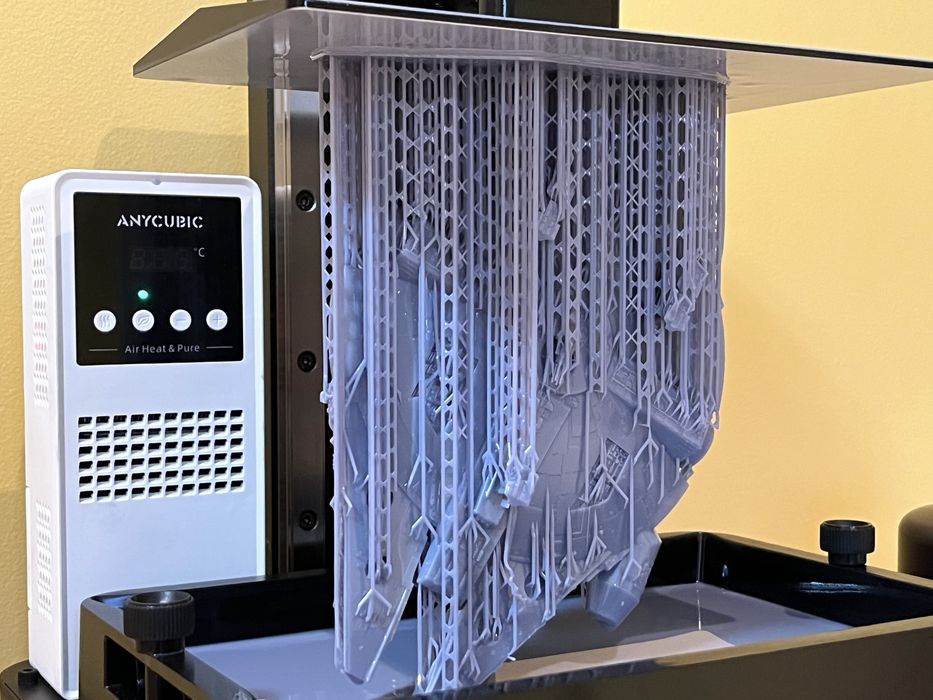
The “Millennial Falcon” 3D model would be our largest physically sized print, having a total duration of 12:03:00 using a total of 171.035ml of resin. The actual printing time turned out to be slightly faster at 11:58:00, showing that the estimates from Photon Workshop were always reasonably close to actual.

Overall print quality of the model was very detailed, but those weren’t “blaster marks“ on the sides of the model, those were sides of support structures that had embedded into the surface of the model!
This is something we hadn’t thought to pay attention to when generating supports. Only the support structure tips should be touching the print and not the support structure itself. Much extra time was needed to remove these embedded supports without totally destroying the surface of the model. This turned out to be very counter productive, because we had attempted using even lighter supports and smaller tips to reduce surface damage.
Then we decided to try setting up the printer in Chitubox to slice the same model and compare the the support structures generated.
We made sure to choose the available Photon Mono M5S Pro profile in Chitubox and double checked that the Photon Mono M5S and resin settings matched Photon Workshop.
It was then that we noticed the difference in the increments of 360 mm per minute vs 6 mm per second. When we sliced the file we received a job time of 06:38:00, which sounded quite quick, but not impossible.
We walked the sliced file over to the printer on thumb drive and launched it with the LCD before shutting the lab down for the night. When we checked in the morning, we found there was much more time left in the print than anticipated.
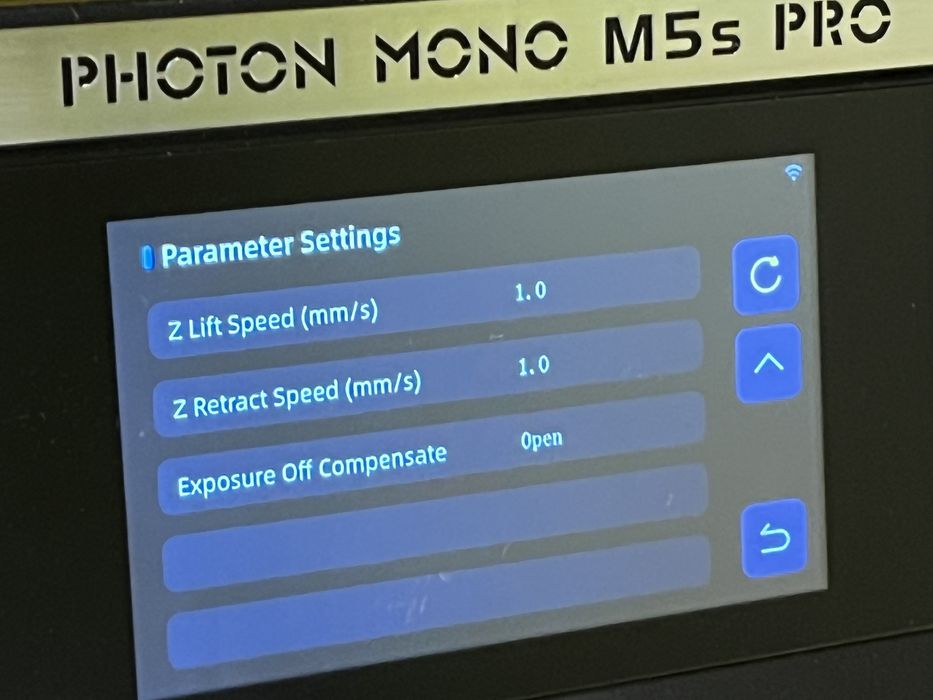
Perplexed, we checked the mid print settings on the LCD screen and found that Z-lift speed and Z-retract speed were both at 1 mm per second. Something had been lost in the conversion of mm per minute to mm per second.
We decided to leave the print to finish and see what would happen. The print completed in a total of a whopping 30:48:00, and the incorrect speed parameters appeared to have also affected print quality.
Supports were stretched and distorted, and didn’t look properly structural. They were very easy to remove and were completely off the print in under a minute.
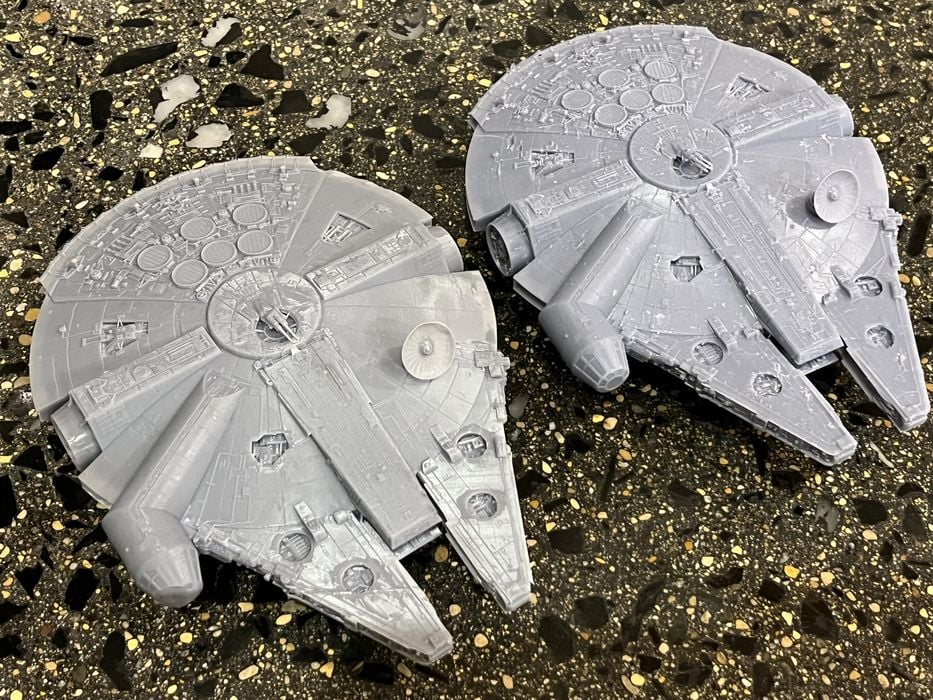
A small defect was noted on the cockpit, no doubt due to lack of proper support. Otherwise, surprisingly, the overall surface quality of the print was very good, with high detail and next to no support marks on the print surface.
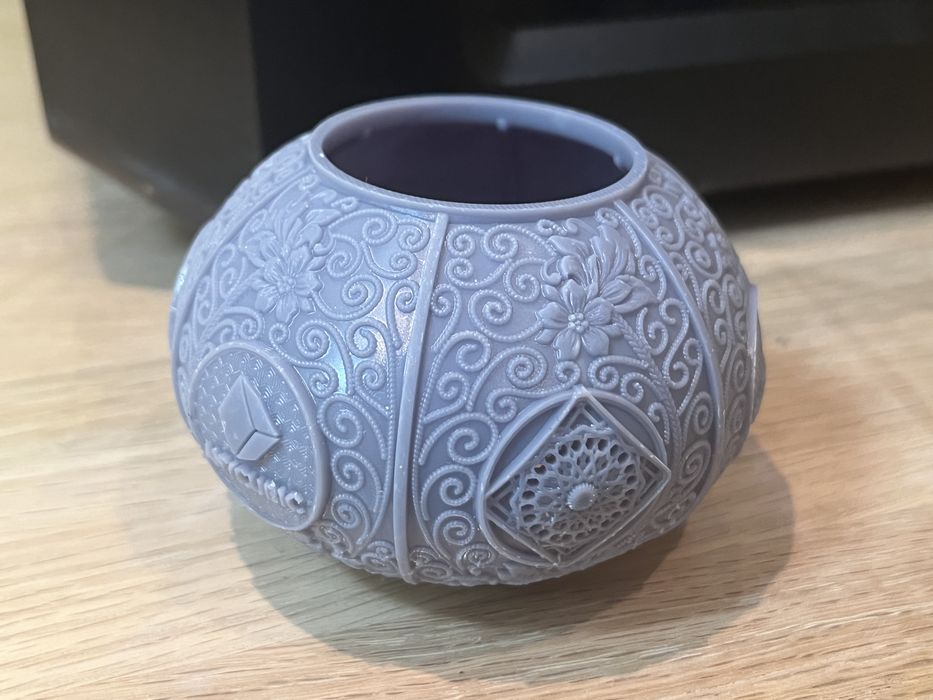
42-m5s-pro-software-lamp.jpg
For our final print, we chose to reprint the Anycubic lamp 3D model by slicing the model ourselves in Photon Workshop using our tuned support settings.
The print completed successfully in 03:46:00 using 45ml of resin. This time removing supports took only seconds, with minimal surface marring, with the print itself looking fantastic.
To wrap things up with the review, we were curious to see how the special quick-release ACF film had stood up, so we drained the tank and inspected the film.
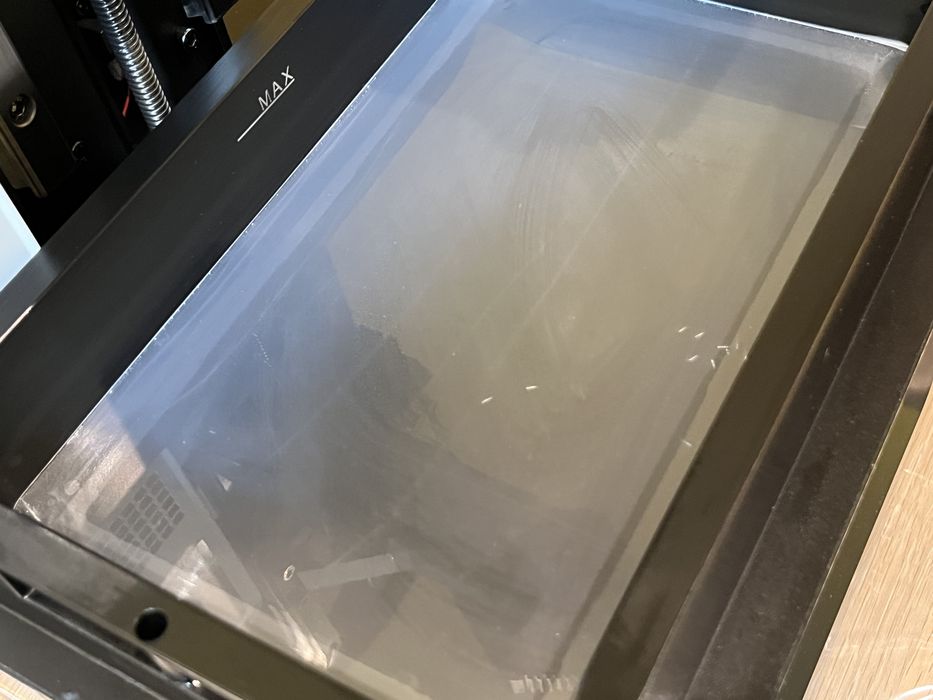
To our surprise we found that there were several areas on the film that had been near misses for punctures from a piece of cured resin that must have been floating around in the tank. The ACF film was sufficiently weakened to warrant being replaced to avoid a possible resin leak in the future. We would have done this procedure for the review, but there was no spare ACF film included with the printer.
Photon Mono M5S Final Thoughts
The Photon Mono M5S Pro was packed very effectively and efficiently for shipping, protected well with foam inserts and bagged to make lifting it out of the box easy. Assembly of the printer was a breeze and really just involved a few minor tasks like installing the screen protector and attaching the Air Heat & Pure.
The digital user manual instructions on the thumb drive contained more info than the printed versions, as those lacked a few important details.
The printer shipped with all the common tools and safety gear that we’ve come to expect, but was missing something we thought should be included – a spare ACF film for the tank. This is really in the same vein as nozzles for FFF printers, and manufacturers have typically always included spare nozzles with each new printer, just because of how prone they are to failure. We didn’t actually have the ACF fail during our review to the point where it leaked, but it was damaged enough for us to declare it unreliable to future use.
We really liked how the Air Heat & Pure was integrated into the firmware to allow for preheating the print environment when ambient temps were low.
We didn’t run into any Auto Device Check errors during the course of our review, but we were glad to know that the Photon Mono M5S was checking itself out when launching every print. We did test out the resin detection feature by purposely running our first print on an empty tank and we were correctly told to add some resin.
We found the instructions for the calibration of the resin to be a bit vague. The manual had us use the supplied Anycubic RERF pre sliced file, but they only mention an “example exposure time” of 1.5s for the first model. We found the actual exposure time to be 2.5s when we checked the details of the file mid print. This embedded value should be made clear to the operator, as knowing the correct value directly affects the accuracy of the test.
A novice just won’t have the eye for detail when examining the subtle differences between the RERF test models, as many of them end up looking too similar. Anycubic could consider adapting and using something like Cones of Calibration that would take the guesswork out of resin calibration for a novice, as the positive and negative results of having the cones touch or not touch are very obvious. That, or providing better visual examples of good and bad results, and pointing out where to look closely on the RERF prints.
Photon Studio was very easy to use and had all the basic features, but it did give us the one unexpected hiccup with the sides of a few support structures bumping into the print surface, causing unnecessary scarring on a larger print.
The only real print failure we had was when we decided to try slicing from Chitubox and had a unit value mismatch that ended up giving us incredibly slow 1mm per minute lift & retraction speeds, which in turn gave us weak support structures, causing the cockpit of the reprinted “Millennial Falcon” to flop about and image poorly. But that was on us for leaving the safety of Photon Studio.
All nitpicking aside, we have to say that the build quality of the Photon Mono M5S Pro is excellent, the hardware quite reliable, and we got some great prints with fantastic detail that for the most part printed fairly speedily although we were just using standard resin.
ANYCUBIC
M5S PRO 3D PRINTER
★ BEGINNER 7/10
★ ENTHUSIAST 9/10
★ PRODUCTION 8/10
BEST FEATURES
✔︎ Great print quality
✔︎ Heated chamber
✔︎ Automated features
QUESTIONS
✖︎ Vague instructions
✖︎ Support generation
✖︎ Spare ACF film
This is part three of a three part series, please read parts one and two.
Via Anycubic