

There’s been a small explosion of “tall” 3D printers lately, but perhaps there’s a way to print tall objects without using one.
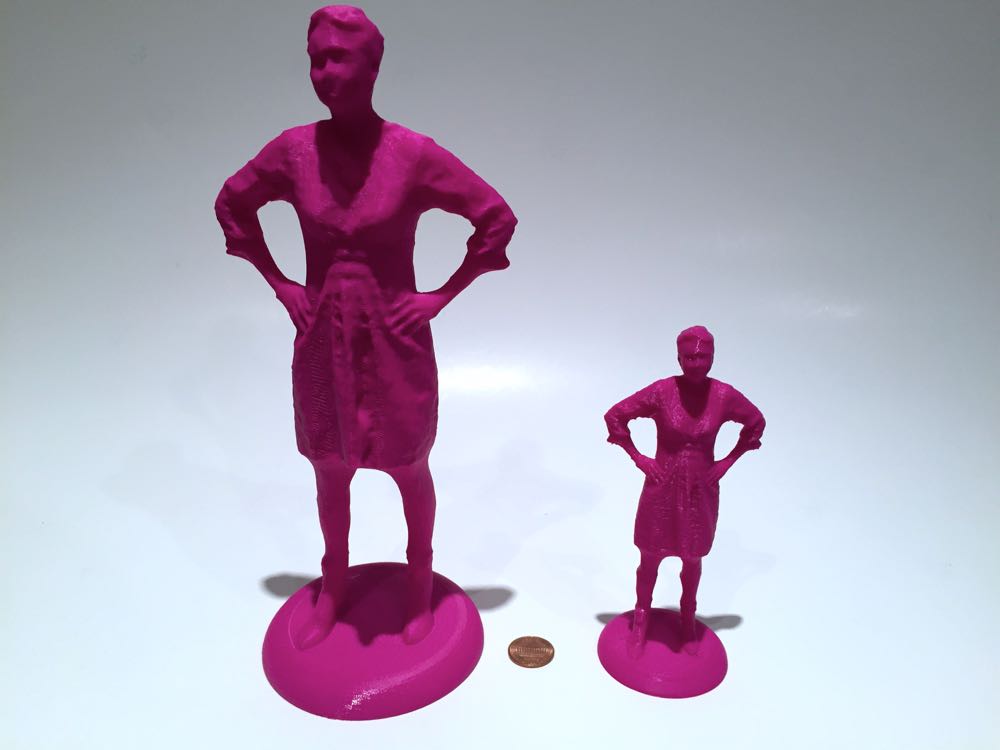
The increasing popularity of tall prints is not a surprise; just pick up a tall print and you’ll immediately see the effect a large item conveys over the more common small prints often made on personal 3D printers. In the image above we see the same 3D model printed in 120 an 250mm sizes. Quite a difference!
Tall printers also tend to cost a bit more, because they have more hardware and provide more value. But there is a straightforward way you can sometimes print tall objects.
The problem you have to overcome is the idea that items must be printed straight up and down. One key reason for printing “vertically” is that many 3D models include a nice, flat base, ideal for sticking to the print bed. We just get in the habit of printing vertically.
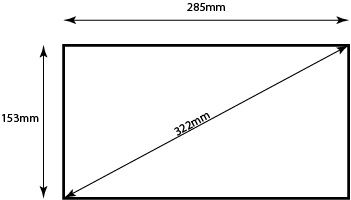
But here’s the idea: if you happen to have a 3D printer with a rectangular print surface instead of square, you have options. Take a look at this graphic that shows a typical MakerBot print plate: it’s XY dimensions are 285 x 153mm, yet many prints are simply 100mm tall prints with an even smaller XY footprint. Meanwhile, the rest of that 285mm width could have been used to print a tall object – sideways! In the MakerBot example, we have an astonishing 322mm of diagonal space that could be used.

It’s pretty easy to tilt over your 3D model and resize, which we’ve done here with MeshMixer. However, there are multiple considerations before printing sideways.
First, you’ll likely not get the use of a full 322mm, because your object will probably slop over the corners. Even so, you can still fit quite a bit in, as we can see here. Typically you’ll have to print sideways instead of diagonally unless you have a 3D model with pointy ends.
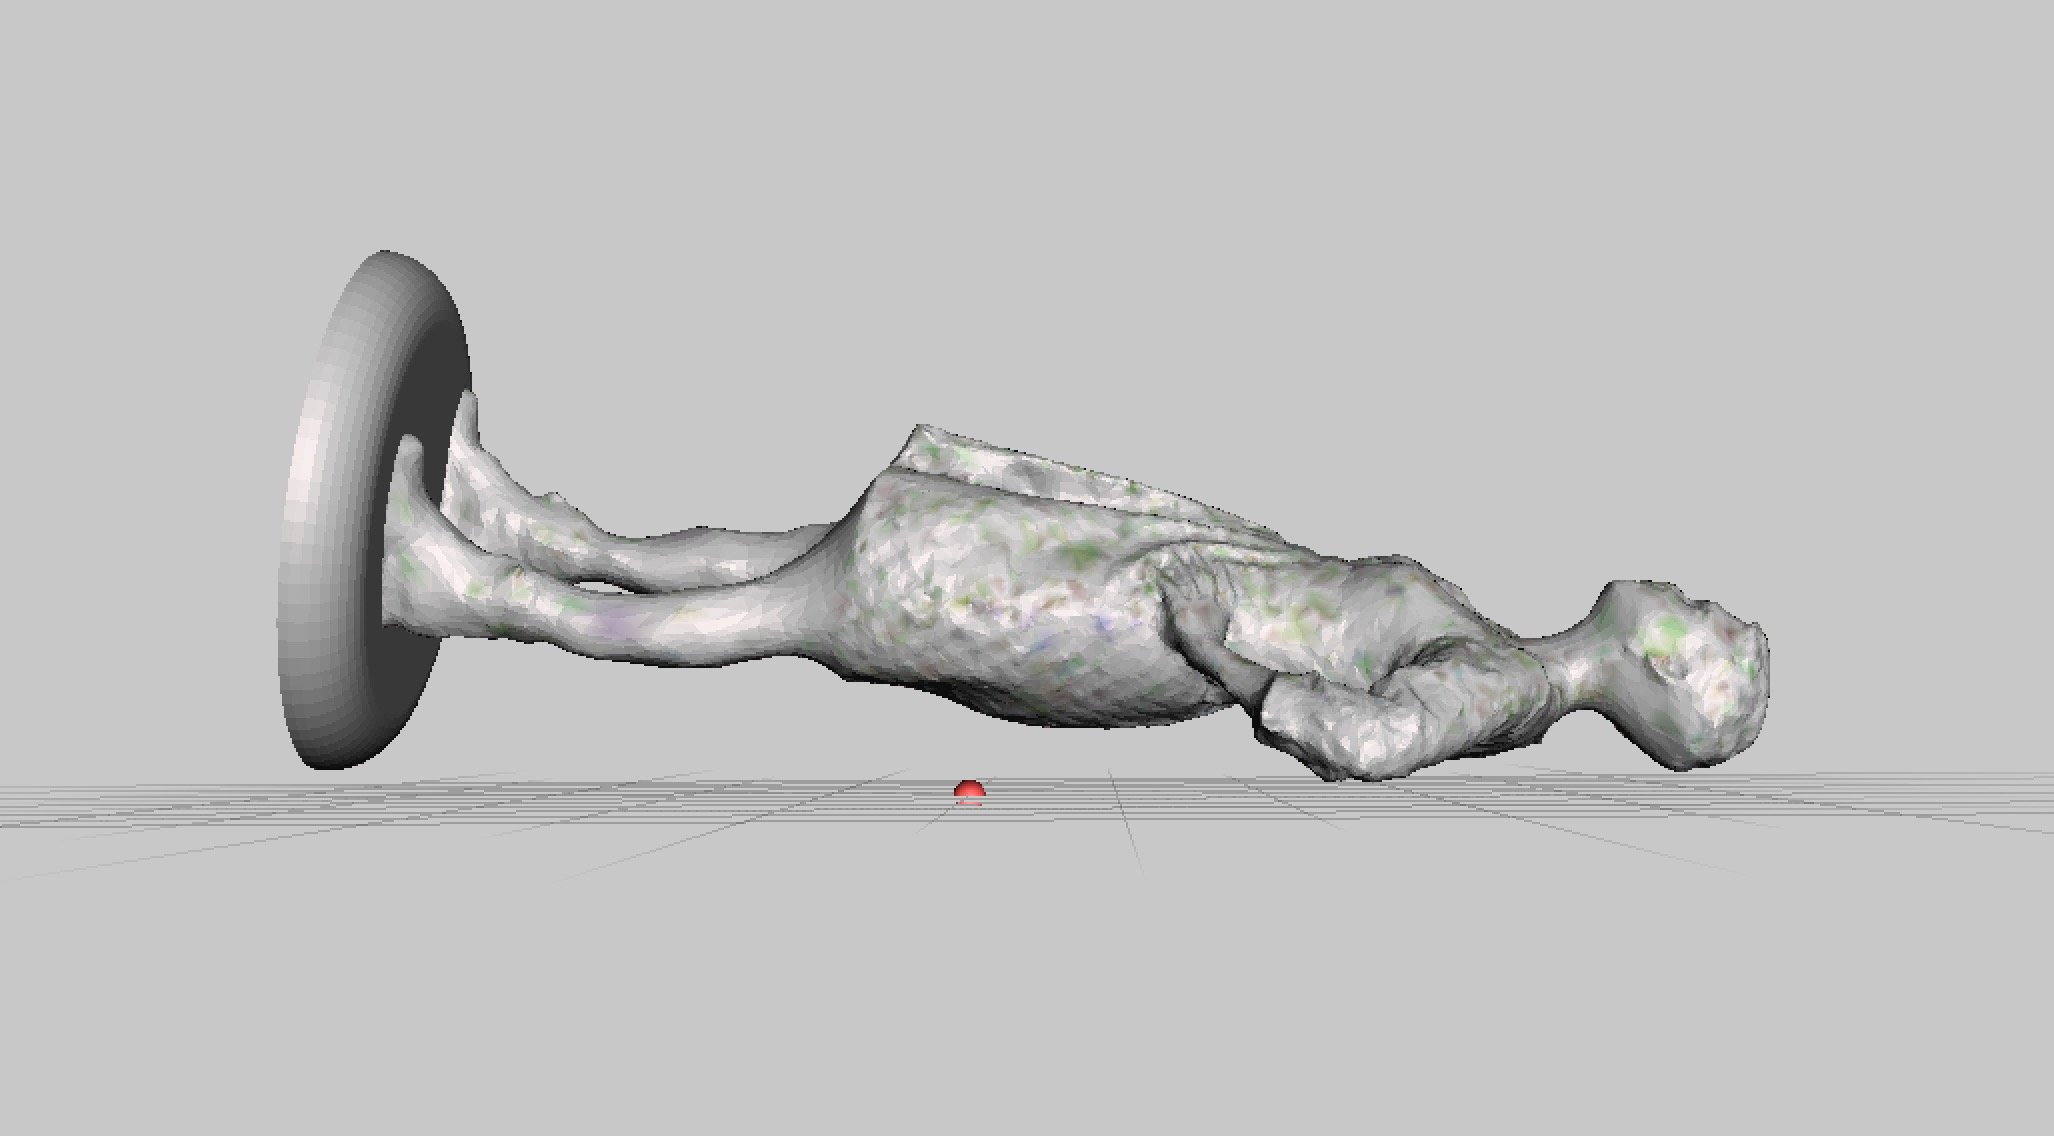
Second, you’d still like to minimize the print time, so you’ll want to rotate the model to the lowest possible orientation. This can be quite tricky in some systems, but there is one way that’s extremely simple: MeshMixer’s “Orientation” feature. Just press the button and it’s automatically done!
Now that you’ve rotated the object, it’s formerly super-flat base is no longer how you’ll contact the print bed. This means you’re using support structures. We generally don’t like support structures as they can be a pain, but in this situation you have little choice.
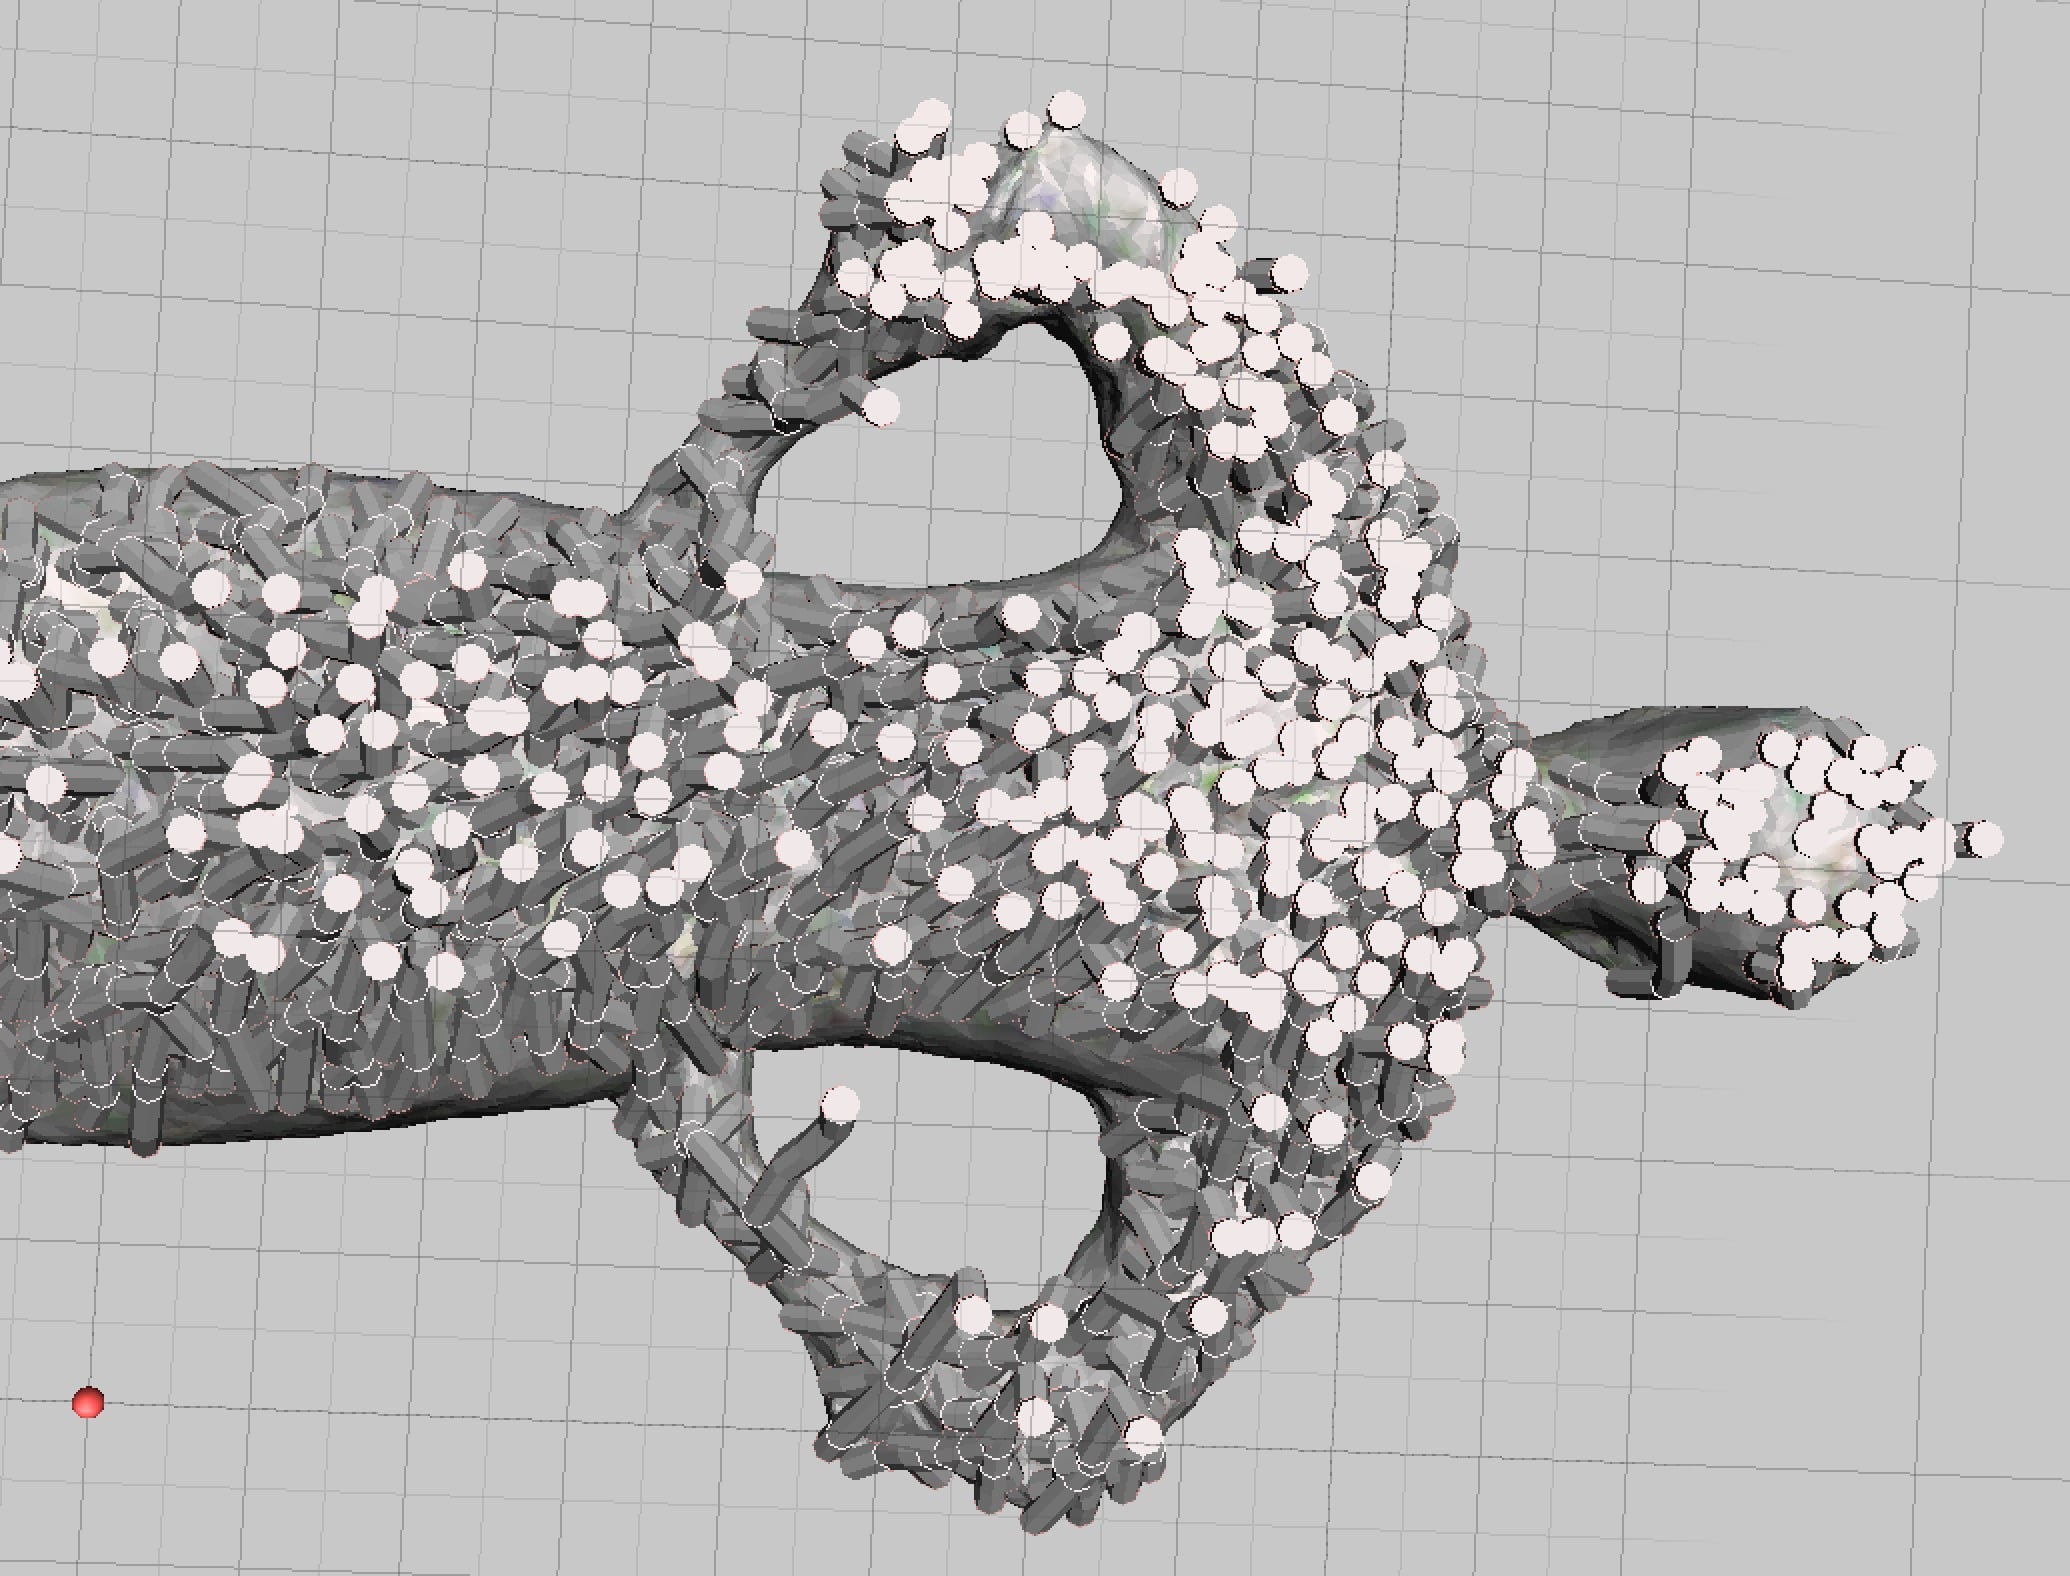
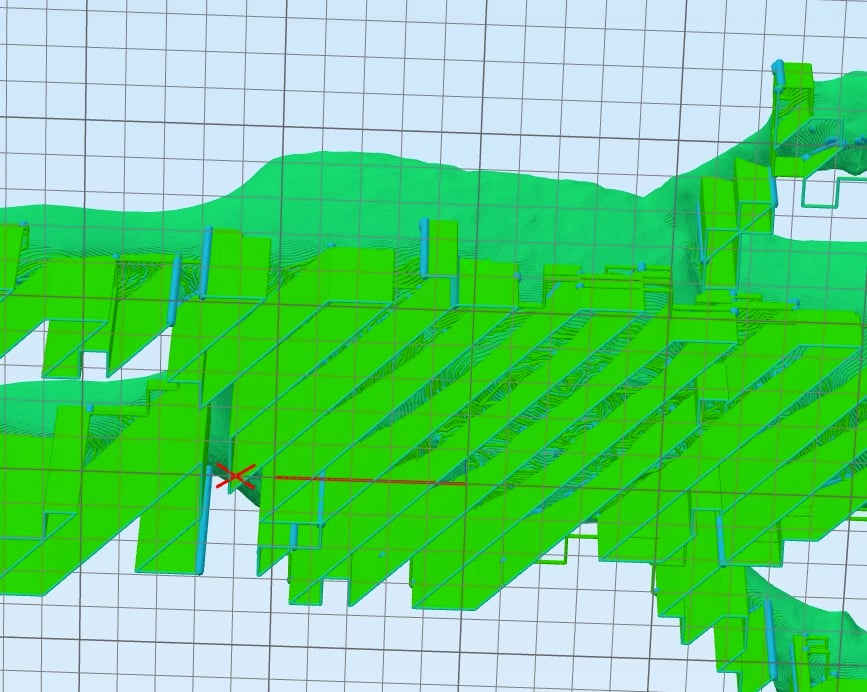
MeshMixer’s otherwise amazing support generator turns out to be not so useful in this situation. You can see the result here of generating pillar supports with MeshMixer: something close to 100,000 individual pillars (ok, exaggerating slightly), which would be very difficult to pick off the object and the print surface.
Instead we used Simplify3D’s support generator, which provided a very simple support structure that’s not only easily removed, but is also very quick to print. In fact, we ripped off all the supports from this print by hand in one 5 second motion!
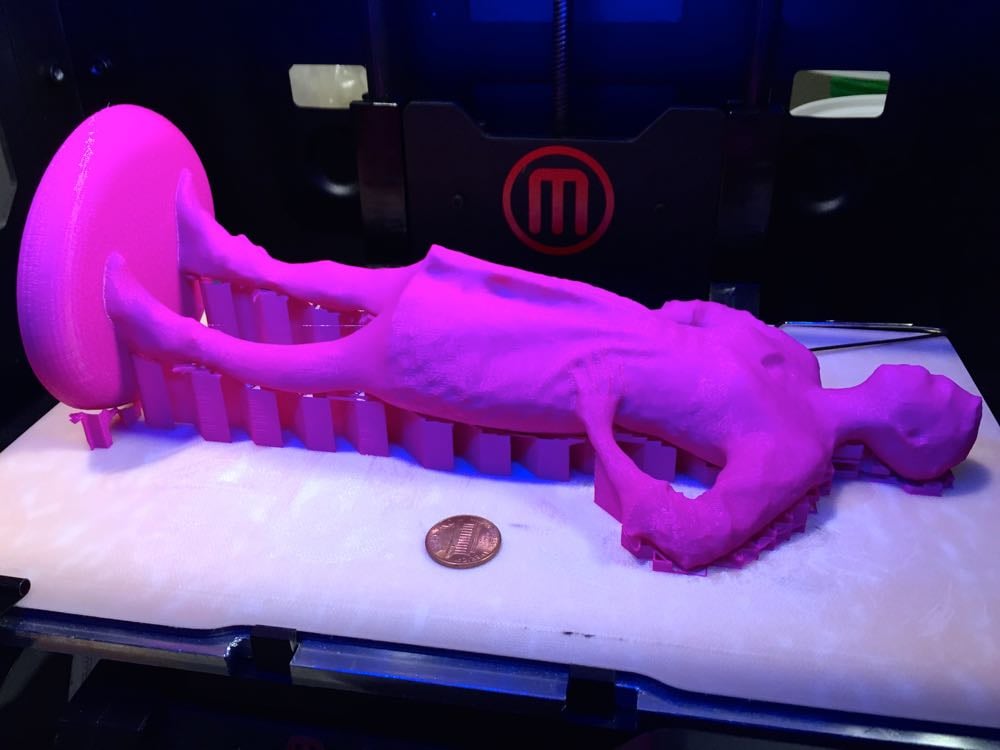
Here we have successfully 3D printed a 250mm model – sideways. The print took only six hours and is startlingly bigger than the more typically-sized 120mm model beside it.
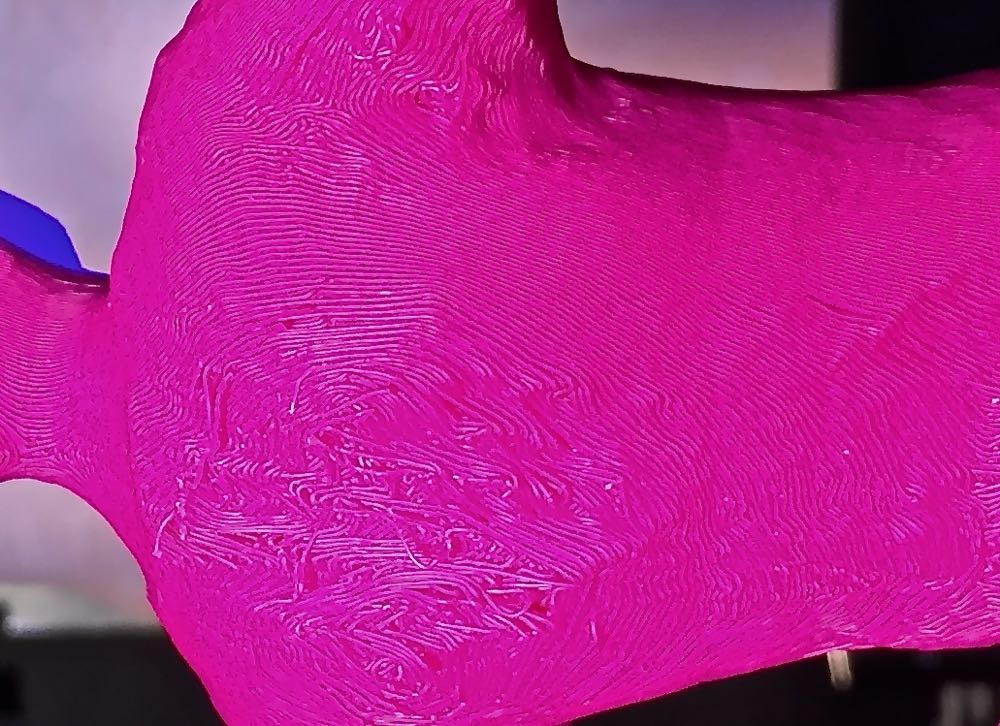
There is a cost in quality when printing in this way; layer lines are displayed different on the print and may be more visible depending on what you’re printing. On the lower side you’ll get a bit of roughness due to the plethora of support attach points, but in this case the figurine looks great from the front.
Best practices: Printing in this way typically takes a long time, so you must do the following:
- Use MeshMixer to quickly orient the part to the optimum rotations
- Use Simplify3D (if available) to generate easy-to-remove supports
- Ensure you have sufficient material loaded for the entire print
- Make sure your print surface is absolutely, positively, perfectly level – a large, time-consuming print will easily fail if you haven’t
- Clean your print surface well and apply a fresh layer of your favorite sticky solution, if appropriate
- Then just wait a bit longer for a much larger print
- Check the print often to cancel failures and avoid a lot of wasted material
Oh, did we mention you can also print on the vertical diagonal, too? We haven’t tried that, as it would use significantly more support material and dramatically lengthen print times, but in our MakerBot example, you could theoretically squeeze out another 35mm for a total maximum length of 357mm. Perhaps not enough additional length to justify the additional print time and material used.