

A method of converting the popular Ender 3 desktop 3D printer to a color printer has been published.
GitHub contributor Sakati84 created an open source project called “3DPrintColorizer”, which does just that.
3D printing in color takes two forms: spot color and full color. This project is a spot color system, meaning it can produce objects with areas in colors from a fixed-size palette, whereas full-color 3D printing can produce gradients, textures and photographic-level imagery.
The approach used by Sakati84 is to selectively color translucent filament as it is laid down by the toolhead. This is done by selecting commonly-available color pens (e.g., Sharpies) from a pen garage.
The approach mostly works, although you should not expect anything close to consistent colors and especially nothing that would produce Pantone-level quality.
But how does it work?
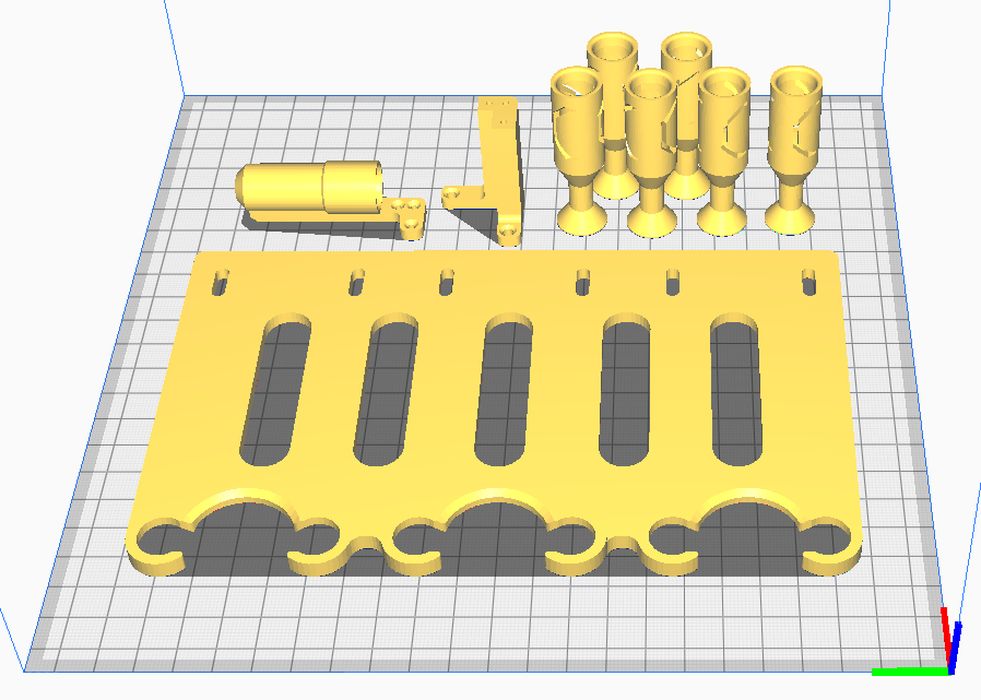
To adapt your Ender 3 to become color-capable, you’ll first need to 3D print a number of parts. Some are used to build the pen garage that’s mounted at the top of the Ender 3, while other parts implement the active pen holder, which sits astride the toolhead.
During operations, a pen is selected from the garage and mounted on the toolhead holder. This pen is then pulled around the top surface of the most-recently 3D printed layer, hopefully laying down color.
Here’s a short video showing the system in action:
How good is the color? It depends on many factors, most importantly the “eye of the beholder”. I’ve used this style of 3D print color previously — but not this specific project — and was not particularly impressed. The colors were washed out and inconsistently applied.
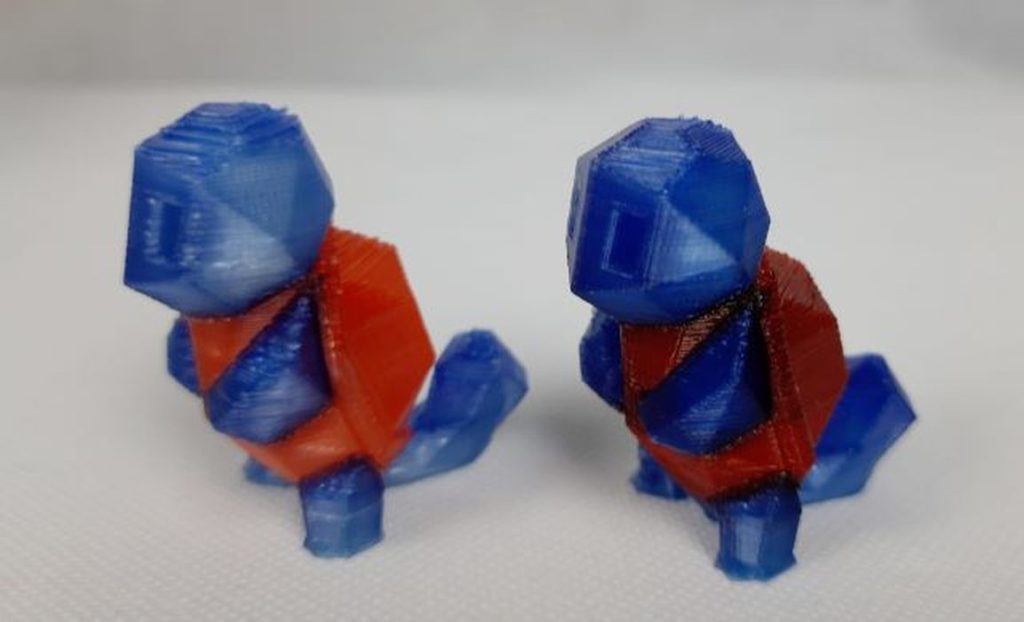
The images provided by Sakati84 appear better than what I’m used to seeing, although there is much room for variation. For example, it’s possible to darken or lighten the colors. Sakati84 explains:
“When painting the model it´s often enough to paint only every second layer. Activate this option to do so. Interlacing also lighten up the colors so they appear more like what you would expect when painting on paper. Otherwise the colors will come out a little darker. Interlacing will also reduce color bleeding between adjacent parts of the print. When it is activated every odd and even numbered pen will print together in the same layer. So when you have 2 colored parts that are close together it´s best to assign one color to an even numbered pen and the other to an odd numbered pen so they don´t interfere with one another.”
As you can tell, the color you get is not going to be particularly accurate.
However, it IS color, and the Ender 3’s prints would otherwise be blandly monochrome.
The software to drive the 3DPrintColorizer system is made available as an Ultimaker Cura plug-in. It implements the color system as an extra extruder for each pen color. Thus when 3D printing a multi-color object, you simply assign an appropriate color extruder to each of the object’s segments. The plug-in does the rest by arranging appropriate GCODE to mount and de-mount the correct pens.
Setting up the 3DPrintColorizer requires a few steps:
- 3D printing the parts
- Assembling the parts
- Calibrating the pen mount and garage
- Installing the Ultimaker Cura plug-in
- Configuring the plug-in with the calibration values
- Mounting a selection of pens in the garage
- Re-slicing the multi-color model
- 3D printing the GCODE
This project is published as open source, and so it is free to start. But really, it’s not free, as there’s a trade-off between cash and labor here: you’ll spend quite a bit of time setting this system up before you receive a completed color 3D print.
You will have to buy some pens, however. Sakati84 has configured the system to accept standard Sharpie pens as well as Amazon Basics pens, which are a bit less expensive.
This is by no means a production product. Things will go wrong: one thing I can think of is that the pens may dry out if left out for too long, for example. It will also significantly increase print durations and may possibly compromise the inter-layer bonding when subsequent layers are deposited.
However, as a fun project to obtain greater capabilities from the popular Ender 3, it’s a great idea, and quite an achievement for Sakati84 to successfully design this complex Ender 3 add-on.
Bonus idea: instead of using this system for coloring prints, it could be used to apply a thin layer at the support-model interface to inhibit bonding. This would dramatically increase the ability to remove support material and increase surface quality. And it would require only one pen, too.