
Prusa Research announced the official release of PrusaSlicer version 2.3, their latest slicing software tool.
Prusa Research has been incrementally improving this software tool for several years, and the latest release seems to have a lot more packed into it than you’d expect from a +0.1 upgrade.
The new software version includes multiple features that will no doubt be highly used. Normally an update includes one or two features a person might actually use, but this release seems to have many, perhaps too many to list here.
PrusaSlicer 2.3
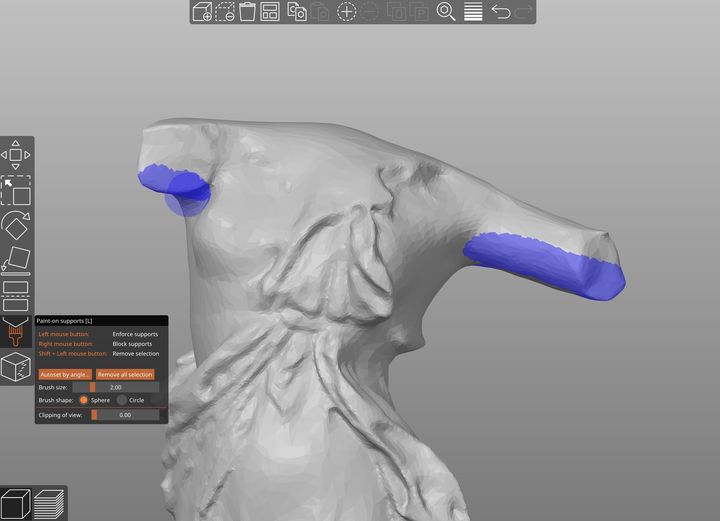
The most notable feature in version 2.3 is certainly “Paint On Supports”. This addresses the ongoing challenges of creating unique and optimal support structures for arbitrary 3D model geometries.
Most 3D print slicing software tools offer “automatic” support generation in the G Code, and that function typically provides sufficient support. The problem is that automatic support generation almost always creates too much support. This is wasteful in both material and time, and 3D printer operators spend considerable effort tuning their support structure configurations before printing.
Different 3D print slicing software offers varying ways to control support structures, but most of them are pretty terrible and sometimes end up taking more time to configure optimally than the duration of a print with fully generated supports.
PrusaSlicer Paint On Supports
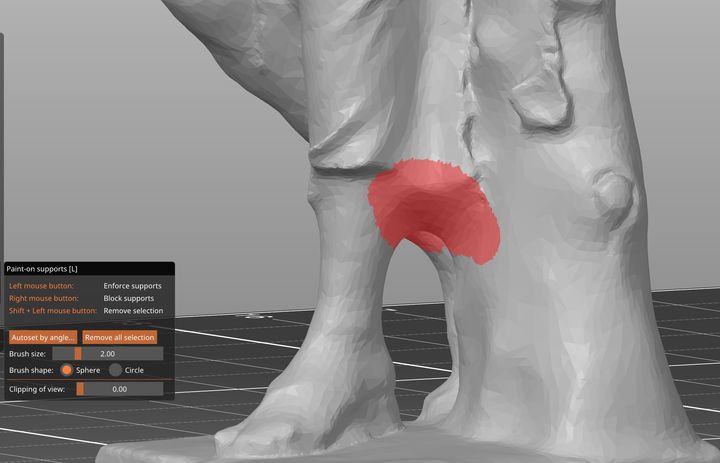
Prusa Research has come up with an incredibly intuitive method of controlling support structures with their new “Paint On Supports” feature. In this mode you’re presented with a “Brush” that you use to paint areas of the 3D model. A painted area can either enforce support generation, or suppress it. The choice is made by clicking the left or right mouse button, which is tremendously easier than having to move back to a menu or dialog to change modes.
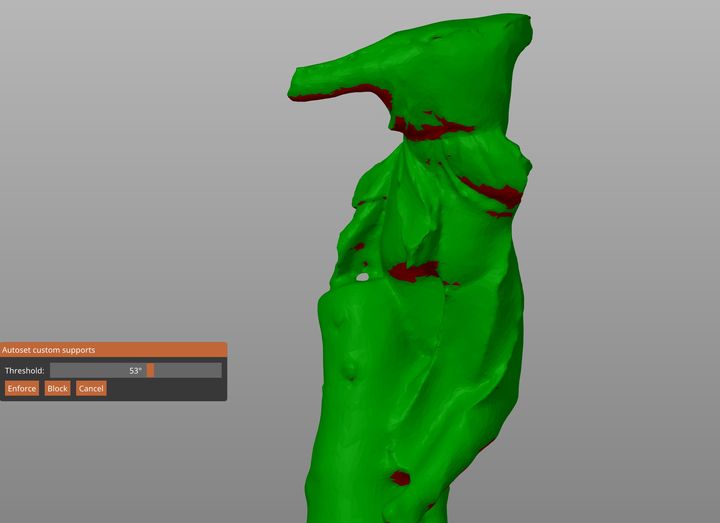
The feature is enabled through ticking the “generate support” option or if it’s already included in a printer profile. That causes PrusaSlicer to generate supports automatically, but the painted areas essentially modify the generator’s behavior. You can effectively add or subtract from the automatic support generation. However, for full control the best approach is to set the automatic support generation angle far lower than its default of 55 degrees. I used 15 degrees, which mostly turns off support except for the absolute minium required. You can then add support to other required areas to form what should be the optimal support structure configuration.
I did some testing with this feature and found it to be incredibly simple to use, perhaps the most intuitive approach for creating optimal support structures.
Paint On Supports would certainly be enough for an upgrade, but there’s much more in version 2.3.
PrusaSlicer Ironing
The next most interesting feature is “ironing”. This was a feature initially deployed in Ultimaker Cura, but has now found its way into PrusaSlicer. The idea is to use the hot nozzle to flatten horizontal surfaces by skimming over top. The heat and a touch of extrusion combine to create a near-perfect flat surface, unlike the typical extrusion lines seen on most FFF 3D prints.
Ironing does not work on sloping or curved surfaces, making it most useful for mechanical parts, signage or other similarly shaped objects. Prusa Research says it can also assist in creating flat surfaces to be glued together after printing.
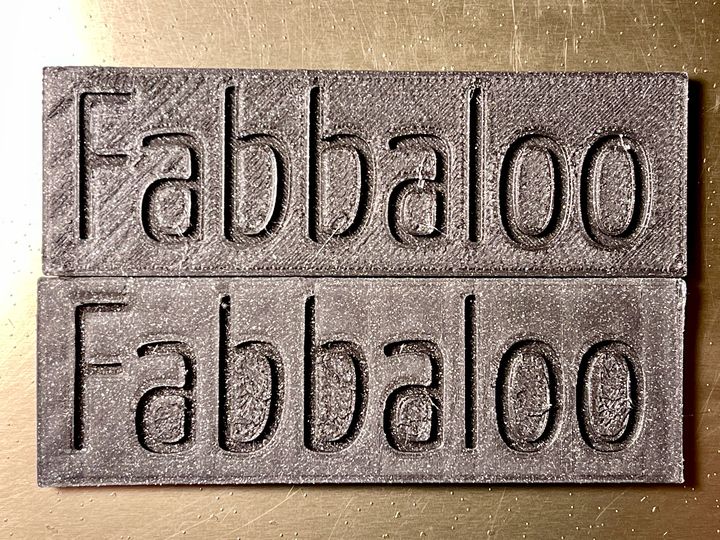
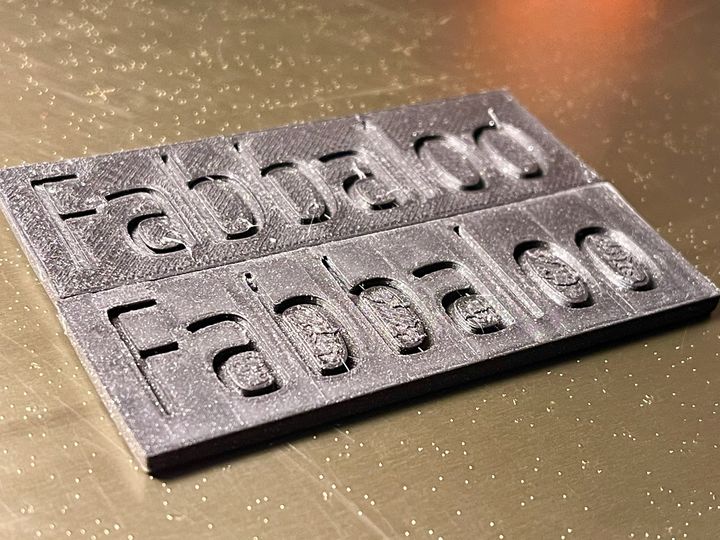
Here are some images from a quick test I prepared using ironing on a flat sample. The printing parameters were identical on each, except that one used ironing. There’s a notably smoother surface on one, as you can see.
More PrusaSlicer Features
There’s plenty more in this release, and while I can’t list them all, here are some that I noticed:
Monotonic infill
This feature ensures that the extrusions on a top surface are all identical. This overcomes the usual effect where the G Code path bounces around between obstructions. While the surface will be complete, the extrusion pattern is visibly non-uniform. Monotonic infill will take care of that and produce wonderful surfaces, only exceeded by ironing.
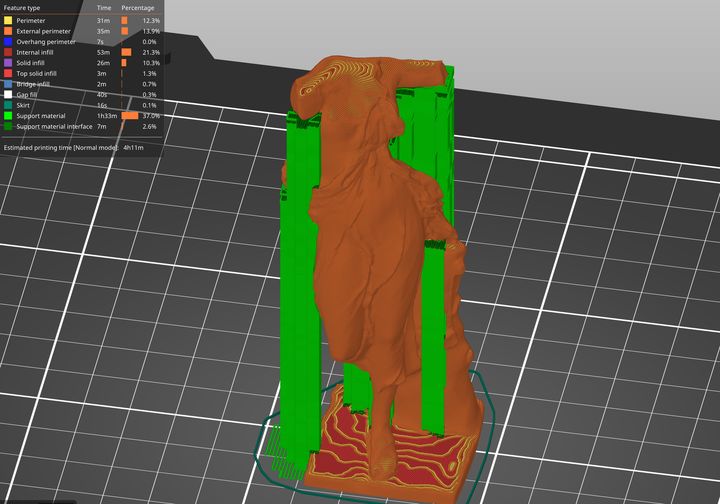
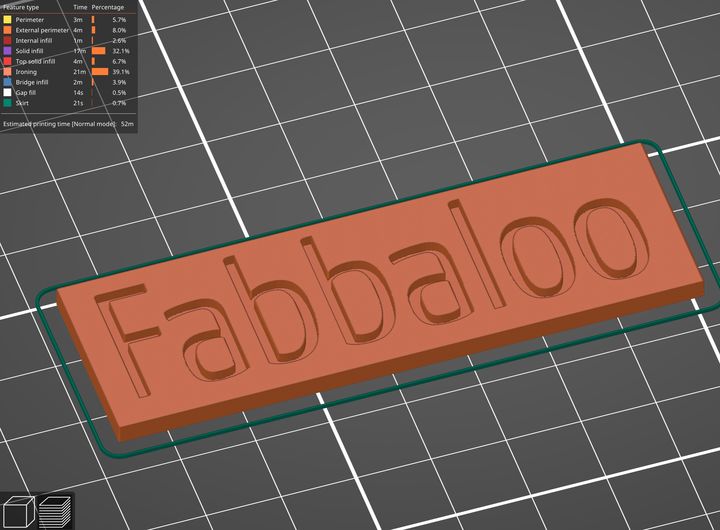
Print Time Estimator
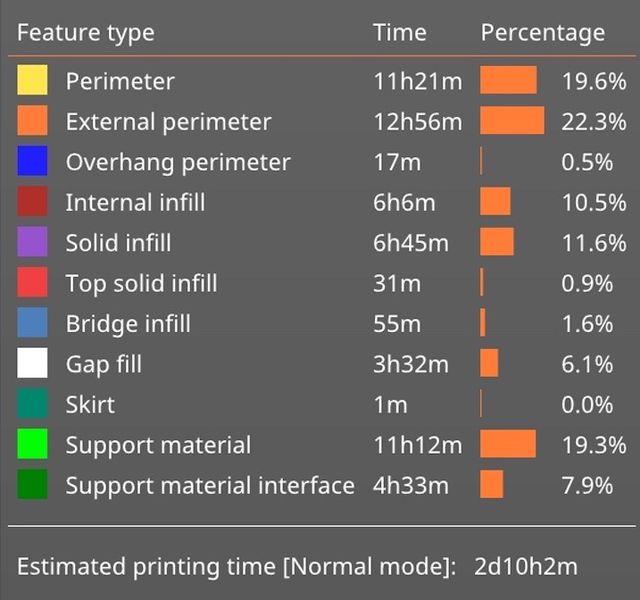
Prusa Research has taken print time estimates to the limit with this new report that is shown after slicing. It breaks down the print job into a series of categories representing different extrusion activities. This will be quite useful to optimize print times by seeing which activity is taking up the most time, allowing for simplification.
Card Ejection
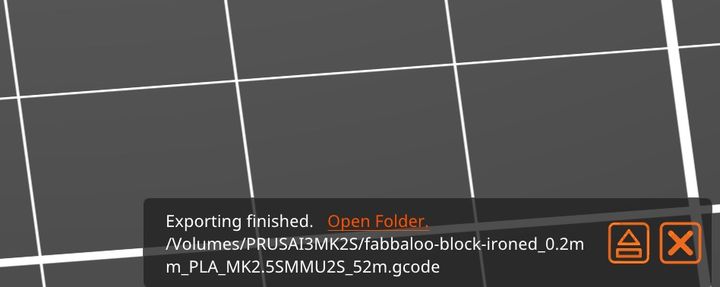
I’ve wanted this feature for a while: after the G Code is saved to an SD card, PrusaSlicer now offers to safely eject the media. It’s a minor feature to be sure, but I’ll be using it on literally every print job, and so will you.

Adaptive Cubic Infill
I haven’t had time to try this one yet, but the idea behind Adaptive Cubic Infill is to reduce the density of large infill areas to save print time and material. In other words, the infill will be denser towards the perimeters and less dense in the middle. For larger prints, this could be a significant time material saver.
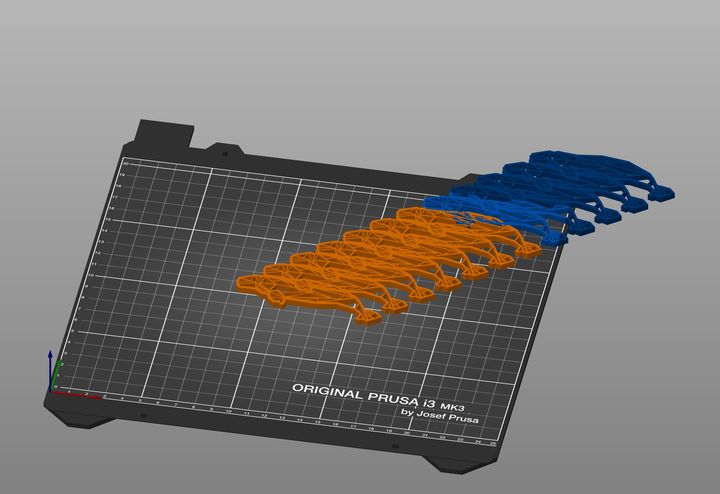
Automatic Arrangement
One feature of interest to those 3D printing many repeated items will be automatic arrangement. In this feature the arrange button becomes smart and can rotate objects in order to find the most optimal fit on the print plate. Here we can see I’ve added a dozen Beluga Whale 3D models to the plate, but they don’t fit:
And here is the same plate after using the new arrangement feature:
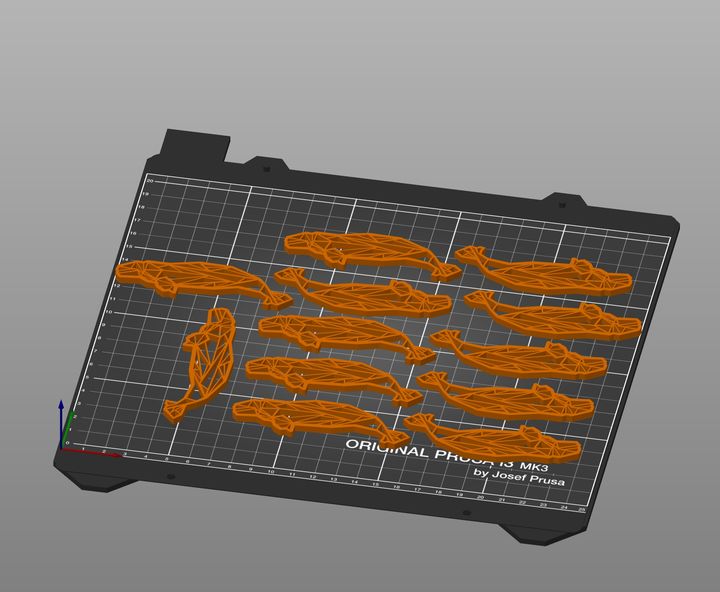
This will surely save a lot of time, particularly if more objects can be squeeze on a plate than one could do manually.
I could go on, but PrusaSlicer version 2.3 has a ton of fantastic features that everyone will use. If you’re a PrusaSlicer user, now is the time to download the upgrade.
Via Prusa Printers