
I’ve been playing with the power recovery feature on some desktop 3D printers, and realized how complex this feature can be.
Power recovery is becoming a standard feature on desktop FFF 3D printers, although years ago it definitely was not. Every 3D printer operator could tell stories of how a massive 3D print was ruined by an unexpected power failure, or worse — if a cord was accidentally unplugged.
In those situations the answer was to just start over and toss out the partially printed object, wasting considerable amounts of expensive filament.
The first time I witnessed a power recovery system on a 3D printer was way back in 2015, when BEEVERYCREATIVE included a battery system on their BEETHEFIRST+ 3D printer. This battery was able to hold power on the machine for 5-10 minutes, even if power was removed. We even made a short video of this machine printing without a power cord:
While that may have been the first commercial attempt at power recovery, it really wasn’t the best approach. Because power outages can last quite a while, 5-10 minutes of extra power doesn’t matter unless the operator took steps to pause the print. That wouldn’t be the case unless the operator was watching the job run, which is unlikely.
A far better approach has been the now-ubiquitous power out process. The typical sequence of events is this:
- Power is removed
- Machine detects this and quickly saves its state
- Operator later discovers the powered off machine and powers it up
- Machine realizes it was in the midst of printing and offers to continue
- Operator confirms and printing resumes
Most of the time this works, but sometimes it doesn’t. It depends on the machine, the environmental conditions, the 3D model in question and the length of the outage.
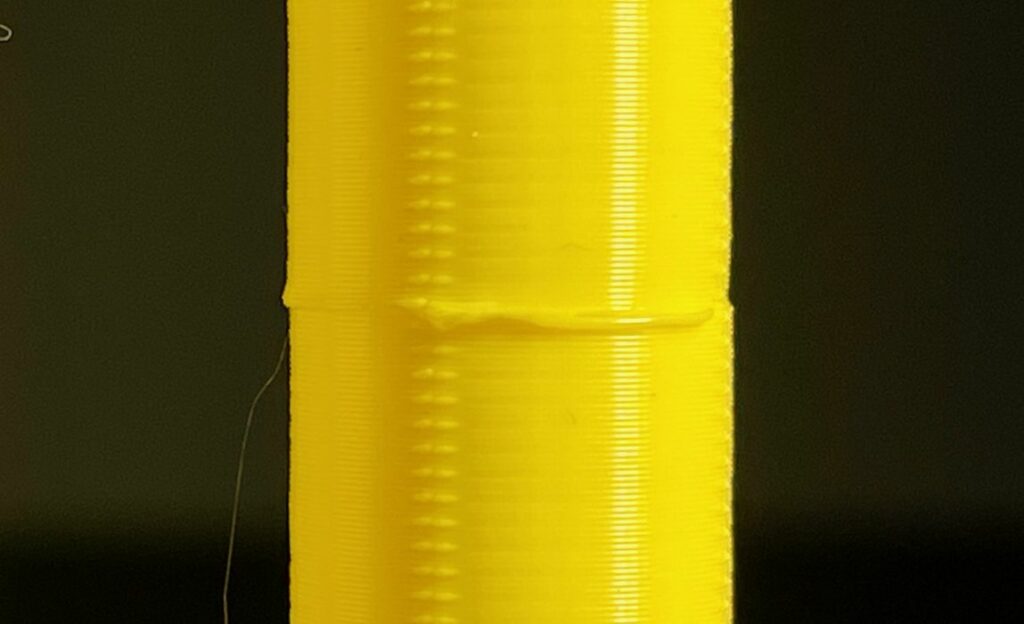
Here we had a case where the resumed print seemed to have missed part or all of a layer. The print completed, but that area of the print was definitely weakened and could easily break. For a mechanical part expected to undergo stress, this is a non-starter.
There are other problems with power recovery.
One issues is melting. When the power stops, the heat of the hot end does not. It naturally cools and there is a length of time when it is still hot enough to melt the thermoplastic. If the hot end just happens to be positioned on the surface of the 3D model when power drops, you might get a large melted zone. That could compromise print quality.
It’s also possible that the print may fuse to the cooled hot end.
Another issue is blobbing. When the power fails that heat in the hot end will also allow for material in the hot zone to drip out, causing blobs. Again, if they are on the exterior surface of the object, print quality could decrease.
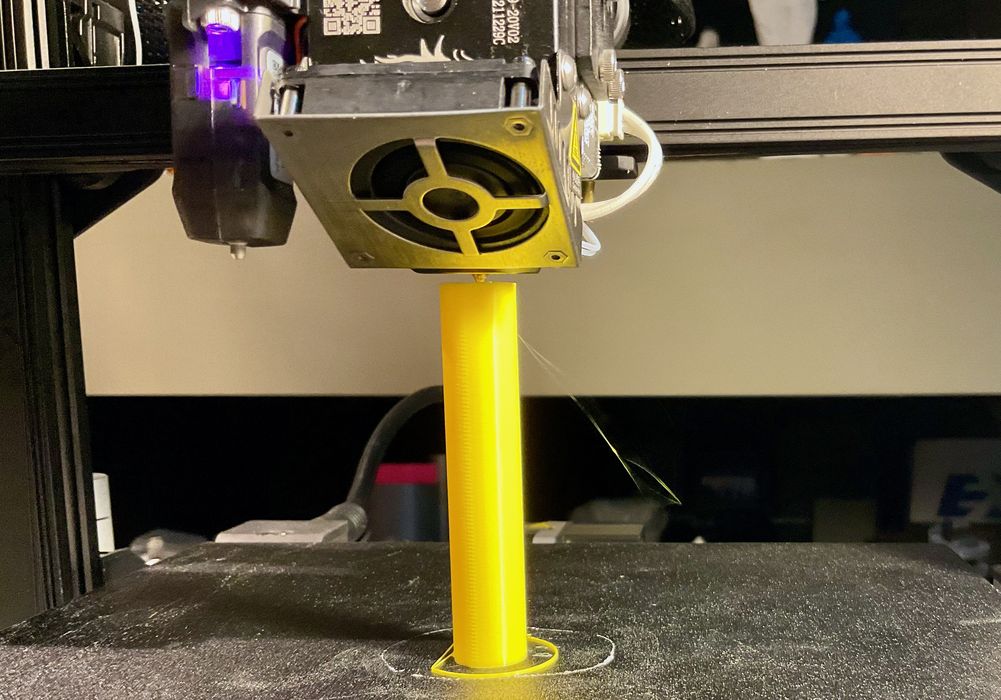
One more issue is stringing. When the print resumes the printer should do a bit of a test extrusion to replace the material that presumably dripped out. But it can’t do this on the print, so the toolhead must move to the side and run the extruder motor sufficiently long to ensure there’s material flowing.
Inevitably this results in a long string of material hanging from the nozzle. Normally test extrusions are done on the print plate, but this can’t be done on a power recovery because the toolhead is already high up and can’t lower without hitting the partially printed object.
The result is that the long string of material hanging from the nozzle is carried onto the print where it is fused somehow into the geometry. Usually these are easy to remove, but not always.
There’s also the problem of where, exactly, to resume printing.
If the power failure occurred while the toolhead was in motion but not printing, no big deal. Just resume that movement.
But if the toolhead was depositing material, where exactly do you start? Do you assume that the extrusion sequence of the final GCODE executed was completed? Or do you do it over again? Either choice could be bad, resulting in extra material or gaps.
Finally, there’s the problem of temperature. When the print stops, the object could entirely cool down if the outage is sufficiently long. Depending on the material type, that could result in a bit of shrinkage. In other words, a tall object might be slightly less tall, and there could be a gap formed when the print resumes.
You might think that the restored print job might heat the object back up, but most printers simply wait for the print surface to get to the target temperature, and don’t allow time for that heat to seep up the partial print and restore the precise thermal conditions during the failure.
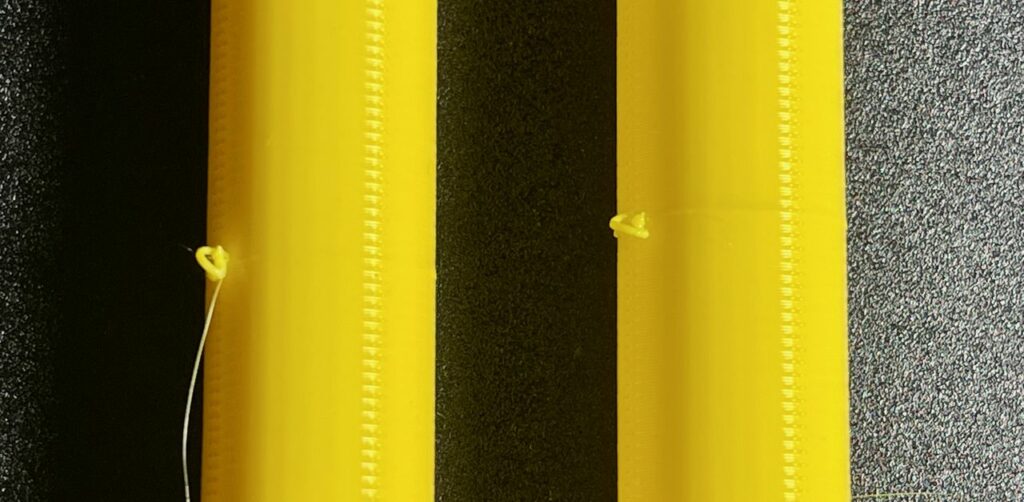
This doesn’t happen all the time. Here you can see two power failure tests with the same machine and material (PLA). On the left was a machine that was restarted immediately, before any thermal shrinkage could occur, and on the right is a recovery from an outage that lasted several hours and completely cooled down the print.
As you can see there’s little difference between the two, although each have a blob caused by the aforementioned factors. I believe this worked correctly because of the nature of the model and material used in the test, because I’ve also seen gaps appear when power fail recoveries are done.
As a result of all this, you can imagine the complications that must be handled by those designing these power recovery sequences. They have to figure out how to do this in a single process that has to handle all situations. Not easy.
The next time your system recovers from a power failure successfully, appreciate the thought that went into the design of that recovery process.
Many Creality printers come with a glass plate coated with a special coating that prints stick to as long as it remains hot. If the power failure lasts more than a few minutes, the current print takes off from the print surface and recovery becomes impossible. Sometimes I measure the height of the printed part, go back to my modeling software to recut the model and restart a print of the missing part.