
There are more 3D printing processes available today than ever, but each has at least one major challenge.
I’ve often said 3D print processes should be treated as a kind of toolkit: select the right tool for the job. That’s because each process has its advantages and disadvantages. You try to avoid the disadvantages by choosing the process wisely. Unfortunately, some persist in trying to use the wrong process in a given situation.
I’ve come to realize that there are plenty of advantages and disadvantages to each process, but usually there’s one key “flaw” that is central to each process. Sometimes that flaw is acceptable for an application, and other times it isn’t. That’s when you go shopping for new ways to make your part.
I’ve compiled a list of the seven major 3D printing processes as defined by ISO, and proposed my selection of the key flaw in each. Of course, there are instances where a 3D printer manufacturer has attempted to overcome the flaw using some innovative technique, but in general these flaws really happen.
Be aware, however, that there are usually even more flaws and challenges with each process, as well as a number of advantages I haven’t listed. And finally, remember a fatal flaw isn’t fatal if it doesn’t matter for a specific application.
Material Extrusion
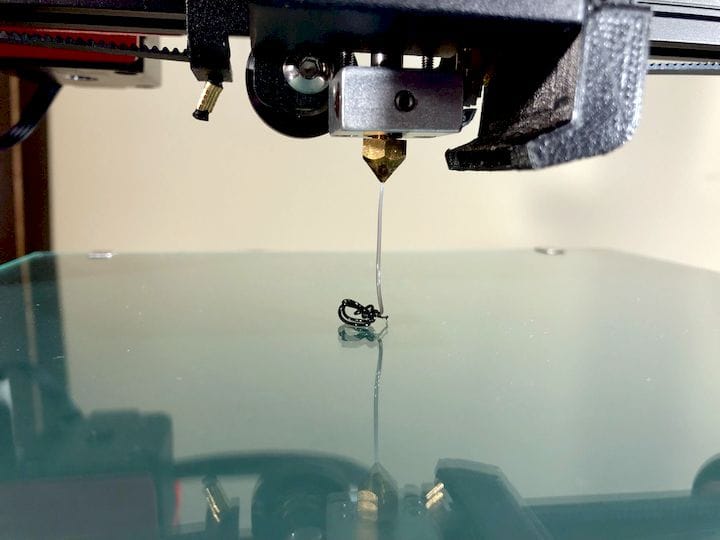
Common processes: FFF, FDM (which is identical to FFF, except it’s the Stratasys trademarked term)
Description: This process involves squirting out a fluid or gel material using pressure. The most typical example of this is FFF’s method pushing a filament into hot end to generate pressure and cause a flow of soft filament out the nozzle.
Fatal Flaw: Bad layer adhesion. The material is laid out in layers, and often by the time the second layer comes around, the first layer has cooled and is somewhat less able to bond with the new layer. This results in parts that are far less strong between layers as they are along the layers.
Some manufacturers attempt to solve this problem with heated chambers, software tweaks or speciality materials, but it’s almost always present in material extrusion prints.
Powder Bed Fusion
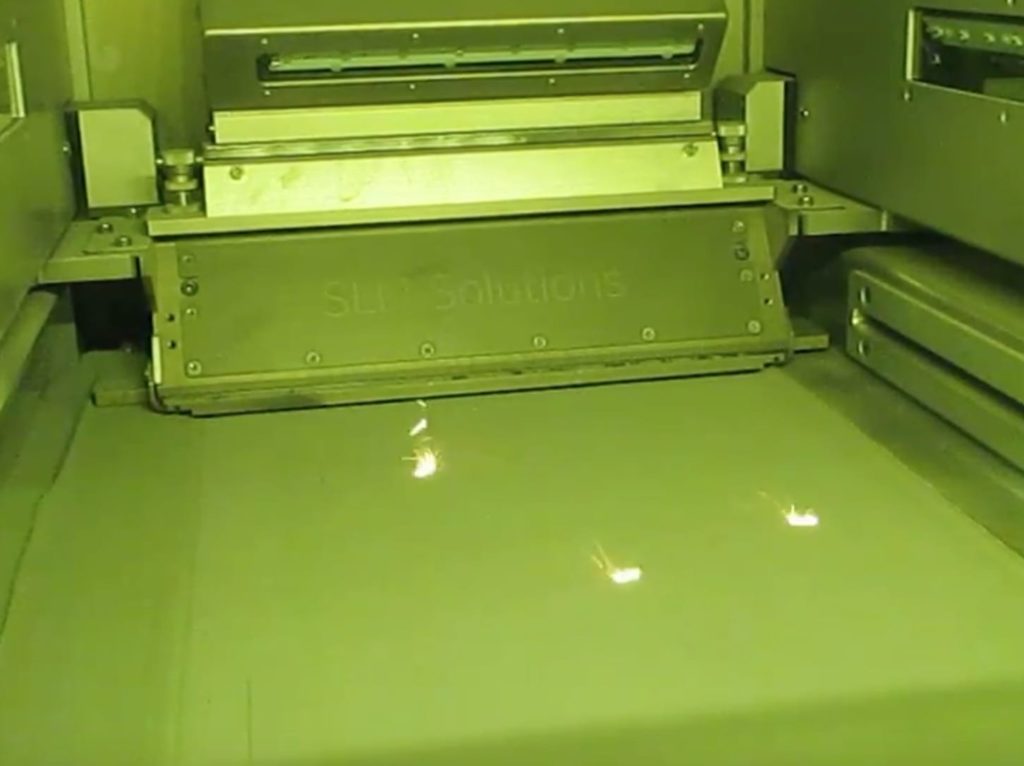
Common processes: SLS, DMLS, SLM
Description: This technique involves blasting high energy, typically from a laser, at a flat bed of powdered material. The laser selectively solidifies portions of the bed, and the process repeated, layer-by-layer.
Usually the laser is a physically large component, so it is mounted in a static location, and tilting mirrors at the top of the build chamber direct the beam downwards toward the powder bed.
Fatal Flaw: As the area of the powder bed increases, the angle at which the laser strikes the powder surface becomes increasingly oblique. This results in non-uniform melting as the “dot” shape changes, as does its per-area energy, potentially messing up the print at the edges.
The solution some vendors employ is to raise the laser higher and higher to decrease the oblique angle, resulting in massively tall 3D printers. Others use multiple lasers or even move the laser source itself to keep it directly over the bed.
Vat Polymerization
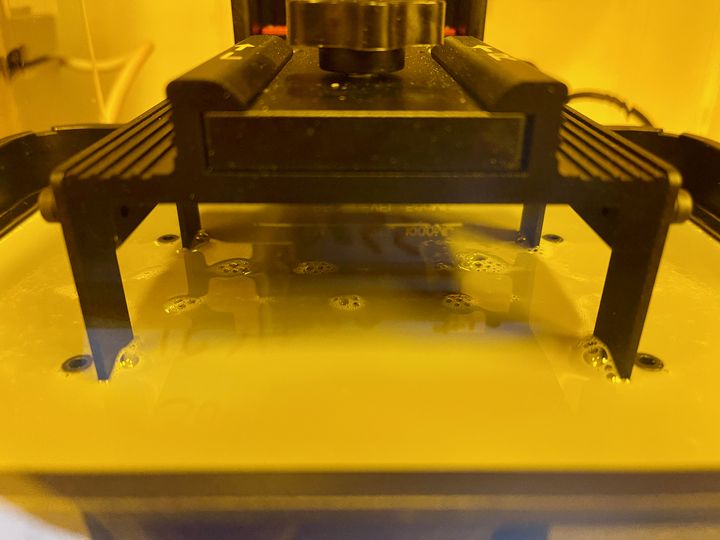
Common processes: MSLA, SLA, DLP
Description: This process involves selectively exposing photopolymer resin to energy, typically UV light from a laser or LED panel. Layers of solidified material are built up on each other to gradually form a 3D object.
Fatal Flaw: UV light is almost always used to cure the photopolymer resin, and that works correctly. However, after the parts are taken out of the printer they can be exposed to additional UV light from other sources, most prominently the sun.
This additional UV exposure can cause the material to continue to cure, and eventually the material can crack as it distorts. This makes this type of part often less durable, especially for outdoor applications.
Some manufacturers attempt to overcome this issue with specialty resin mixes.
Material Jetting
Common processes: PolyJet
Description: This process involves selectively jetting liquid photopolymer resin from inkjet-like nozzles, layer-by-layer. Each layer is cured by a pass of UV light, and subsequent layers are built on top of the solidified material. Support material is used to handle overhangs.
Fatal Flaw: Such systems involve a “plumbing” set up to flow resin from its source cartridge to the inkjet heads. In the event that the material needs to be changed, the entire plumbing system must be flushed out to remove any trace of the old material.
The flushing is done with the new material. This means that you are effectively dumping quantities of expensive resin each time you change materials.
Binder Jetting
Common processes: MJF, NPJ
Description: This technique involves using inkjets to selectively drop a type of binder on a flat bed of powder. Areas receiving droplets are to be solidified and the rest of the powder remains loose. This progresses layer-by-layer until an entire object is produced.
Fatal Flaw: These processes typically require a post-printing treatment to engage the binder. In some cases tremendous heat is required to activate the binder, and that heat can take a very long time — sometimes up to a day — to cool down before further processing can be attempted without distorting the parts. This can be a drag on machine throughput. This is why some vendors produce swappable build chambers; while one is cooling, another can be activated for a second print job.
Direct Energy Deposition
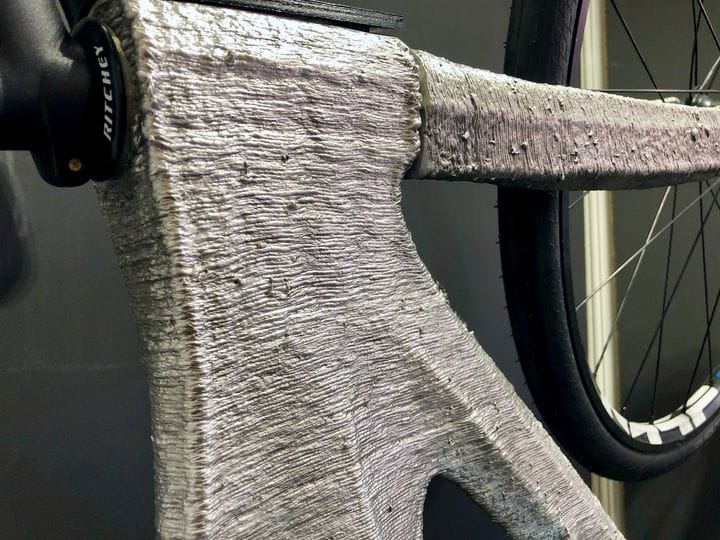
Common processes: DED, WAAM
Description: This approach involves extruding a metal, either metal powder or metal wire, whereupon it is immediately struck by high energy. The energy melts the metal and the meltpool drops immediately to the position in 3D space where the operation took place by means of robotic arm.
Fatal Flaw: While generally efficient and highly scalable, DED almost always results in rather poor surface quality resolution. Prints tend to look quite coarse. Some manufacturers add in CNC milling tools to smooth the surfaces during or after the print takes place.
Sheet Lamination

Common processes: CleanGreen, Solido
Description: This process requires sheets of material to be laminated together, one-by-one. As each sheet is applied, a cutter slices off the perimeter of the shape of the object at that layer height. After printing completes, the sliced areas are pulled away to reveal the final part.
Fatal Flaw: There are some geometries where the waste material becomes trapped inside the object and cannot be removed. This limits the possible geometries that can be successfully 3D printed with the process.