
3D scanning can appear to be complex, but there are actually only a few standard steps required.
I’ve used multiple 3D scanners, and each tends to come with its own software to control and process the scans. The software is actually the most complex part of the process, as the scanning is usually a straightforward affair.
One very common issue with most of the 3D scanning software is that there are different terminologies, confusing interfaces and a lot of mystery involved. In almost every software tool I’ve tried, I’ve been initially baffled by the workflow.
In this post I’m going to explain the fundamental steps of 3D scanning that must happen in each scanning workflow. By understanding the basics, you might have a better chance of understanding what’s actually going on when you use these scanning tools.
Note that here I’m talking about the workflow for non-photogrammetry 3D scanning, where you have a physical 3D scanner of some sort.
There are ten fundamental steps in the 3D scanning workflow:
- Calibrate
- Scan
- Scan again
- Align
- Fusion
- Meshing
- Texturing
- Editing
- Simplification
- Export
3D Scanning Calibration
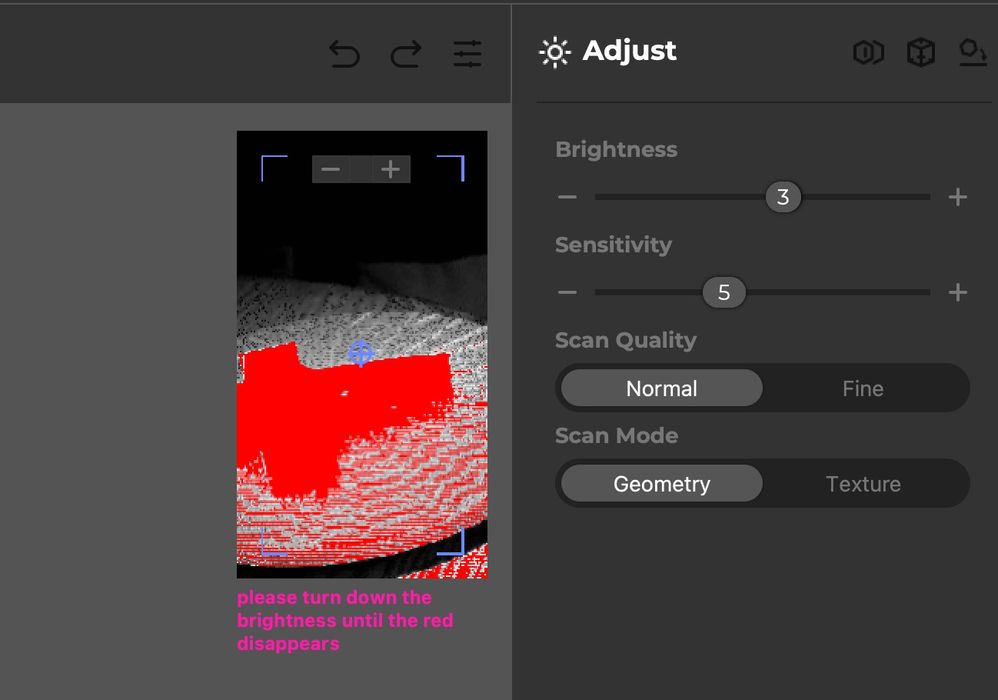
After one sets up the hardware, which may involve cables, PCs, tripods, turntables and other accessories, the initial stage is to calibrate the configuration.
This is sometimes done by using a standard target object where the device and software registers its settings. Sometimes you’ll be asked to move the target around to obtain the proper calibration.
Certain turntable systems require you to run the scanner against an empty turntable to calibrate the system. This also enables easy subtraction of the table from the scan later on.
3D Scanning
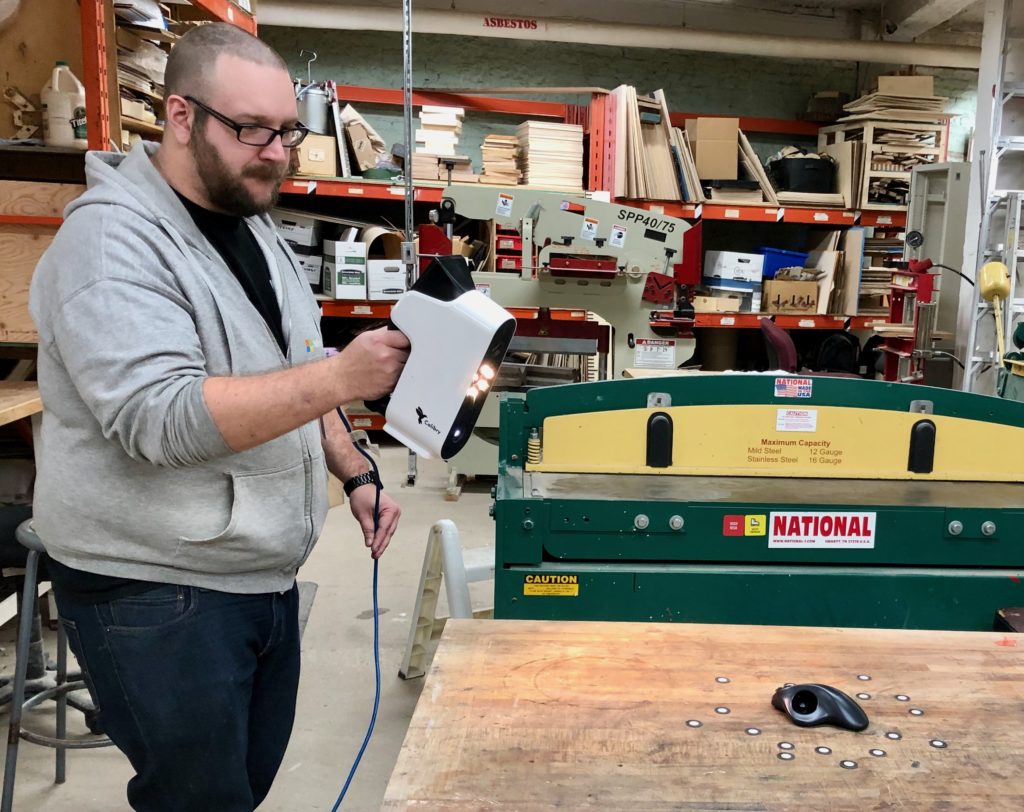
The actual scan takes place after calibration. Here the trigger is struck, and the scanning begins. You might have to wave a handheld scanner around the object, or perhaps wait for a turntable to rotate fully.
This must be done carefully to ensure all surfaces are scanned. Good software will provide feedback in real time showing what’s been scanned for the operator.
Also important will be the distance to the subject. Most scanners will have an effective zone beyond which (too close or too far) the scan won’t register. It’s important to sweep this “3D scanning sweet spot” over the surfaces of the subject.
3D Scanning Again
While the steps above are obvious, now it gets more tricky. Often a scan takes place, but the bottom of the object is missing because you can’t scan underneath an object.
The solution is to do additional scans. Typically the object is reoriented, perhaps turned upside down, and scanned again. The idea is that you’ll later combine the two scans together and thus join the top and bottom. Sometimes you’ll need several scans to capture the entire object.
3D Scan Alignment
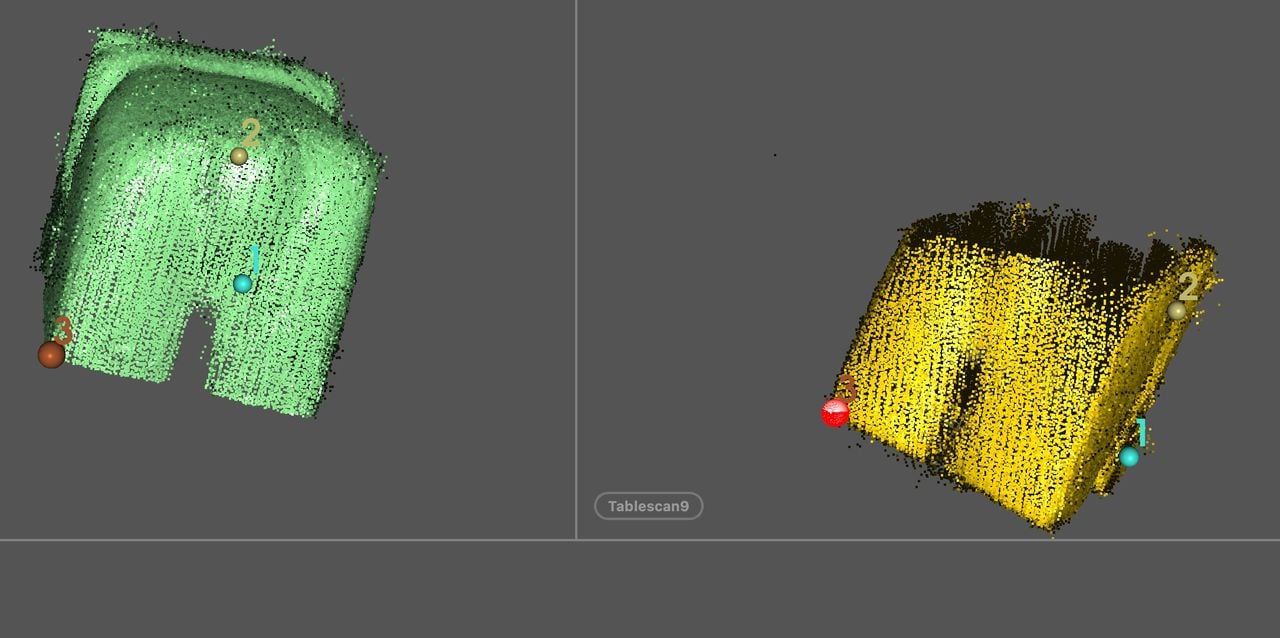
At this point you’ll be “aligning” the multiple scans that you’ve previously collected. This step is not required if you have only one scan, and that explains why some software tools have confusing workflows: you may or may not need to do alignment.
The alignment process usually involves selecting three separated points on a scan, and then matching these three points on the second scan. The software then “joins” them together and refines the alignment automatically. This can be done for multiple scans, joining one to the next and building up a whole 3D model.
3D Scan Fusion
Fusion is the process of putting the scans together after alignment. The scans may be slightly off for various reasons, so this is not as straightforward as pasting them together. There may also be stray scan points that don’t make sense and here some of them will be culled.
3D Scan Meshing
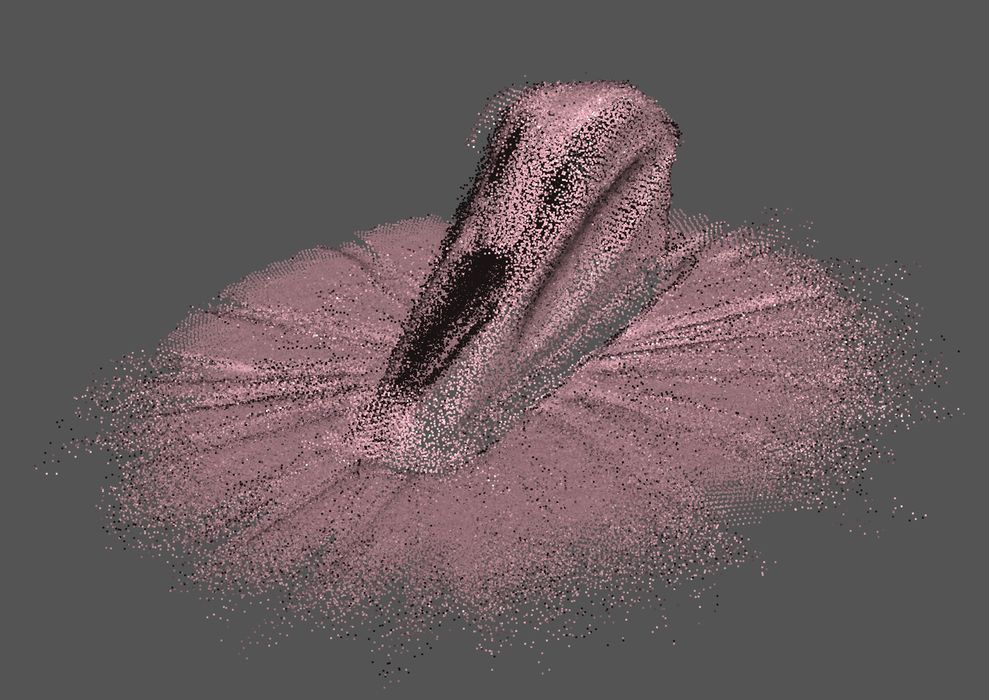
Up until this step you’ve been working with “point clouds”. These are simply points in 3D space representing where the scanner detected a solid surface in 3D space. While the scan might appear to be complete, if you zoom in with the software tool you will see that it’s really just a bunch of points.
Meshing is the process of transforming these points into a surface. Triangular surfaces are identified by selecting three adjacent points. These are made consecutive and thus you have a surface made of triangles (this is basically STL format). Unfortunately, the scan will no doubt have “holes” where the scan missed parts, and repairs will have to be made later.
3D Scan Texturing
Texturing is the process of applying a full color texture to the generated scan surface. Some scanning systems take intermittent color images during the scan process, and these are “projected” onto the surface from different angles to gradually develop the true textured surface.
Texturing is optional if you’re only interested in the object’s geometry.
3D Scan Editing and Repair
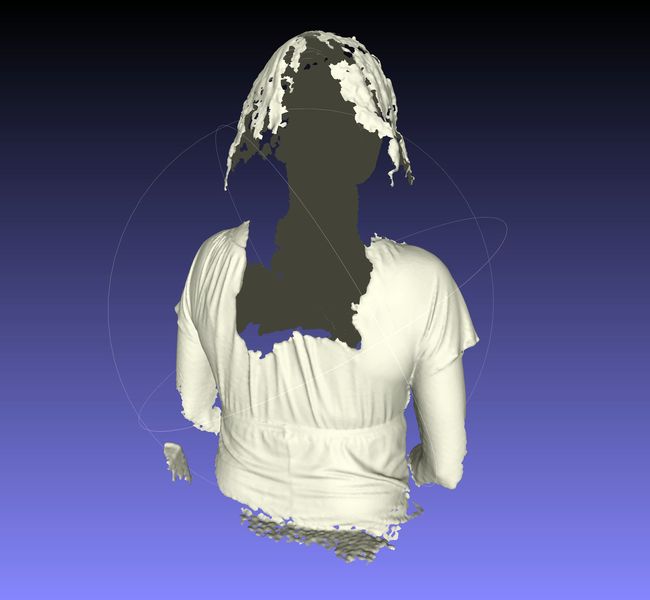
3D scans almost always require editing and repair at this point. There will be holes, as mentioned previously, which have to be filled in to create a manifold object suitable for 3D printing.
There will also be extraneous material. Often you’ll see weird blobs floating nearby that are scan artifacts. These should be clipped out.
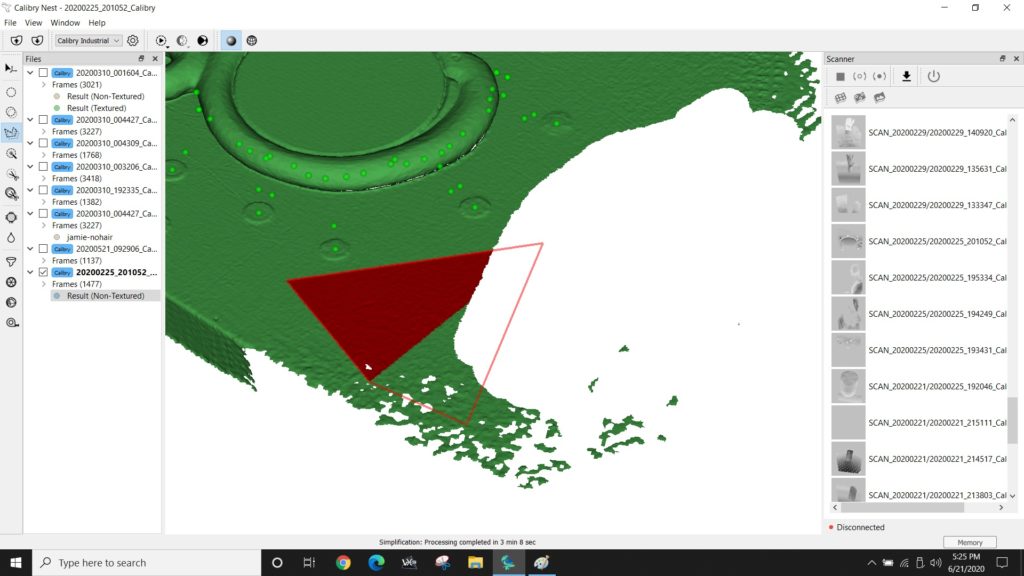
A very common effect is to capture the table, floor or surface on which the object sits. This must be cut off, usually with a “plane cut”. Sometimes software tools do this automatically, but often they don’t.
There may also be rough spots that were poorly scanned, and these should be smoothed out.
You may also have to reorient the scan so that it is right-side up. I’ve also encountered situations where the subject was standing on a sloped floor, which I didn’t notice until editing.
This step is all about cleaning up the scan.
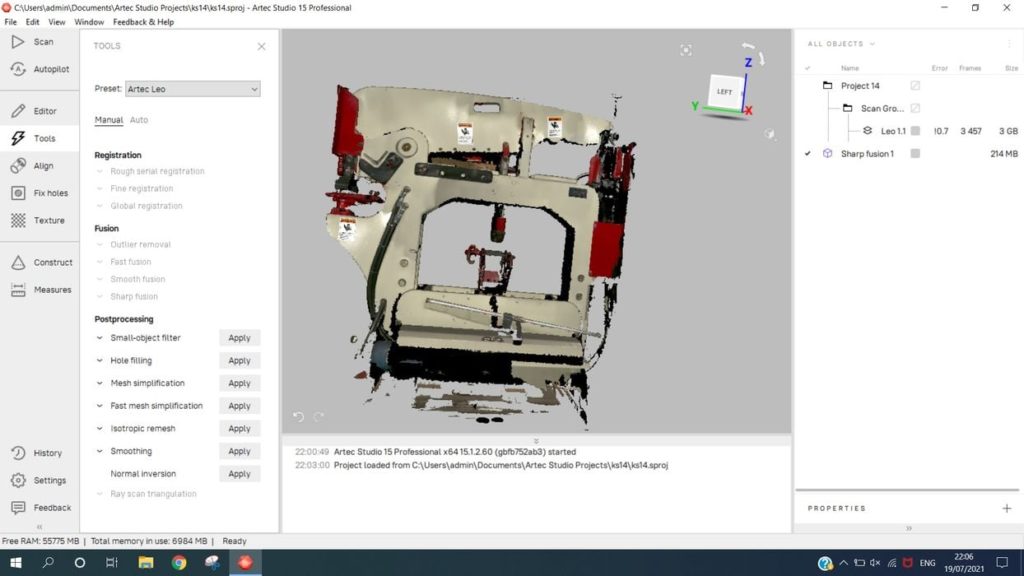
3D Scan Simplification
Simplification is the process of reducing the number of triangles that make up the surface. Scanners can capture enormous numbers of data points that translate into hugely complex and massive STL files. These are often problematic for slicing and other processing, and should be simplified. The simplification, if done properly, would not notably affect the quality of the 3D model.
3D Scan Export
Finally, when this is all done you must export the 3D model. Usually for 3D printing you will use STL format, but sometimes you can use 3MF, too. If you want to export a 3D model with the color texture, you can try OBJ format.
And there you have it: all the steps required to perform a scan with a 3D scanner.