

Autodesk has found a method to dramatically speed up certain types of 3D prints on their Ember resin-based 3D printer – and these adjustments might work on other resin 3D printers, too.
The problem facing virtually all laser and DLP-based resin 3D printers is one of speeding up the process, currently limited by two issues:
- UV light is shone through a the bottom of a clear tank to cure a layer of resin, but unfortunately the cured resin also sticks to the tank, requiring a method of unsticking that often takes much time
- Upward motion of the print to clear space for curing the next layer during a print requires the often viscous liquid resin to fill in the gap. However, depending on the geometry of the part, suction forces slow this movement significantly.
Several companies have overcome the first problem through various means. Some, like Carbon and Autodesk, use ways to introduce a very small oxygen-rich layer in the tank that inhibits curing, thus no adhesion. Other approaches involve applying a layer of non-stick material on the tank surface, and another approach I’ve seen is to use low-power to cure the resin, which turns out to be insufficient to also stick to the tank.
Ironically, the companies who have overcome the first problem (tank sticking) have run into the second problem (suction) when they try to crank up the speed, which is no longer limited by the tank adhesion. It seems that the resin can’t flow quickly enough to keep up with the layer curing.
However, Autodesk has a solution for this, which they’ve made available for their Ember resin 3D printer. It doesn’t involve a hardware change, but does require a materials change, a model change and a software change.
Here’s what they do:
- Drastically reduce the “footprint” of each layer of the 3D model by transforming solid areas into a lattice
- Use a new resin formulation that is less viscous and flows more easily, reducing suction effects overall
- Print the first few layers in the usual manner, because the big, flat print plate cannot avoid the suction problem when it’s so close to the tank bottom
- Once the print plate is free from the tank bottom, print the remainder of the object without the time consuming tank rotation process
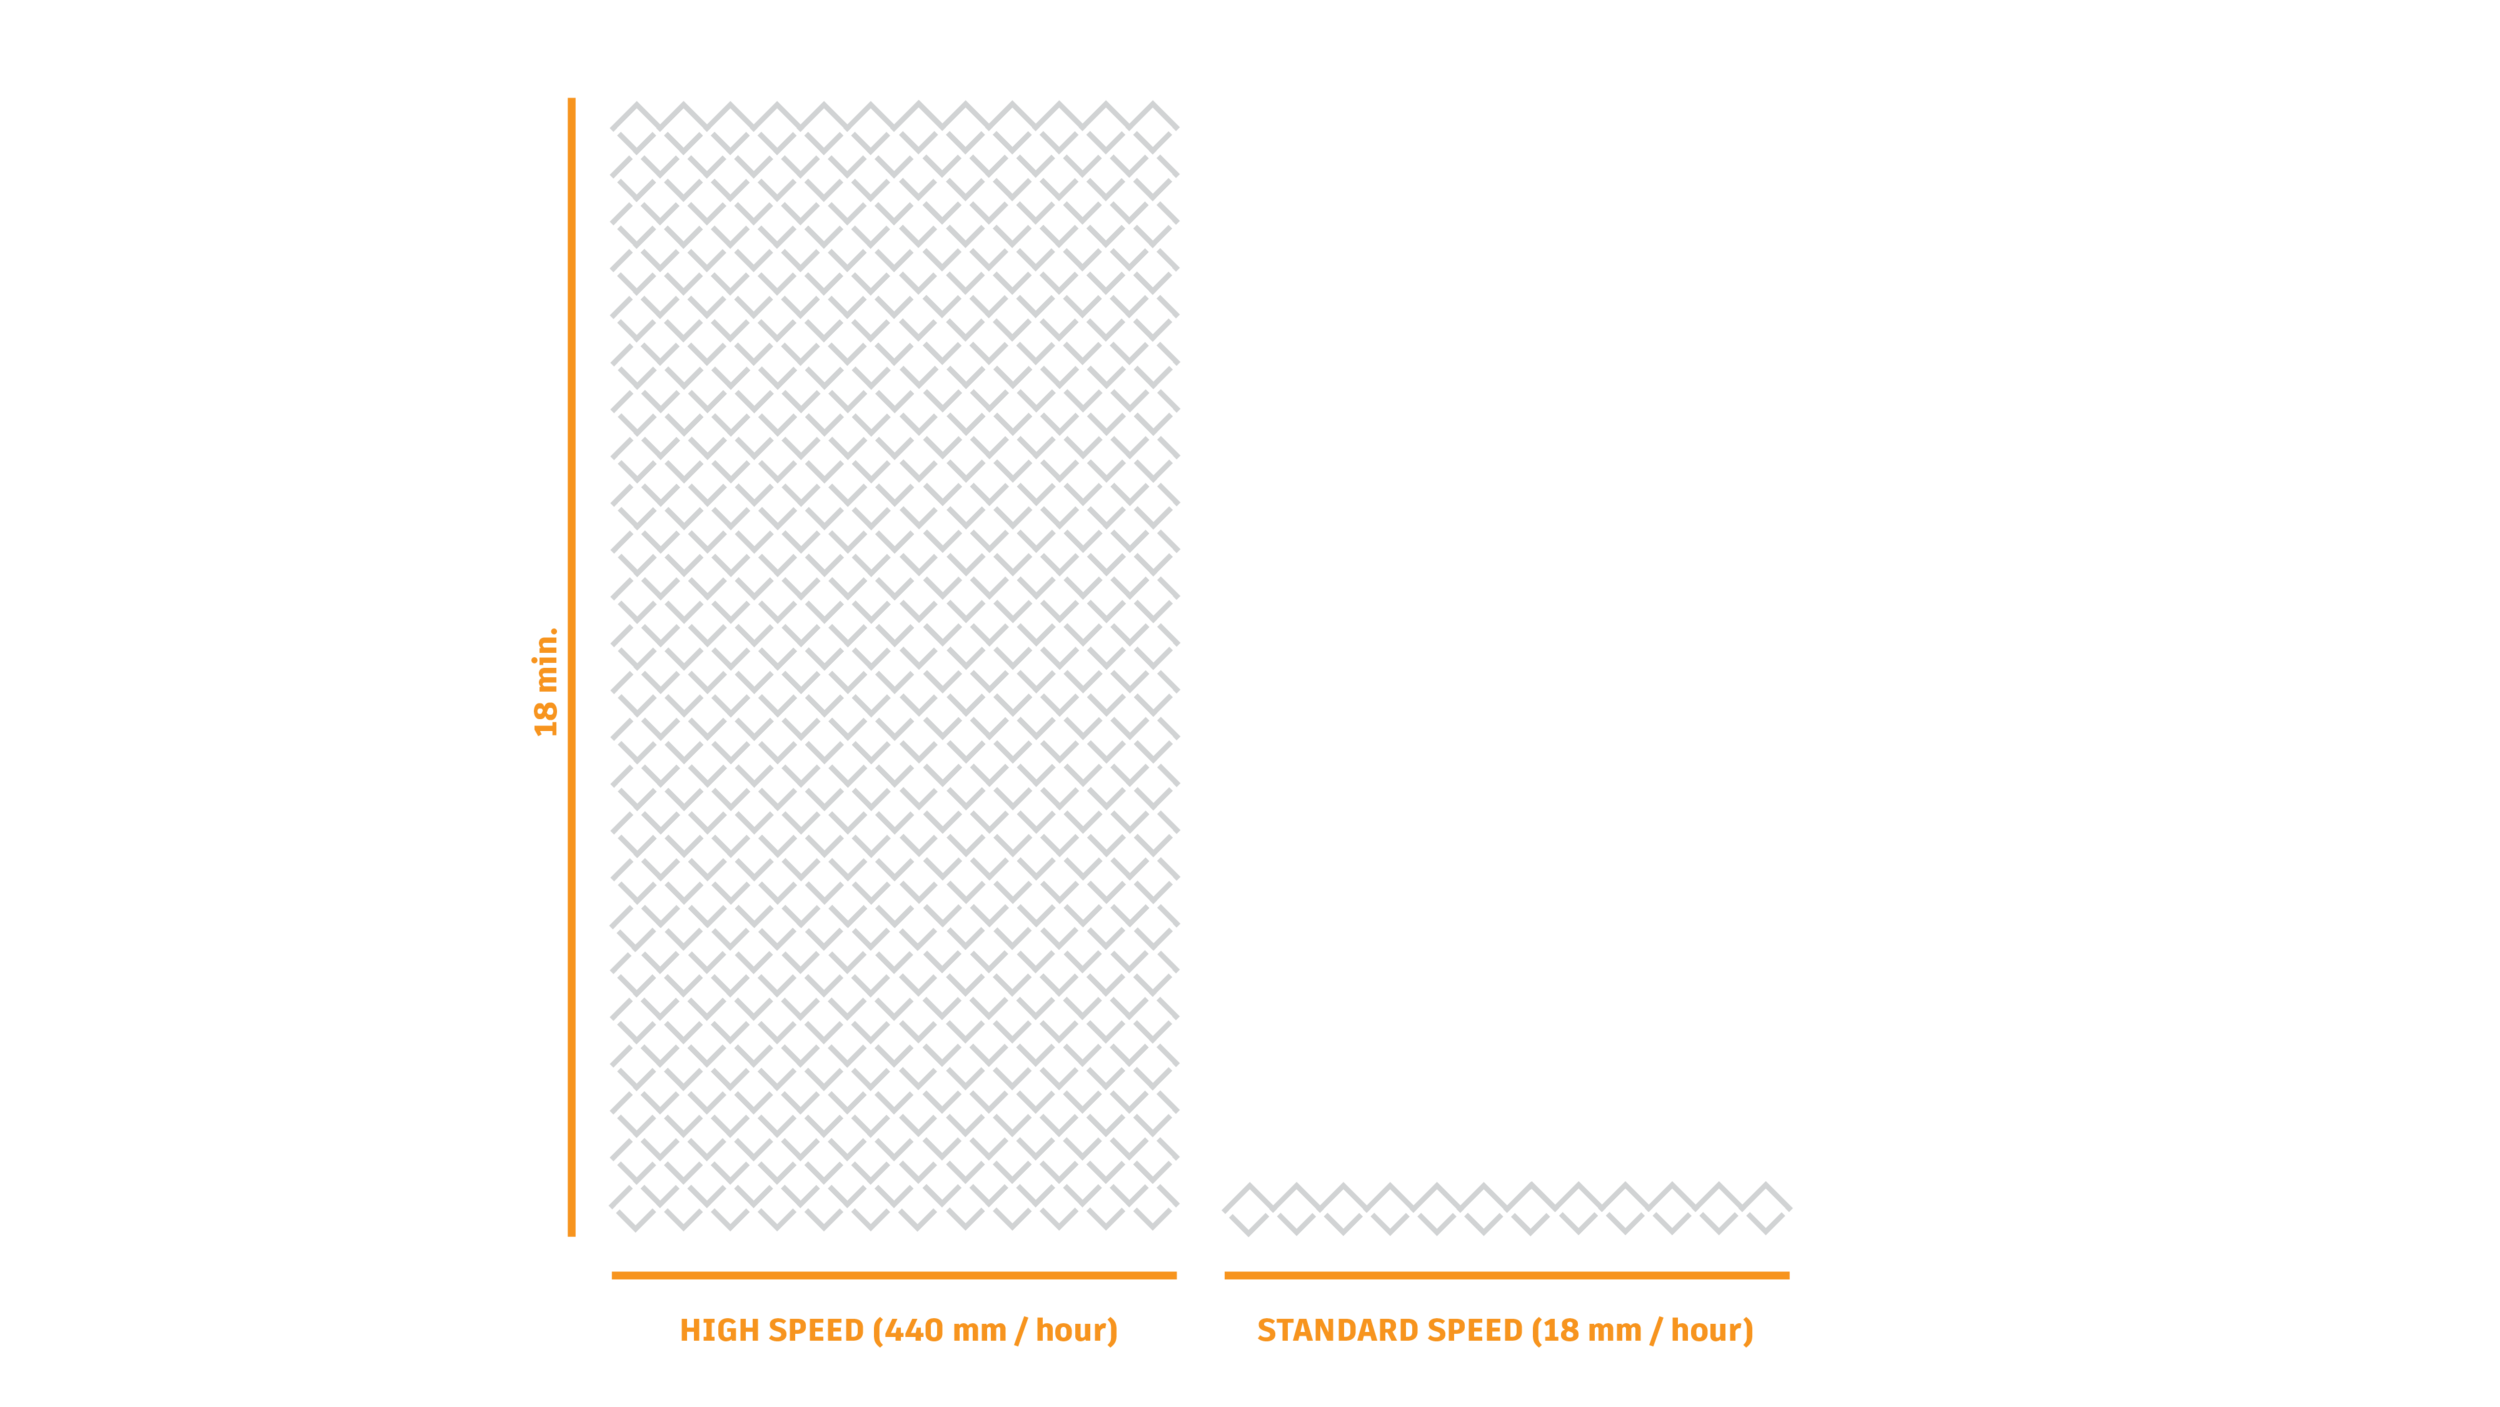
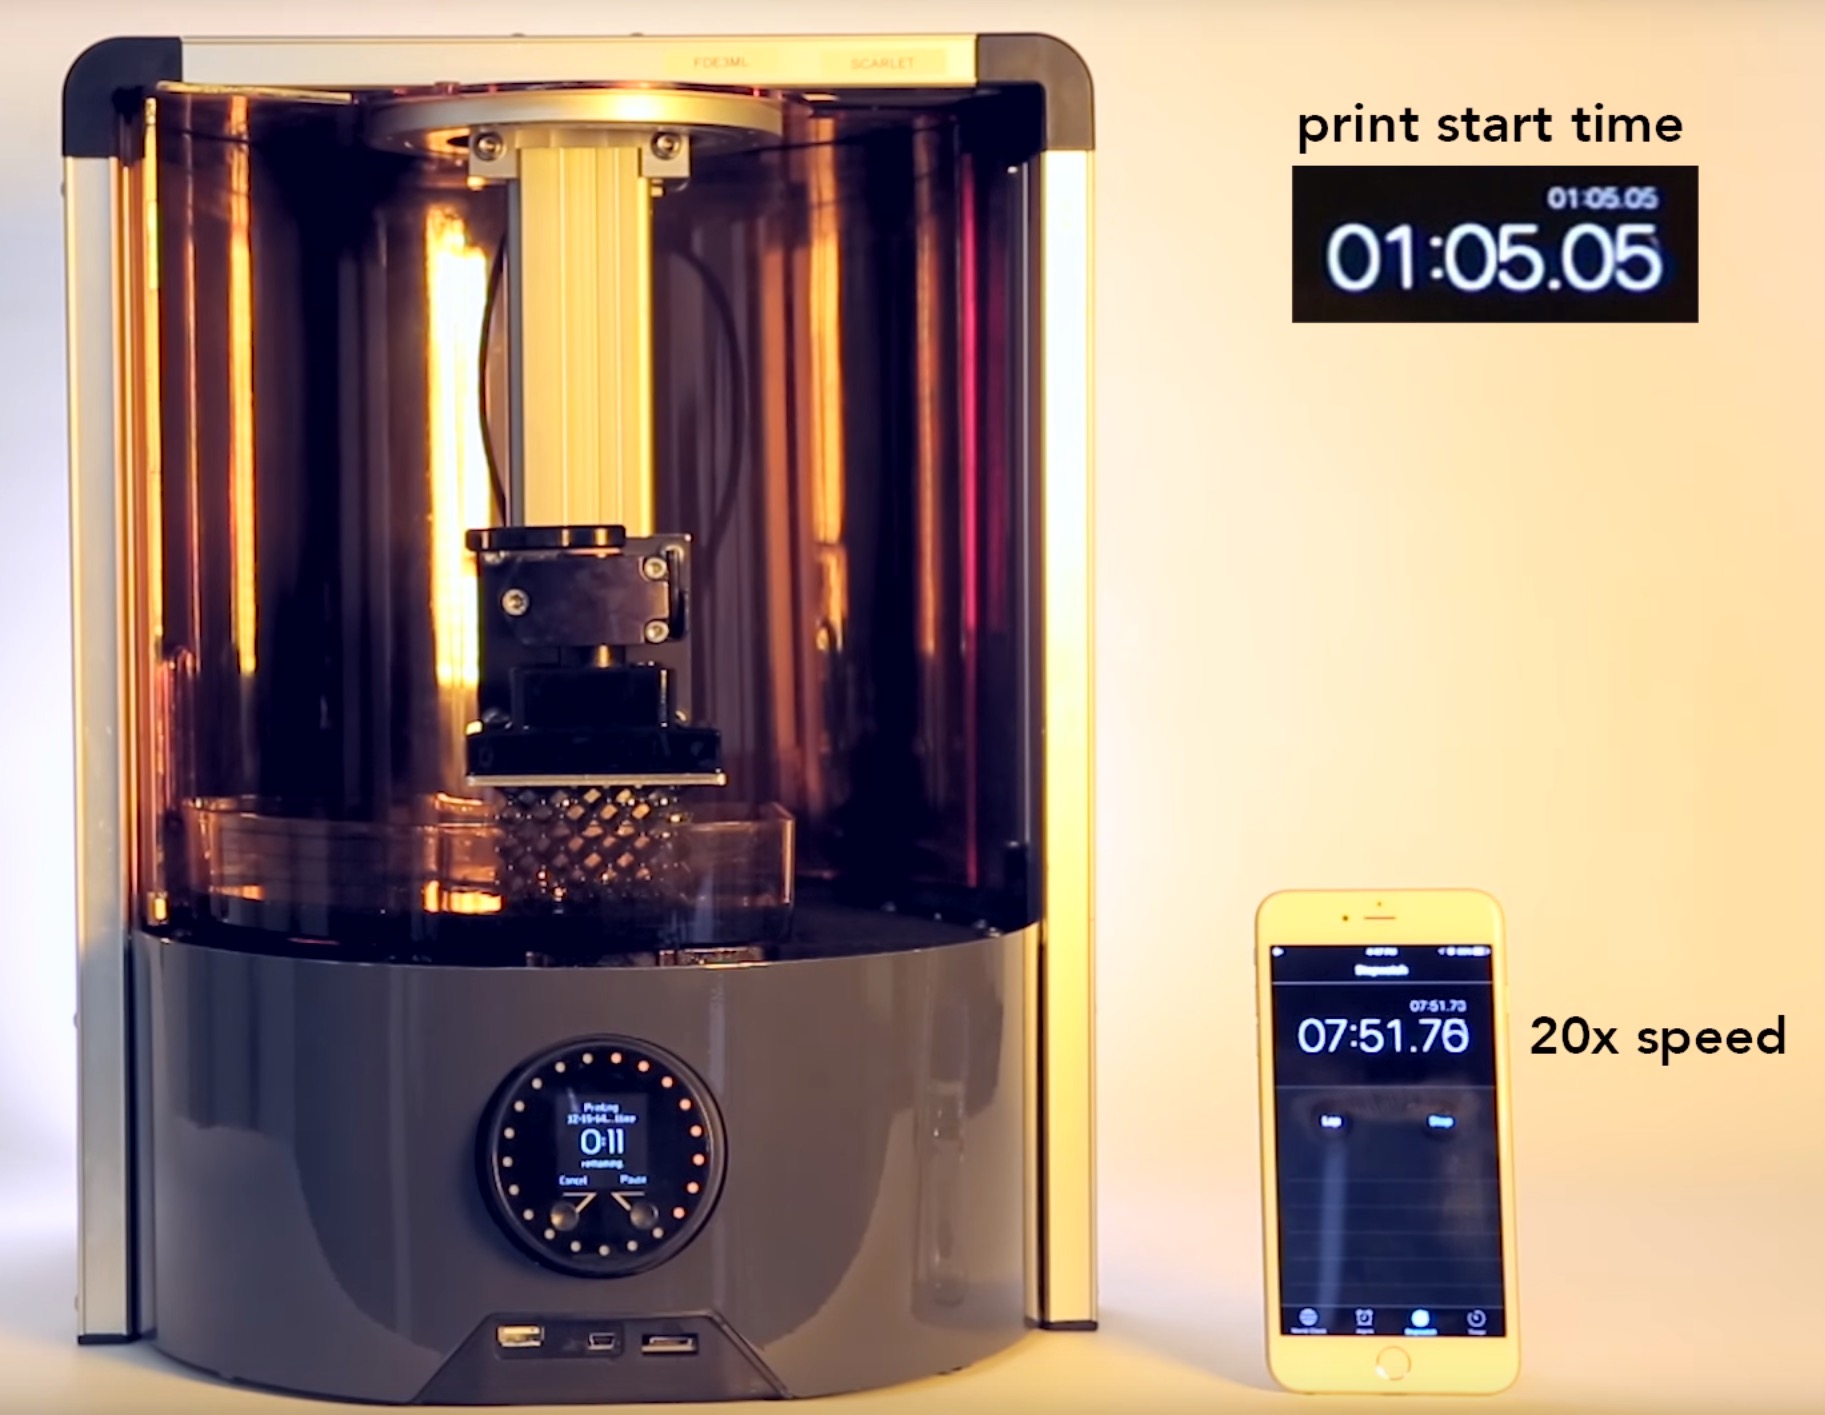
This, according to Autodesk, should speed up print speeds to a startling 440mm per hour. Wow! Here’s the video showing how it works:
There are some specific steps to take to get this going, which Autodesk has chosen to deploy as an Instructable, link below.
But note carefully: The effect is only usable for objects that can be transformed into suction-immune lattice shapes. Autodesk has provided a utility to do so, but for some prints, particularly those requiring strength, this approach really isn’t a good option.
Another interesting thing: this approach could theoretically be used on practically any other resin-based 3D printer. There’s only four steps, none of which are unique to Autodesk. Even the new Autodesk resin could be used in other 3D printers.
Via Instructables