

This is part three of a series describing practical methods of capturing 3D scans of museum sculptures.
I’ve had great success 3D scanning and subsequently 3D printing sculptures from museums around the world, so I thought I’d tell you how it can be done.
There’s much to tell, so this story will be split into several parts:
Part 1: Getting Organized
Part 2: Selecting Subjects
Part 3: Performing The Scans
Part 4: Processing Your Scans
Part 5: Fixing The Models
Part 6: Printing The Scans and Beyond
In this step we’ll describe the actual steps involved in performing the 3D scan. With a bit of care, you should be able to capture spectacularly good scans, even with limited equipment.
The first thing you must do is select the right time and day to do the scan. In a museum, for example, a busy day would see perhaps dozens of people milling around your subject. These folks will no doubt move around and confuse the background imaging of your scan, as we discussed in Part 2. You want to select a time and date when there are the fewest people hanging out at the museum.
In the case of an outdoor scan, it’s critical to select a non-rainy day when lighting is uniform from all directions. While you might think a sunny day is a pleasant moment to scan due to the bright light available, it’s actually not optimal. The reason is that the sun will always cause your exposure to differ as you rotate around the subject. One side will be dark, the other light. Normally this doesn’t matter much in 2D photography, as you usually place the light behind the camera. You cannot do that in 3D photography.
What this all means is that the best outdoor day is one that is completely overcast, where the lighting is uniform in all directions.
There are some lighting concerns for indoor works, if illuminated by spotlights. If you must scan a subject that is poorly lit, then consider asking the authorities if you can plant a temporary light to normalize lighting conditions all around the subject. You could also consider using a flash to do this as well, but many museums will not permit flash photography. Be careful, or you might find yourself on the front steps of the institution.
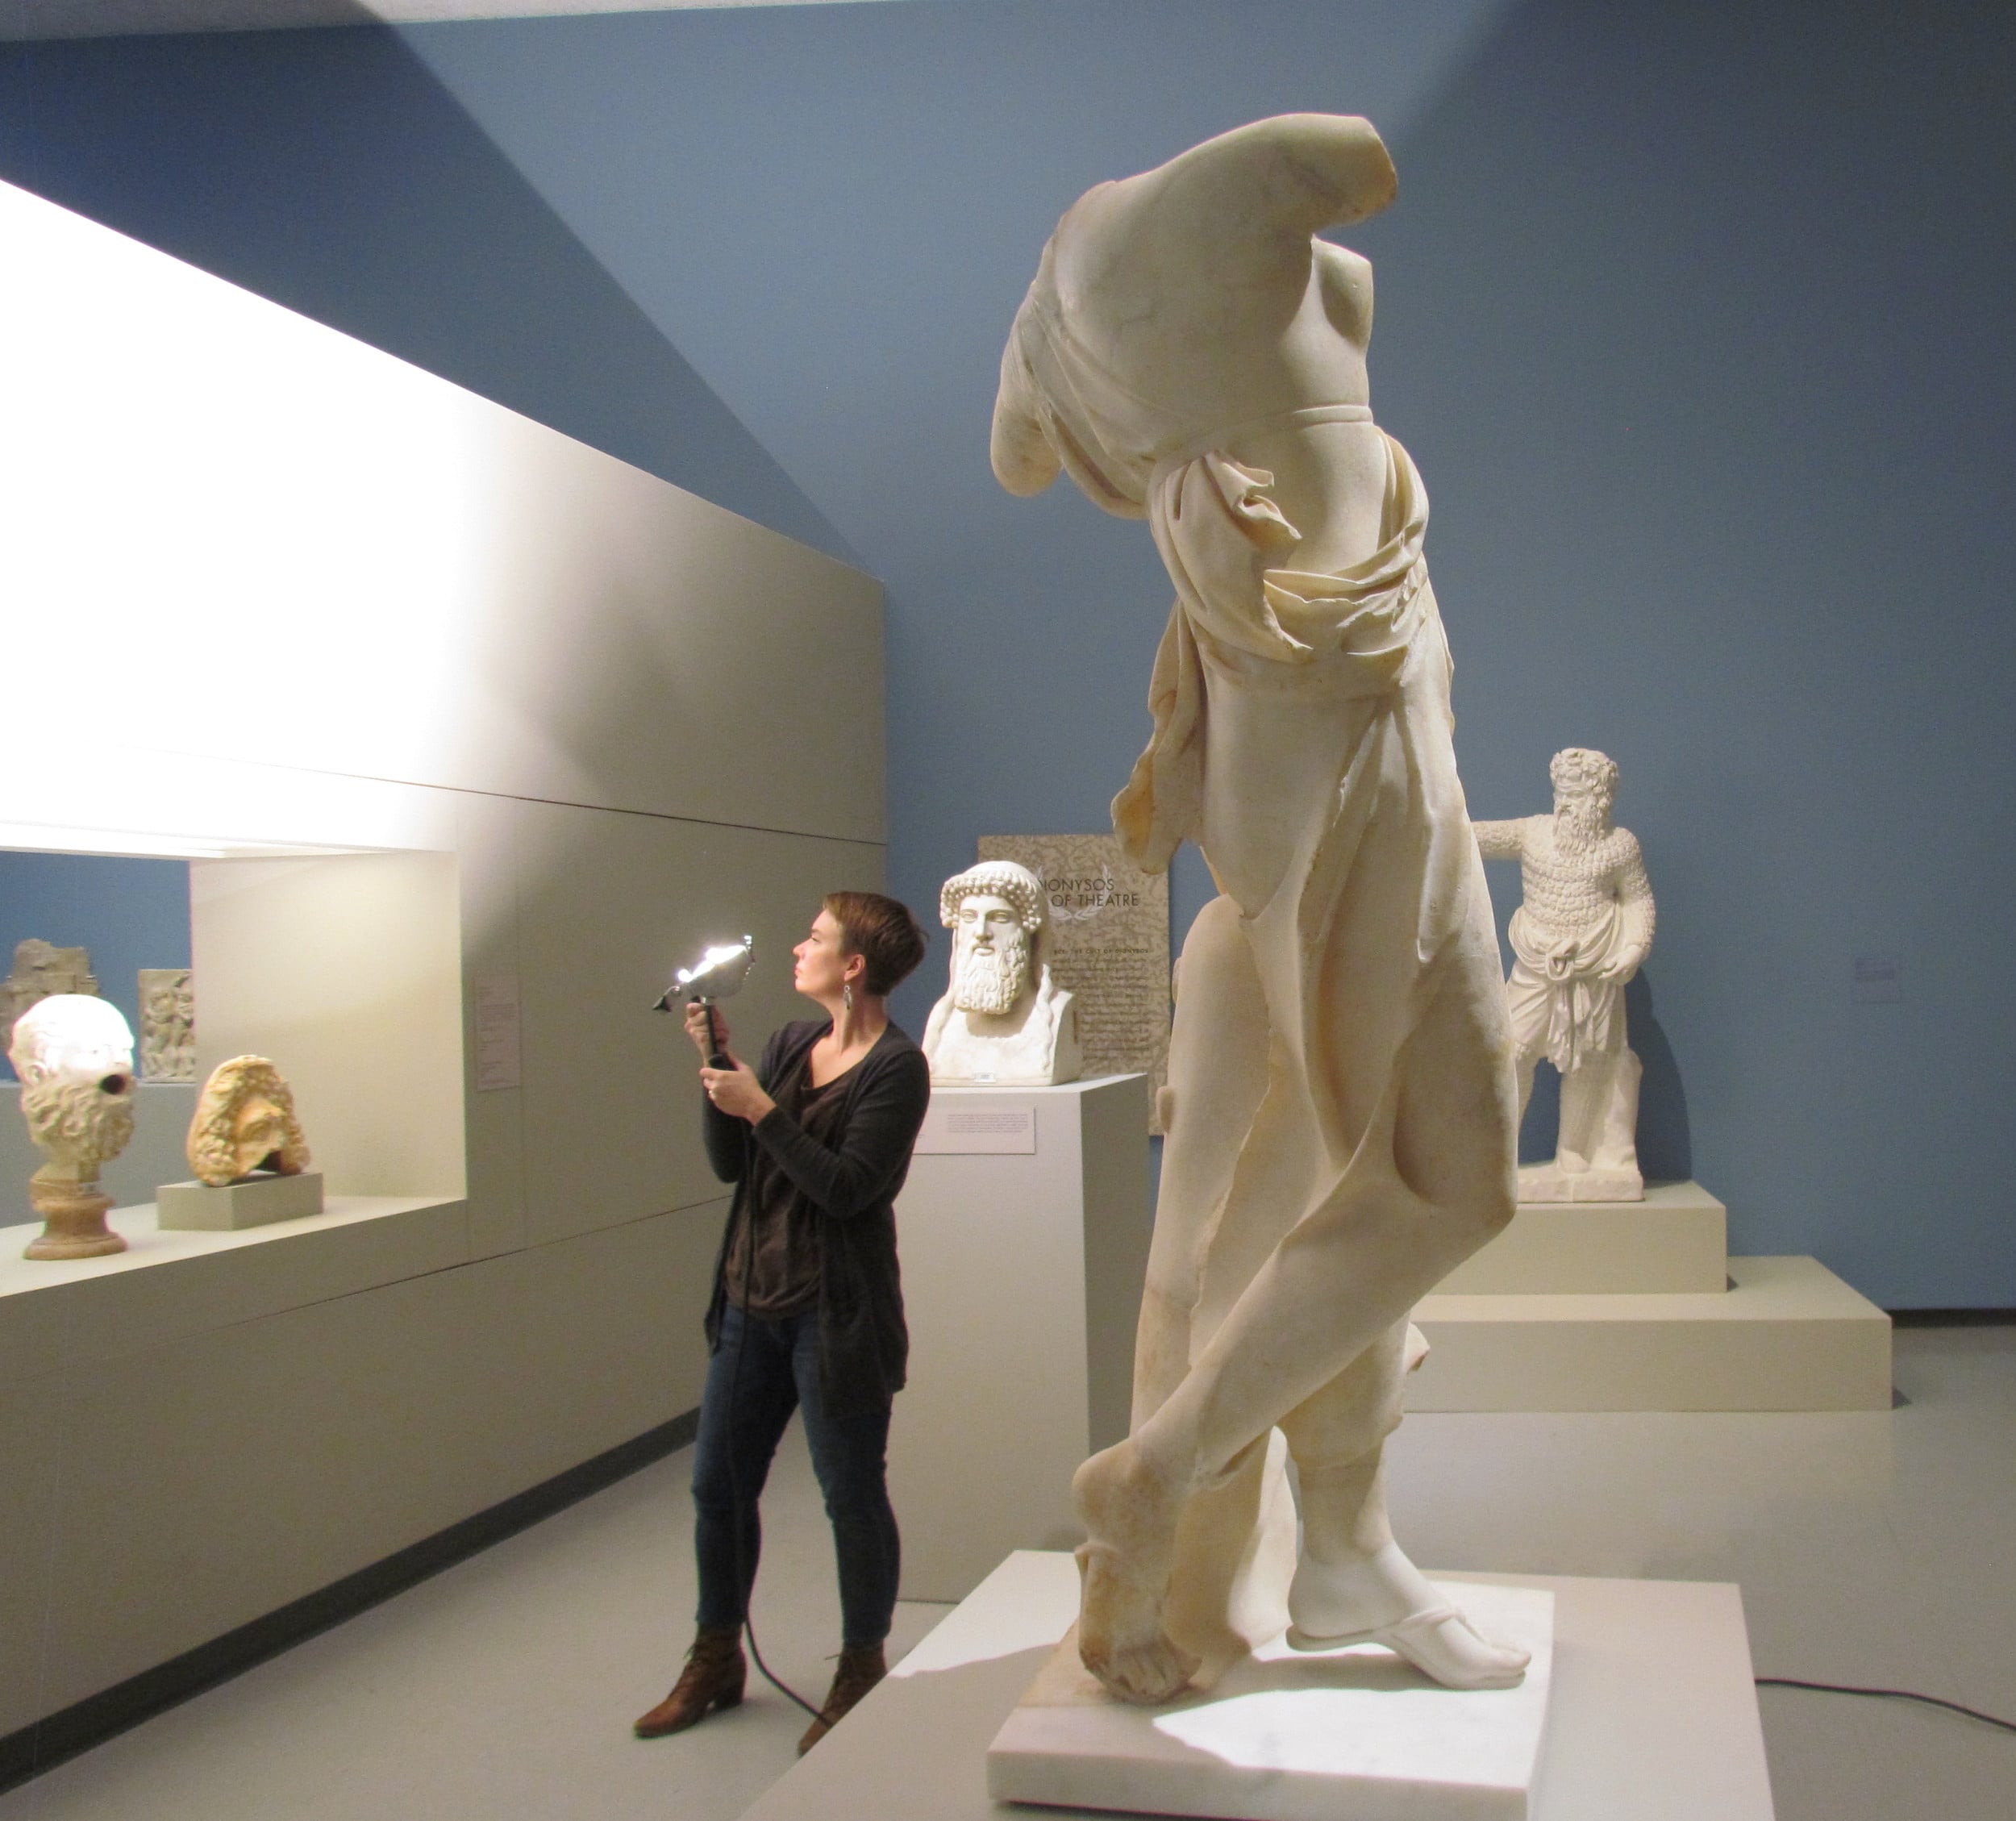
A good trick for doing this is to not illuminate the subject directly, but bounce it off a nearby light-colored wall for diffuse lighting. You may need someone to help you with this. Don’t be afraid to move the light as you move about to ensure proper illumination of each frame.
Now the actual scan can take place. Basically you’ll be taking a progressive series of images around the subject, usually at least 40 are required, as some will be flubs.
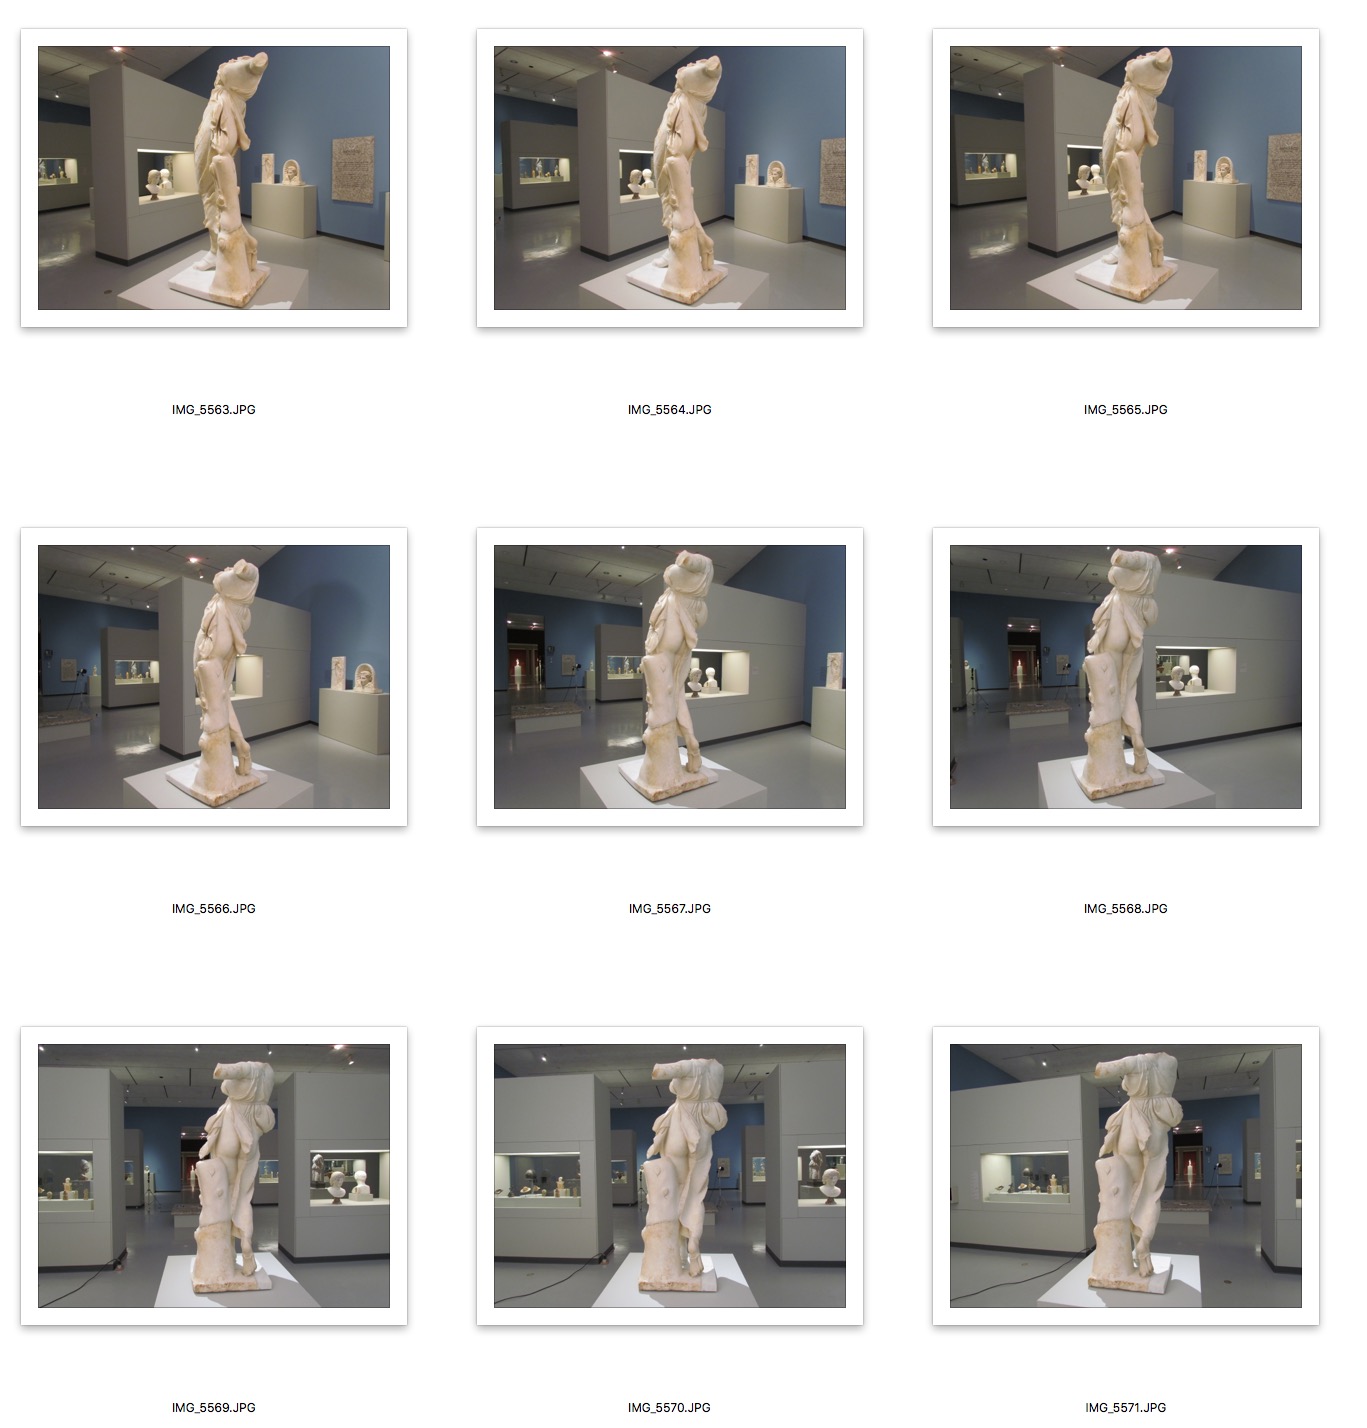
You can use a tripod to ensure perfectly still images, but that can be awkward in a busy museum. Some museums may not permit use of tripods. You can also get benefit from a single-pole stand with your camera, as opposed to a full three-legged tripod. Nevertheless, it is quite possible to take good images with only your hands. Handheld images are taken carefully:
- Face the subject
- Brace the camera if not on a tripod (e.g. pull arms against your body for sturdiness)
- Ensure the ENTIRE sculpture is in the camera’s view
- Focus on the center of the sculpture
- Pause and make sure the image is OK (there will be a temptation to zoom around to finish quickly, but patience is required to ensure good photos)
- Gently take the image
- Take a step or two to the left and repeat. Yes, you can go right also, just keep going in the same direction!
- Stop when you overlap with your starting point. Make sure you capture several overlapped images, otherwise you may have missed a section – you can always throw extra images away, but you can’t get ones you missed
After completing the 360 degree scan, you might consider doing a closeup view of a detail area, like a face. If you’re doing that, repeat the 360 process but viewing only the required detail area.
At this point, you’ve successfully captured a sculpture, at least in image form. Move on to your next subject and repeat the process. If you are using a handheld approach, take your time as your arms will eventually tire and become shaky. Take a break if necessary.
At the end of a long day of scanning, you are now ready to process the captures in the next step. Pack up your gear and head out from the museum.