

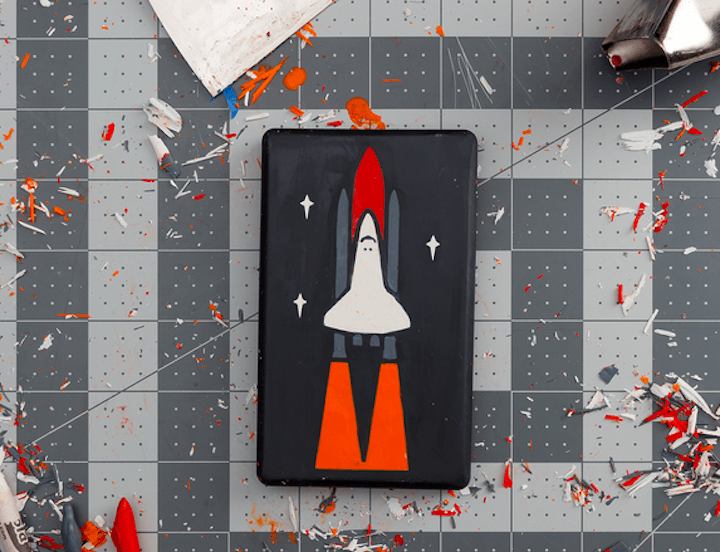
Formlabs has published a method of coloring 3D prints that I hadn’t seen previously.
The technique is not suitable for fully coloring 3D models, but rather a way to introduce spot color to certain surface areas of a given 3D print. And it uses crayons!
The idea is to 3D print an object with indentations – of a slight depth on an otherwise flat surface. This is commonly done in 3D models to, say, add lettering to an object. Other 2D-ish shapes can be applied as you might imagine.
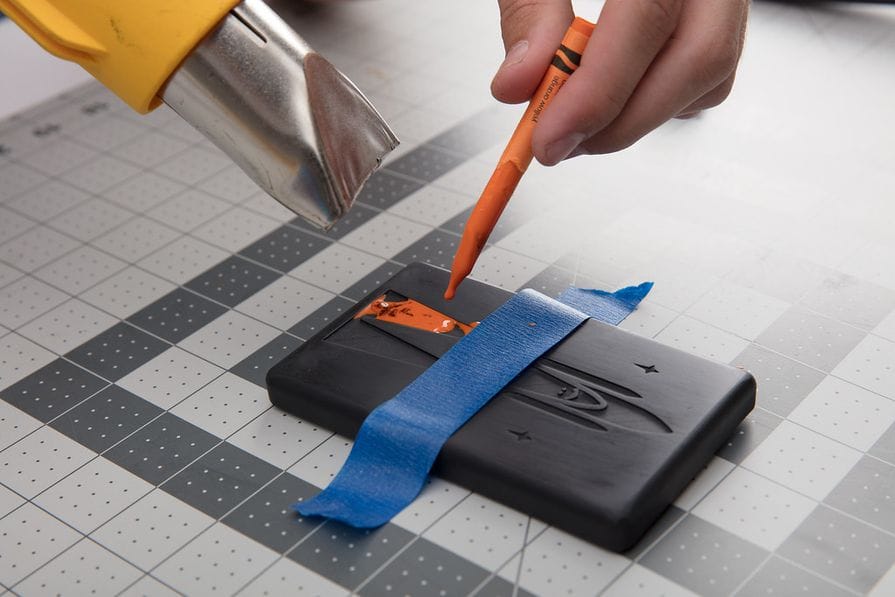
The technique is to select a wax crayon and use a heat gun to drip melted wax into these indentations. By careful application, you might be able to apply a number of different colors to different indentations. Mixing colors is also possible, but the visual results will be unpredictable. I’d advise sticking to a single color per indentation.
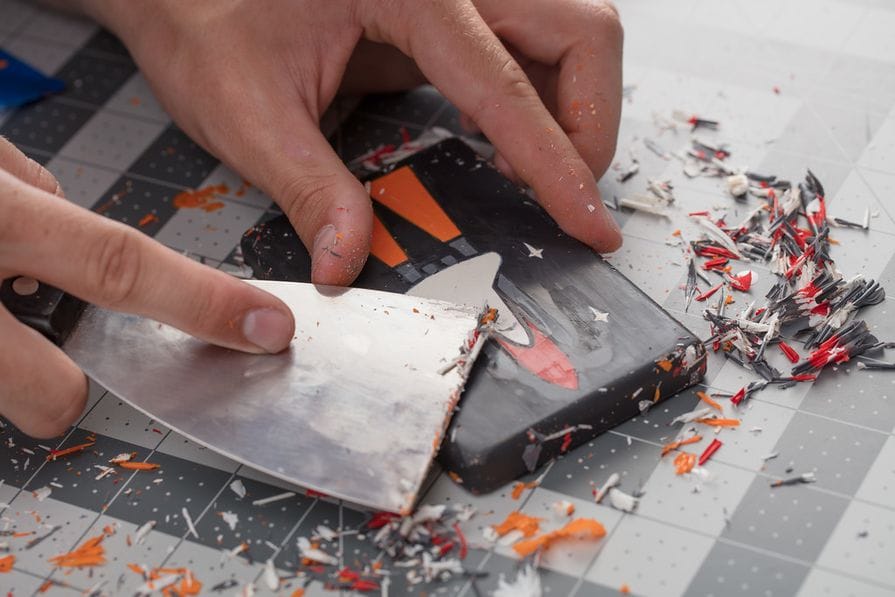
Of course, the wax will be imperfectly applied: there will be slops over the sides and the amount of wax may exceed the depth of the indentation. Here you simply use a flat scraper to precisely shave off excess material.
Formlabs also advises to apply a tape mask over areas you don’t want to apply colored wax. This is a very good idea, because most 3D prints exhibit layer lines in which stray wax could be caught. It would be difficult to remove stray wax from layer lines. You may even consider sanding surrounding surfaces to ensure they are entirely flat.
There are two powerful advantages to this approach. First, the number of possible colors available is quite large, and inexpensively obtained. Just pick the color you like.
Secondly, it is a technique that is usable by almost anyone. You need only a heat gun and scraper, plus the materials. I suppose you could even use a lit match
In a way, this is the opposite of the traditional method of applying layered spot color on 3D prints. In that approach, you use a raised area instead an indented area. Just when the 3D printer begins printing the raised area, printing is paused and a material change occurs. Then after resuming printing, the raised area takes on a different color.
It’s a simple technique that is quite effective, but only in certain geometric situations, most typically being flat shapes with lettering on them, or maps with a bit of topography.
Neither of these approaches actually color your entire 3D model; for that you will need to acquire a very different type of 3D printer.
Or some paints and a brush.
Via Formlabs