
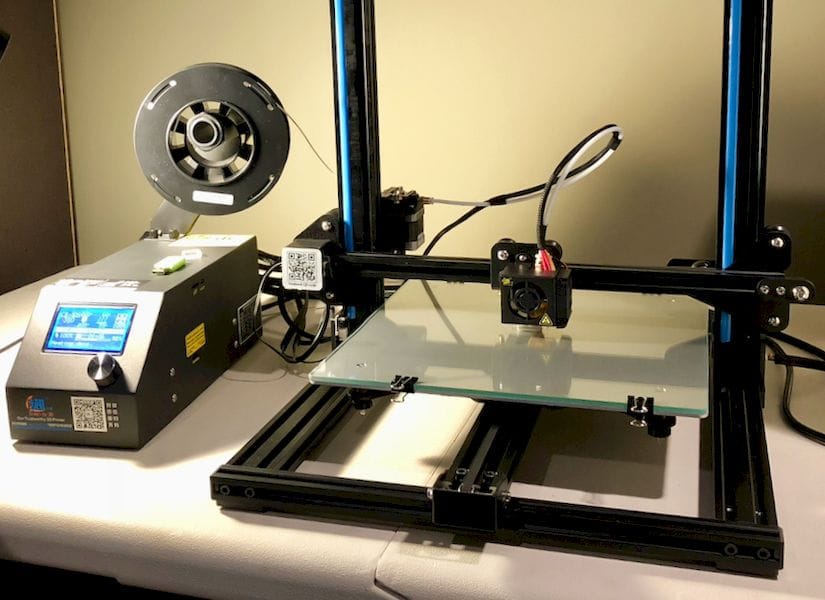

We continue our investigation of a brand new CR-10S desktop 3D printer.
This is part 2 of a two part report; part 1 is here.
I’m not a fan of the sloppy “hairspray” approach, nor the gluestick method, so I tried good old blue tape.
Blue tape does work – and in fact Creality includes a couple of large flat sheets of masking tape that can be used, as well as a small roll of wide masking tape. (But being Fabbaloo, we prefer blue!)
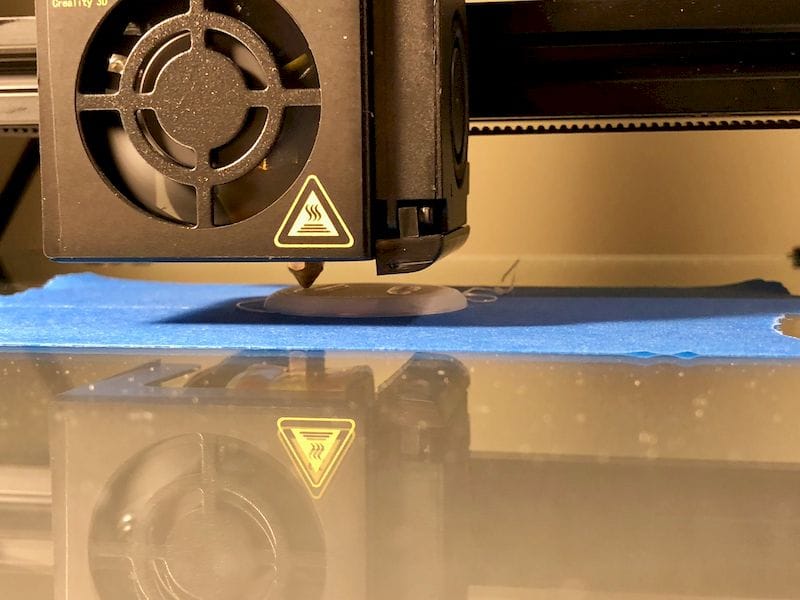
However, as with all tape solutions, it’s not optimal. It would seem the correct approach for adhesion on the CR-10S is to apply a sheet of PEI, which provides a durable and sufficiently sticky reusable surface – and it’s not sloppy in any way.
And it turned out I happened to have a sheet of BuildTak, a commercial adhesion sheet, handy in the workshop. However, to cover the entire CR-10S build plate you must have a sheet 300 x 300mm. My sheet was a bit smaller at 240 x 240mm, so I planted it in the center of the CR-10S glass plate, thinking I would rarely use the outer edges.
The BuildTak provided an extremely good adhesion surface and I had zero adhesion problems since. I recommend that any CR-10S users reading this consider BuildTak or similar solutions.
Software for using the CR-10S does not seem to be explicitly provided, but that’s not a worry for most people, who can easily pick up a copy of several different slicing systems, such as Cura, to drive the CR-10S.
In my case, I used my handy Simplify3D software, which is third-party proprietary slicing software that is extremely powerful and provides great results. I find it quite useful because of the different types of 3D printers I encounter: I can often use the same Simplify3D software regardless of the machine, so it’s quite familiar to me.
One of the issues with machines that don’t include software is the question of tuning the printing parameters to achieve optimal results. This can be a lengthy trial and error process, involving many test prints. However, the good news here is that the vast numbers of CR-10 operators have organized into online communities where much information is shared. I found something called “Uncle Jessy’s” print profile, which appears to be in both Cura and Simplify3D form. This profile does indeed quite well, and makes it a lot easier to achieve success.
There are plenty of quirks to this machine, as it is considerably less automated than some other equipment I’ve used, in spite of the automated leveling process (which, by the way, was not particularly useful after applying my too-small BuildTak sheet: the auto leveling test points were OUTSIDE the BuildTak range).
One of the quirks is the method in which you load filament: it’s entirely manual. There does not appear to be a “move filament” command from the control panel, or at least I could not find one.
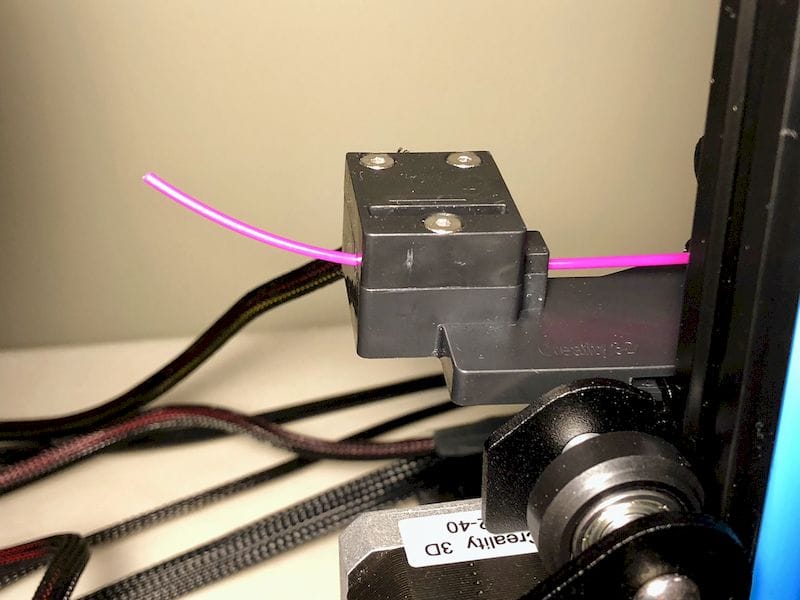
The extruder on the CR-10S is a Bowden style, meaning it is some distance from the hot end, and must push the filament through a tube to get there. Fortunately, the tube is not very long due to the ingenious design of mounting the extruder motor literally on the Z-axis itself. This is quite different from, say, the Ultimaker + series, whose fixed-location extruder motor demands an extremely long Bowden tube.
Back to loading filament. Once you’ve preheated the hot end, you press open the filament gears and then insert the filament. I found it sometimes tricky to do so, because the extruder gear sometimes twists the filament away from the tube entry port. You have to bend the tip of the filament and hold the extruder clamp “just so” to make it insert easily. That’s something you will learn quickly.
Then, manually push the filament the entire length of the Bowden tube into – and through – the hot end. Yes, you push the filament until it comes out the nozzle. There is no “load filament” command that I can find, which seems to be on every other machine I’ve used. Unloading filament is similar: heat it up, and then pull it out by hand.
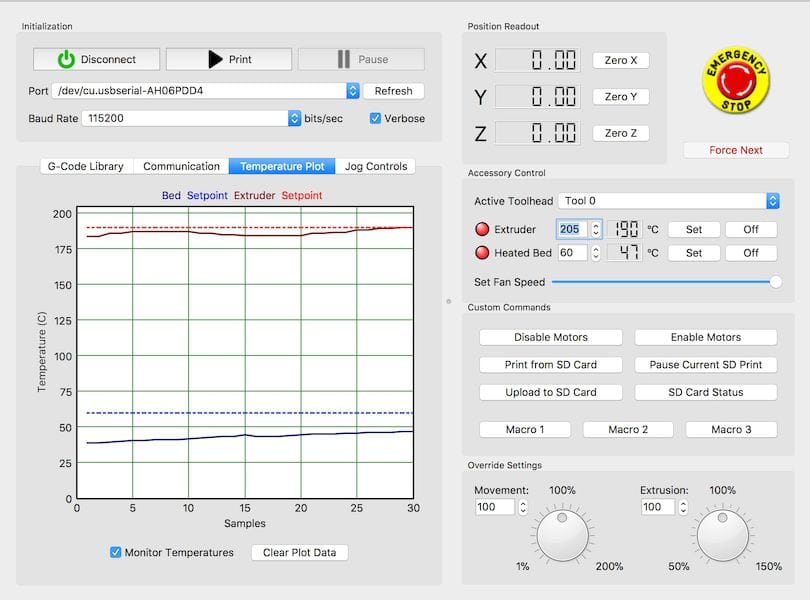
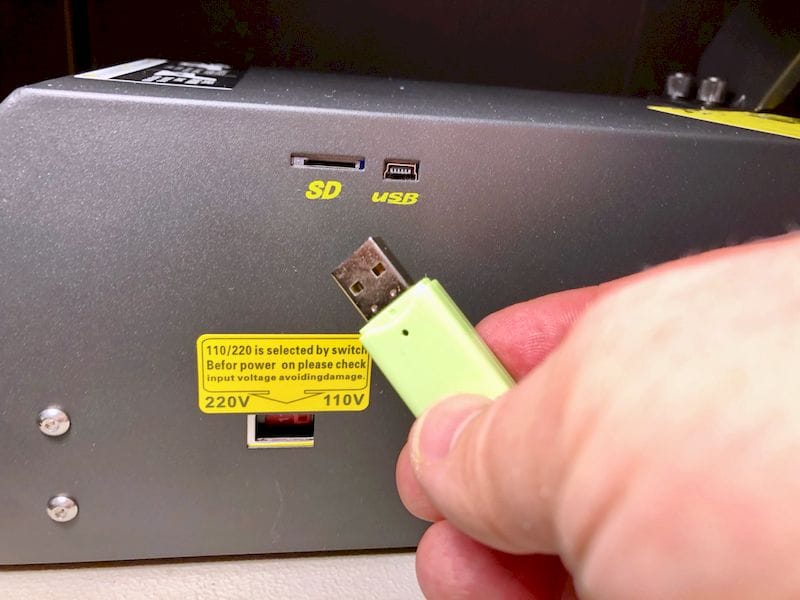
I should point out that there is a way to do this a bit easier: connect up a laptop via the included USB cable to the CR-10S, and then use a real-time 3D printer control program to provoke the machine to do whatever you like. In my case I used Simplify3D’s machine control panel as shown here to jog the material forward and ensure the color was properly flushed from the hot end before proceeding.
The CR-10S does not have WiFi, but you can instead use the included USB port to control the machine from a separate computer, or use the SD Card port to install sliced GCODE files ready for 3D printing.
Creality has included an appropriate SD Card, but it’s the tiny size, so they also include a standard USB holder for it. This enables you to easily slice and write GCODE from your laptop onto the SD Card.
Each time you insert the SD Card the controller insists you hit “refresh” to re-read the card and present the list of files. It would be nice if it simply did that automatically, especially because it already knows that it needs to be done.
Printing operations are pretty much the same as you’d find on other equipment: select a file, wait for warm ups, and then wait for printing to complete. The plate warming time is a bit longer than some other machines, but that is likely due to the enormous 300 x 300mm size.
I didn’t encounter any errors when printing – aside from adhesion issues and a broken filament, which I’ll explain in a moment.
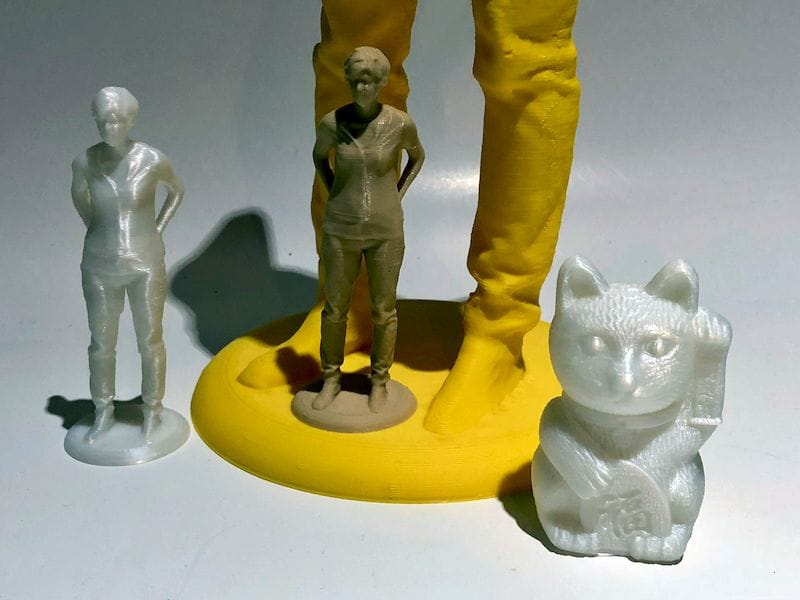
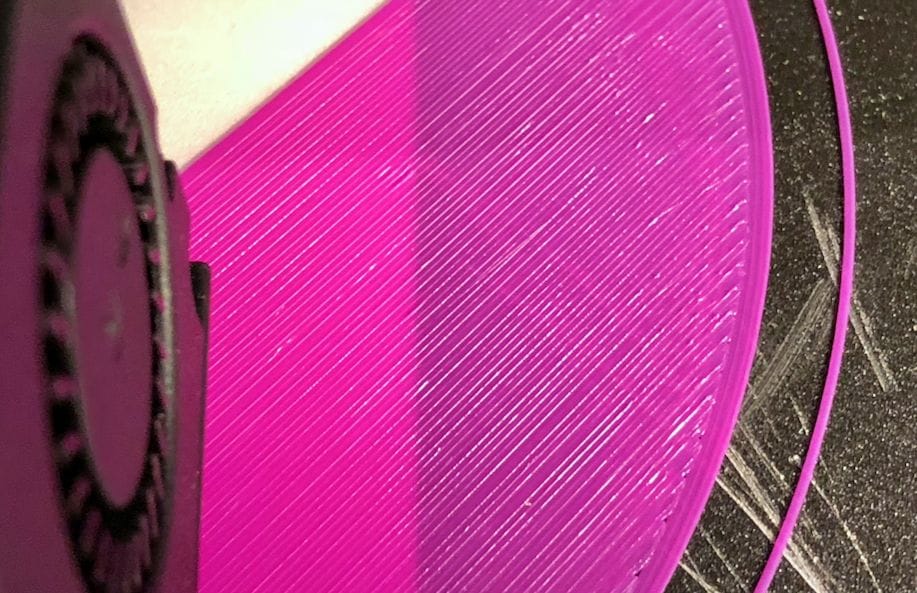
Prints were of very good quality. They were not the absolute best I’ve seen, but the print quality is more than acceptable.
I did test the “filament out” sensor. It’s an unusual hardware item that appears to have been added “after the fact” to the CR-10S packaging: it does not appear in the “quick start guide” and is only explained abruptly in a single separate instruction page.
It turns out to be quite simple to install; just clip it onto the extruder mount and plug in the remaining signal cable from the controller. You’ll have to remove a temporary circuit on the end of the cable, because that’s what bypasses the filament out detection signal if you don’t hook up the sensor.
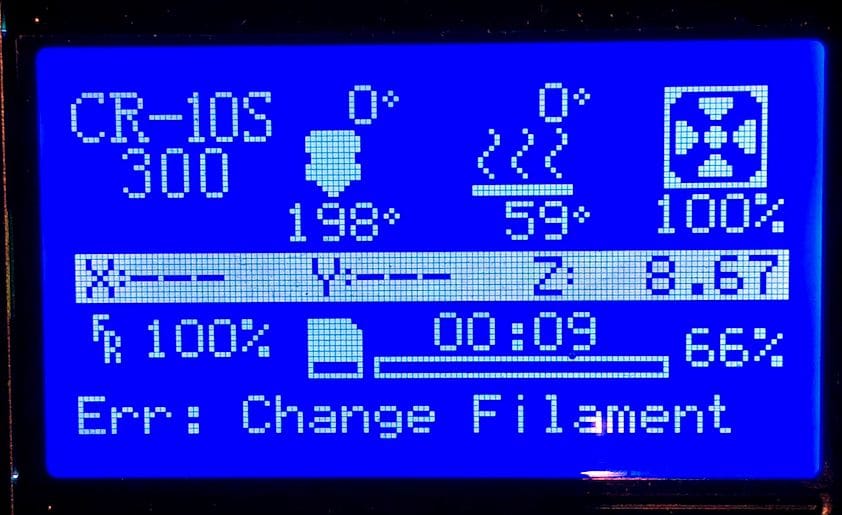
In operations, the filament-out sensor works. It first appears as a message on the control screen, and after completing the last GCODE instructions, the toolhead moves nicely to the home position, where you can change the filament. Fortunately the system leaves just enough exposed filament for you to grasp and pull out. After replacing the filament, you can resume the paused print – and it indeed works.
The notable feature on the CR-10S is the size of possible prints, so I decided to give it a try, even though large prints:
- Take a very long time to complete
- Burn off a lot of expensive filament
- Risk failure during the long print duration
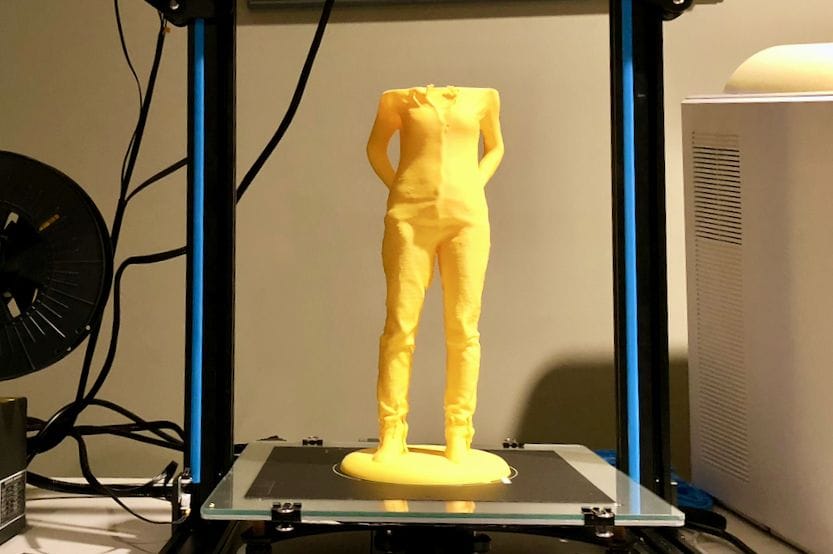
And yes, that’s what happened: in one attempt to 3D print a large figurine, the filament must have broken somehow, and the job “completed” with a lot of air printing. It was at this point I decided it would be best to install the optional filament-out sensor and retry the large print.
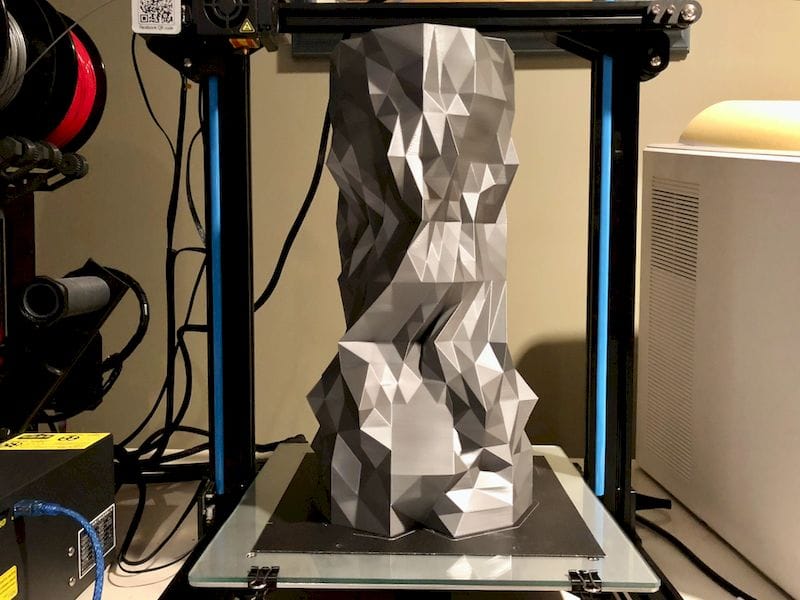
Nevetheless, once you get your adhesion and filament spooling correct, you should be able to 3D print rather large objects that take many hours to complete. We were able to 3D print an enormous vase in only 8 hours successfully, but of course more complex large tests could take literally days to execute – and we’d need a few more spools of filament.
After using the CR-10S for a couple of days I can comment on the unit’s strengths and weaknesses.
While the CR-10S is quite inexpensive for a machine of its size (currently USD$628), it is not necessarily for everyone. I would not recommend this machine for non-technical consumers, as they may become frustrated with the limited documentation and somewhat manual process of certain aspects of machine operation.
Instead I’d say it’s a technician’s machine and is seemingly made for useful modifications. In fact, the machine seems to scream for add-ons to make it run even better. I did so myself by installing the BuildTak adhesion surface and got very good results, for example.
There are countless other modifications available from the large CR-10 community, things to make the machine print better, last longer and do more things. It’s a new world of exploration for those who like to tinker. It’s no wonder this machine is quite popular.
If you want to print very large objects at a decent price, but are not scared away by manual operation or machine assembly, this is likely the machine for you.
This is part 2 of a two part report; part 1 is here.
Via GearBest