

We’ve been testing the latest release of Simplify3D, version 2.1.1, a third-party 3D printer slicing system. We’re impressed.
First, you’d wonder why you might need a third party slicing tool, when every personal 3D printer already comes with slicing software. It might be MakerBot Desktop, Slic3r, CubeX or something else, but they’re all free and Simplify3D isn’t.
We found the case for Simplify3D to be compelling. It provides all the features of the free software, but adds many more. It performs slicing lightning fast, too.
We tested the OSX version, but they provide support for Windows and Linux as well. Installation is simple, but OSX required a simple security bypass as Simplify3D was classified as an “unknown developer”. The product also requires registration/activation before use, unlike open source tools or those provided by the manufacturer (with an exception to 3D Systems, who for some reason require their software to be registered as well). The software is “registered” to a specific machine but you can deactivate and relocate to another machine with another activation. This is the right way to do licensing.
Simplify3D supports both cartesian and delta robot machine styles, including a very long list of pre-configured common personal 3D printers. If your machine doesn’t happen to be listed, you can probably manually configure it using the extensive preference panels.
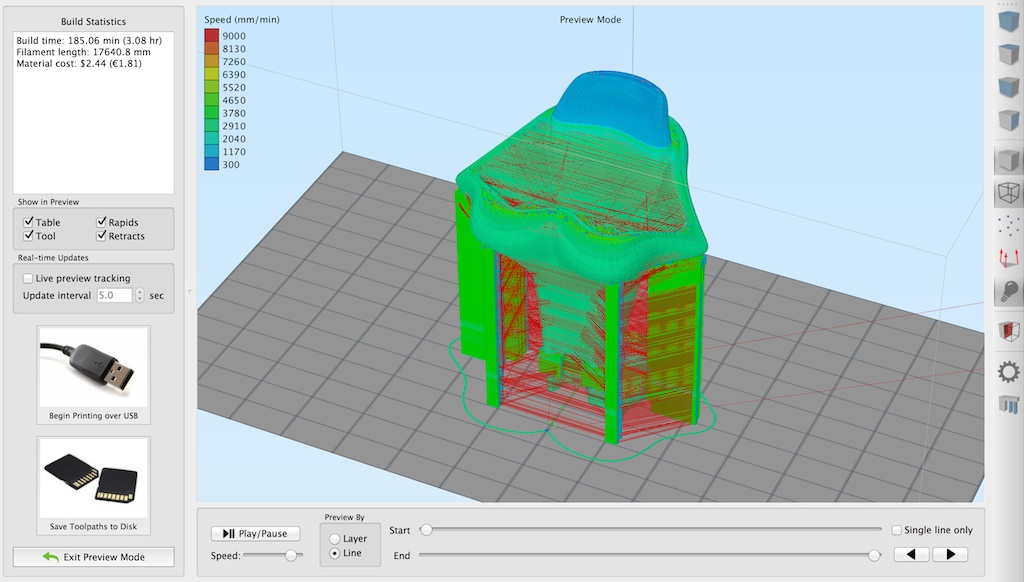
The main interface window provides a beautiful 3D view of the build table, where you can see exactly how your model is positioned. Models can be viewed from any direction and in a variety of visual modes. The viewing capabilities are similar to those found in a full-on 3D modeling package, but you must remember Simplify3D is “only a slicer”. You’ll also see a list of all imported 3D models and active processes, slicing your model.
One of the many unique features of Simplify3D is the ability to view cross-sections of a model. Yes, you can see inside a model on any axis, thus alleviating the problem of complex shapes obscuring views.
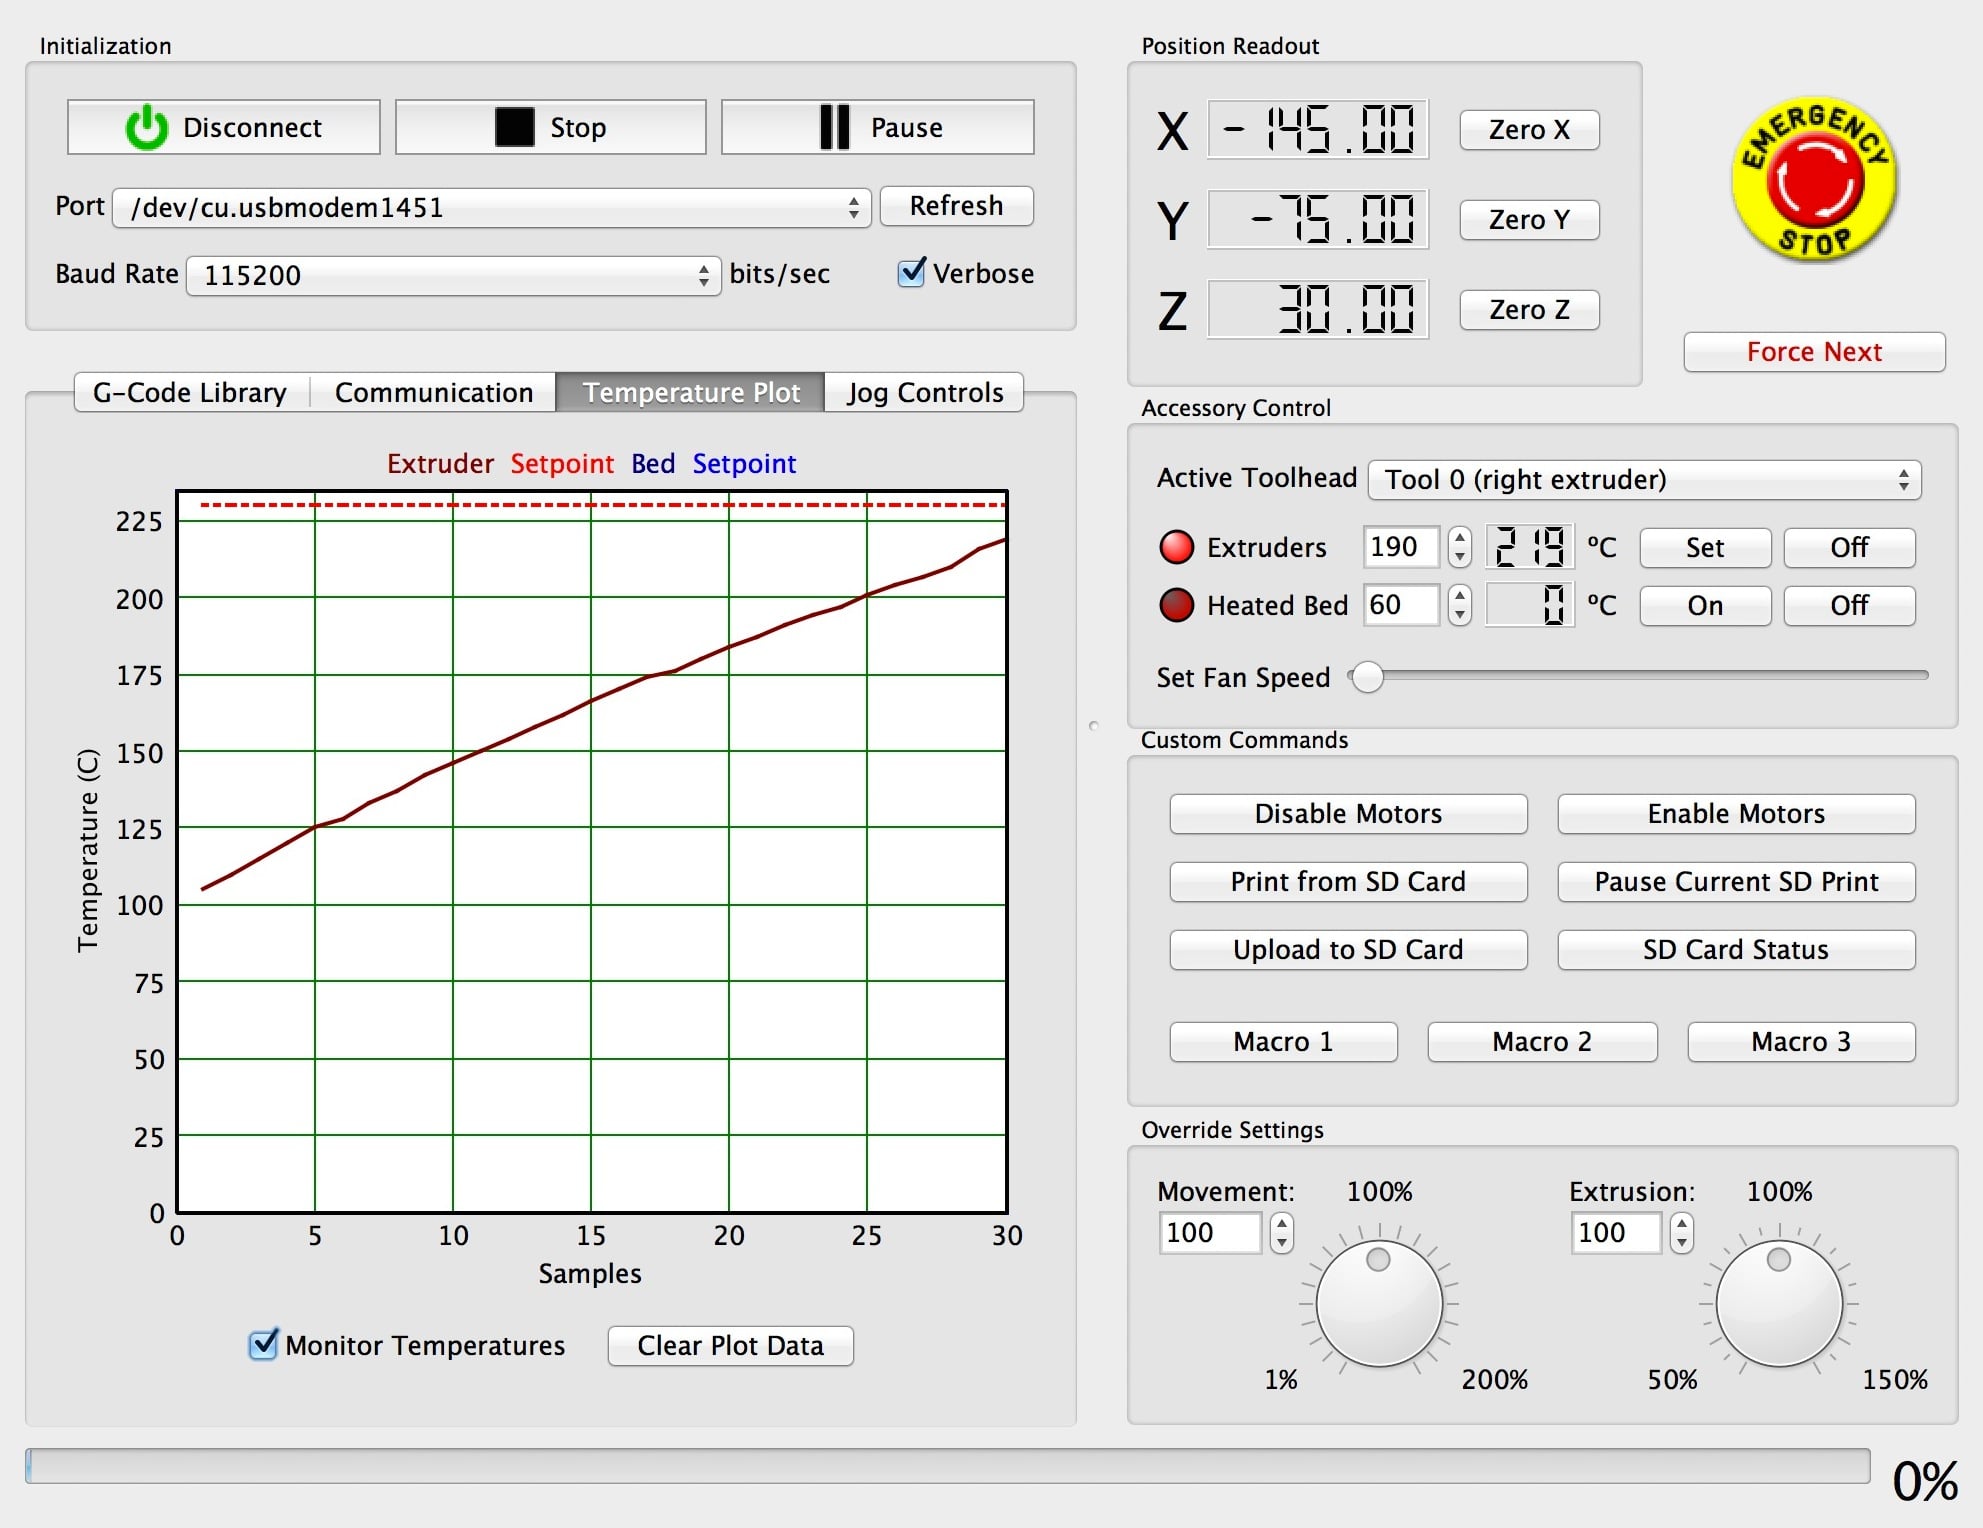
In addition to slicing 3D models for printing, Simplify3D also enables direct control of your 3D printer. You’ll be able to control temperatures and mechanical movements to perform machine setup, material changes, testing and more. The controls are extremely extensive and provide the ability to perform virtually any required action. Simplify3D even includes a bed leveling process. Check out the easy-to-find “Emergency Stop” button.
We’re very impressed with the 3D model manipulation features. It may seem a simple thing, but the ability to scale, rotate and position your model is very useful. Even better is the ability to perform these operations on a numerical basis, where you can precisely specify required changes.
Simplify3D offers the concept of “processes” to configure slicing activities. A “process” includes all the specific parameters for slicing, including layer size, speeds, materials, etc. You can use pre-set processes or make up as many of your own as required. Just select the most appropriate process from your list to slice your model. Each supported printer comes with several tested profiles for instant use – but you can tweak them if you like.
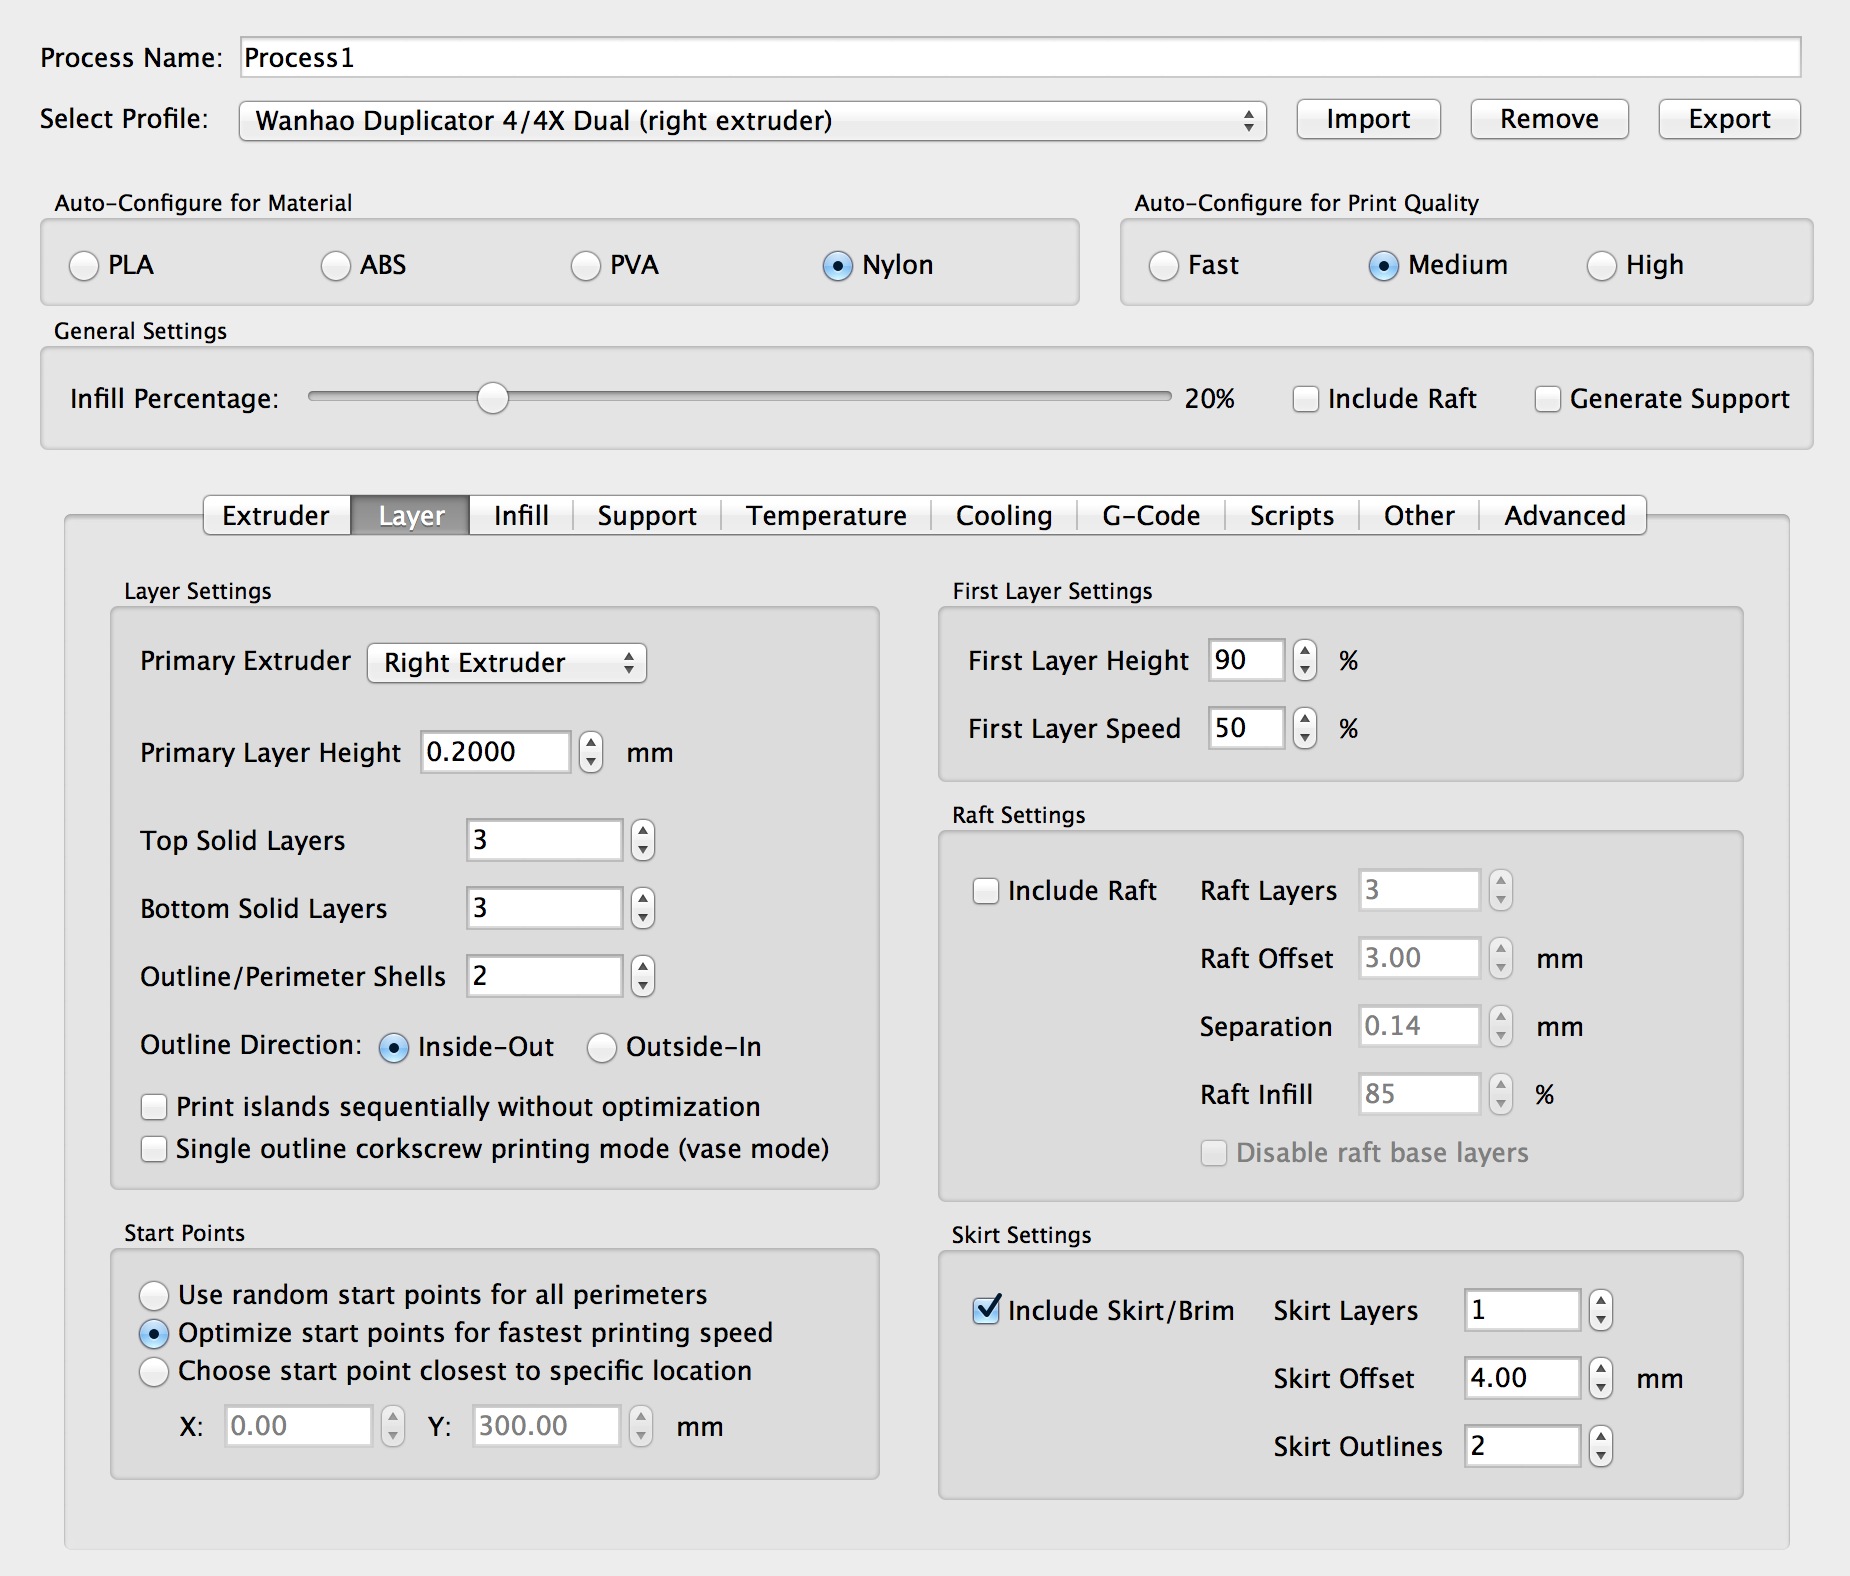
Processes are the meat and potatoes of Simplify3D. Within them you can specify virtually every conceivable parameter for almost any situation. We can easily see how a new, unknown material could be printed by tweaking multiple settings. Processes can even be imported and exported, meaning they can be shared once a new configuration is deemed successful.
Slicing is done very quickly, and you’re able to select either streaming the GCODE directly to your 3D printer or saving the GCODE to a file, perhaps for installation on a USB stick or SD card. Simplify3D provides an excellent overview of the print, including details on cost, material used and estimated completion time – in addition to calculating volumes and other stats prior to printing. Curiously it measures the amount of material in a print by filament length, rather than weight, which most other slicers use. Visually the printer movements are charted in a color-coded manner that permits extensive examination to ensure the print will proceed correctly.
Curious about Simplify3D’s slicing speed? We tried slicing a very complex 10MB 3D model with several common slicing tools with identical printing parameters:
- 1.0X – Simplify3D (29 seconds)
- 0.8X – Kisslic3r (22 seconds)
- 1.5X – Cura (44 seconds)
- 5.0X – CubeX (145 seconds)
- 67.0X – MakerBot Desktop (1,958 seconds)
- XX.X – Slic3r: crashes after 3m
We’ve seen crashing from time to time in different slicing systems: an inability to handle complex models, resulting in a crash. It seems that Simplify3D is not only able to handle complexity, but it does it very quickly. MakerBot Desktop did finally complete the slice, but it took an extraordinarily long time. Perhaps MakerBot Desktop found this particular model pathological. Kisslicer is a tad quicker, but it has very limited features compared to Simplify3D.
We also noted that the print time was somewhat better. When slicing for a MakerBot, for example, Simplify3D’s code took 6:40, whereas MakerBot Desktop’s code estimated 7:54. That’s close to a 15% improvement, which is very welcome for those day-long prints.
Simplify3D provides a decent set of repair tools to fix up damaged 3D meshes. Some slicers do this automatically (or worse, they don’t and make “assumptions”), but Simplify3D permits some control over the process.
There’s an “Add-Ins” menu, which currently holds only one option: “Convert Image to 3D”. This is a function many people would like to use that you can’t easily find, but Simplify3D has integrated it into their system for immediate use. It does a pretty good job too, especially on lettering, although we suspect it will be used mostly for portraits. We’re wondering what new add-ins may appear in the future.
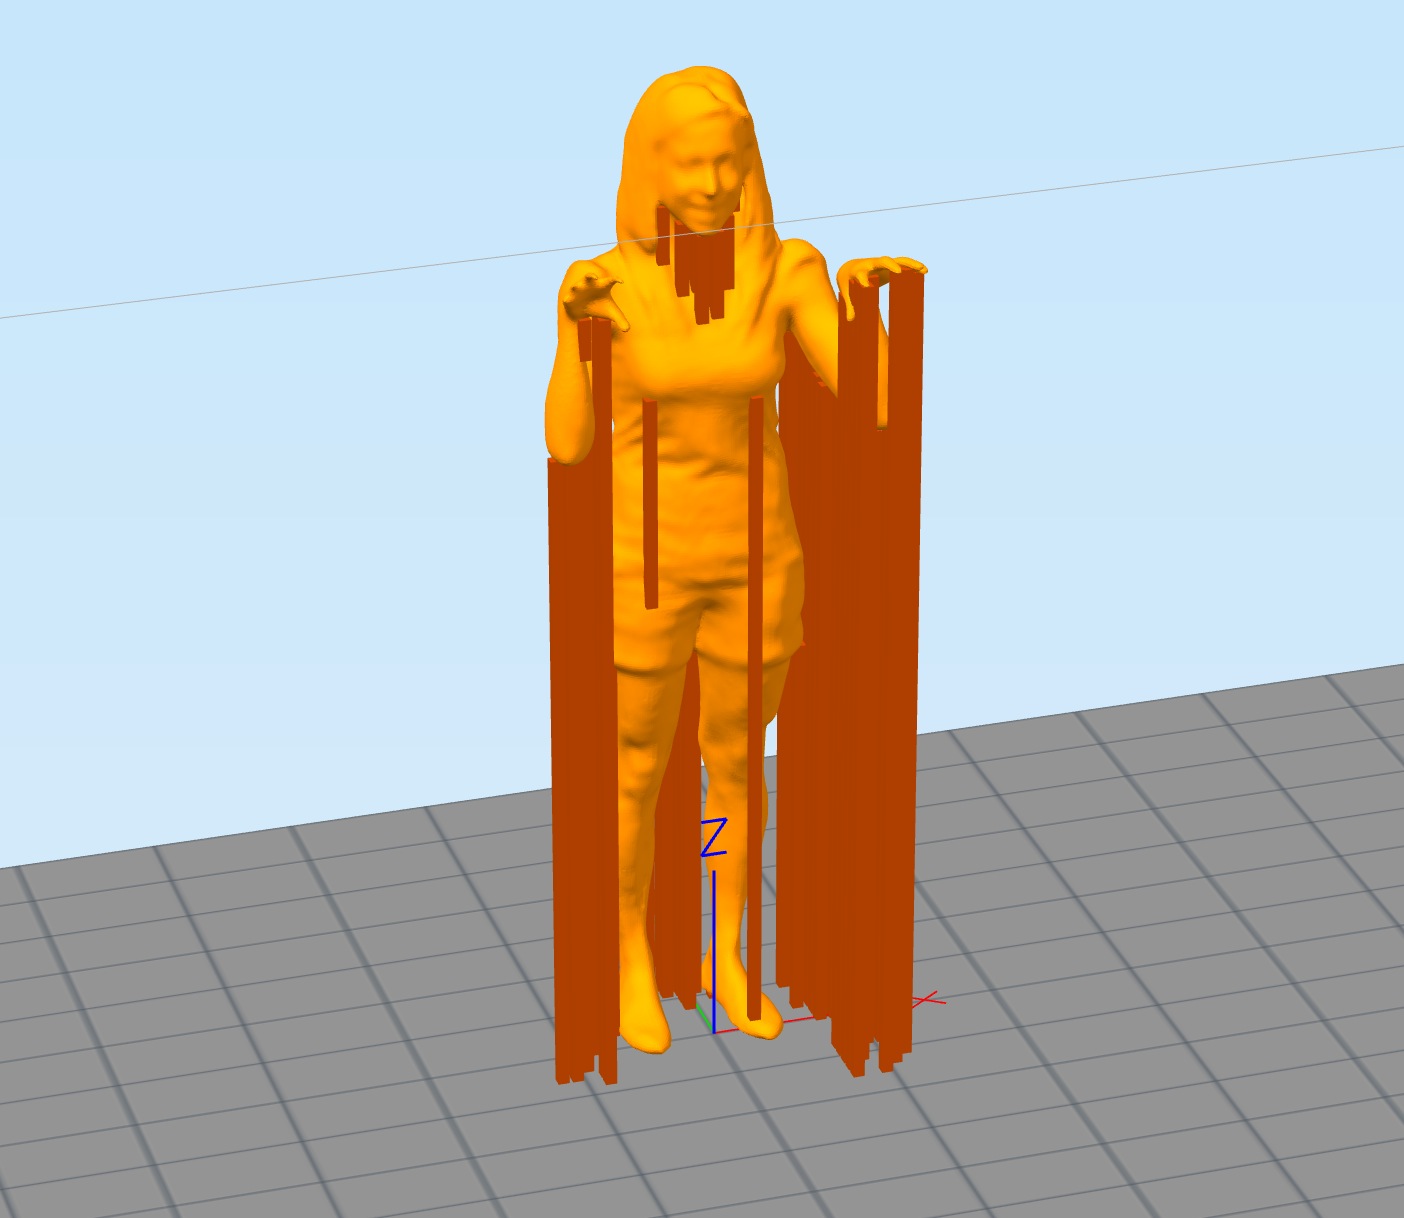
Support structures are obviously included in Simplify3D, but you do have quite a bit of control over their generation. You can also save them for later use and manually add support structures if you feel they’re required in particular spots. While Simplify3D’s support feature is pretty good, we still prefer Meshmixer’s, although that tool’s supports are not integrated in the Simplify3D system.
At the Simplify3D website, you’ll find several terrific tutorials that examine more advanced uses, such as dual extrusion techniques, mesh repair or the best way to add manual support structures. Overall we found the information presented by Simplify3D to be very useful and easy to follow. However, much of it is pretty straightforward due to their excellent user interface design.
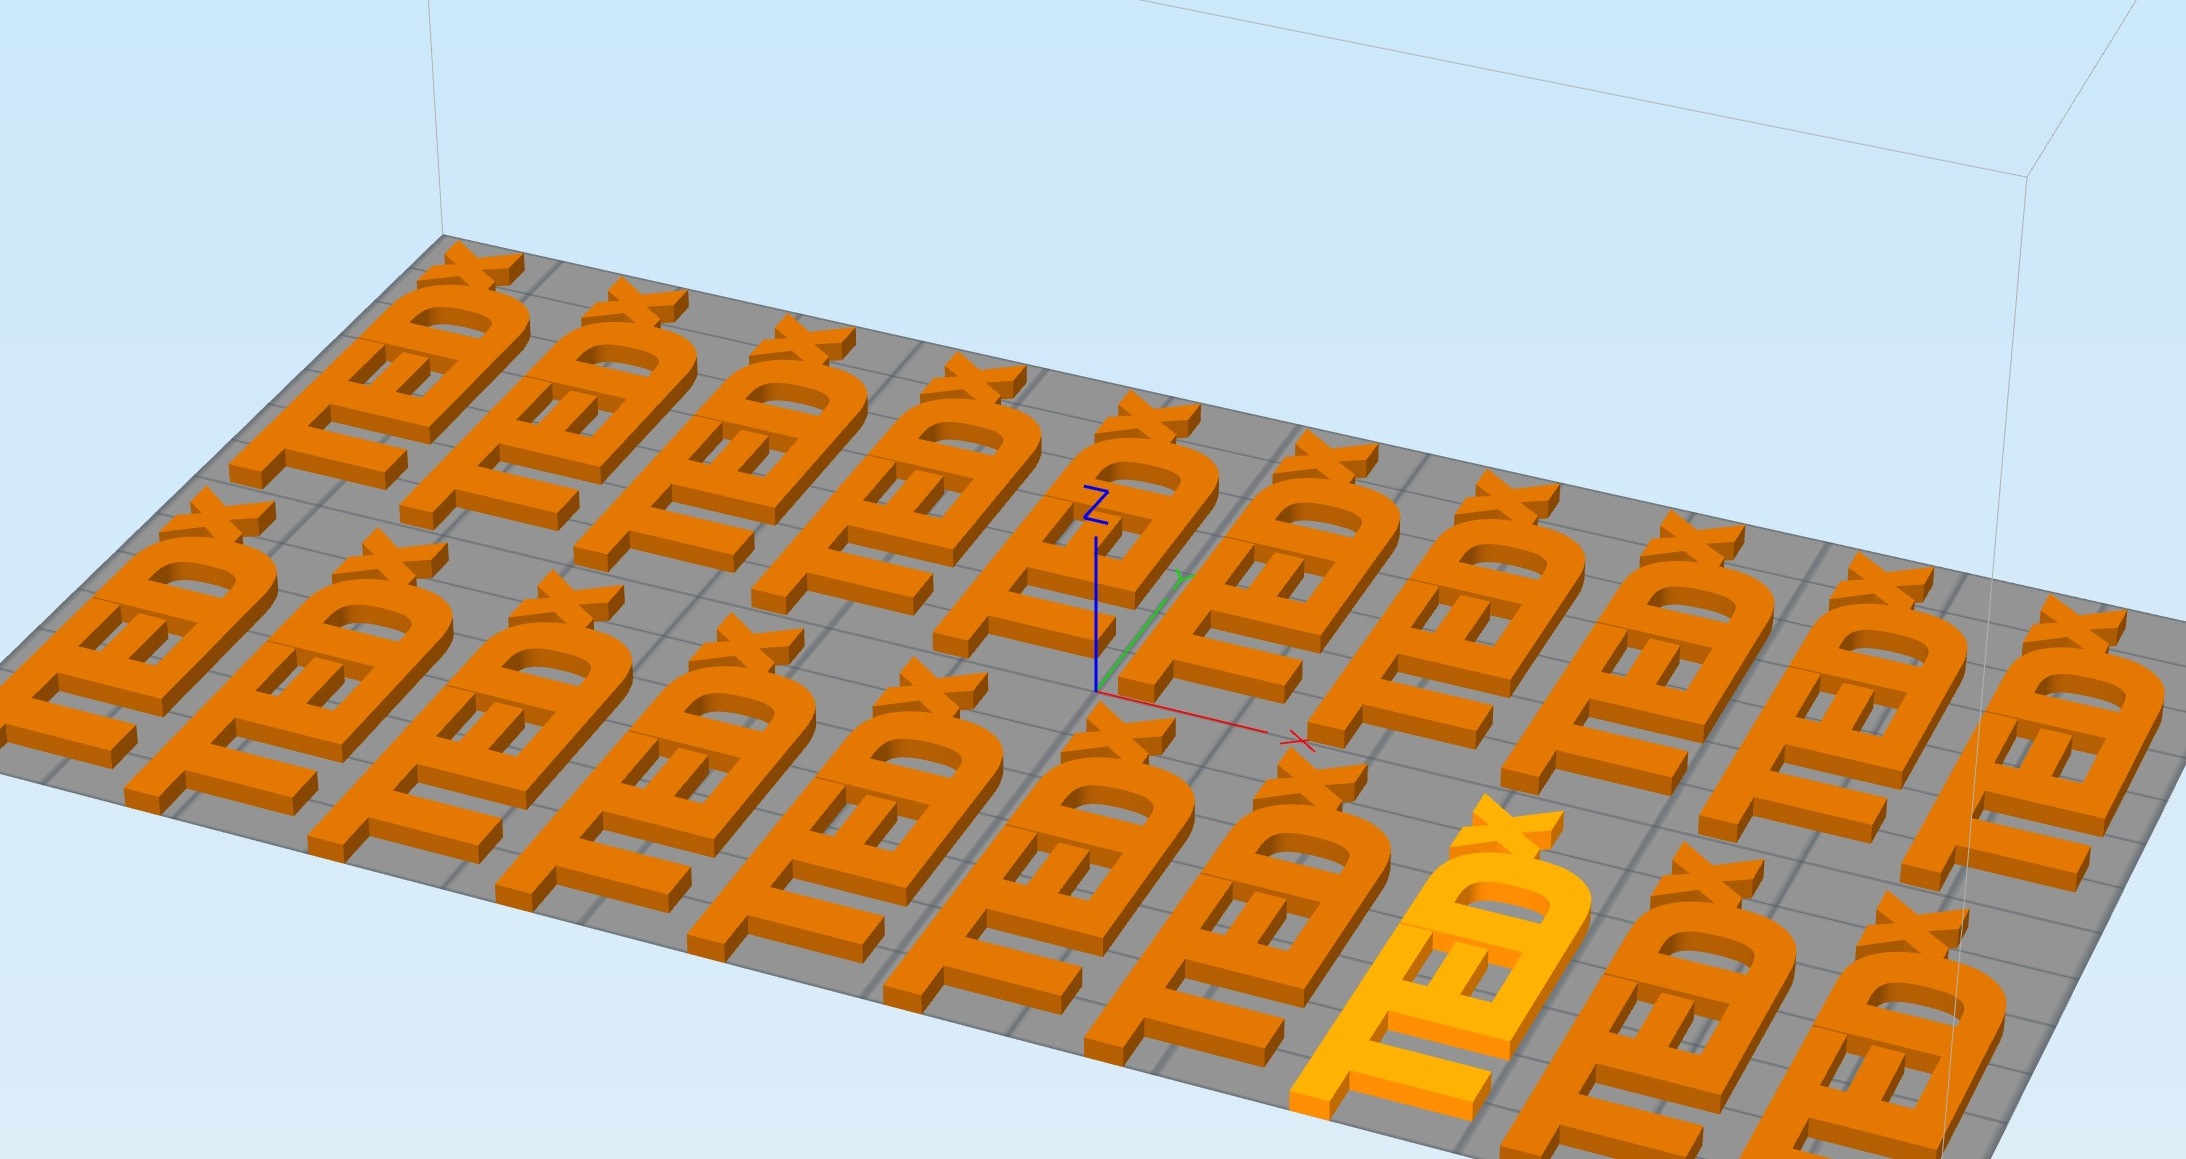
Simplify3D can very easily create additional copies of any 3D model and automatically position them on the print surface appropriately. This makes it very easy to print a flat of lego blocks overnight.
A fascinating feature is what Simplify3D calls “sequential printing”. In this mode the printer is able to print a group of objects one at a time. It does not print all layer 59’s before printing layer 60s – instead if prints a chunk of object 1 and then descends vertically down to print a chunk of object 2, and so on. The GCODE is composed to avoid crashing into previously-printed material. This vertical approach is very different than typical slicers and can dramatically improve the finish by reducing the number of stringies between objects. It’s also faster since inter-object traveling is reduced.
Perhaps the most startling feature of Simplify3D is it’s ability to employ different printing parameters within a single print operation. The example they cite is to print a faster and heavier base and a lighter, finer resolution upper component. If used cleverly, this feature could save significant print time – and provide additional strength to layers that require it.
The complexity offered by Simplify3D is vast, so you might wonder, “what if I had to print my complex set of objects again?” Would you have to set up all the processes and object placements again? No – Simplify3D lets you save the entire state of the platform, including objects and processes in a “Factory File”. It’s a ready-to-go print job, just the way you wanted it. You can call them up later and print them out in exactly the same manner.
We could go on listing features, but there are simply too many. From basic things like material selection to advanced sequential printing to picking an amusing song to play when your MakerBot finishes printing, they’re all in Simplify3D. You’ll have to check them out yourself.
What’s missing? In a package this advanced, you’d wonder if anything more could possibly be included. But there is. Simplify3D offers features we’ve previously seen only in big-time industrial 3D printer software, but one feature we’d like to see added to Simplify3D is hole strengthening. Some industrial software permits you to identify holes and explicitly specify the number of “winds” around the hole, each adding strength.
Unlike most 3D printer slicing software, Simplify3D is not free. They’re charging USD$140, which might seem like a lot, but on the other hand, it is really multiple tools in one. We’ve tried it and we like it. It actually simplifies your workflow by reducing the number of tools you’ll need to prepare and print your 3D models – as well as printing them in better quality.
If you can afford it, everyone should have Simplify3D.
Via Simplify3D