
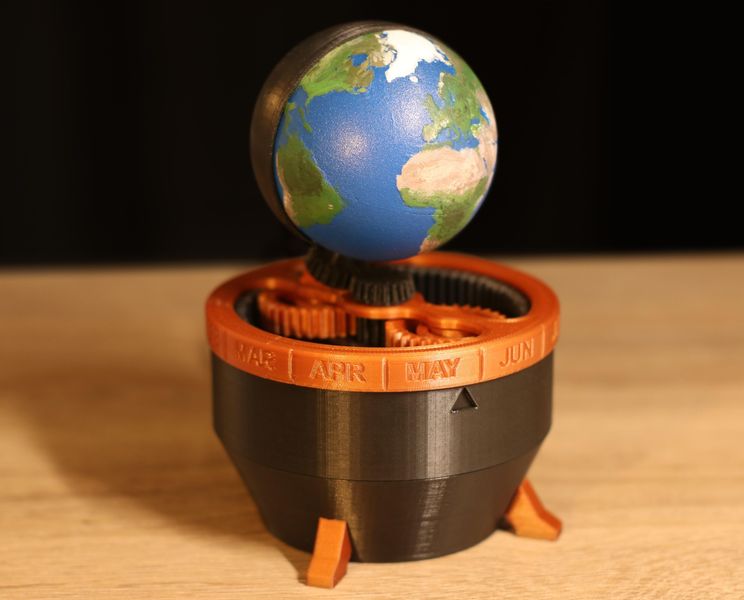
This week’s selection is the 3D Printed Earth Clock by engineering student Simon Robert.
France-based Robert devised an incredible timekeeping gadget that shows you the current time in a very different way.
The 3D Printed Earth Clock doesn’t show you the “numbers” of the current time. Let’s admit it — numbers are arbitrary and ultimately imaginary. Perhaps a better way to represent time is to show the Earth itself.
And that’s exactly what Robert has done.
The 3D Printed Earth Clock is a small model of the Earth mounted on a sophisticated set of gears. As time passes, the clock turns the Earth to the same position it currently occupies in its orbit around the Sun.

In real life, half of the Earth is always in shadow. This is demonstrated on the 3D Printed Earth Clock with a dark “shell” that fits over the back half of the planet. If you can see the Earth’s surface, it’s illuminated right now, otherwise it’s in darkness.
As you might imagine, it’s not particularly exciting to watch on a minute by minute basis, since the “clock” turns only once per day. You can see this motion if it’s sped up, as Robert has done in this timelapse video:
The 3D Printed Earth Clock is not a simple project. It involves 3D printing 26 different parts, many of which are gears that must precisely fit together. Robert goes to great lengths to explain how successfully 3D print the parts and prepare them for assembly.
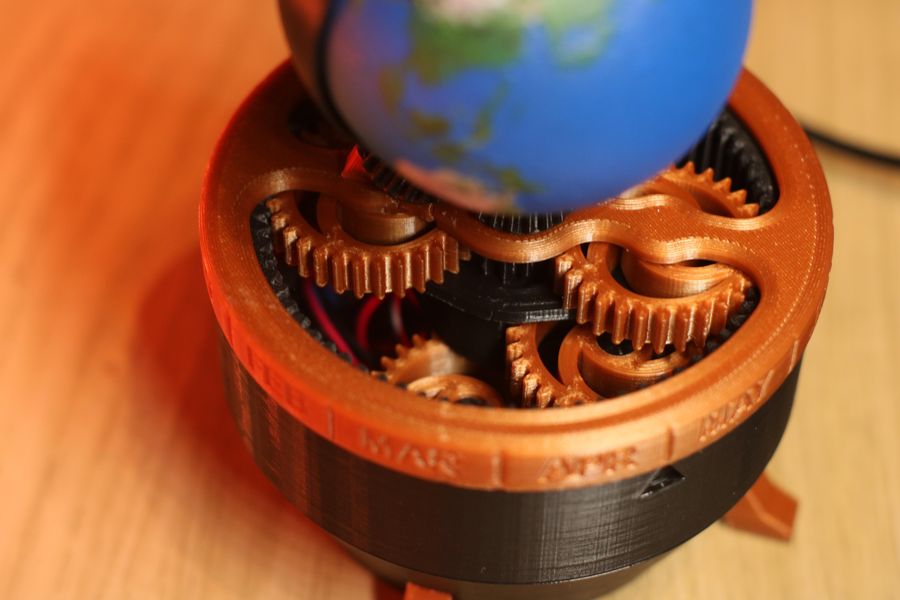
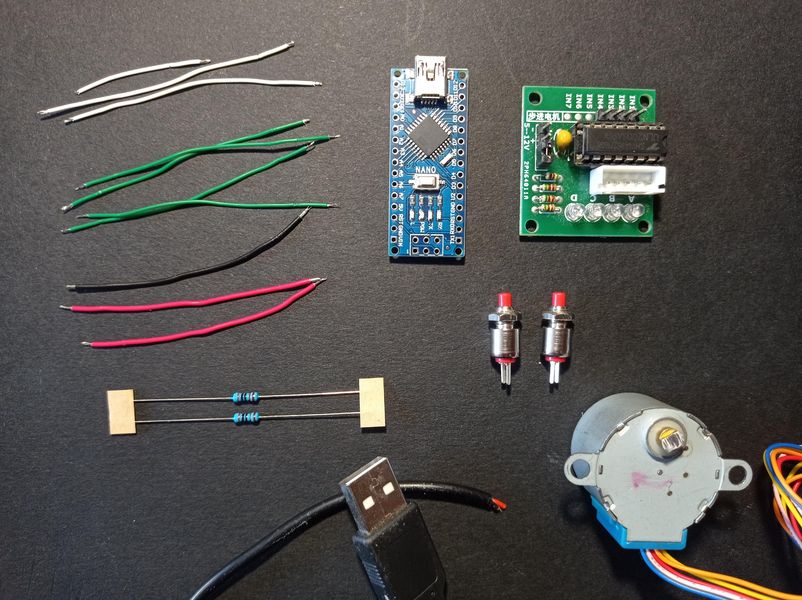
The project also requires some electronics to drive the motion system and turn the Earth appropriately. This is accomplished with an Arduino board and a single stepper motor that drives the two axes of motion for the tiny planet.
The most visible portion of the clock is the Earth itself. Robert divides the Earth into two hemispheres, North and South, which must be pasted together.
Robert recommends painting the Earth blue, and then applying more detailed painting to the continents. I suspect it may be possible to 3D print the hemispheres in color using a multi-color 3D printer option, such as the Prusa MMU or Mosaic Palette. However, that would require one to “paint” the 3D model in software to enable the multi-color 3D printer to select the correct filament for each zone.
On the other hand, by painting the Earth manually it might be possible to achieve a much more realistic surface appearance, which would be quite desirable for this project. However, that would require some expertise in miniature painting, and that could be a project on its own.
Assembly of the 3D Printed Earth Clock is a bit tricky, since there are plenty of mechanical bits along with the electronics. Robert has simplified this by publishing an easy-to-follow five-minute assembly video:
In Robert’s Instructables entry, he describes in some detail the math required to compute the configuration of the clock’s motion system. Not everyone would be interested in this, but certainly some would be, particularly those considering designing their own clocks.
The 3D Printed Earth Clock is a truly impressive design that will challenge you to print and assemble.
When you’ve completed it, the only thing left to do is make the Sun to light it up.
Via Instructables