
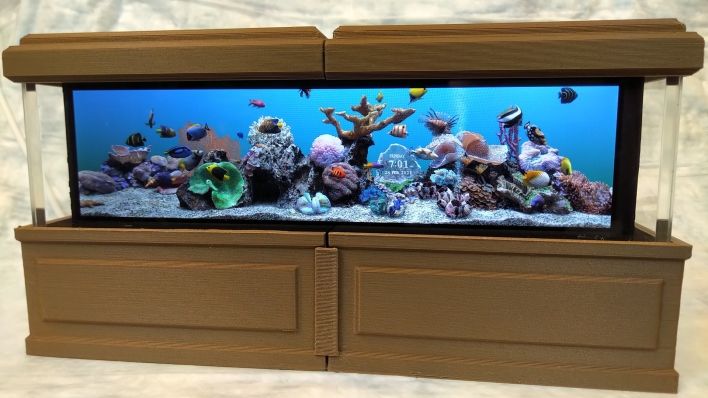
This week’s selection is the incredible 3D Printed Rockpiquarium Screen Saver by Colton Westrate.
While the image above looks interesting, you might be asking how can you 3D print a screensaver? Isn’t that software? And who needs a screensaver these days anyway?
For older readers the notion of a screensaver will bring back fond memories. In the early days of computing when systems were so unbelievably dumb that they didn’t turn down the visuals when unattended, the rickety displays of the day were easily damaged.
That was solved by the introduction of screensavers, which would activate accordingly and display randomly moving items on the screen to prevent “burn in”. But this also enabled a platform for creativity that was filled by many artistic programmers. Competition flowed, and soon computer users would actually BUY screensavers.
I always felt the most beautiful screensavers were pseudo-aquariums, where fishy avatars would peacefully swim across the screen, often magically reappearing on the other side. (Sorry, Flying Toasters fans!)
Michigan-based Westrate became a fan of screensavers at a young age, and to this day still inhabits creaky old forums where such things are apparently still discussed. One of his favorites was the “Serene Screen Marine Aquarium”, another fishy example.
Westrate realized he could actually build a dedicated device that could run this prehistoric screensaver.
In a long post on Hot Hardware, Westrate describes in much detail the process he used to develop this unique 3D printed hardware device.
Essentially, Westrate created a tiny Windows 10 system that was able to run the software, which is still kicking around. The core of the system was a Rock Pi X board, which is a complete Windows-capable system but the size of a Raspberry Pi, and it even includes on-board graphics. Westrate chose the 4GB RAM / 64GB storage version for only US$85.
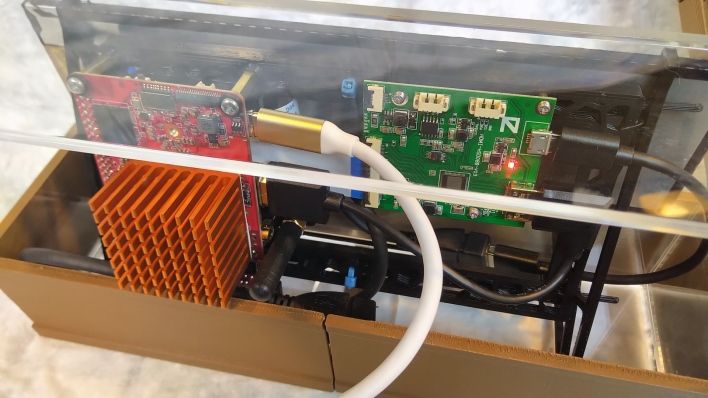
The tiny screen used on the system is an eight-inch HSD088IPW1-B00 LCD unit that can display graphics at 1920 x 480, available for only US$65.
The casing for the system was designed around the screen. Westrate measured the screen precisely and then used Autodesk Fusion 360 to design a housing that would fit the opening well. With some added extrusions, chamfers and fillets, he was able to design a 3D printable case whose classic wood-furniture-like appearance would complement the 20+-year-old screen saver.
Westrate explains:
“When the LCD arrived, I printed some thin cross sections of the stand and hood to confirm their fit around the acrylic and to make sure that they were the proper size to hide the top and bottom edges of the LCD without blocking any pixels. The stand was tweaked to make it slightly taller and then I set about work designing the brackets and support structure that would hold things in place internally.”
Printed on a Prusa Mini with an oversize 0.8mm nozzle, the parts all fit together quite well.
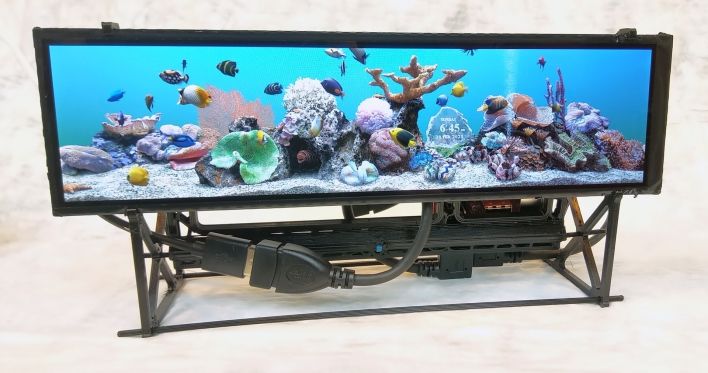
Westrate’s biggest issues were in software, where he had to find and install a number of unusual drivers, but eventually he managed to get the Rockpiquarium running, as you can see in these images.
Fortunately, Westrate has provided the STL files and other information for the project on Thingiverse if you’d like to tackle this project yourself.
In the end Westrate managed to get the system running at 75fps, creating a very smooth fishy view.
I only hope the screen doesn’t burn out.
Via Thingiverse and Hot Hardware