
Our hands on review of the new Photon Mono M5S resin 3D printer from Anycubic continues with a look at setup, calibration and operations.
This is part two of a three part series, please read parts one and three.
Photon Mono M5S Setup and Calibration
We followed our standard procedure of copying the contents of the USB thumb drive to our computer so we could have a backup copy, as well as be able to have access to any items on the thumb drive if it was in use plugged into the printer.
We started the setup of the printer by reading through the paper user manual and then the digital copy of the user manual. We found the digital version had more information than the printed user manual had to offer.
For example, turning on the printer and waiting for Auto Device Check automatically checks the printer’s hardware to help troubleshoot and reduce print failure. If and when there is an error, the LCD on the printer would simply display the error and a QR code to give the operator a guide to follow.
The printer checks hardware condition, resin volume and leveling before each print job. Employing error auto-pausing that will pause the printer when abnormal conditions present themselves, such as bottom non stick detection, which monitors if the model does not stick to the print platform. We strongly recommend reading the digital manual prior to setting up and using the printer.
We found that both Mac & PC versions of Photon Workshop were included on the USB thumb drive, but we checked Anycubic’s website and found an even newer version of the software and downloaded it for our Mac.
Setting up the Anycubic branded slicer was easy, as given that it is written entirely by them, it essentially guaranteed that the Photon Mono M5S Pro is already one of the possible choices of printers to add.
Once done with that, we installed the Anycubic app onto our mobile device and configured it, as this app was what allowed us to add the printer to our Wi-Fi network. Detailed instructions for doing this task are found in the printed and/or digital manuals for the printer.
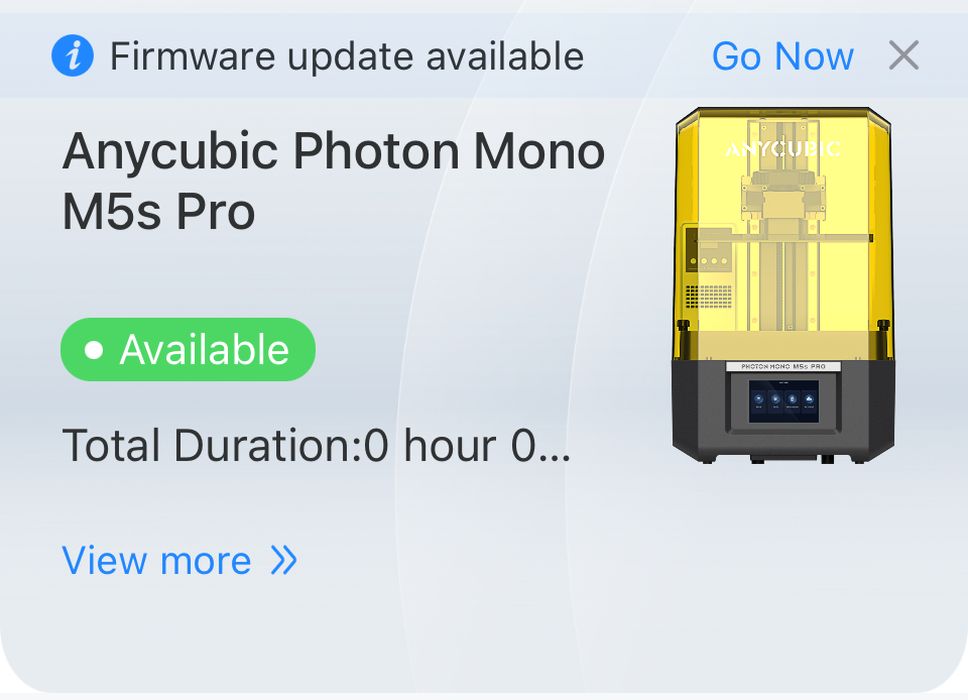
Once the app was installed and set up, we were able to control the printer from our mobile device and even update it to the latest version of firmware, which we did. Now we had a choice on how we could slice and send files to the printer for output.
We decided to test print one of the pre-sliced GCODE files included on the thumb drive while we got acquainted with the slicing software.
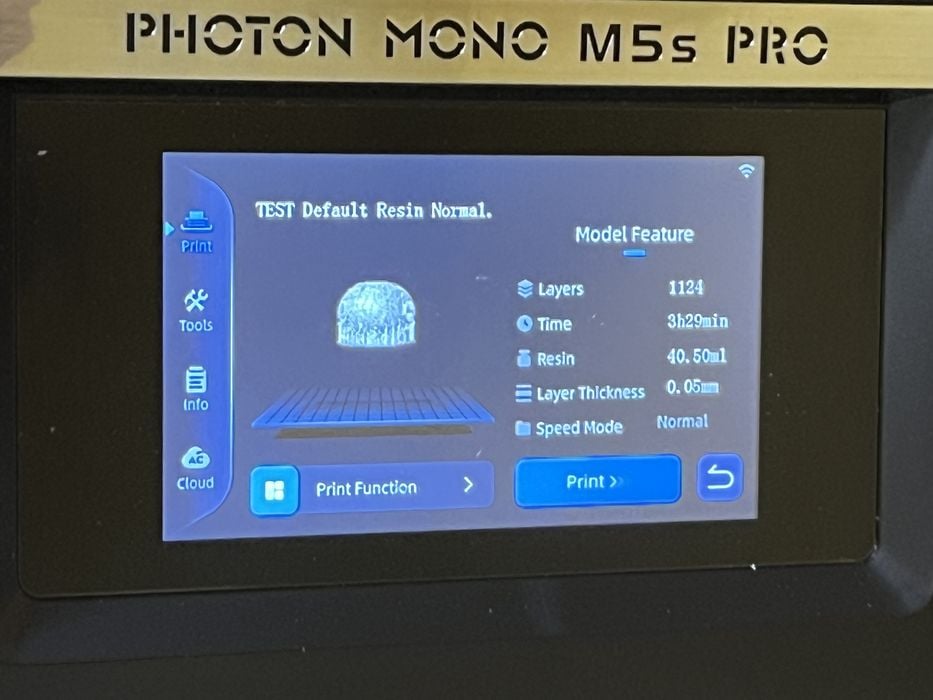
Since we hadn’t poured any resin into the tank yet, it was an ideal time to check if the resin detection system worked. We went to the LCD screen on the printer and launched TEST Default. The build plate lowered into the empty VAT while the LCD screen displayed Auto-Check On.
When the platform reached the bottom of the empty tank, it lifted up & down once, then promptly displayed an error on the LCD – “Please replenish the resin, the resin cannot complete printing”.
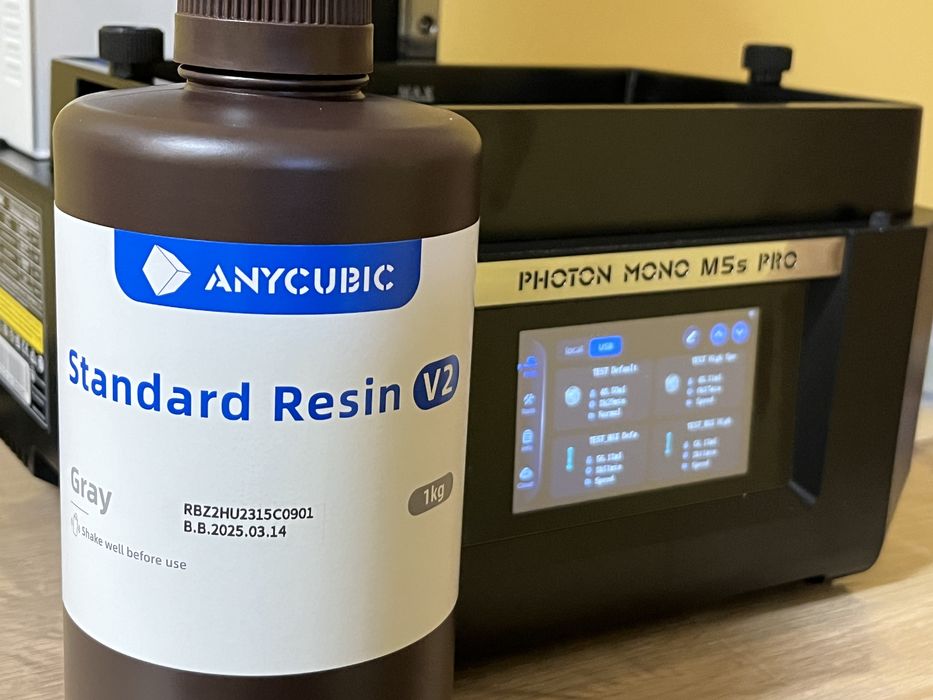
As part of the review, Anycubic had supplied us with some Standard Resin V2 Gray. We made sure to shake the bottle well, then raised the platform and added resin to the max level indicator on the wall of the tank.

The firmware of the printer has an option named Delay Start that allows for the heater unit to activate for a specified amount of time prior to the print starting, in order to preheat the build chamber and the resin itself. This would be a handy feature to employ when launching a print remotely and not having access to confirm if the printer was properly up to temp. We left this feature alone and let the print continue as is.
We re-launched our TEST default print, making sure to manually turn on the Air Heat & Pure first to keep temperatures stable and help control odor for the duration of the print.
We considered the heating portion of the device to be especially handy given this time of year with low winter temperatures outside. Now we wouldn’t have to worry whether the temperature in the building dropped too low for reliable resin printing.
This time the print began in earnest, showing an estimated build time of 3:29:00 and using 40.5ml of resin, using a fine layer thickness of only 0.05mm.
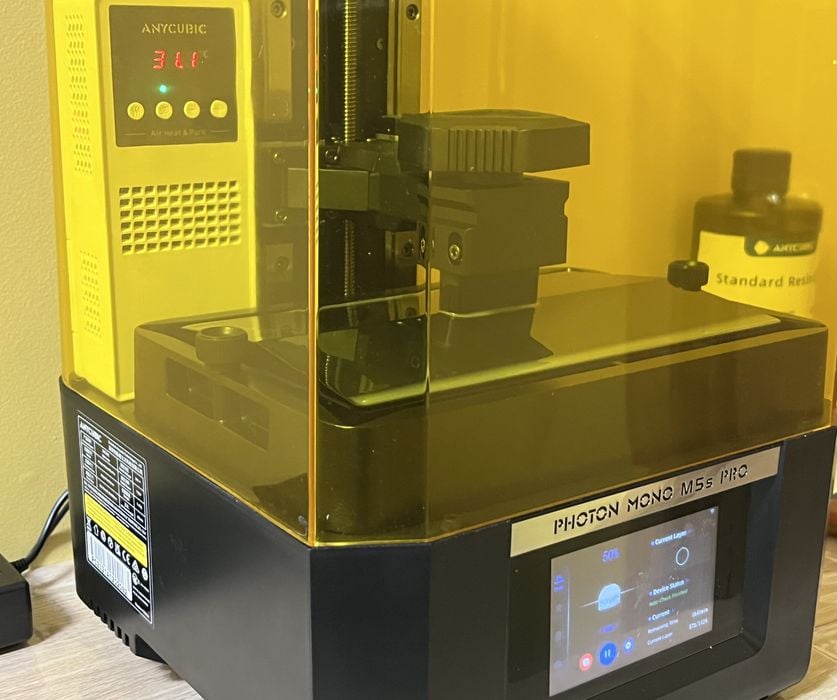
When we checked on print progress halfway through, we saw everything was working as it should be, with the exception that the temperature had gone beyond the 25°C that we had set for a value on the Air Heat & Pure and was now 31.1°C. While extra heat isn’t quite unwelcome, it seems that UV curing light was the source of the additional heat being generated.
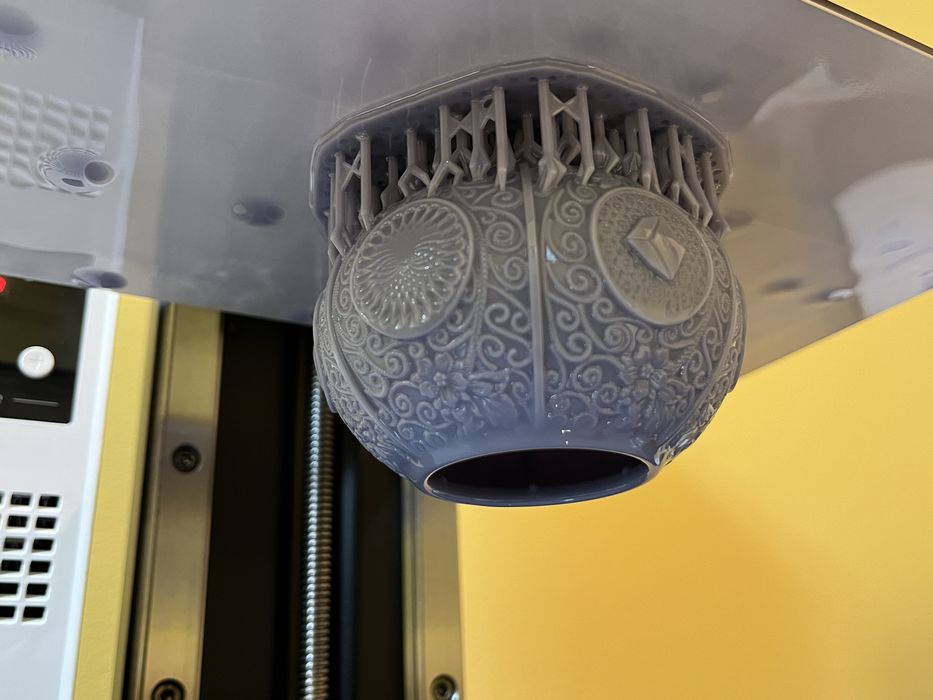
The print completed in 3:34:00, slightly longer than advertised. We let the print drip dry first and then removed and transferred the platform to our papered work area and gently pried the print off the platform using the metal spatula.
When we tried to remove the support material from the print we found this task to be quite difficult, as the pre sliced supports were quite hard, taking several minutes to generate a pile of support structure debris.
When all the supports were off the print, we passed it through the wash & cure stations to clean up and then cure any remaining raw resin and then inspected our print.
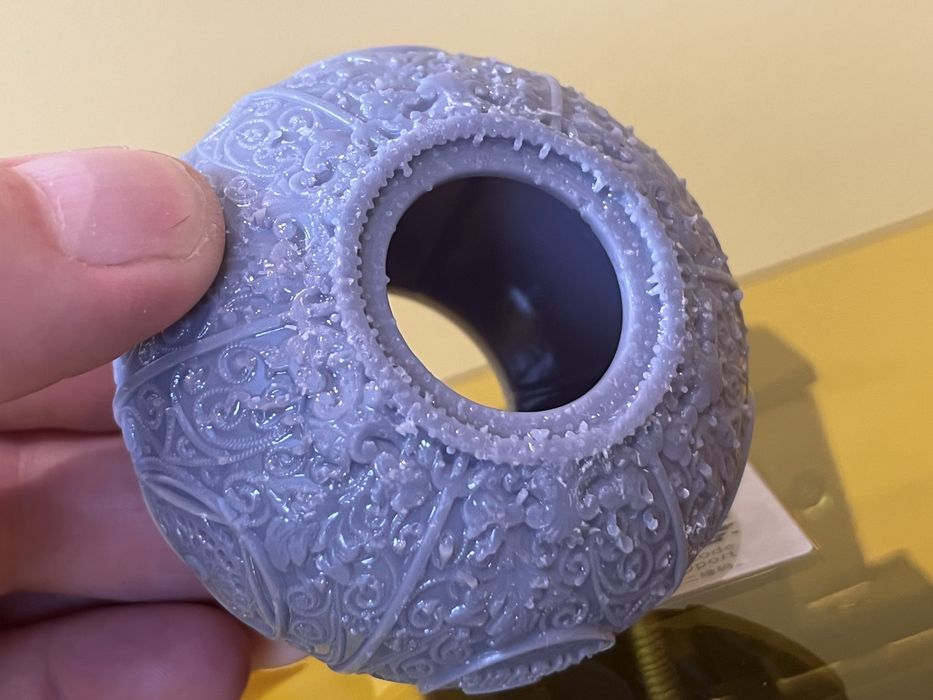
The print’s detail was quite good and the surface finish was outstanding, except for the areas that were marred by the overly-strong supports. We were curious to see if we could improve surface quality when we sliced our own prints, but with pre-sliced GCODE, there’s not much you can do to adjust settings.
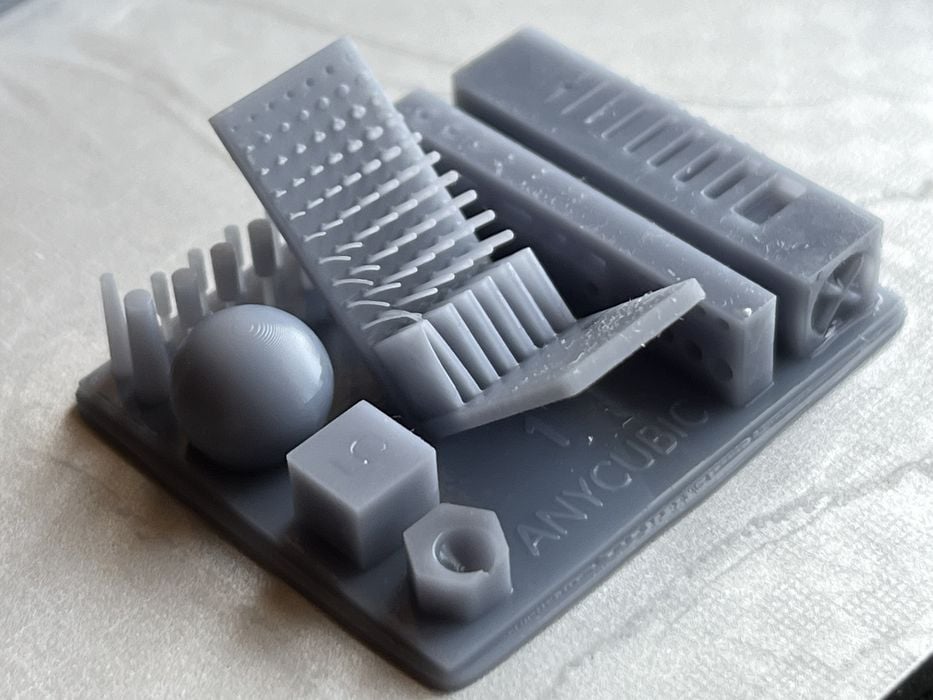
We launched Anycubic Photon Workshop and loaded in the Validation Matrix print. This print is one of many that helps determine the correct exposure settings for a particular resin and is always printed directly on the build plate with no supports.
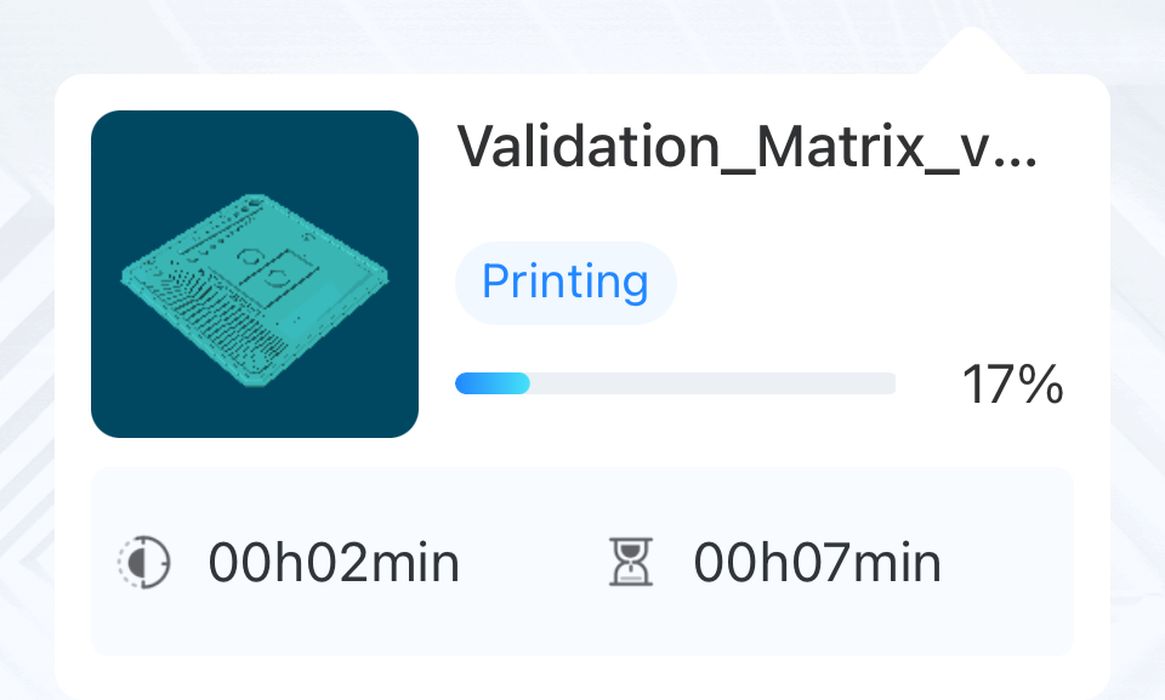
We strongly advise tuning your resin printing parameters before doing any serious print jobs. The parameters match the resin’s properties with the capabilities of the 3D printer. Even parameters provided by manufacturers with their own resin tend to be overly conservative.
We went onto Anycubic’s website and confirmed the settings for our jug of Anycubic Standard Resin V2 for use with the Photon Mono M5S Pro. The settings we found on the website matched the Default Resin Normal profile already available in Photon Workshop, so we went with those and sliced our print, getting an estimated build time of 7:21 and using 1.771ml of resin.
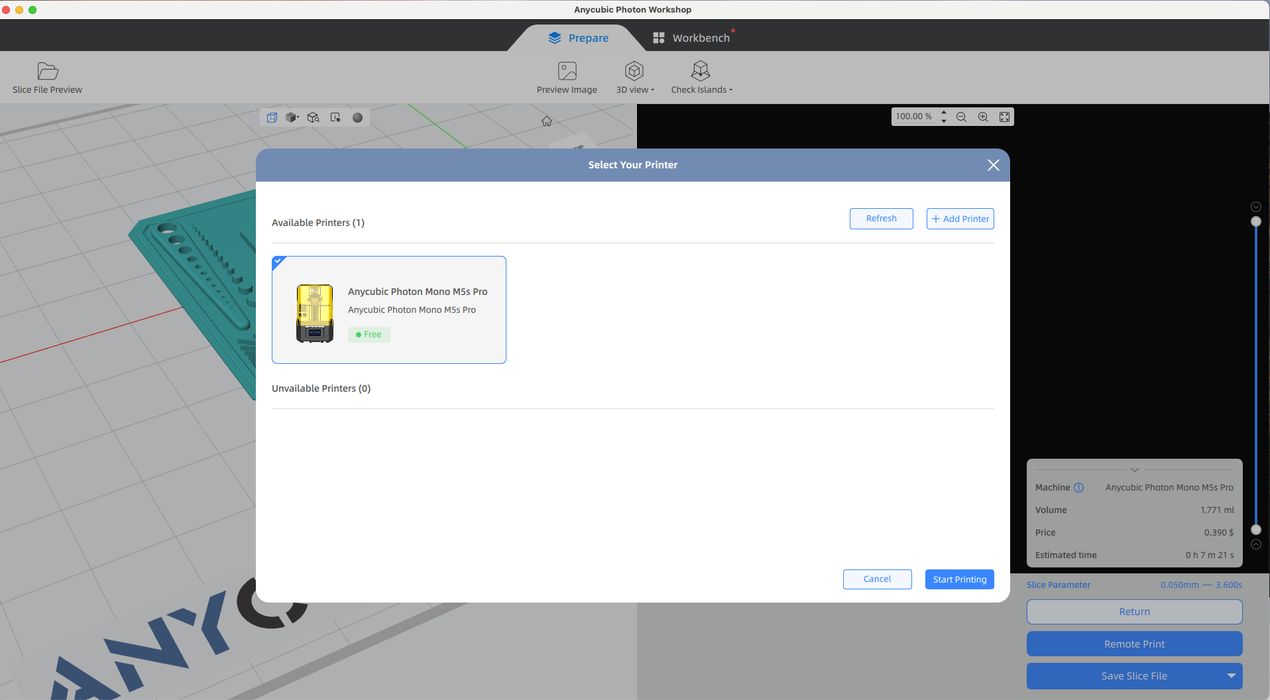
Then we simply clicked on Remote Print in the slicer and sent our job directly to the printer, switching to the Workbench portion of slicer to monitor the progress of our print.
We found we could do the same on the Anycubic app on our mobile device. Our first calibration print completed in 00:11:00 using 1.77ml of resin. The print turned out quite well and with good detail, so we wondered if we needed to tweak our exposure settings much.
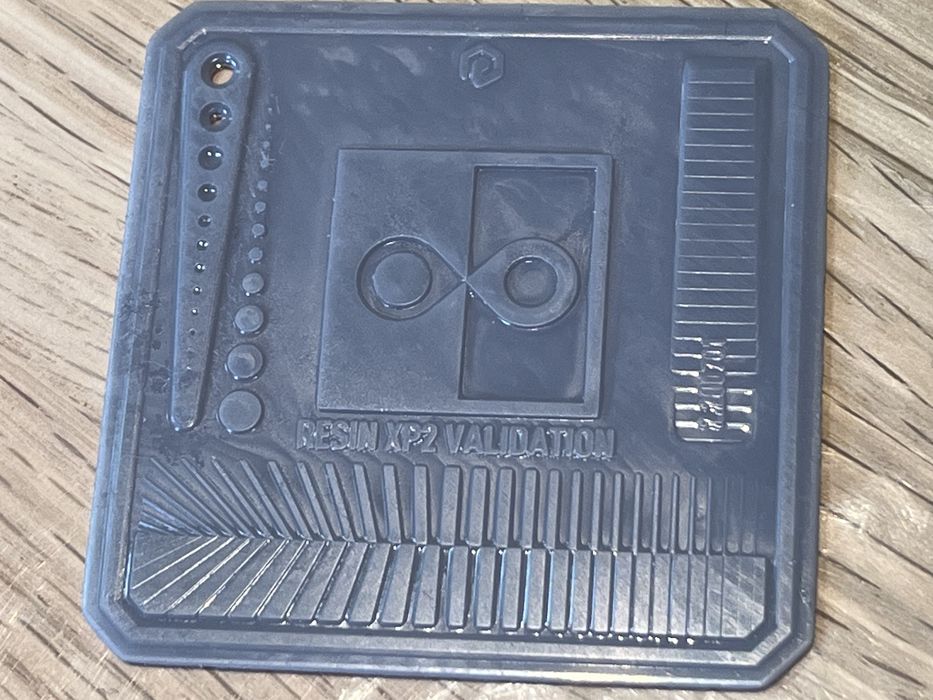
This is where we would normally switch to using the highly effective “Cones of Calibration” 3D model to fine tune exposure settings. However, Anycubic supplies a “resin exposure rangefinder” procedure named “RERF”. It is provided in the form of a pre-sliced print on the memory stick.
According to the user manual, the RERF test contains eight models, each being numbered. The exposure time for model 1 is equal to normal exposure time and the exposure time for other seven models will be increased by a percentage.
Viewed as a set, the operator is able to determine the correct exposure time by comparing negative and positive details in the model. The longer resin is exposed to UV light, the more negative details will be reduced and positive details increased.
Since the file was already sliced and on the memory stick, we decided to print it and see what we would get. When the print completed, it appeared that we had several of the eight prints that looked quite good, so the results were a bit ambiguous.
We decided to switch back to the Cones of Calibration 3D model to dial in exposure settings, slicing the model in Photon Workshop using default settings and getting an estimated print time of 00:59:22 and using 1.965ml of resin.
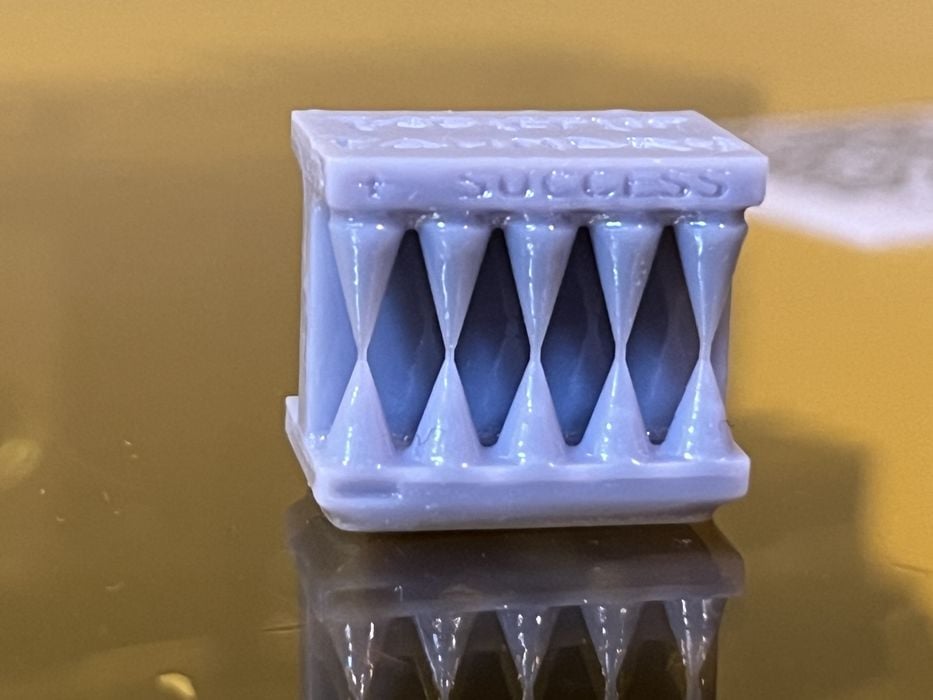
The Cones worked as designed with all cones touching on the Success side, and none touching on the Failure side, showing us that we were definitely in the ballpark with our default exposure settings.
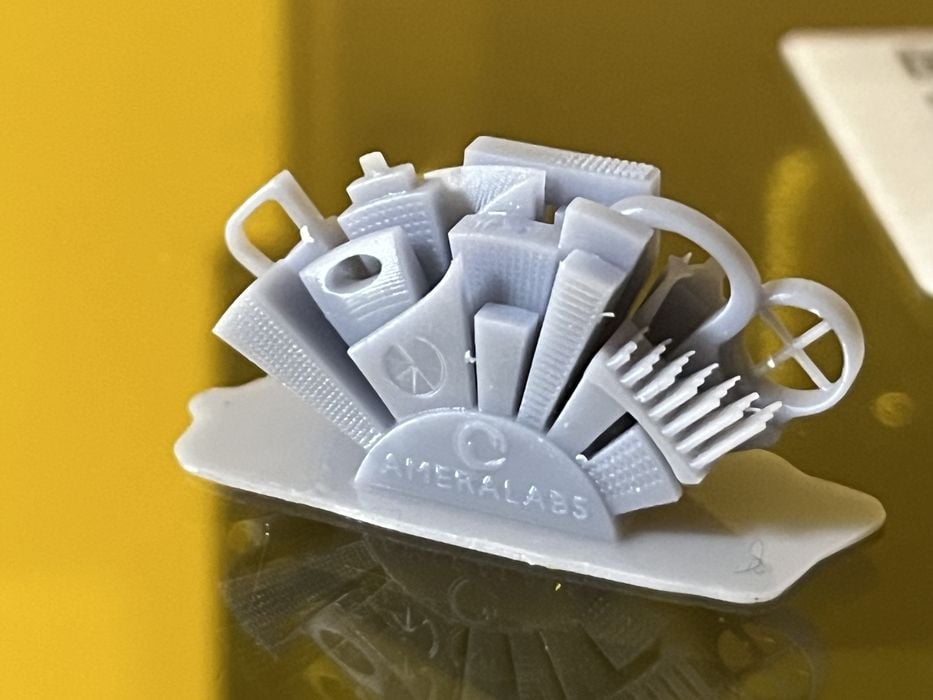
These calibration prints used hardly any resin at all, so just for fun we decided to run another of our typical calibration parts, “Ameralabs_town_V2”, getting a build time of 00:58:16 and using 1.857ml of resin. This benchmark job turned out fantastic, especially considering that we somehow managed to drop it on the floor between washing and curing and caused no obvious damage! We decided the settings were good to go, and moved forward slicing more complicated prints.
Photon Mono M5S Operations
Now it was time to slice something larger and more challenging, the Eiffel Tower. This print would have a build time of 07:28:00 and would use 10.439ml of resin. It would be our last print directly on the build plate with no support structure, as the print itself is basically a support structure.
Now that we had a larger object to deal with on the build plate, there was more housekeeping to do in order to prevent a big gooey resin mess over the printer and our work surface.
Giving prints some extra time to hang and drip dry and then using the plastic spatula to scoop droplets off the top & bottom of the build platform and into the tank are both good practice. Wearing gloves and a proper mask when working with uncured resin are both a must, as the material is just not friendly to the human body. Having a work area covered in disposable paper makes cleanups a breeze and gives a large area to plop the gooey platform down onto and have the space necessary to coax any stubborn prints off of the build platform and then fiddle about removing supports.
Maintaining a precise order of operations goes a long way to keeping the toxic goo in control.Here are our typical steps:
- Put on gloves & a mask
- Remove the printer lid
- Scrape droplets off the platform
- Remove the platform by holding the dry upper portion of the bracket
- Place the platform on its edge on the papered work surface
- Use the metal spatula to pry off the print
- Put the platform back in place
- Replace the lid on the printer — while both hands were dry.
Putting the lid back on the printer ASAP is prudent, as the Air Heat & Pure can’t do anything with the resin odor in the open air. We made sure to top up the resin in the tank before replacing the lid.

Our Eiffel Tower print turned out successful and looked great, with only a minor issue where one of the base pads of the Tower had somehow detached from the build plate and reattached in a new location, without affecting the completed print.
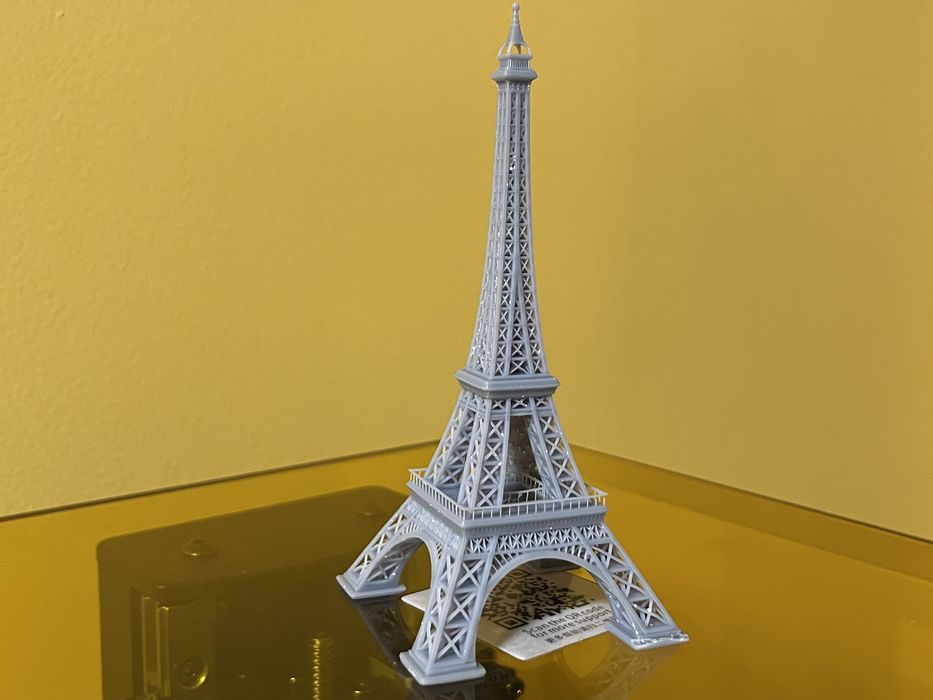
We did note that the model had picked up a bit of debris flakes from our wash station, so we made sure to clean that up before our next print. This is another good reason to get all the bits off of a print before washing.
This is part two of a three part series, please read parts one and three.
Via Anycubic