

Our lab has been very busy lately, this time testing the Creality Sermoon V1 Pro desktop 3D printer.
This is part one of a two-part series. Please read part two.
Sermoon V1 Pro Specifications
The Sermoon is one of Creality’s many brands of desktop 3D printers. While their most popular brand is the Ender series, the Sermoon series just happens to also include excellent machines.
The Sermoon series currently includes three models, the D1, V1 and V1 Pro. Our testing involved the V1 Pro device. The Pro differs from the “not Pro” model in that it includes a door sensor and an onboard webcam.
The Sermoon V1 Pro is a FFF-style device, using standard 1.75mm filament. The machine is capable of handling PLA, ABS, PETG and even flexible TPU.
The hot end of the Sermoon V1 Pro maxes out at 250C, which is more than sufficient to print each of the aforementioned materials. However, this also means the machine is not able to handle higher temperature materials, such as nylons or PEEK.
The Sermoon V1 Pro’s extrusion system includes a direct-drive extruder, which greatly helps when printing with TPU, and a standard 0.4mm brass nozzle. The extruder uses Creality’s “Sprite” technology, which involves dual toothed gears that provide a very strong grip on the filament.
The build volume on this device is quite reasonable at 175 x 175 x 165 mm. This is slightly smaller than many other desktop 3D printers, but is more than enough to print most 3D models.
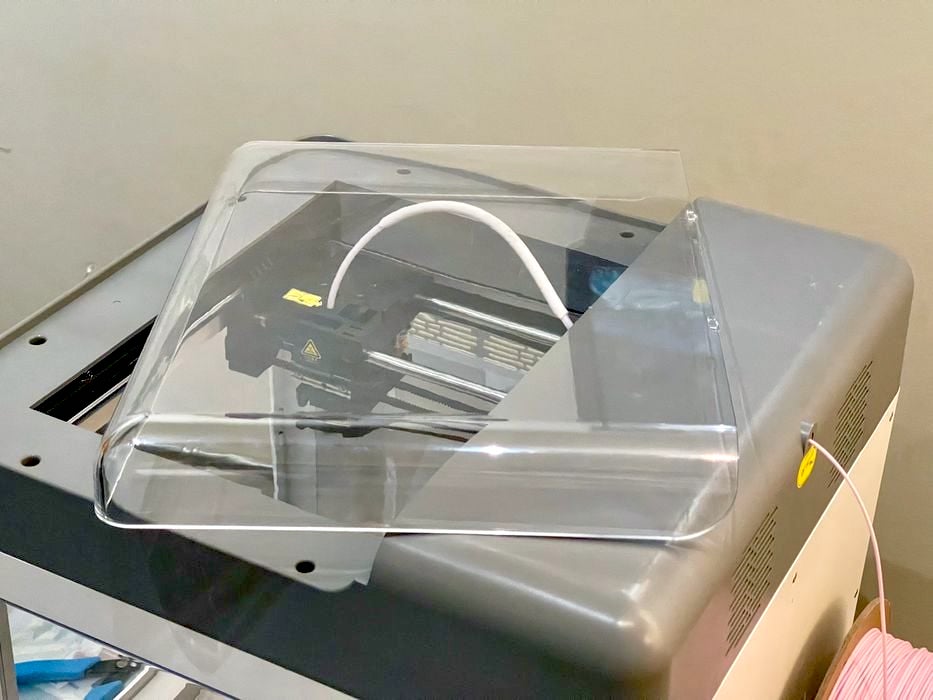
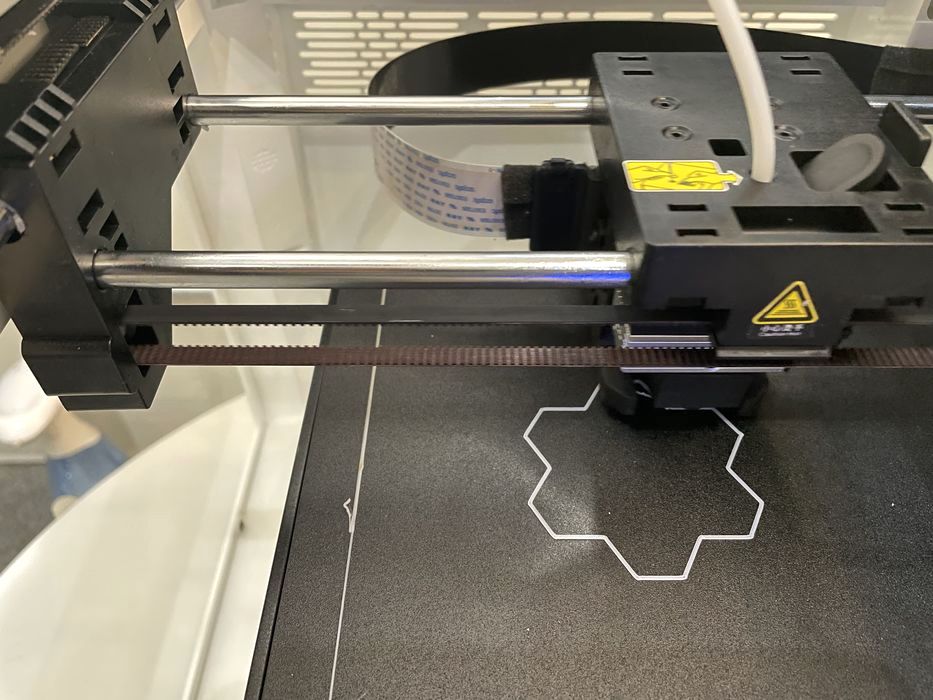
The key feature of the Sermoon V1 Pro is that it is a fully enclosed 3D printer. Unlike the open gantry devices that frequent product pages, the Sermoon V1 Pro’s case completely encloses the build volume. This is quite advantageous as it allows the machine to capture heat from the print surface and reduce the thermal gradient that can cause warping in prints. In other words, the Sermoon V1 Pro is more reliable than typical open gantry equipment.
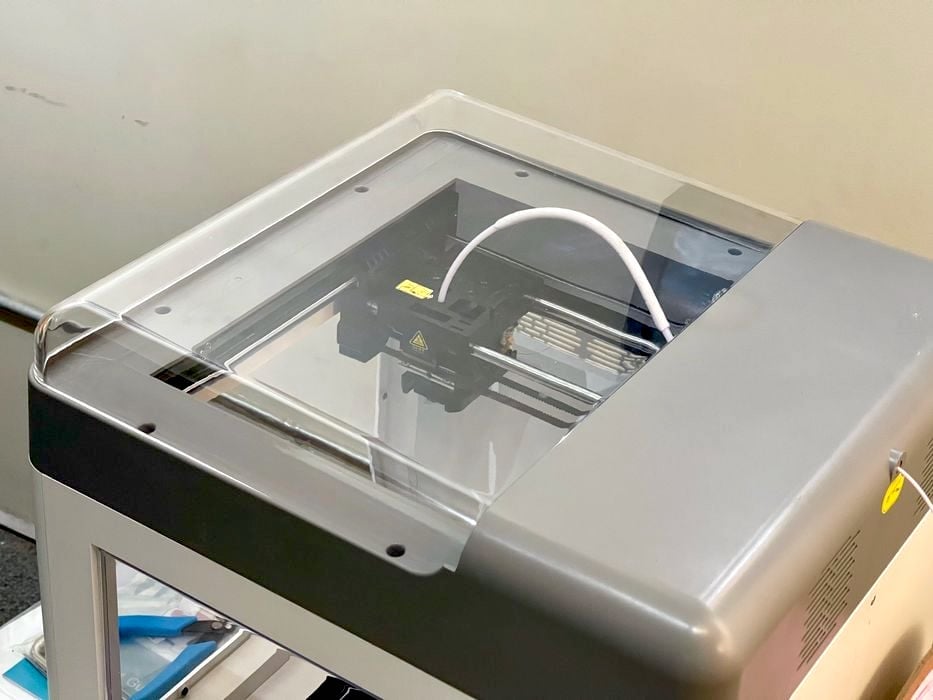
You can access the interior of the machine easily by lifting off the top clear panel, which fits snugly on the top of the machine. This must be done during filament loading, but it also provides an excellent view of the active print job and also allows light into the build chamber.
The Sermoon V1 Pro’s print surface is heated to reduce warping, but it can only reach 80C. At first I thought this was too low, because typical ABS print configurations use 100C as the bed temperature. However, when you realize that the Sermoon V1 Pro’s enclosure captures heat to raise the internal temperature, the bed temperature is somewhat less important, and 80C could be sufficient.
Control of the device is done primarily through the large color touchscreen on the front of the machine. The menus shown are easy to follow and we had no problems operating the machine.
There are a number of convenience features on the Sermoon V1 Pro:
- Filament-out detection and handling
- Remote control using WiFi and onboard camera system
- Magnetically attached flexible print surface
- Internal LED light to easily see print activity
Unboxing The Sermoon V1 Pro 3D Printer
Unboxing the Sermoon V1 Pro was perhaps one of the easiest machines we’ve ever opened up, largely because the device is entirely pre-assembled. Many desktop 3D printers are shipped in flat-pack form, where you must at least erect the gantry and attach some cables.
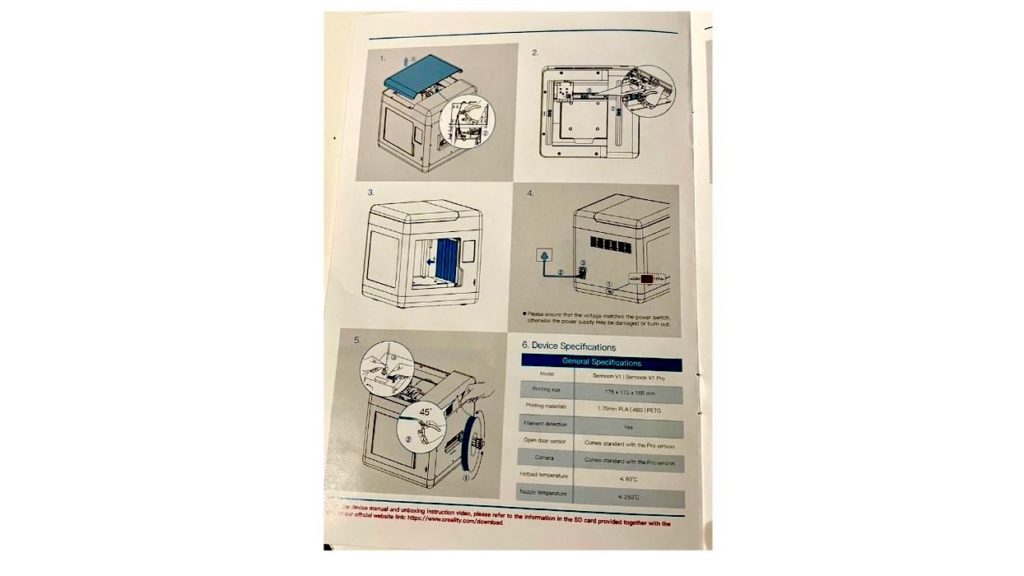
But you don’t have to do that on the Sermoon V1 Pro because it’s basically ready to go. There are also helpful instructions, although the process is so straightforward you almost don’t need them.
While the leveling procedure is easily done, Creality has pre-leveled the machine at the factory so it isn’t absolutely necessary to do so once you set up the Sermoon V1 Pro. However, we did so anyway, as it is a good practice.

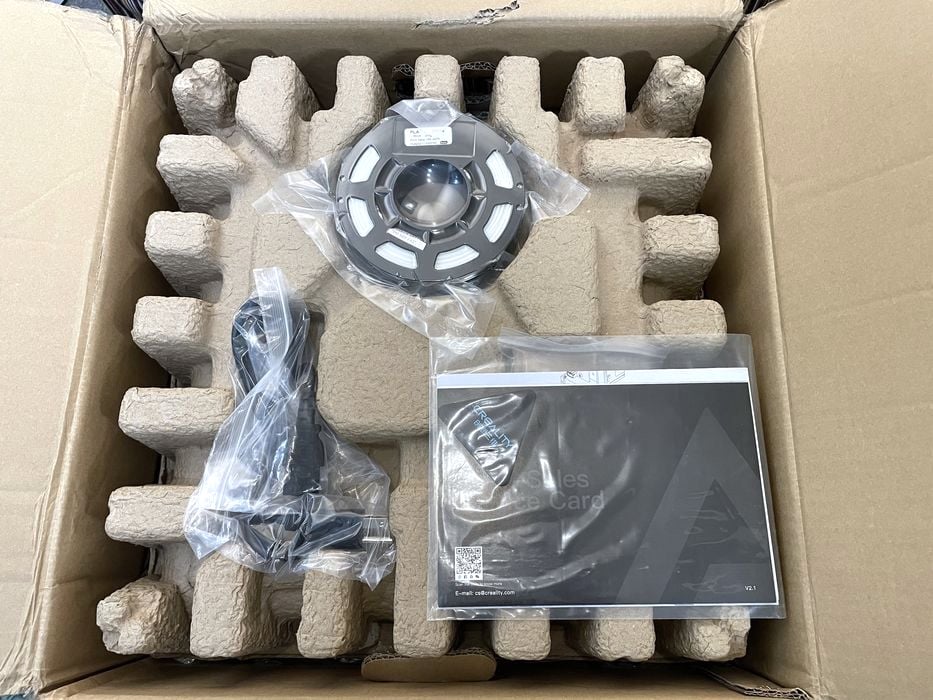
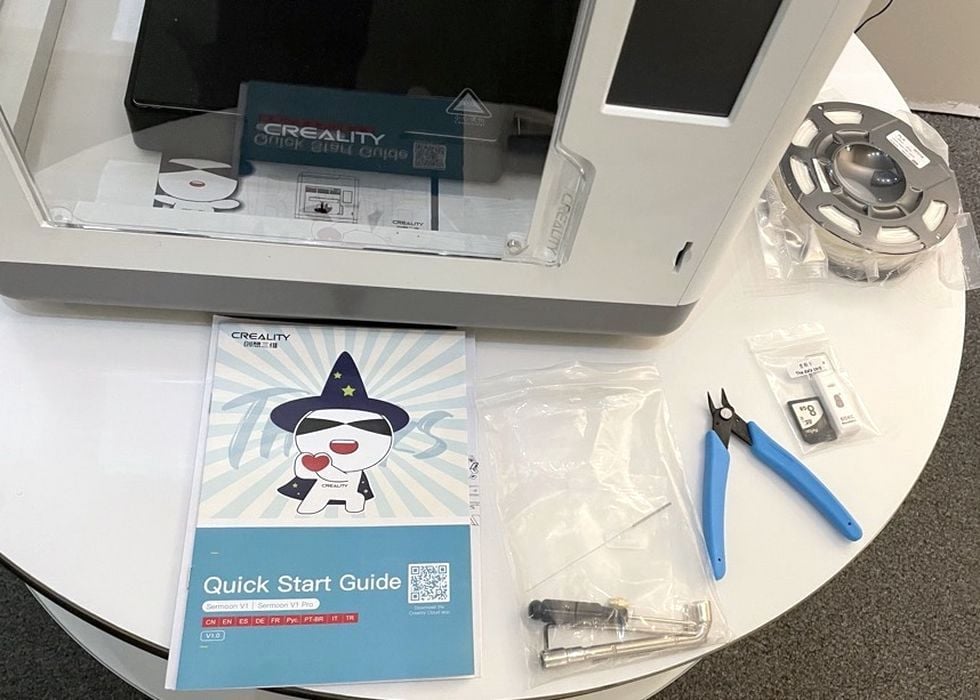
The Sermoon V1 Pro is fully assembled, but that doesn’t mean you may eventually require some tools to perform maintenance or troubleshooting. Creality has included a bag of the most useful tools for this purpose, but in our testing we never had a need to use them, even when setting up the machine.
The Sermoon V1 Pro is small enough that it should easily fit on any desktop surface, and even can be placed in an office setting, as you will see.
Sermoon V1 Pro 3D Printer Job Preparation
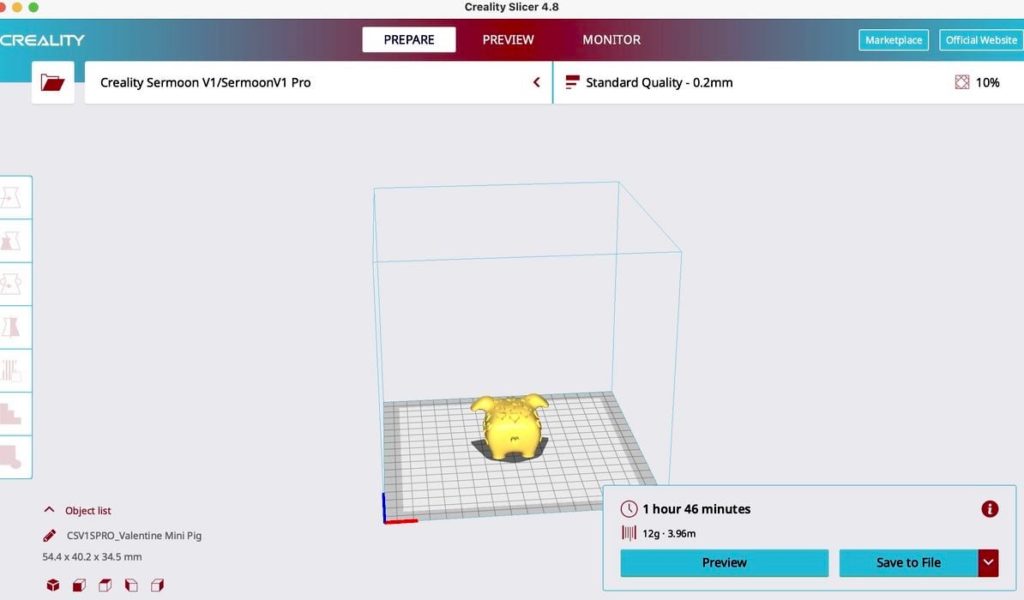
Every 3D printer must use separate software to prepare jobs for printing, and that’s the case here.
Creality provides a slicing tool they call Creality Slicer. However, when you open the software, it is clearly a customized version of the open source Ultimaker Cura tool. That’s actually good news, because Ultimaker Cura is a very powerful job preparation tool including many useful features. We were even able to use some of the “experimental” features when preparing jobs. However, we hope that Creality will update their slicer when new versions of Ultimaker Cura are released.
After 3D models are sliced with the software, they must be transferred to the Sermoon V1 Pro. This can be done in two ways.
First, you can save the GCODE file on a standard SD card and insert it into the machine. From there you can start the job from the Sermoon V1 Pro’s front panel touchscreen.
The second method is to use the WiFi connection, which I will describe shortly.
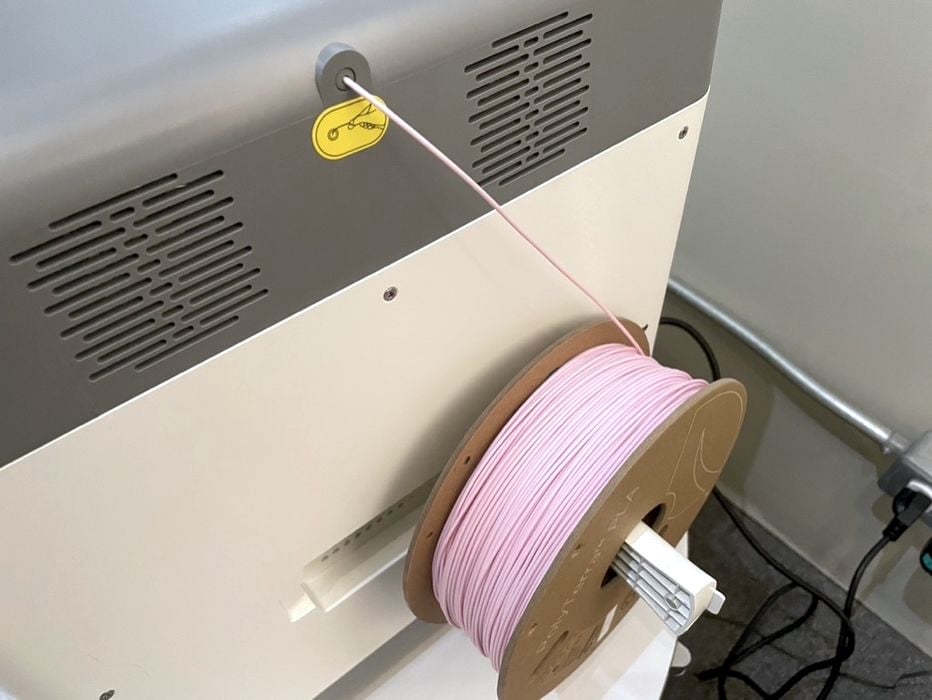
Before you can print, you must load filament into the Sermoon V1 Pro. The device has a handy universal spool holder that folds out from the right-hand side, and it can accommodate standard 1kg spools.
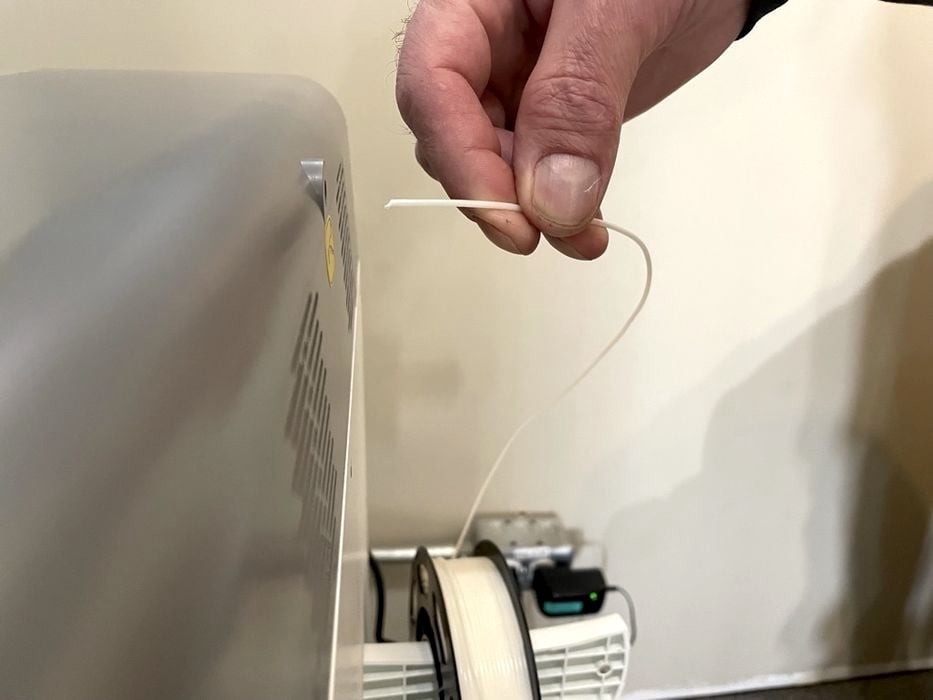
Loading filament into the machine is surprisingly easy. The filament must be manually pushed through a small hole on the right side of the Sermoon V1 Pro, where it eventually reaches the extruder.
Normally extruders require you to open up a door, or push a tab to enable the extruder to accept filament, but that’s not the case on the Sermoon V1 Pro. Here you simply push the filament into the extruder until it “stops”. Then from the front panel, you press Feed and the extruder instantly grabs the filament and you’re done.
We found the filament insertion and removal process to be extremely easy and reliable. Unlike some other equipment, anyone can load and remove filament on the Sermoon V1 Pro.
This is part one of a two-part series. Please read part two.
Via Creality