
We were able to do a detailed test of Creality’s new HALOT-ONE resin 3D printer.
This is part two of a two-part series on the Creality HALOT-ONE 3D printer. Part one is here.
After machine setup, we were able to launch test prints.
HALOT-ONE Printing
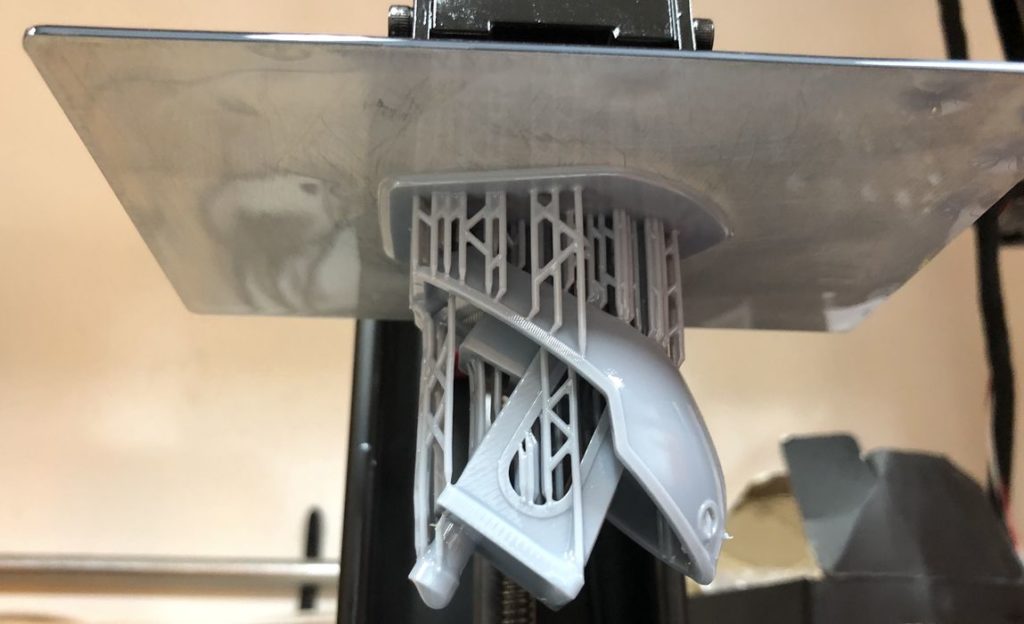
halot-one-successful-print
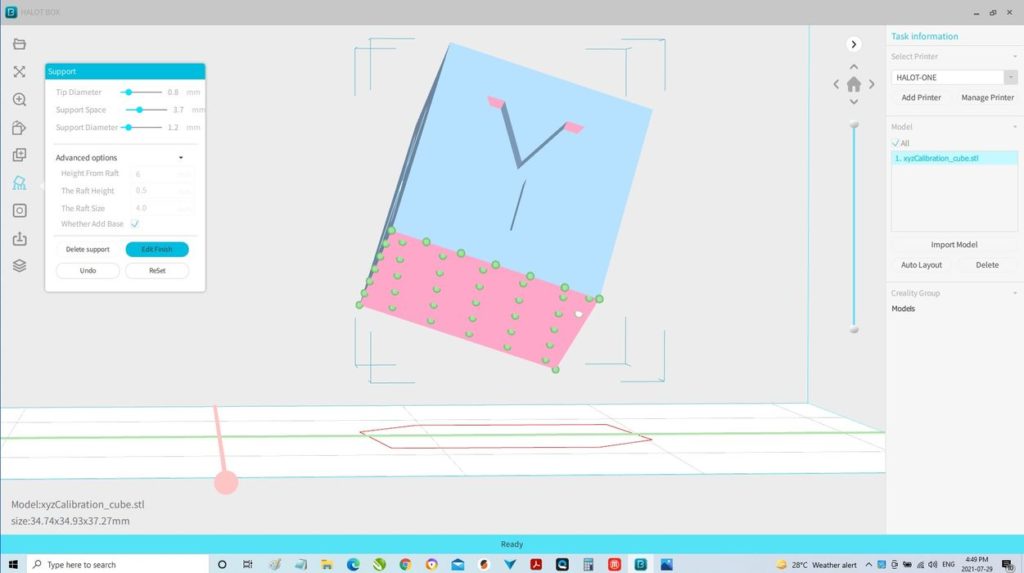
Our first test print was the standard XYZ calibration cube, which was to print in 82 minutes and used a whopping 3.6ml of resin. Unfortunately, our 3D print failed, as the raft didn’t stick to the build plate and was found at the bottom of the resin tank. This is why properly tuned pre-sliced files are necessary.
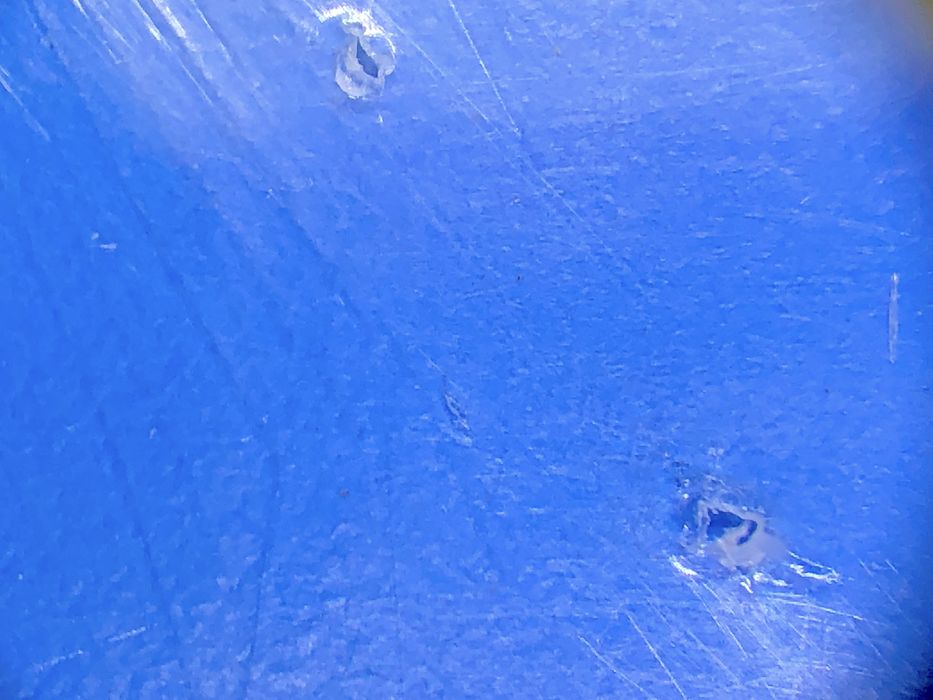
Our second attempt at the XYZ calibration cube also failed in a similar manner. However, we then found some dents in the FEP, as bits that fell off the build plate must have been pressed hard into the membrane. This shows the importance of getting the 3D print parameters correct.
At this point we became confused because the HALOT BOX software did not show a means of tweaking the typical settings, such as exposure time, compensation thickness, focal length, etc.
How exactly were these to be changed, as they must be when dealing with print problems as we had?
It turns out Creality has an unusual approach. Instead of changing them in the slicer software, you instead change them on the front panel!
Knowing this, we were able to set the following on the front panel and try the XYZ calibration cube once more:
- Underlying exposure: 40s
- Exposure delay: 4s
- Print exposure: 3s
- Lifting height: 6mm
- Printing speed: 1-3s

However, please note that there are different words used for these parameters: Bottom Exposure Time, Light Off Delay, Exposure Time, Bottom Lighting Distance, Motor Speed. Those familiar with resin 3D printers will figure this out quickly, but it could be baffling to newbies.
These parameter changes got us a successful first 3D print.
Important: the print settings on the HALOT-ONE reset to defaults each time you upgrade its firmware. Therefore, you must check and possibly adjust the on-screen print settings before each and every print job.
I’m not sure I prefer this approach, as it separates the job file from some print parameters. While it makes it easy to tweak and re-run a job without the need for re-slicing, it also allows you to “lose” the correct parameters because they’re not stored in the print file.
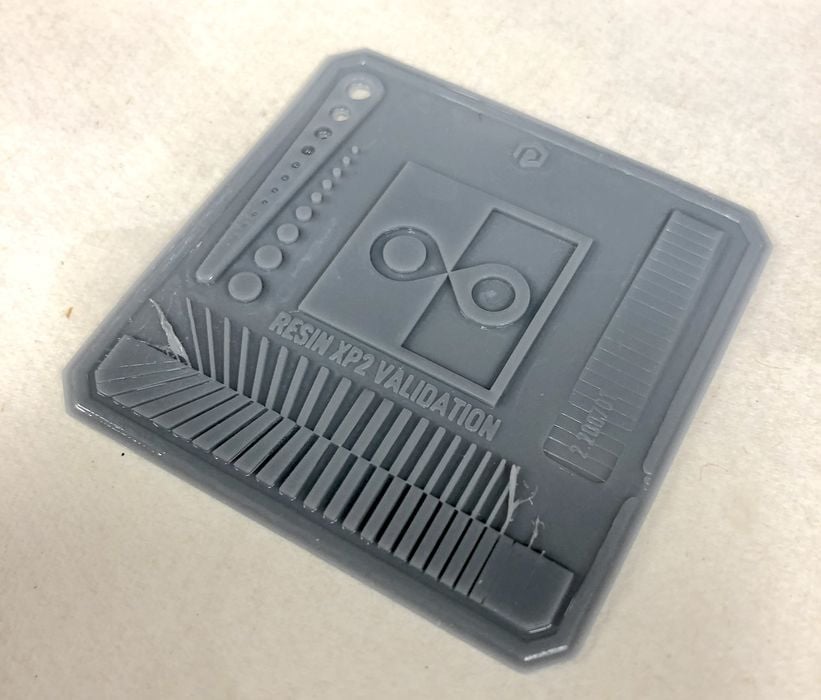
We then used the Validation Matrix 3D print to fine tune our settings. This is a standard test object that is quickly 3D printed on resin equipment, and allows a quick visual verification of under or over exposure. We recommend using this object for tuning any resin 3D printer.
HALOT BOX successfully generates code for printing, but we have one suggestion: the rafts should have a beveled edge to assist with removal. The rafts generated currently have a vertical edge, which is sometimes hard to pry off as there is no edge to catch with your removal tool.
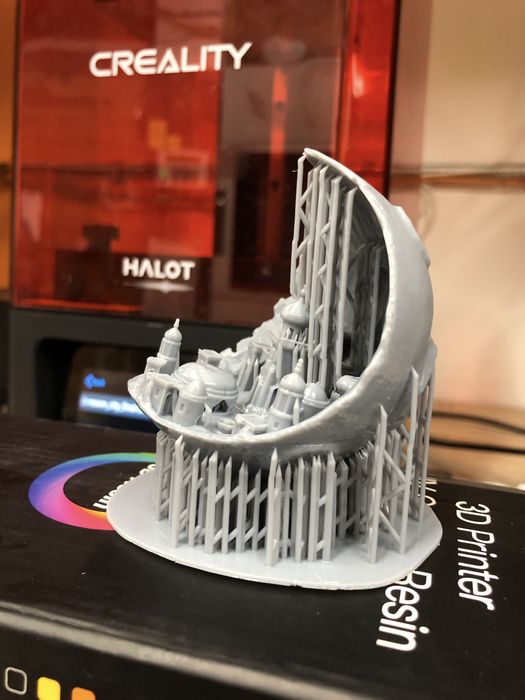
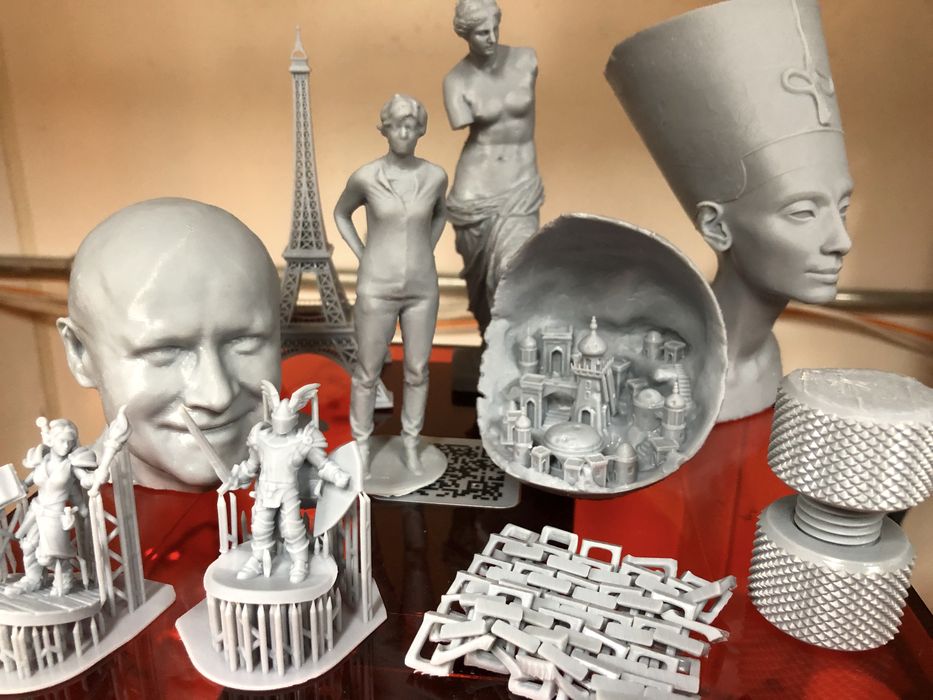
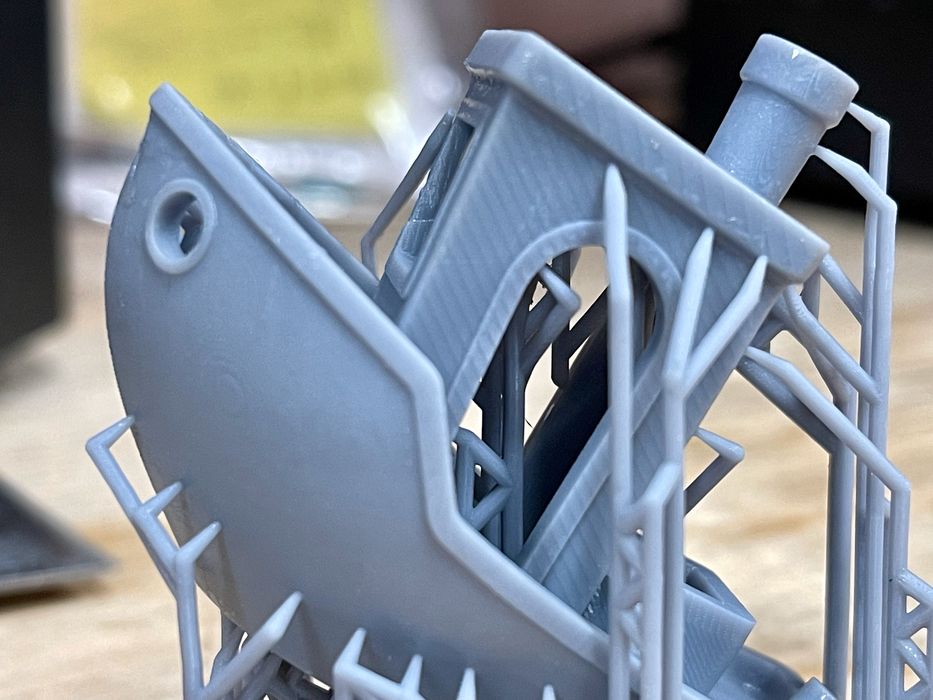
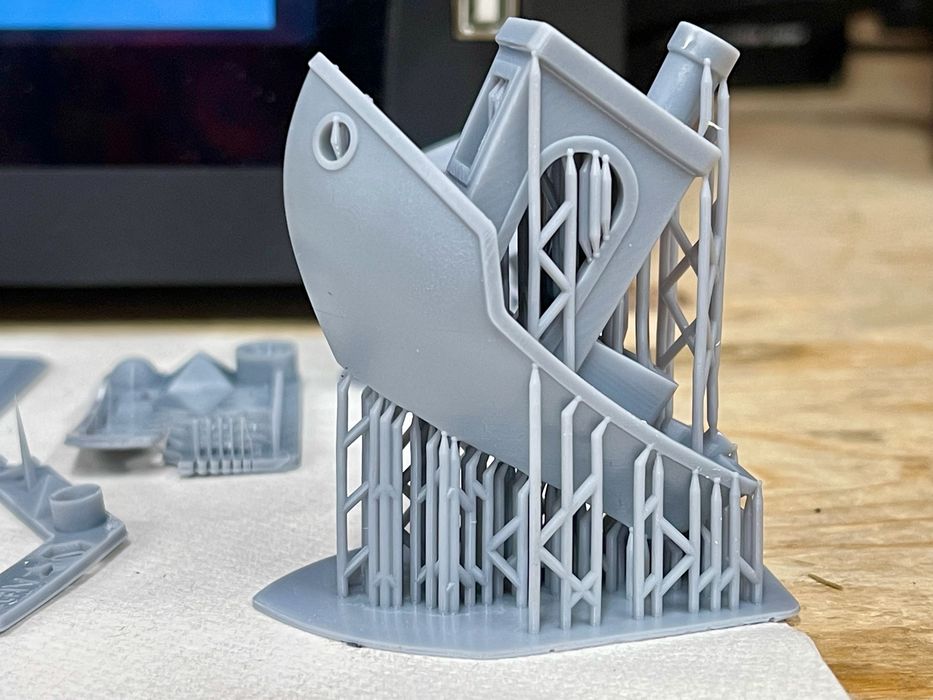
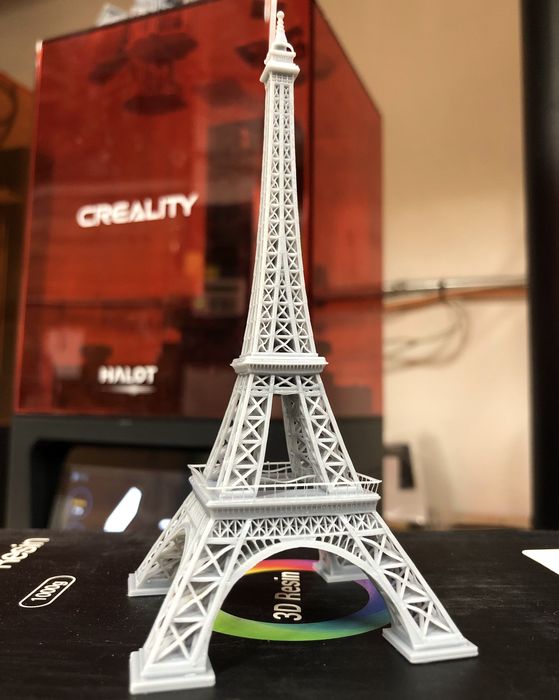
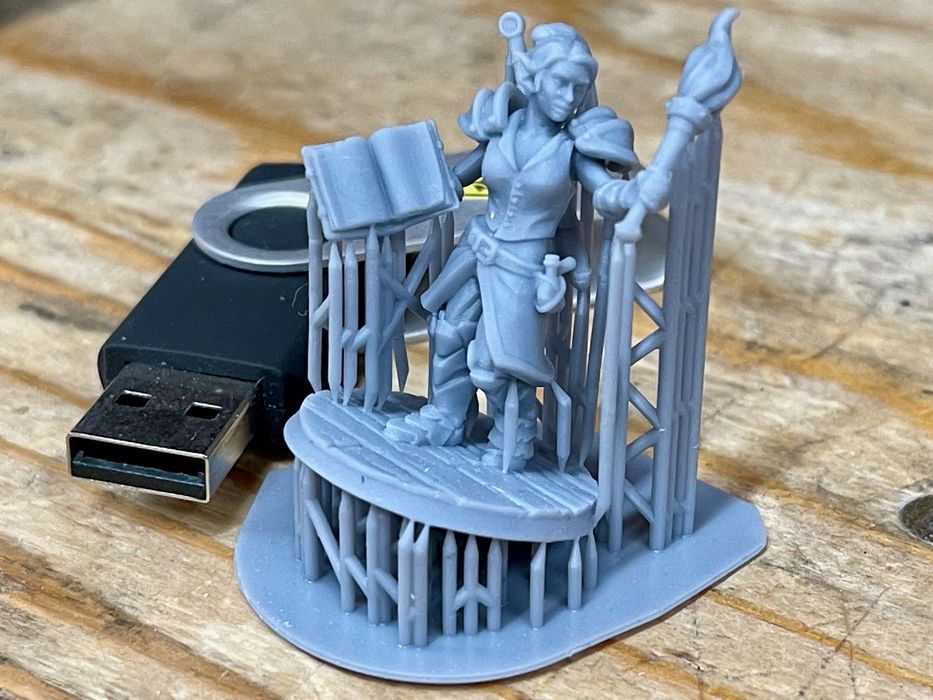
After tuning the resin parameters successfully, we went about 3D printing a number of objects, most of which turned out extremely well, as you can see in these images.
One very peculiar issue was seen on the famous #3DBenchy print. While the print came out near perfect, there were unusual striations visible on the housing as seen in this image. Strangely, these were NOT visible on other portions of the print, even at the same layer level.
We could not figure out how these were being generated, and did not see them on any other print. Fortunately, they are very small and you might not see them at all unless you looked very closely. On some prints they were not visible at all.
HALOT-ONE Slicing
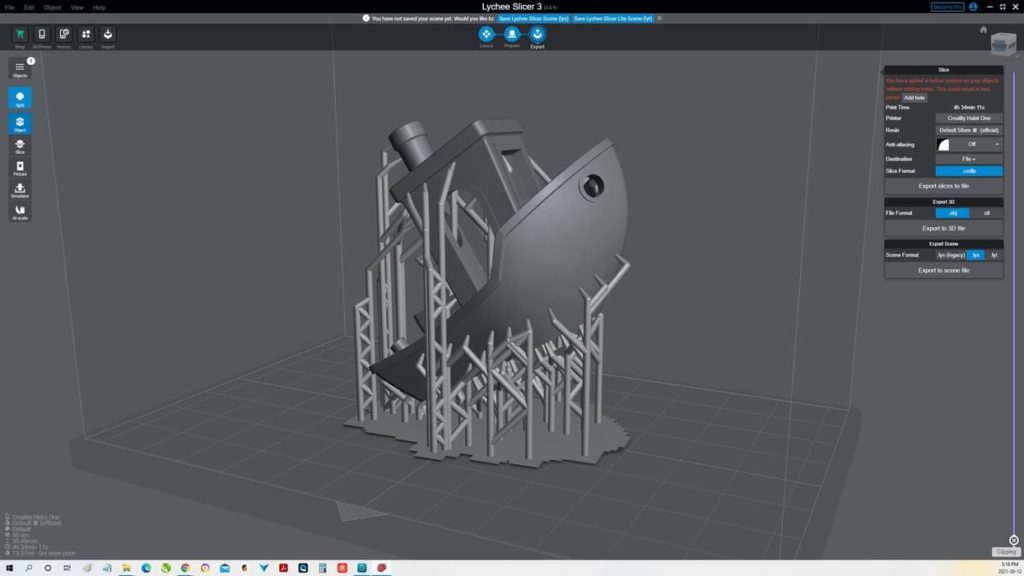
We tested using the third party Lychee Slicer instead of HALOT BOX to see how it worked with the device.
One feature we noticed is that the HALOT ONE apparently does not support 0.01mm layer height, but only goes down to 0.05mm layer height. That size is more than sufficient for high quality models, so this is not an issue.
We found that the Lychee Slicer produced more effective support structures in an easier way than HALOT BOX. However, HALOT BOX is an entirely new piece of software that will no doubt be upgraded continuously by Creality. As of this writing, it’s probably already improved.
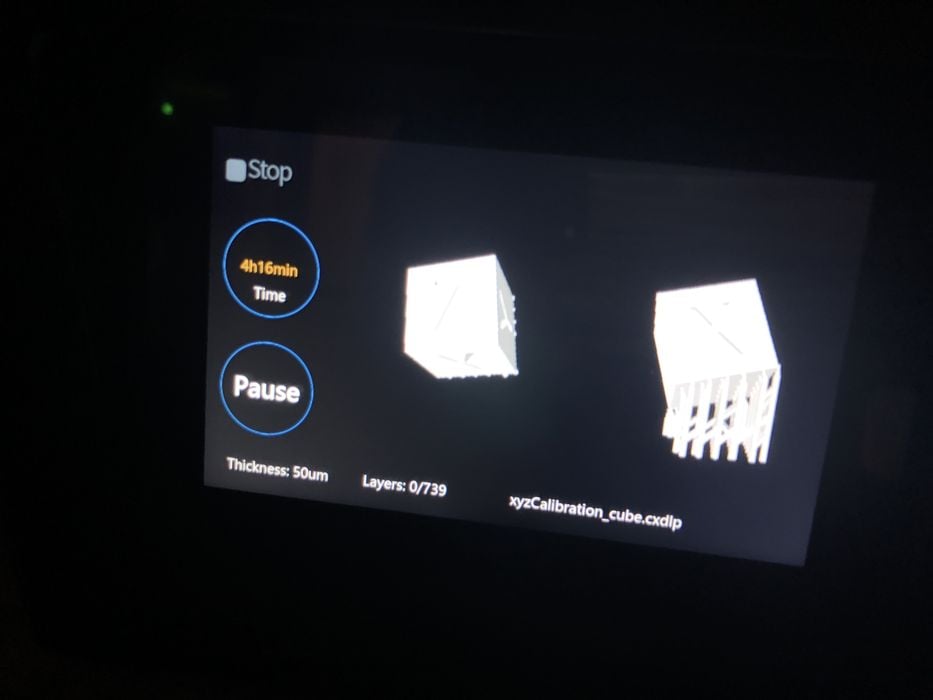
We noticed the estimated print time on the HALOT-ONE’s front panel was often wrong. For example, a job sliced in HALOT BOX would estimate at 23:8:53, while the printer reported 33:49:00.That is a significant difference. The job actually took 24:00:00, meaning the slicer was more accurate.

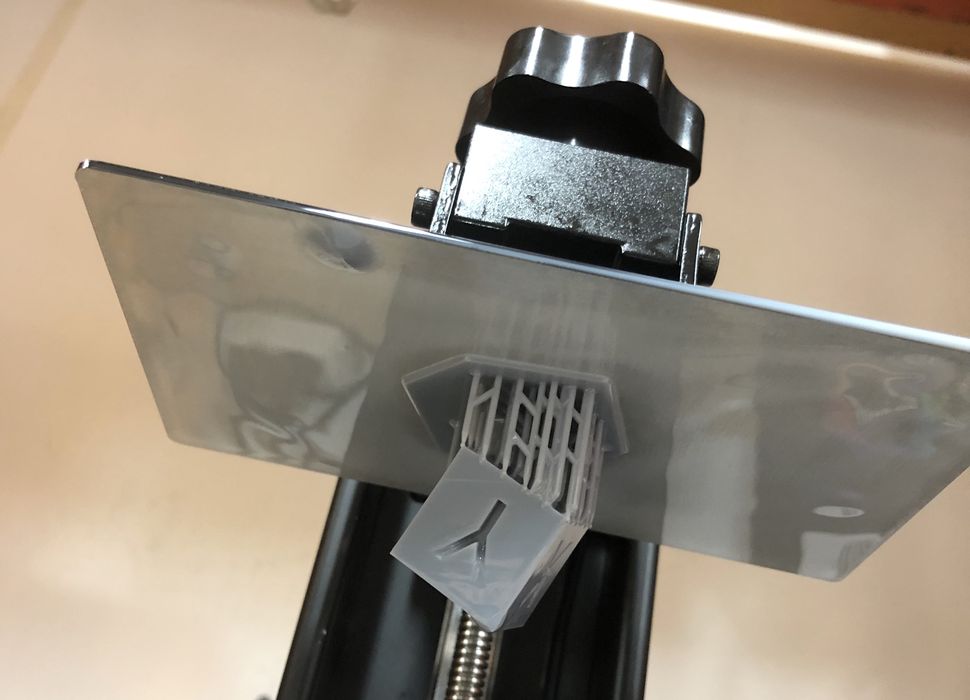
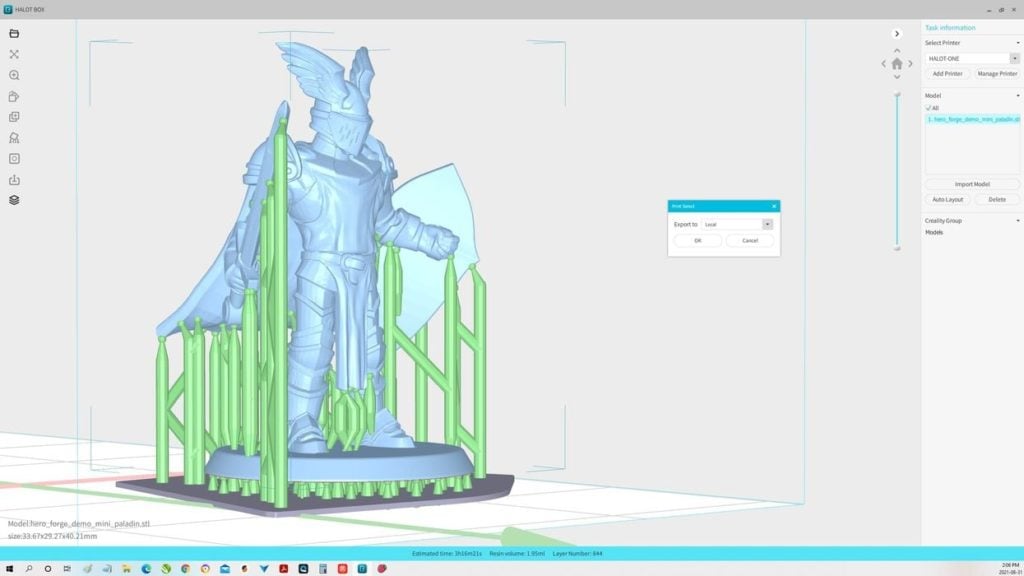
We successfully 3D printed a chain mail 3D model after a few tries with incorrect support parameters. These are notoriously challenging to print due to the flexible structure and many tiny components. However, after we had tuned the HALOT-ONE, we were able to print this unusual object easily, and the support structures came off without any effort after changing the the tip diameter to 0.5mm and the support spacing at 4.0mm.
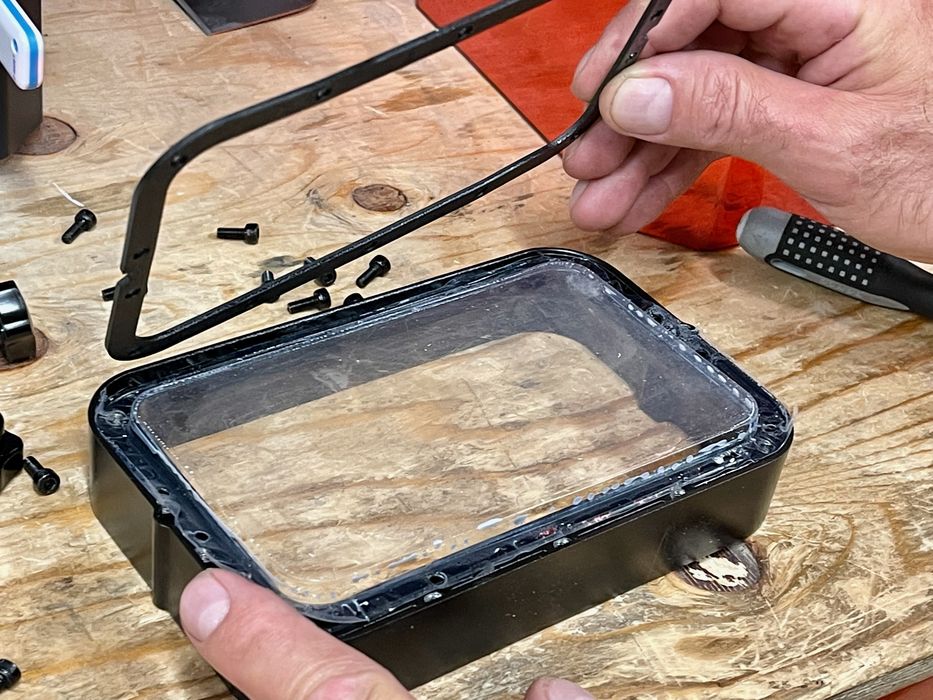
During one of the chain mail tests, the print failed and once again stray bits were pressed into the FEP. This time, however, we got more than dents as by chance the bits were sharp and actually punctured the membrane.
After the print failed, we found resin had leaked under the tank and was cured on the optical window. This required removal with a razor blade, and replacement of the FEP surface, which turned out to be straightforward. Always have extra FEP membranes handy!
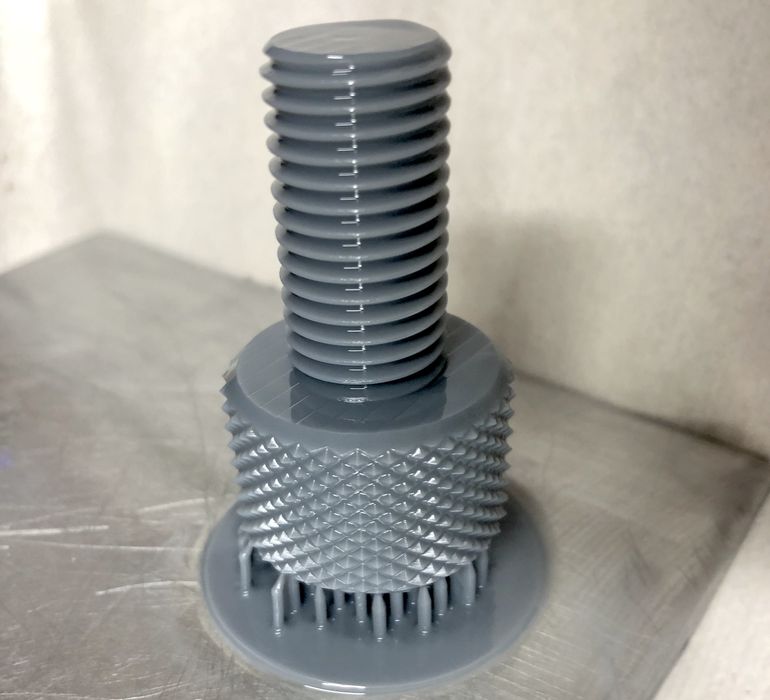
After proper tuning and support structure design, we were able to reliably 3D print very high quality objects easily on the HALOT-ONE. The nut and bolt fit perfectly, for example.
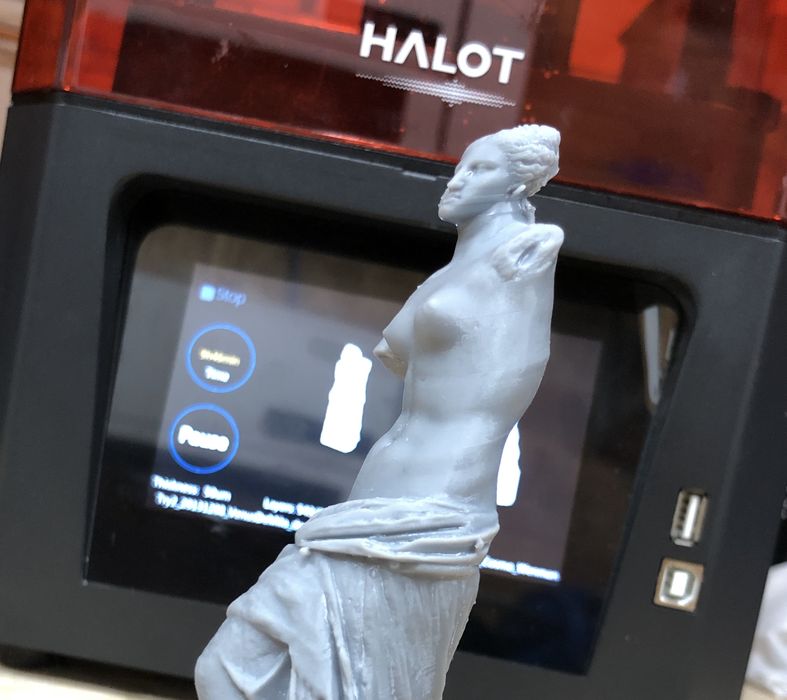
We 3D printed the famous Venus De Milo 3D model by Cosmo Wenman, and had a bit of a problem: this item was at first printed completely solid, and the weight of the object ended up to be too much for our spindly support structures. The figure came a bit loose towards the end of the job, and the resulting shape was rather interesting.
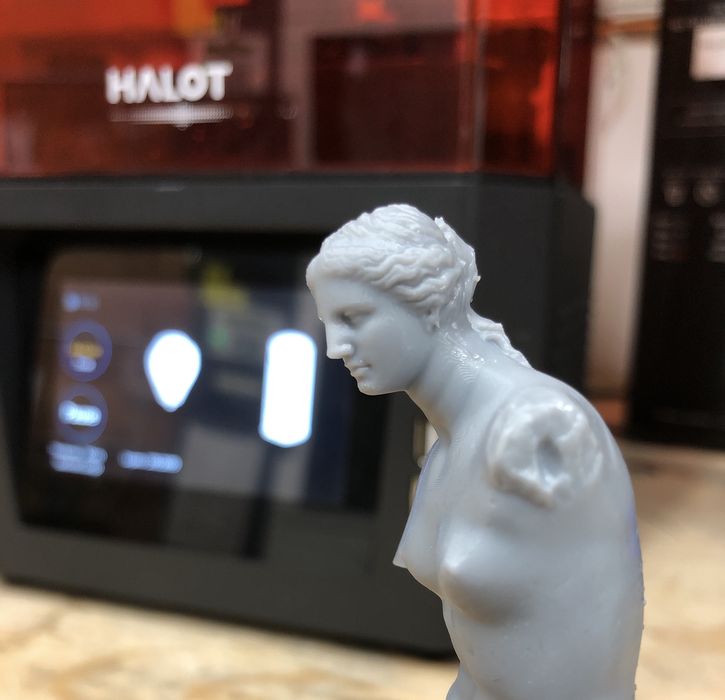
While this wasn’t the fault of the machine, it definitely demonstrates the critical importance of configuring the correct support structures for the job. A re-run with increased tip support size completed successfully.
Support structure optimization was a consistent issue for us. Again, not the fault of the hardware. However, the experience would be far better if the associated slicing software, HALOT Box, was more intelligent about how it automatically generates supports. In the end we had to resort to manual support generation for most of our successful prints.
Conclusions
We quite like the HALOT-ONE’s hardware. It’s very solidly built, and that’s something you immediately notice from the heft of the small machine.
It’s entirely possible to 3D print extremely fine objects with the HALOT-ONE, and we did so successfully many times.
Operation of the device was strange, however, as it seems you have to perform print tuning using the front panel instead of the slicing parameters as is done on virtually all other 3D printers. Nevertheless, the HALOT-ONE is entirely usable.
We’re hoping Creality will improve the smarts in the HALOT BOX software that is the standard slicing tool for the HALOT-ONE. It’s a relatively new tool, so it’s understandable that it may have a way to go to reach full functionality.
At this time the HALOT-ONE is best for those with some knowledge of how to properly set up resin 3D print jobs, as the automatic support generation requires some improvement. But if you can handle that, this is a very effective device that’s available at a very low cost.
This is part two of a two-part series on the Creality HALOT-ONE 3D printer. Part one is here.
Via Creality
Very usefull artical. I use Chitubox for slicing and choose “file-parameters” for printing but then the printing time is much longer then the time shown in Chitubox after slicing.
Is it better to use the printer-parameters ?