


I took the new Scenario 3D scanning app for a test drive.
I’m a sucker for new 3D scanning apps, and there are quite a few. However, most have one kind of limitation or another. Polycam, for example, offers both LIDAR and photogrammetry-style scanning methods. However, the more accurate photogrammetry method is limited and you’ll have to pay more to use it after a quick trial.
Another useful 3D scanning app is Scaniverse, which we reviewed in detail some time ago.
Scenario 3D Scanner
Now there’s a new one called “Scenario”, which at first may not appear suitable for 3D printing applications, but in fact is quite appropriate.
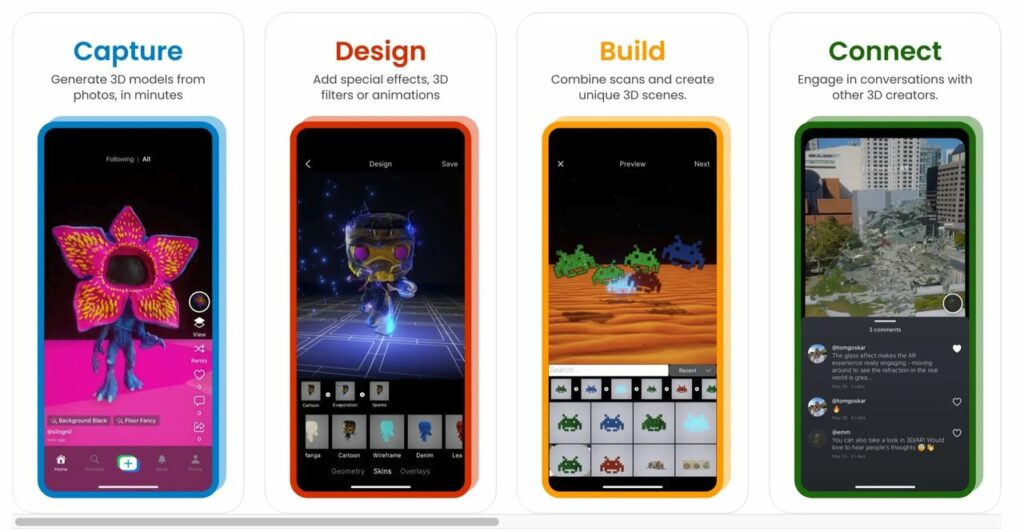
Scenario’s target market seems to be children, where they can scan nearby objects, edit, tweak their style and appearance (hence the name “Scenario”) and post them online for comment and sharing. They explain:
“Create high-quality 3D models with your phone. Edit and design your captures directly on your device by adding effects, skins, or animations. Combine different models and backgrounds to create unique 3D scenes. Share your creations and connect with 3D enthusiasts from around the world.”
That’s certainly fun, but it turns out you can actually download competent photogrammetry 3D scans from Scenario, too.
Photogrammetry is probably the best approach for capturing highly complex objects. It involves taking numerous images of a subject from different angles. Then, software looks to see how the object shifts against the background to understand the camera’s place in 3D space, and then generates a 3D model.
There are plenty of photogrammetry software options, but they all tend to be somewhat expensive in terms of software and hardware. Lots of processing is required because you need a lot of images to generate a proper 3D model. How many? In my experience, it really has to be over a hundred.
That’s a lot of images, but some inexpensive photogrammetry options limit the number of images you can supply for a job. This compromises 3D model quality.
That’s where Scenario gets interesting: it allows up to 200 images per job! Even better, the processing is done at no charge — Scenario is essentially a totally free, high powered photogrammetry system in your pocket.
Scenario is an iOS app that’s available at no charge, and it uses the existing camera system on the iPhone — no LIDAR required.
Scenario Operation
Scenario is very easy to use, although for 3D print purposes there are a lot of augmented reality bits in the user interface whose purpose is for scenario creation and sharing that we won’t use. For Fabbaloo readers, the best approach to using Scenario is to simply capture the images, process them, edit the result and download.
The central activity in Scenario is capturing images, and the app makes it extremely easy to do so.
You can capture images either automatically through a timed process (auto capture every couple of seconds), or a manual process where you press the trigger button.
I found the timed process not as useful as the manual process. This is because you have to line up your camera view for each image, and sometimes it requires you to reposition your body and that might take longer than the automatic interval. Also, I found the automated capture to be quite a bit slower than I’d experience when manually triggering captures.
Scenario allows you to select any camera lens available on the iPhone. I was able to choose the zoom lens, which allowed more close up images of the subject, which could improve scan quality.
The capture process is similar to any photogrammetry system: tediously move around the subject, snapping images frequently. You must go all the way around without skipping any angle. You should also perform extra circles around the subject at different heights.
I would, for example, turn the iPhone upside down to allow the camera to be at a low level for one circuit. I would also point the camera down at the subject for yet another circuit. Be sure to look carefully at the subject to capture any areas that might be hidden by the geometry.
Please ensure the subject is equally illuminated on all sides, otherwise you’ll end up with a “dark side” of the capture. However, if you’re just concerned with capturing the geometry, that doesn’t matter so much.
Capturing using the manual trigger approach takes a minute or two, depending on how fast you go. It’s pretty quick, often faster than you’d require with very expensive 3D scanners.
Once you’ve captured the images, you hit a ticky box and upload the images. For 200 images, I was uploading around 950mb of data, so you probably want to have a WiFi connection handy.
Note that you must leave the phone in the Scenario app while the upload proceeds. This again suggest a very good network connection is required, otherwise your phone would be tied up for quite a while.
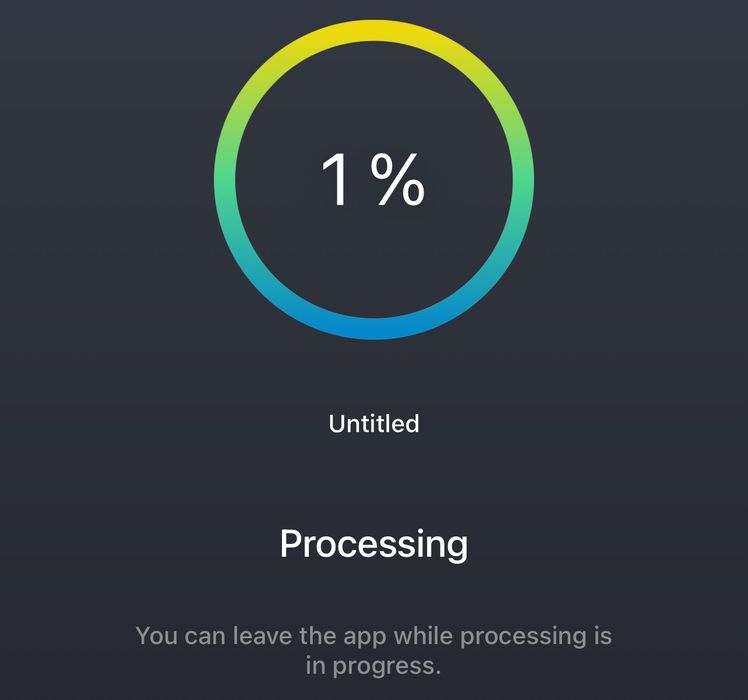
Once the upload finishes, a cloud system then “processes” the images. This is the generation of the raw 3D model. Once complete, you’ll get a notification — because you need not hang around in the Scenario app while processing takes place.
The resulting scan is then placed in your portfolio along with a list of your other scans. These can then be accessed and viewed in AR mode, but I was mostly interested in the edit features.
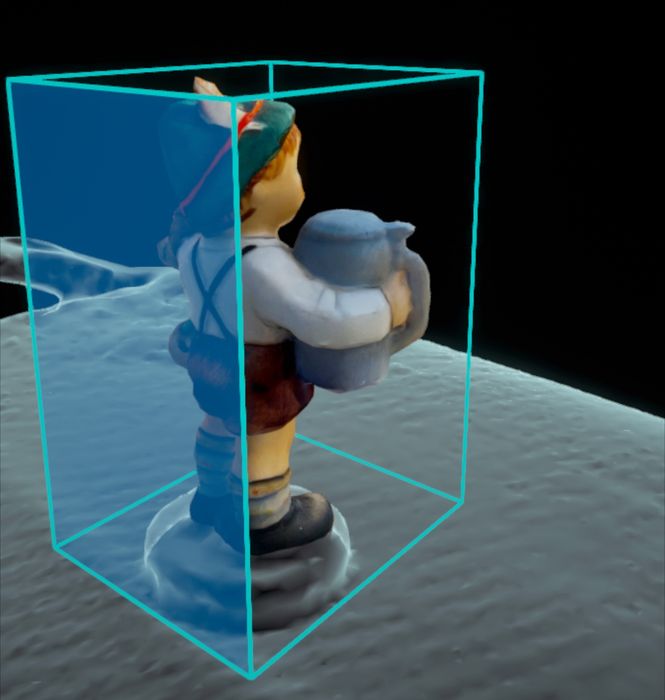
Editing scans is a bit different than I’ve experienced, as you will be presented with a lot of options for scenario creation. For 3D scan and print purposes, the main edit function required is cropping. This allows you to snip off the “floor” that was surely captured during the scan. This is done by sliding the bounding box appropriately.
I found that Scenario actually does a pretty decent job of cropping automatically, and there was rarely much to do. Of course, this depends on the scene you’re capturing, and the lens system you’ve used for imaging.
Note: cropping is a bit weird, and you might not understand how it works at first. But here’s what to do: touch one of the bounding box faces to select it. Then slide it to and fro along its axis. This is actually pretty easy once you realize how it works.
Finally, the result must be made available for other 3D software and printing. This is done by extracting the 3D model from the Scenario app through sharing.
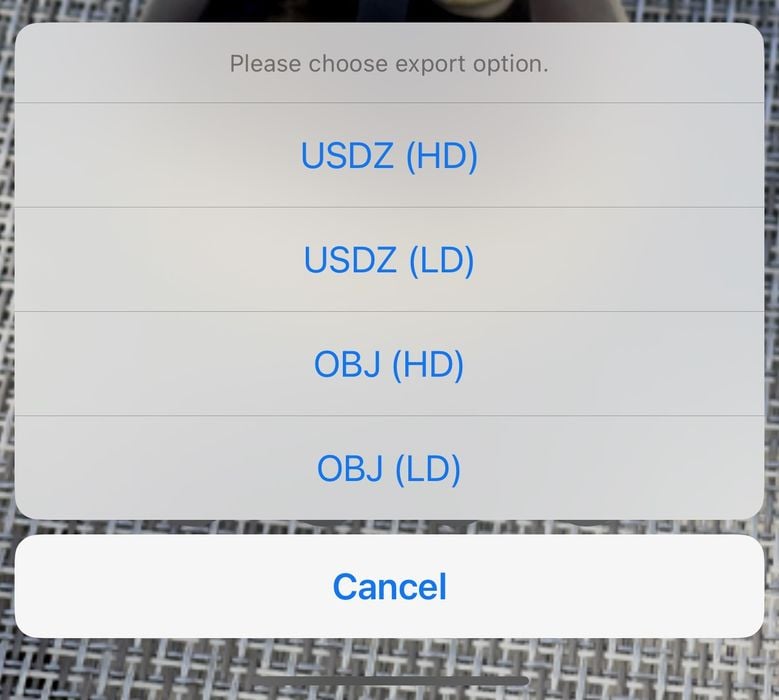
Scenario offers export using different file formats, including USDZ, but the most useful for our purposes is .OBJ, which actually includes both the 3D mesh and a color texture.
Sharing can be directed through the standard iPhone sharing methods, like email, instant messaging, or direct download to iCloud Drive. That’s what I used, and it was easy and fast — again, depending on the network speed.
The download appears as a zip file, and inside you’ll see the .OBJ file and the associated color texture map. The bad news is that the download DOES NOT export the edited file, but provides the entire, unedited scan. This renders the editing process useless, as you have to re-edit the file after export.
Scenario Results
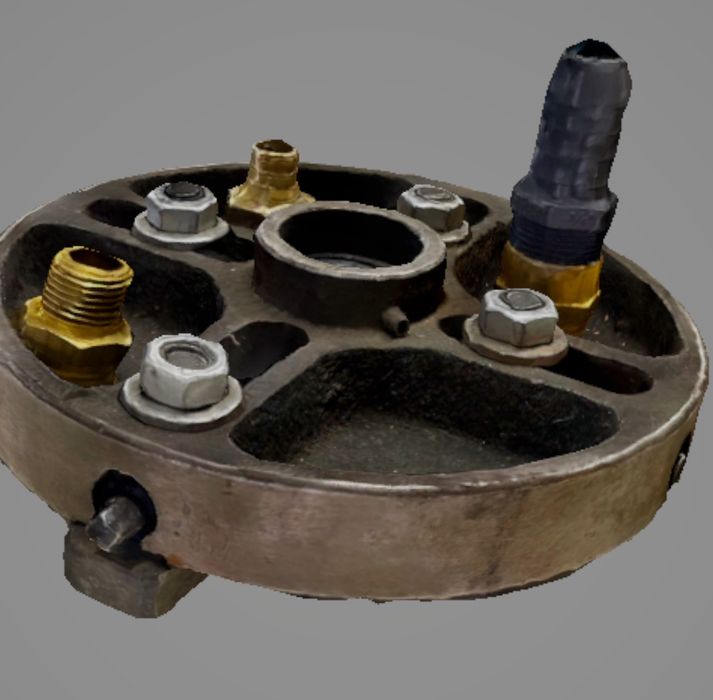
I was quite impressed with the 3D model results from Scenario. Above we see a metal thing with lots of detail — and this is the 3D model, not an image of the object.
I was particularly impressed with the ability to capture the shiny bits on this item, which often confuse 3D scan systems.

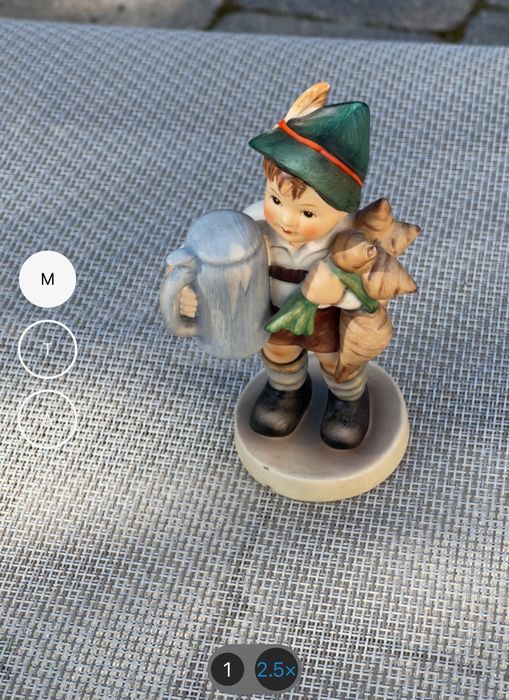
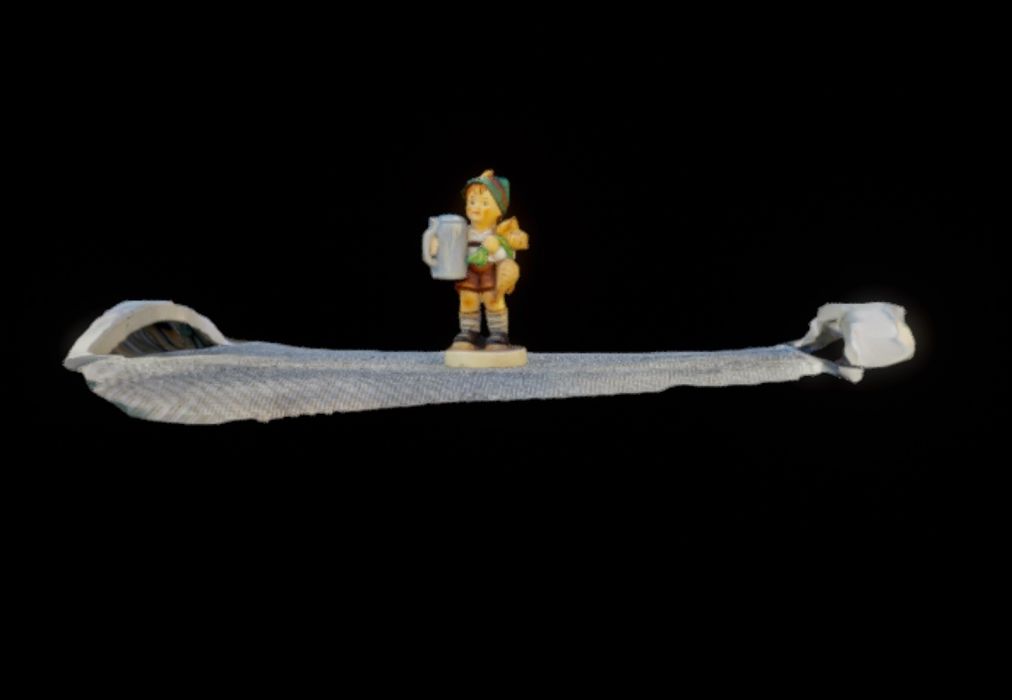
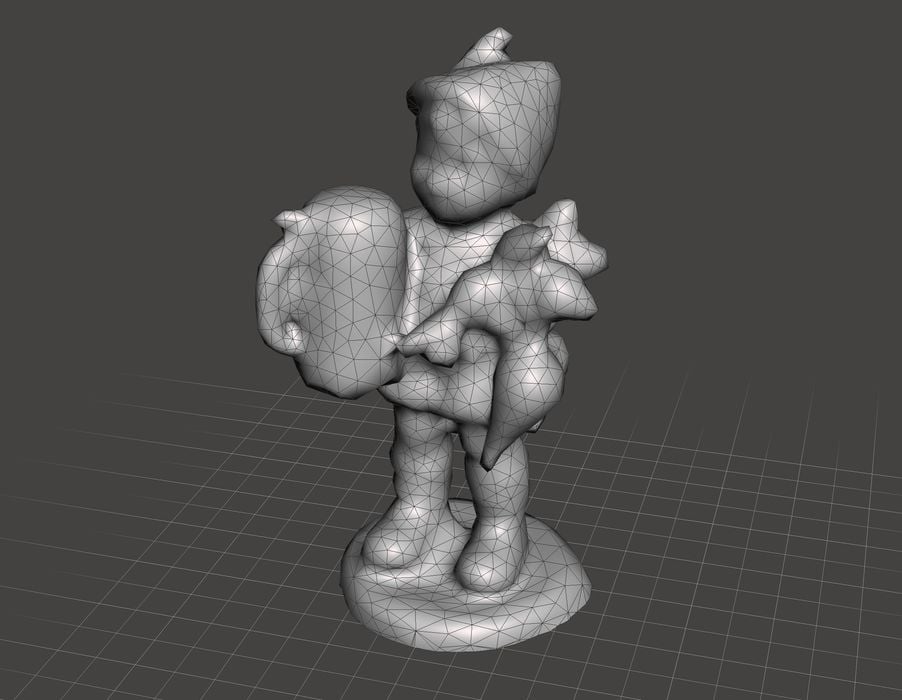
Here I scanned my standard scanning benchmark, a ceramic Hummel figurine with 196 images. The results are really good, as you can see here. However, Scenario was unable to export the high-def version of the 3D model: the app would crash every time I attempted to export it.
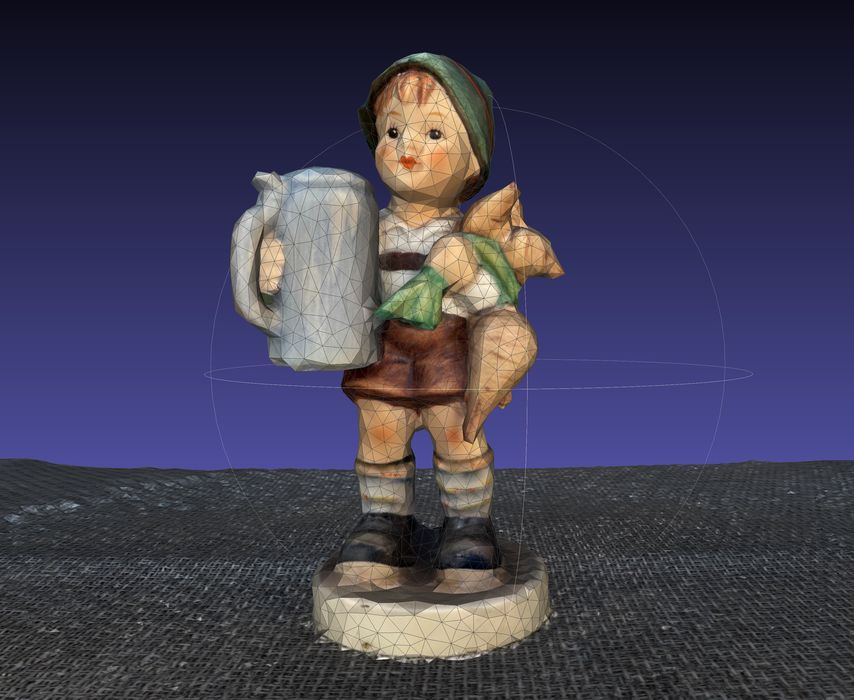
Here’s the lo-def version, which is not bad, and hints at the detail that might be available if the app didn’t crash. Perhaps Scenario should be changed to export the edited model, which would be a lot smaller.
I repeated this scan, but with a smaller number of images, only 96, in an attempt to get the download to work.
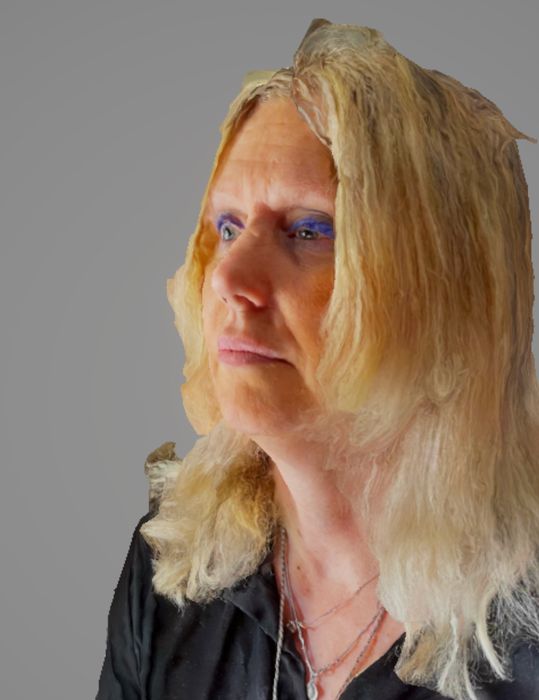
I also scanned a handy human, which are frequent subjects for handheld scanners, and had similar good results. It even did not a bad job on hair, which is quite something for a 3D scanning system.
However, like the Hummel figurine, I could not download the 3D model based on 175 images, and will have to redo it with fewer images.
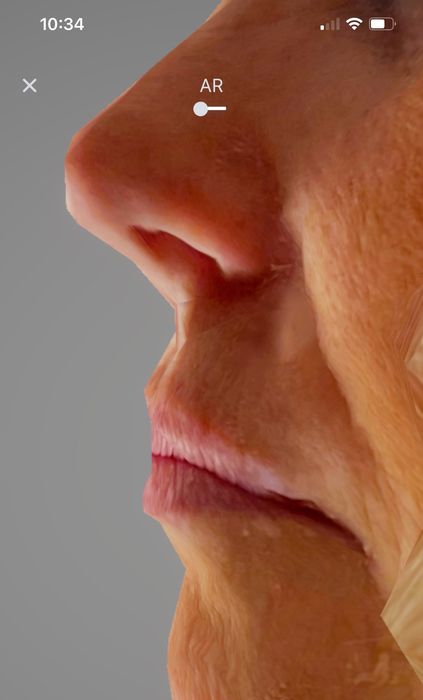
Well, that didn’t work either. I took 95 images, and was able to download, but Scenario presented me with only a “lo def” option. The result above is not bad, but needs more detail.
Scenario Final Thoughts
Overall, the scan results from Scenario are very good, and quite usable for 3D printing purposes — if the app allows you to download a hi-def version.
There is little to be contested if an app is provided absolutely free of charge as is Scenario. For the cost of zero, you are able to capture and process extremely good 3D scans using photogrammetry, all with an easy to use handheld app that’s in your pocket all the time.
For those starting out in 3D scanning, Scenario is a very good option. However, experienced 3D scanner operators may find better results with paid scanning options.
Finally, while Scenario is available at no charge at the moment, it does say “Early Access” when you launch the app. It may be they shift to some form of paid service eventually. But for now, it’s free to use.
Via Scenario