
This week’s question is how one can 3D print large outdoor sculptures.
Fabbaloo reader Robin asks:
“My idea is to 3D print outdoor sculptures. They will be in sizes between 50 x 50 cm, as that will be the size the printer I will buy can produce. The sculptures should be able to handle the outdoor climate of Sweden, which includes: snow, rain and sun. They will be monocoloured, however I also want them to be finely crafted and detailed. They should be able to be pleasing to the eye from a near point of view.
My question therefore is: What material should the sculptures be made of and do you think I will run into any problems regarding crafting a detailed outdoor sculpture?”
This is an interesting question that I am pretty certain has been considered by many 3D printer operators: could outdoor sculptures be produced? How would one do so?
Here are my thoughts about this question from different aspects.
Size
Robin suggests that the unnamed printer being considered would be able to 3D print objects up to 500 x 500 x 500 mm. That’s pretty big as far as 3D printers go, almost reaching into the professional category. With that will come a hefty price for the equipment — or decreased quality and function.
An important consideration here is that it is entirely possible to segment sculptures into smaller pieces and print them on smaller equipment. Then they can easily be assembled into a sculpture that’s far larger than the 3D printer’s build volume.
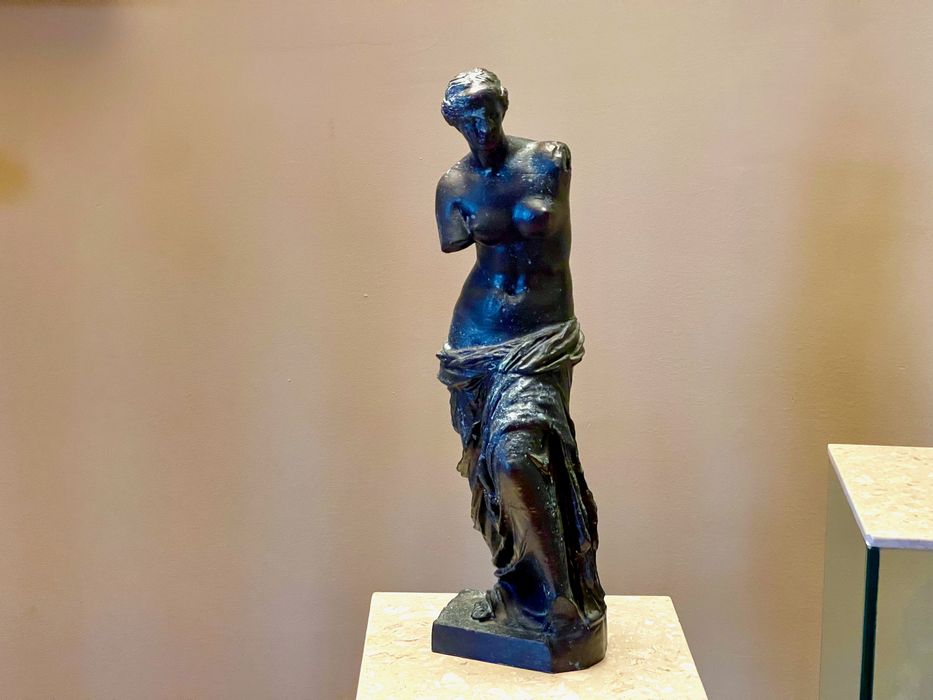
I’ve actually done this several times. At top is a 500mm Venus De Milo print by Cosmo Wenman (bronzed) that I made a few years ago. I produced this on a normal Ultimaker 2 3D printer with far less build height than 500mm.
How did I do this? I simply chopped the model into a series of smaller pieces and printed them one by one.
There is another reason for doing this: 3D printers are notoriously unreliable and it’s not uncommon for prints to fail a third of the time. That means that printing a very large object is quite a risk, and considerable material and time could be wasted. It’s less risky to print a bunch of smaller parts and then assemble them later. If one fails, it’s not a big deal.
Printer Type
The type of printer should be considered, but I think there’s only one real answer, FFF.
- Metal: too expensive
- Resin: too small build volume, material susceptible to UV exposure
- PBF polymer: too expensive
- Other speciality methods: too expensive
Print Time
Printing time could be an issue. Larger objects can be produced on FFF devices as above, but the print times could be days or weeks to complete all the parts. However, faster approaches are likely far more expensive, so production time should be factored into any project.
Environment
The environment described by Robin will have the following relevant characteristics:
- Cold during winter, which may make the material brittle and susceptible to breakage, so the material should have some “give”
- Hot during summer, which could cause slumps if the material doesn’t have a sufficiently high glass transition temperature
- Water exposure during non-winter, so the material should not be affected by liquid exposure
- UV exposure from the sun, so the material should be UV resistant
- General outdoor damage from random impacts, so the material should be somewhat strong
Coatings
Some of the problem above can be rectified with an appropriate coating. I recommend this be done to alleviate the UV ray problem, for example. Basically, the idea is to paint the sculpture completely, first with a couple of layers of primer, and then something resistant to UV. There are tons of different epoxy coatings that can be used, and these would simultaneously fix the layer lines that appear in the prints.
Material
Let’s add up all of the above and see what we get.
- Use an inexpensive smaller FFF 3D printer
- Segment the sculptures into smaller pieces for printing and assembly
- Use ASA (UV resistant) or ABS material for strength and thermal resistance
- Use ABS cement to glue the pieces together
- Apply extra glue at the joints and sand them to smooth them out
- Use an epoxy coating to seal the sculpture’s surface
- Prime and paint the sculpture with appropriate colors, preferably UV resistant
That’s the process I would use to produce outdoor sculptures of this type. Good luck with your project, Robin!