
Do you know what an R_E_R_F file is used for in 3D printing?
If you haven’t been using an Anycubic resin 3D printer, you most likely have never heard of this file type.
It’s used to assist in calibrating the exposure time for a given resin on a 3D printer, which is a critical step to achieve proper 3D prints.
Normally calibration is done by repeatedly 3D printing a benchmark object with slightly different exposure times. These are then compared and the ideal exposure time is identified.

If your exposure time is too long, then structures become too large. This is especially evident on fine details like lettering. On the other hand, if the exposure time is too short, those details may not appear at all! There’s also the risk of printing a weak structure that doesn’t hold up to gravity during the print and fails.
You really need to figure out the correct exposure time before starting a desired print, and note that the exposure time can be different for each resin used in a 3D printer.
The bottom line here is that resin 3D printer operators should spend considerable effort doing exposure tests before doing their production prints.
The problem is that these iterative tests take a lot of time. Even the smaller benchmark objects take around ten minutes to complete. That may not sound like a lot of time, but you have to add in the effort to remove the print from the plate, wash and cure it. This takes more time than the print itself, and I find I can do only about one iteration per hour. If I use a bigger test object, it will take hours per iteration.
Then consider you must do many iterations. Sometimes I’ve done a dozen, trying to dial in the exposure time to the tenth of a second.
It’s not fun at all.
It also makes you use up a lot more consumables, including disposable nitrile gloves, solvent, paper towels, etc.
Calibrating resin is likely the worst aspect of resin 3D printing.
If only there were a way to print with multiple exposure levels within a single print job. Then you could try a bunch of possible settings and see the results all at once.
Alas, resin 3D printers don’t work that way. You can pick an exposure time, but each layer in totality will get that exposure.
Enter R_E_R_F files.
Anycubic implemented a very unusual feature in some of their resin 3D printers that can actually do multiple exposure levels on each layer. “R_E_R_F” stands for “Resin Exposure Range Finder”.
With the software provided with their resin 3D printers, they include a very special GCODE file, “R_E_F_R”. The suffix varies by model, but the machine’s firmware looks for this specific filename.
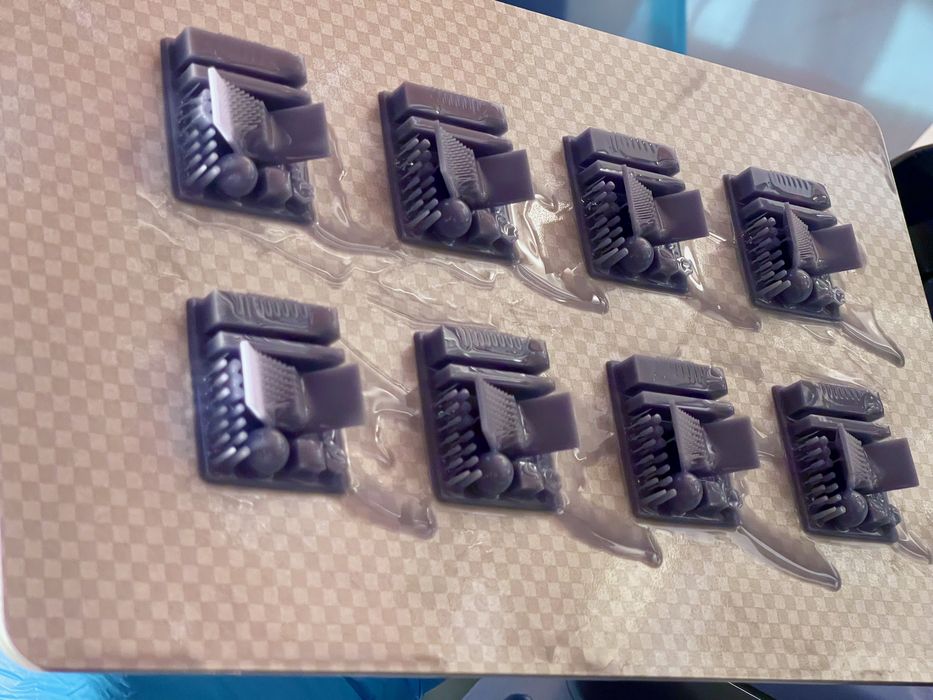
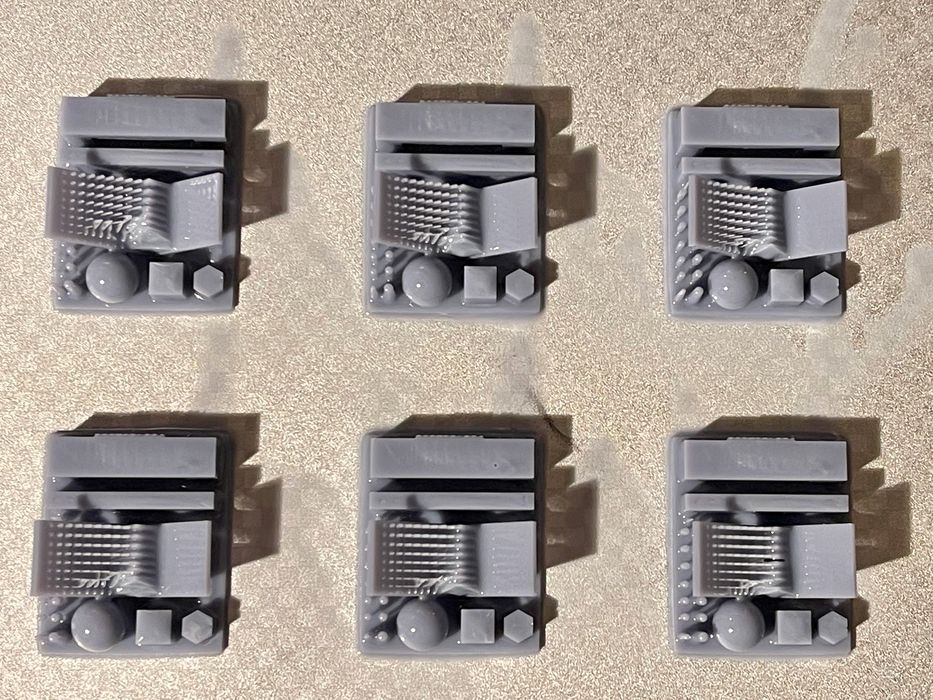
If found, the machine executes a special routine to perform different exposure levels on eight identical copies of a test object. They explain:
“There are eight models in the file. The exposure time for model 1 is equal to ‘normal exposure time’ of the file, and the exposure time for other models will be increased by an increment of 0.25 s.”
So, for example, if you had set the normal exposure time to 2.0 seconds, then the other seven prints would use 2.25, 2.50, 2.75, 3.00, 3.25, 3.50, 3.75, 4.00 seconds respectively.
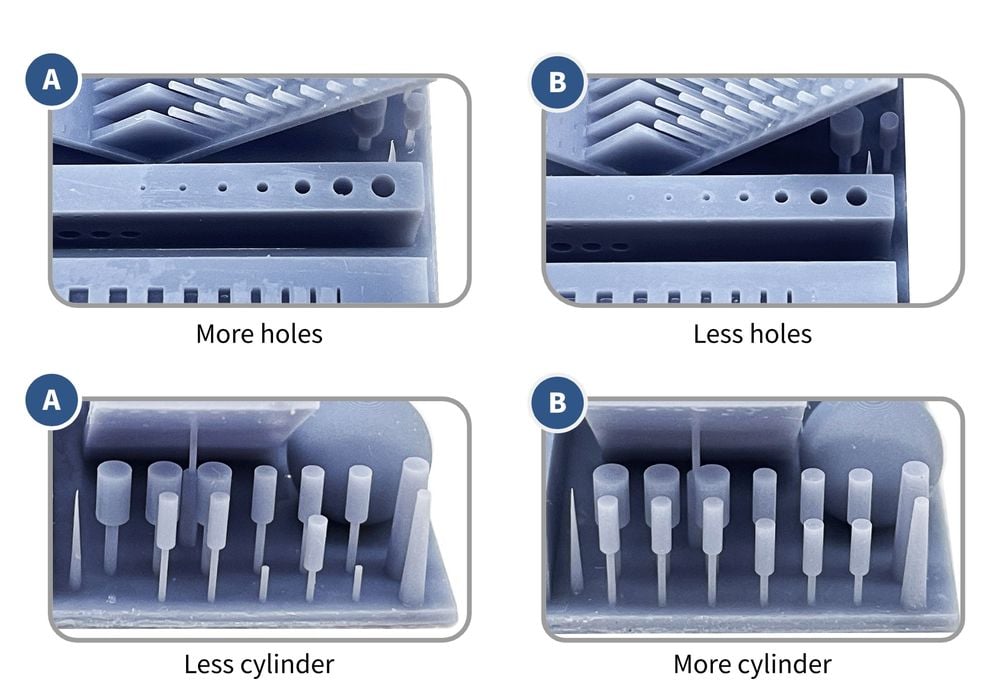
This is ideal, because you can then quickly look at each of the prints and determine where the optimal exposure level would be for that resin on that printer. This is a massive time saver.
You might want to tune the exposure even further, but the R_E_R_F test will at least put you very close to the optimal level, from which you can perform fewer standard tests to refine the exposure level.
One issue with the R_E_R_F file is that the individual models are not uniquely identifiable other than their position on the plate. So if you remove them you have to keep track of each carefully. Ideally, you have to clean them individually one at a time so you can mark them with the exposure time or number them.
Anycubic provides this file, and you can’t change it. Fortunately, there is a reasonable test model used, and you can determine proper exposure times with it.
If you do want to change the 3D model to test an alternate benchmark geometry, this is actually possible, although not supported by Anycubic. This video explains how you can create your own R_E_R_F file:
I believe this is a very important step in resin 3D printing. Up to now there really hasn’t been any inherent exposure calibration for most devices, and operators are left to fend for themselves. More expensive devices rely on pre-cooked exposure times using standard materials, but that’s not possible for other machines and especially with third party resins.
Anycubic’s approach here is very welcome, and I am hoping it inspires other resin 3D printers manufacturers to recognize this issue and develop similar — or even better — ways to calibrate resin.
Via Anycubic
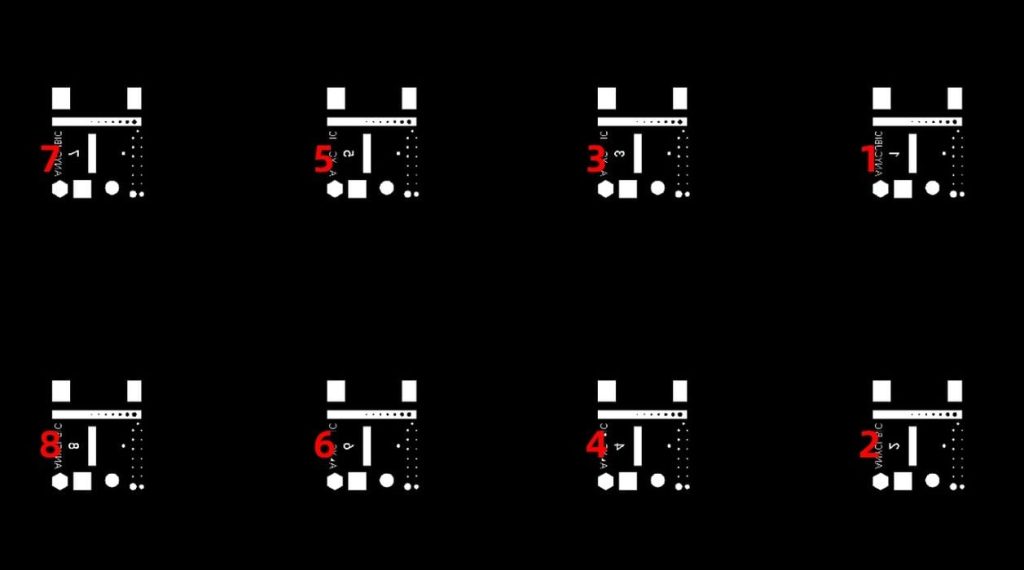
Just a comment on the identification of each RERF – there’s a number under the upslant with the pinholes (vs the hairs) – Yeah it’s still hard to see without good glasses or a camera.
Each print is indeed labled with difference numbers, so you can easily tell them apart after removing from the buildplate.
Look under the 45 degree plate to the right on the print.
It´s hard to find, but it is there.