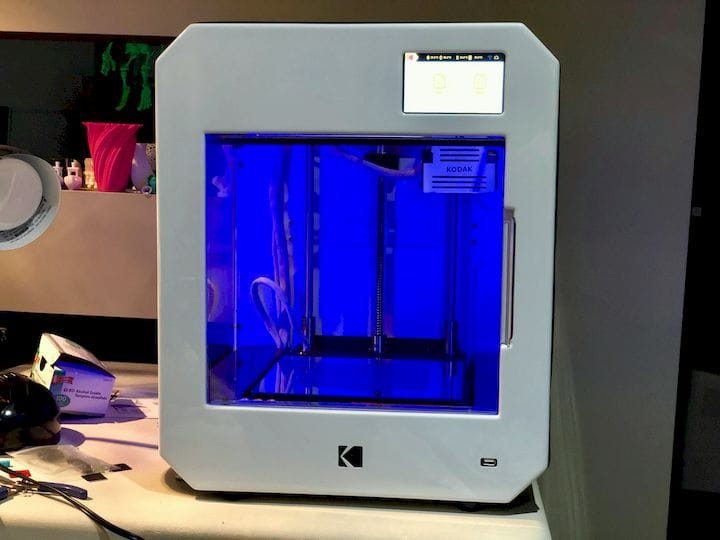
![The Kodak Portrait 3D printer reviewed [Source: Fabbaloo]](https://fabbaloo.com/wp-content/uploads/2020/05/image-asset_img_5eb0971f345c0.jpg)
This is part 2 of a 4 part series reviewing the Kodak Portrait 3D printer.
Part 1, Kodak Portrait 3D printer Unboxing and Setup, is here.
Part 3, Kodak Portrait 3D printer Advanced Operations, is here.
Part 4, Kodak Portrait 3D printer Final Thought,s is here.
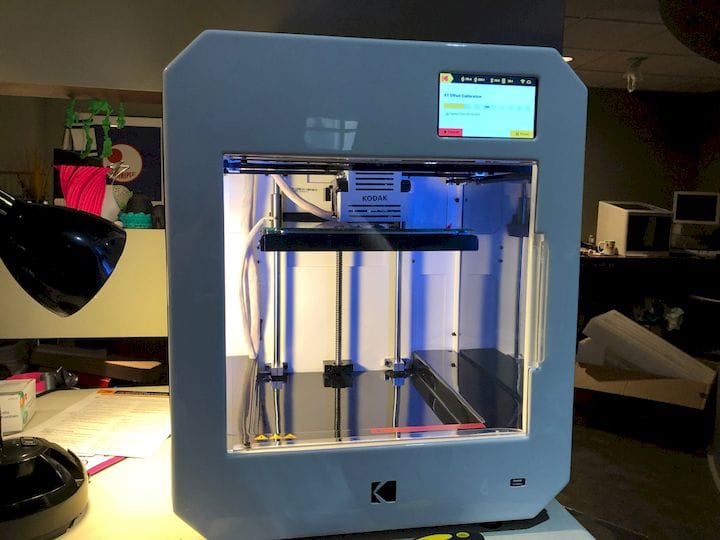
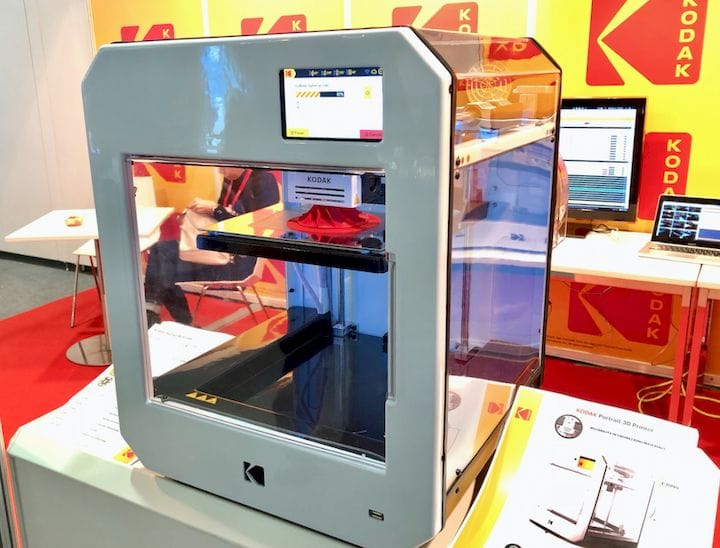
Now that we’ve unboxed, powered up and calibrated the machine, it’s time to try printing on the Kodak Portrait 3D printer.
Kodak Portrait 3D Printer Concepts
Kodak’s philosophy on this machine is to make it as easy as possible, and enable those unfamiliar with 3D printing to be productive. This is a very ambitious goal with a machine of this power: the dual extrusion capability, for example, complicates things considerably over a single extrusion scenario. However, Kodak has somehow made this about as simple as it could be done.
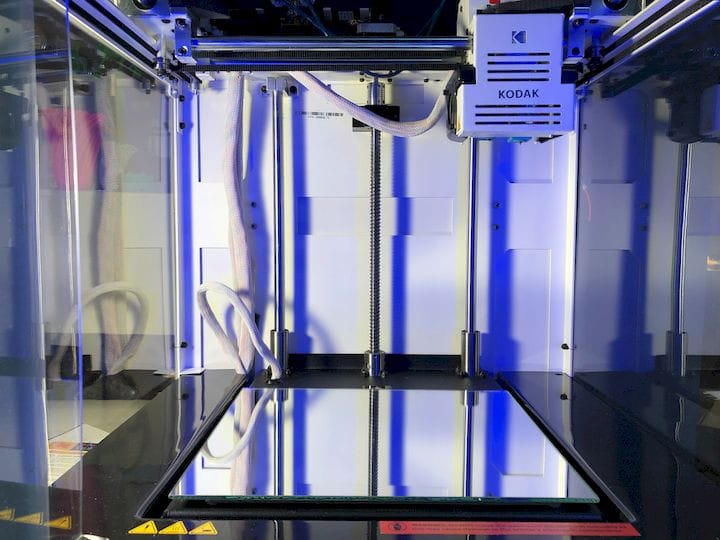
In dual extrusion scenarios, one of the key concepts is to ensure you synchronize extruder references. For example, if you are using materials A and B in a print, you must ensure you assign materials A and B in the slicing program to the correct parts of the model and to the correct extruders. You must then ensure you physically load materials A and B on to the same extruders you sliced with. This can be tricky.
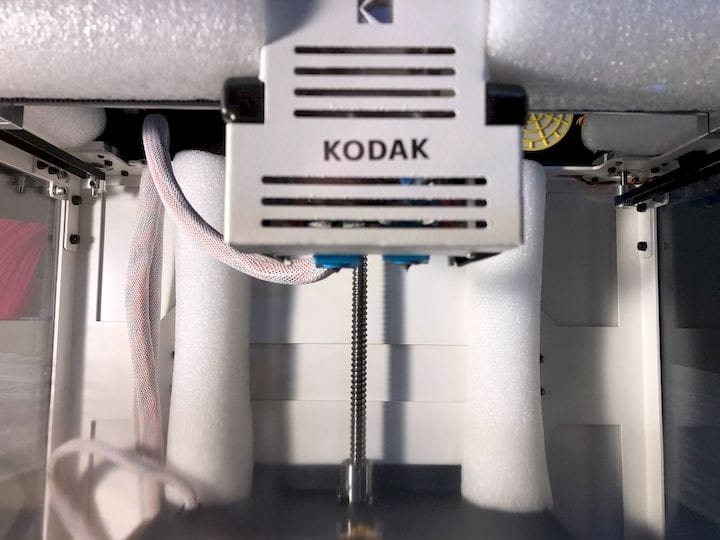
![The Kodak Portrait 3D printer has to differentiate between the two different extruders [Source: Fabbaloo]](https://fabbaloo.com/wp-content/uploads/2020/05/kodak-portrait-3D-printer-red-yellow_img_5eb0971f92df8.jpg)
I made a mistake early on using the Kodak Portrait 3D printer: the two extruders are clearly labelled “I” and “II”. The labelling is the same on the hot end and the extruder filament entry ports on the rear of the machine. Extruder I labeling is colored-coded yellow, and extruder II is color-coded red. My mistake was to assume that “red” is hotter than “yellow” and so I was loading the “hot” materials like ABS into the wrong extruder.
In the Kodak Portrait 3D printer, extruder I (yellow) is the all-metal path that can be used for any material; Extruder II (red) is used only for PLA, PVA and Flexible materials. I’m thinking Kodak got the color choice wrong here, as it confused me and likely will baffle others, too.
The bed system for the Kodak Portrait 3D printer is interesting. Unlike most contemporary machines that use a spring steel plate with a specialized coating, Kodak has opted for a removable glass plate. It’s embedded in a metal frame with magnets that swiftly align and affix the plate in the correct position.
Kodak Portrait 3D Printer Adhesion
For adhesion, things vary considerably depending on what material you’re using. This chart illustrates the possibilities:
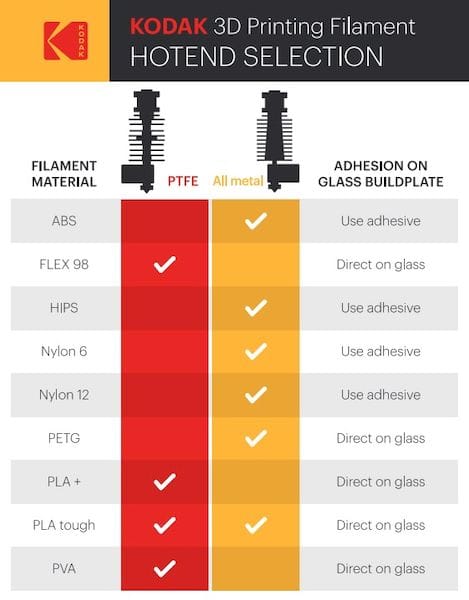
Some materials are printed directly on the glass bed — and that’s assuming it’s properly cleaned with IPA and dried, for example. Others require an adhesive. For this, Kodak includes a bottle of dimafix, a popular third party 3D printing adhesive. This is not a spray, but rather a fat “pen” that can quickly and efficiently cover the build plate without mess or loss of adhesive liquid.
![The Kodak Portrait 3D printer includes a bottle of dimafix [Source: Fabbaloo]](https://fabbaloo.com/wp-content/uploads/2020/05/image-asset_img_5eb097203c67b.jpg)
We’re told by Kodak engineers that the bottle should be good for a hundred or so 3D prints, and that you need only re-apply it after a few prints. However, for a lengthy 3D print I would always apply a fresh layer to avoid wasting dozens of printing hours only to fail because of an adhesion issue.
Kodak smartly includes two glass plates in the package. This means you can have one slathered with dimafix for one set of materials, and the other bare glass for the rest. Thus you always have a plate ready for action regardless of the type of material involved.
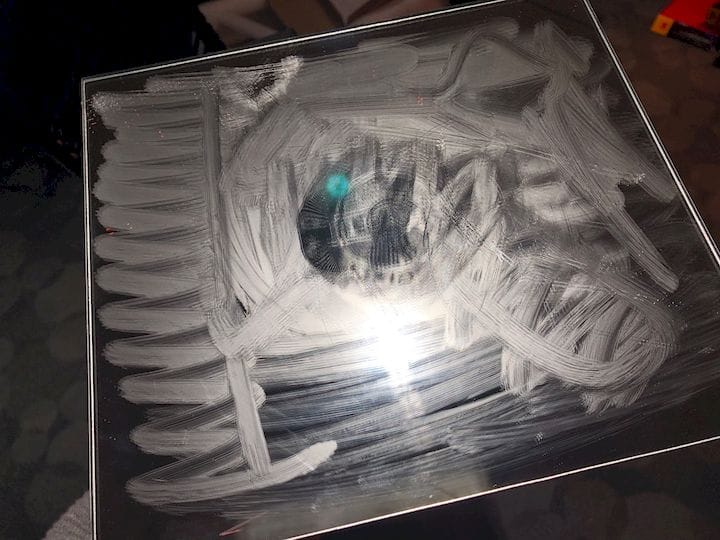
I did have some issues with the dimafix. It turns out that the solution is actually a two-part composition that must be adequately mixed before application. In other words, when they say “shake before using”, they really mean “SHAKE FOR AT LEAST 30 SECONDS” before using. And don’t casually cover the plate like this:
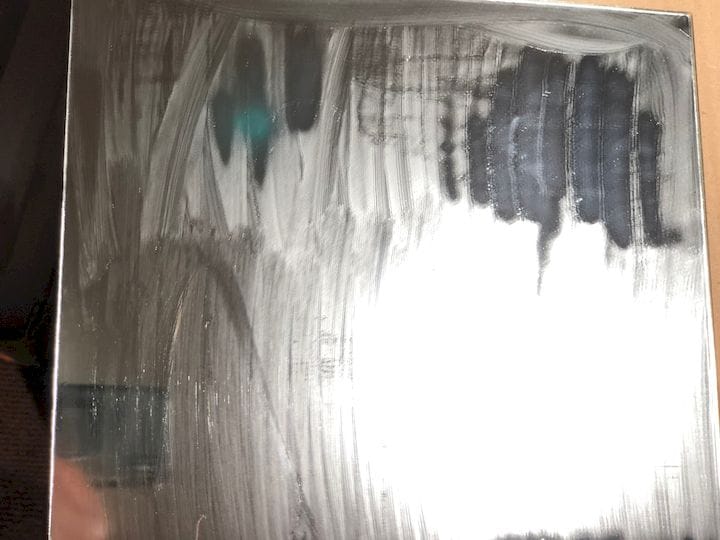
Instead, move both ways to ensure all areas are sufficiently covered like this:
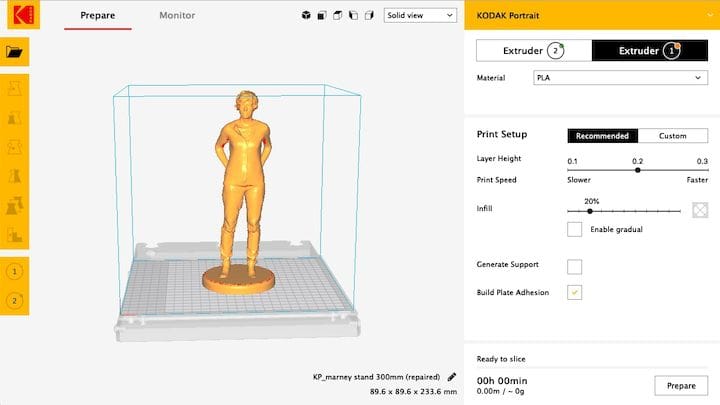
Now that we had the machine powered on, loaded with filament and build plate sufficiently “slathered” and attached, it was ready to prepare some jobs for printing.
Kodak Portrait 3D Printer Job Setup
Kodak provides two means of job preparation: First, you could use their desktop application that works on Windows, MacOS and Linux. It’s a Cura-derivative and seems to work okay. You slice and store your GCODE on a USB stick, and after inserting into the Portrait, you can select the files for printing.
After some testing, I chose not to use this option because it is so much more limiting than their cloud system. The desktop application also seems to have far fewer print profiles than are available in the cloud system. I would use the desktop app only for situations in which the network is down; really, the Kodak Portrait 3D printer is designed for network operation, and that’s what you should use.
There’s a great pleasure in being able to sit at your desk and start a print job, without having to run around the room with SD cards or USB sticks. And it’s even more impressive when you realize you can observe the entire print using their remotely operated webcam.
The cloud system is quite powerful, and there’s a reason for that. Kodak has very wisely chosen to partner with long-time 3D print cloud provider 3DPrinterOS, which we’ve written about in the past. They offer a very powerful system for remote operation that includes not only 3D printer control and monitoring, but also file storage, job preparation, slicing and even 3D model repairs.
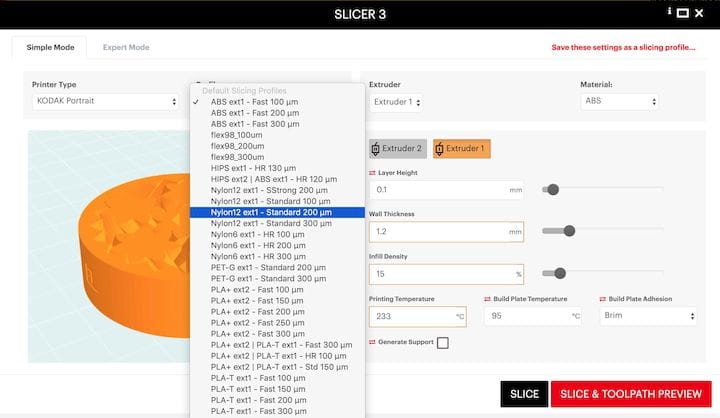
While in theory you could simply use 3DPrinterOS directly on the Kodak Portrait 3D printer, it is far better to use Kodak’s implementation, as they include customized material profiles for the device. These dramatically increase the probability of successful and high-quality 3D prints — and that’s ultimately what you’re after, isn’t it?
In our testing, we found the cloud process quite satisfying; we did not have run back and forth to the printer with USB sticks and worry about file management on such. Instead, 3DPrinterOS handles all of that with a seemingly infinite online storage capacity. It’s a very powerful way to manage all your printing files.
3DPrinterOS has several different file types, including: 3D model, Layout, GCODE. These may seem obvious, but the best part is that their slicing process ensures that you actually save the print job layout each and every time. This is something I often forget to do in other slicing systems, and allows one to more easily adjust complex bed layouts.
![3D printed Anubis [Source: Fabbaloo]](https://fabbaloo.com/wp-content/uploads/2020/05/image-asset_img_5eb09721e39db.jpg)
Printing works very well on the Kodak Portrait 3D printer, as seen here. This is a print of “Anubis” provided by Kodak, printed in two different materials (PLA+ and PLA Tough). The print took 27 hours to complete, and was actually the first print done on our test machine, certainly a record for a first print.
Next, let’s look at a more advanced 3D printing experience with the device.
Part 3, Kodak Portrait 3D printer Advanced Operations, is here.
Via Kodak 3D Printers