

Perhaps one of the most popular styles of printed 3D models is vases. There’s a reason for that – and a tip you need to know.
First, let’s talk about why vases are so popular. The reason is straightforward: they’re often extremely easy to 3D print on almost any 3D printer. They’re easy because:
- They are essentially hollow and require a minimum of material to print
- They’re often round at the base, minimizing the possibility of warping off the print surface when cooling
- Usually a vase shape uses a continuous extrusion per layer, meaning there are few, if any, retractions and movements to disturb plastic flow
- There are many vase 3D models to choose from, and they’re easy to design in all 3D modeling software
And they often look great, too.
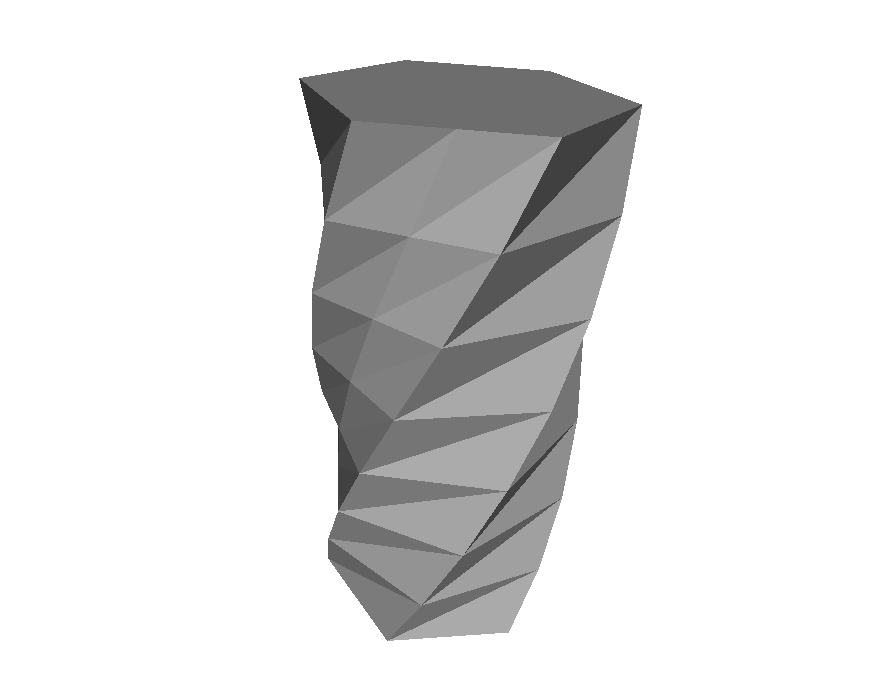
But sometimes there’s a problem when you find a vase 3D model to print. When you open the model in your 3D software, you might see something like this, which happens to be the very popular Twisted 6-Sided Vase by MaakMijnIdee.
If you were to 3D print this, that’s exactly what you get: a solid chunk that is not vase-like at all. What’s happened? Why is there no vase?
Here’s what you get with typical standard 3D printer slicing settings. It’s a block, and not a vase.
The result is because the 3D model does actually describe that shape. However, if you want to actually print a true vase, you must take special action with your slicing parameters. Here’s the trick:
Import your “block” vase 3D model into your slicing software. You’ll notice that it will appear as a block, as shown here in our screenshot from Simplify3D’s 3D printer management software.
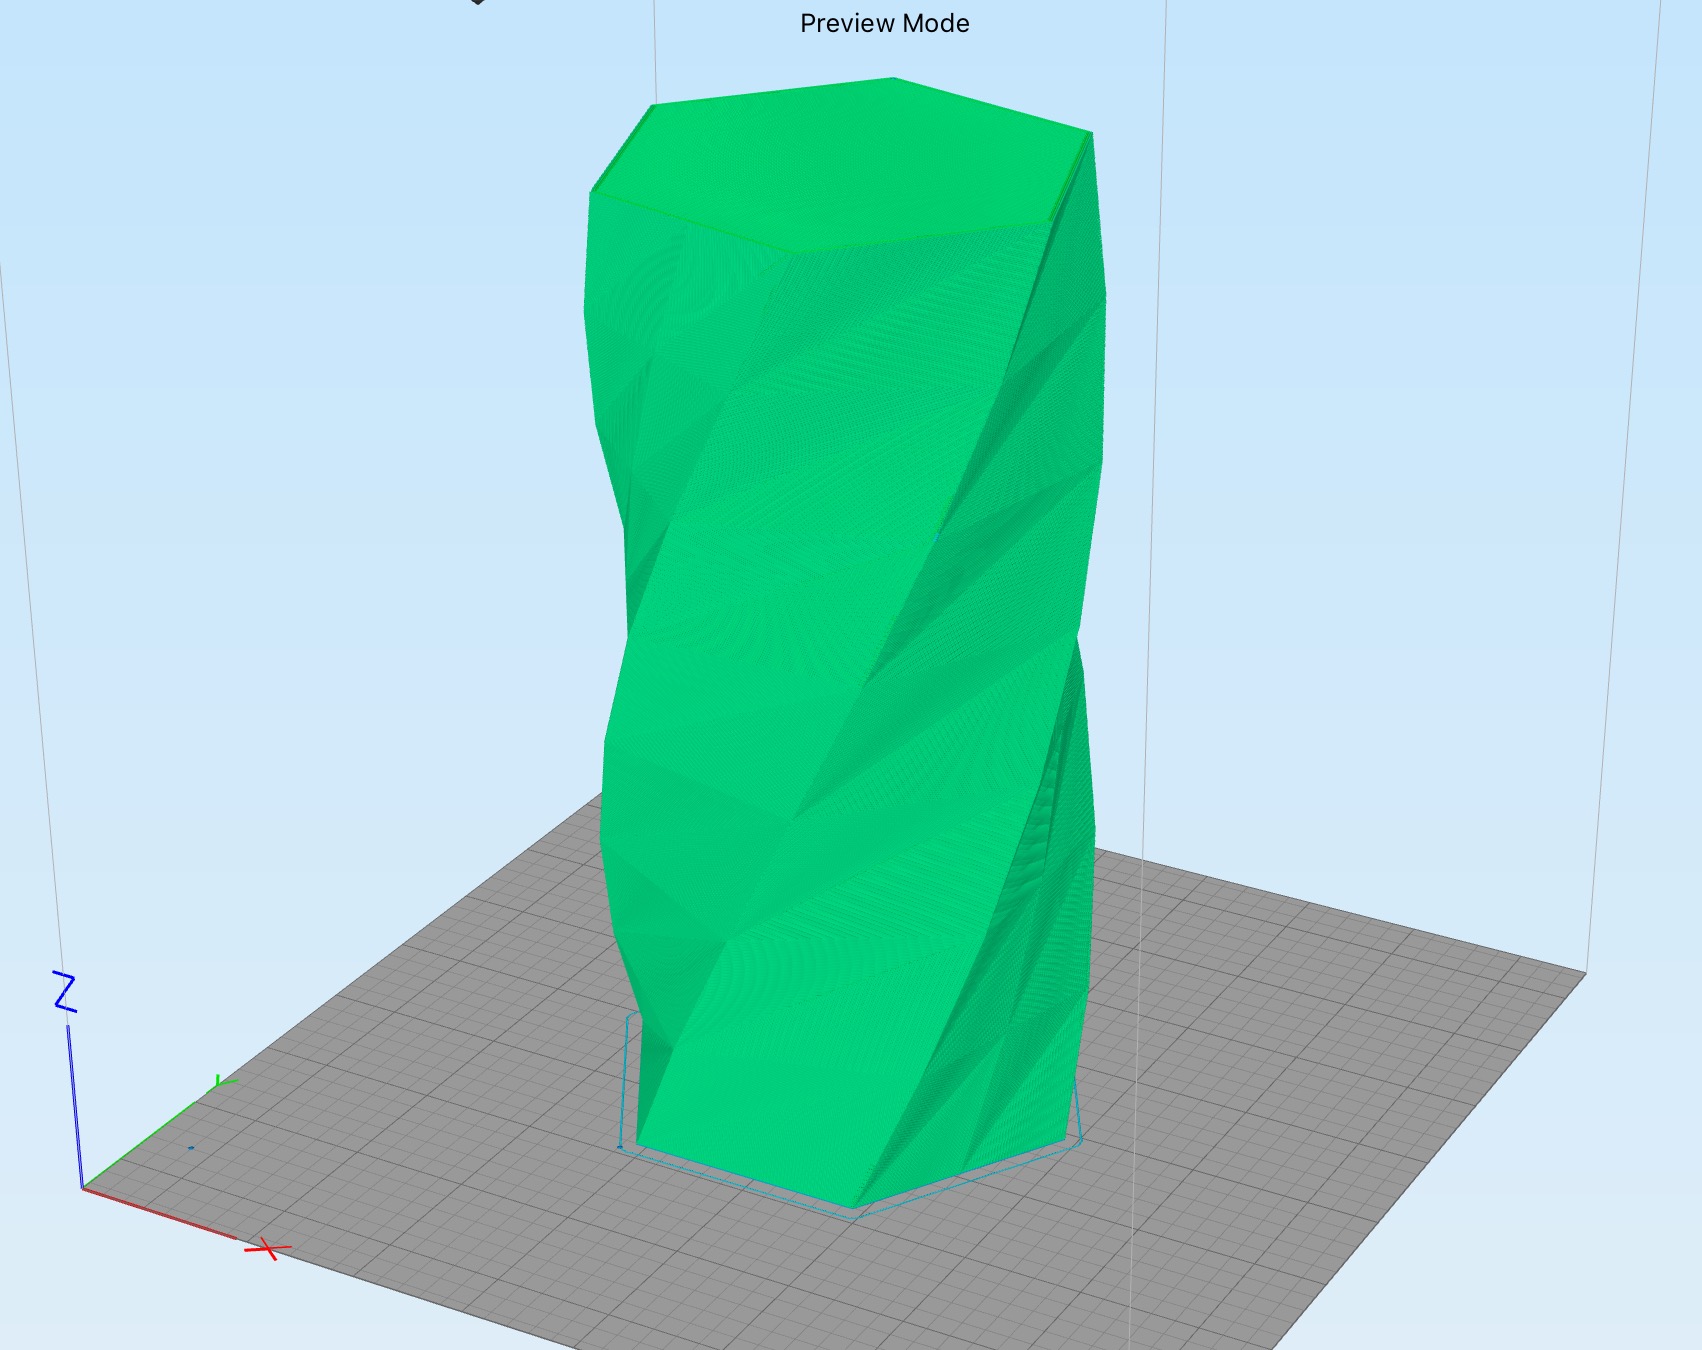
If you were to slice the 3D model with standard settings, here’s the preview of the “vase”. If you look carefully, you can see that the top of the 3D model is sealed up tight. You’re printing a block.
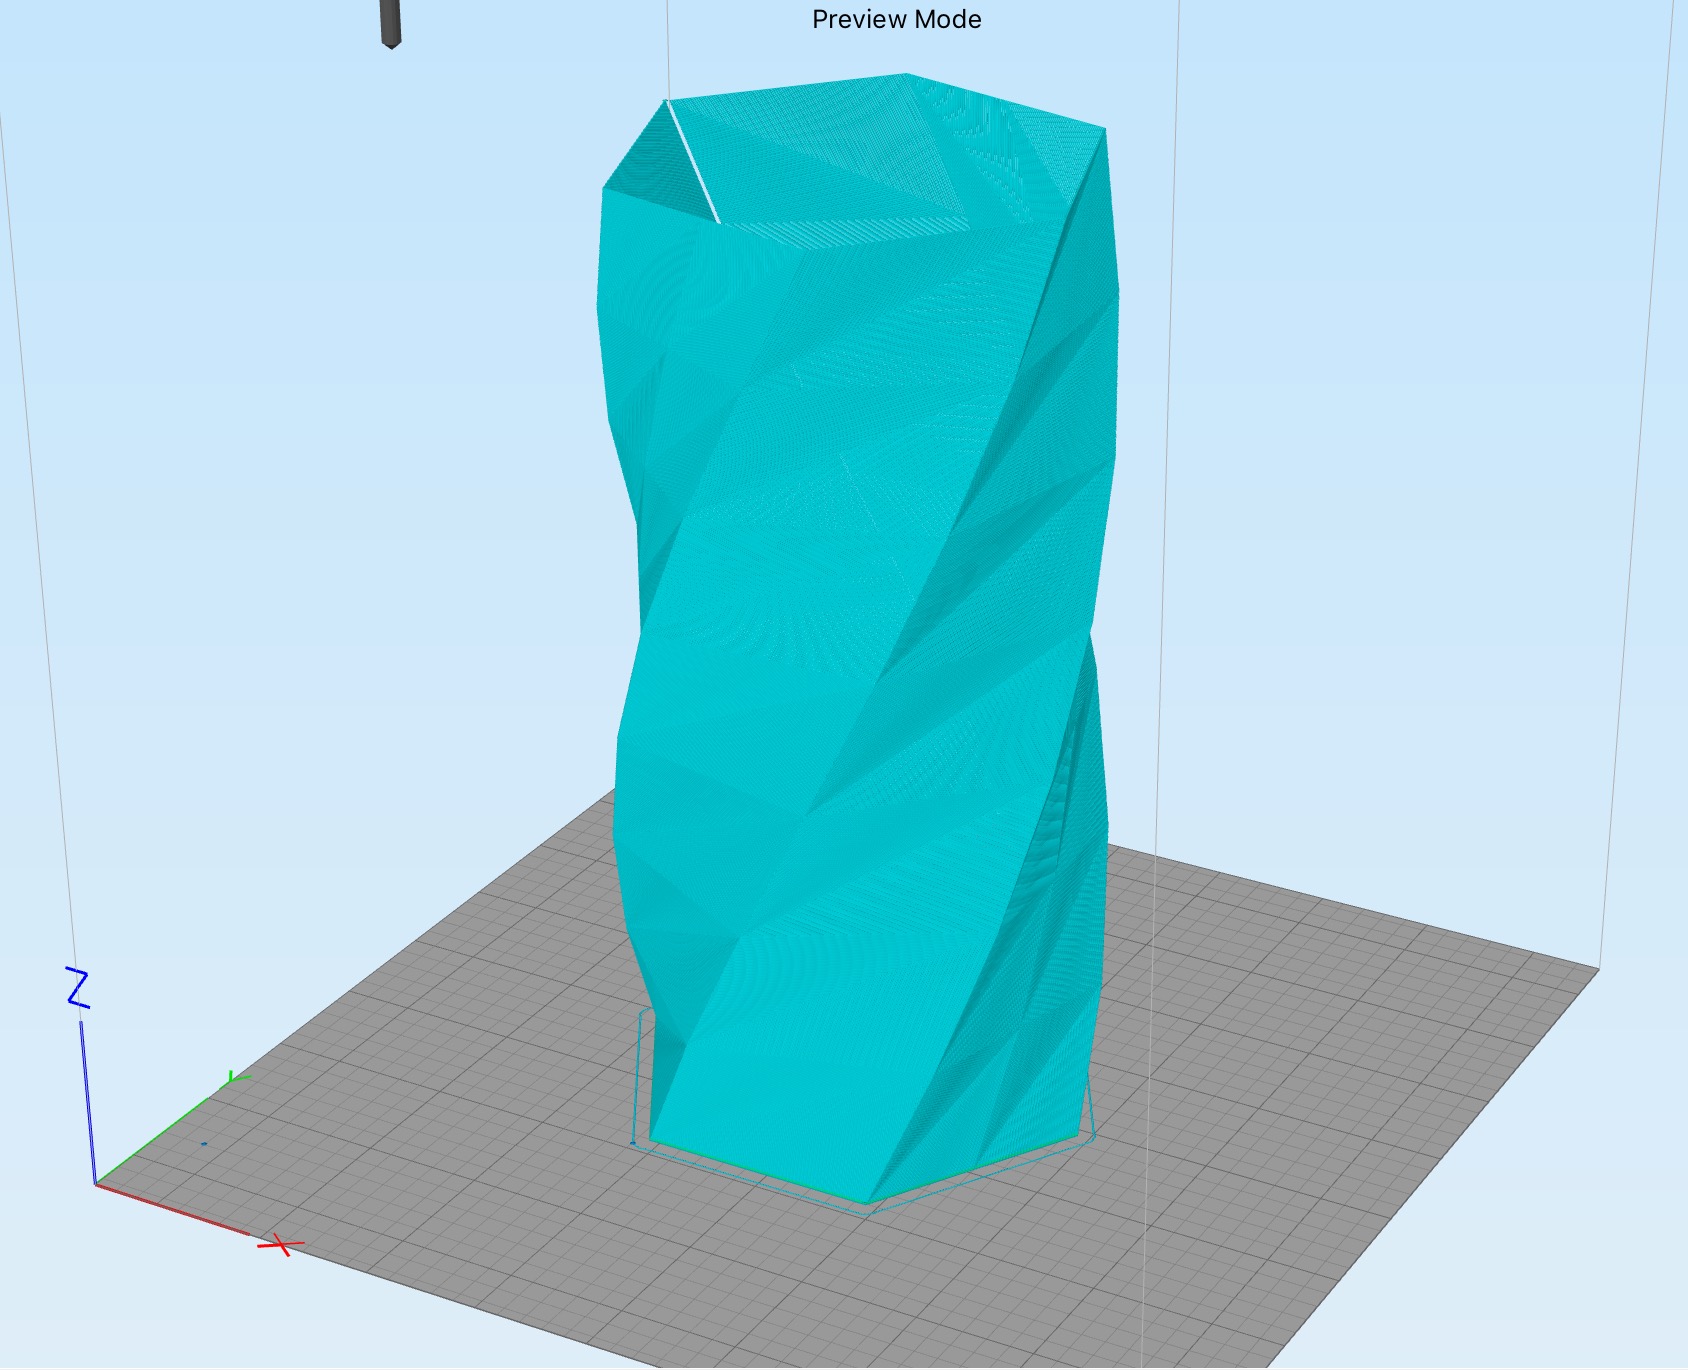
Now let’s play with the slicing settings. Make these changes:
- Change the number of perimeters / shells / outside layers to one
- Ensure the number of bottom layers is several. Three is often sufficient
- Change the percentage of infill to zero. Yes, no infill at all. It’s a vase, after all
- Change the number of top layers to.. wait for it .. zero!
Let’s slice the 3D model again and here is what you get. It’s a true vase: walls, floor and no top. It also prints extremely fast because it has only a single extrusion per layer.
That is the trick for quickly producing an amazing vase 3D print with little material.
Some slicing software, such as Simplify3D, can also improve on this further by employing what they call “Vase Mode”. This assumes you are printing this type of shape and takes advantage of it by “spiraling” upwards, gradually increasing the z-height as the print proceeds. This results in an even faster print with no seams, because there aren’t any!