
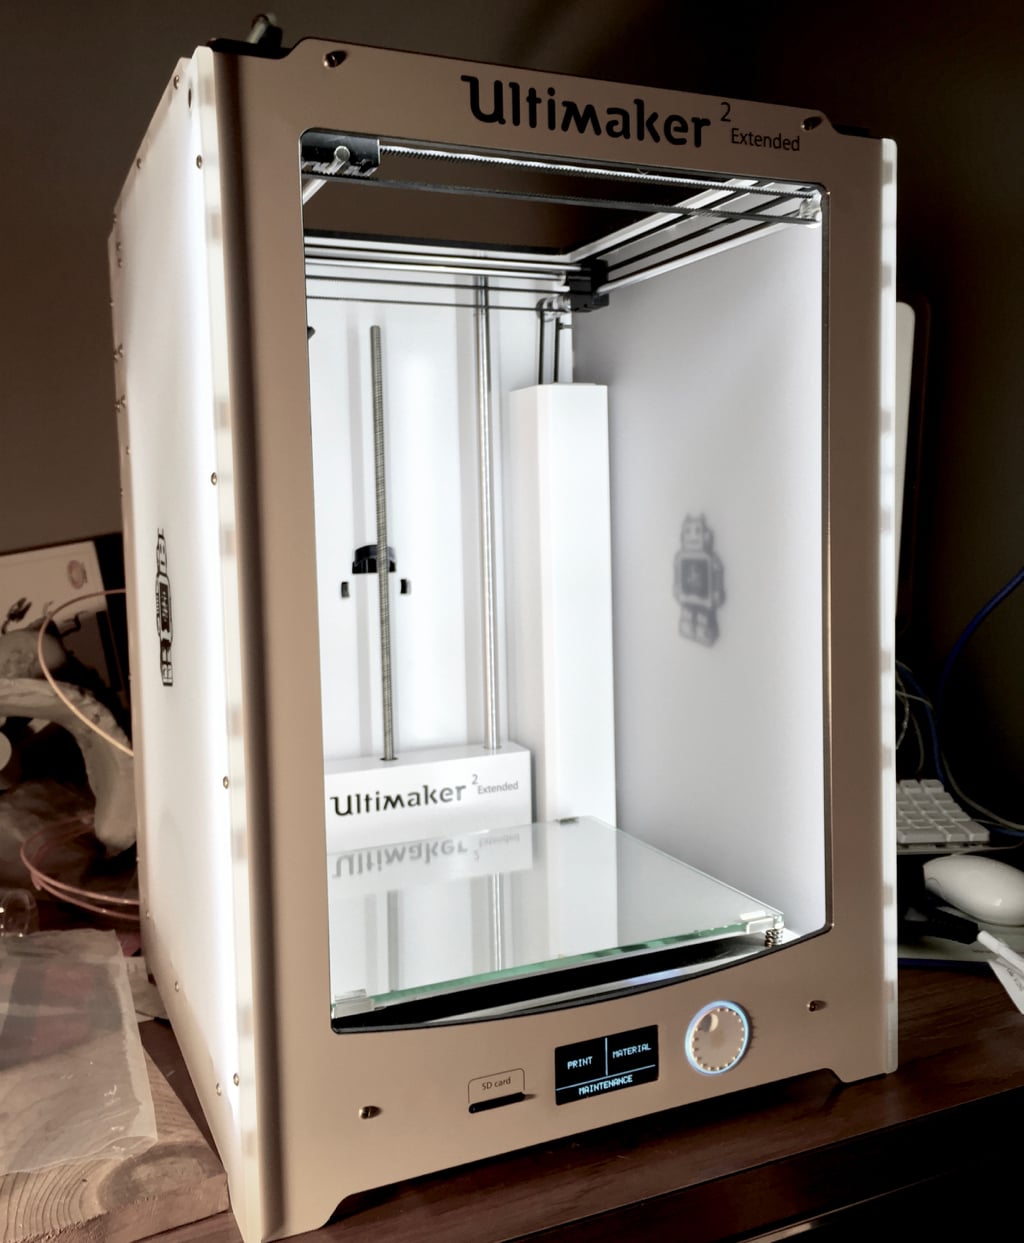

This is part 3 of our short series on the Ultimaker 2 Extended. Today we’re talking about operating this huge 3D printer.
Aside from loading the filament, which we described in Part 1, you’ll be spending most of your time using the very straightforward control panel. It’s not as fancy as more recent machines that include a color touchscreen, but it’s as simple to use: there’s only ONE button!
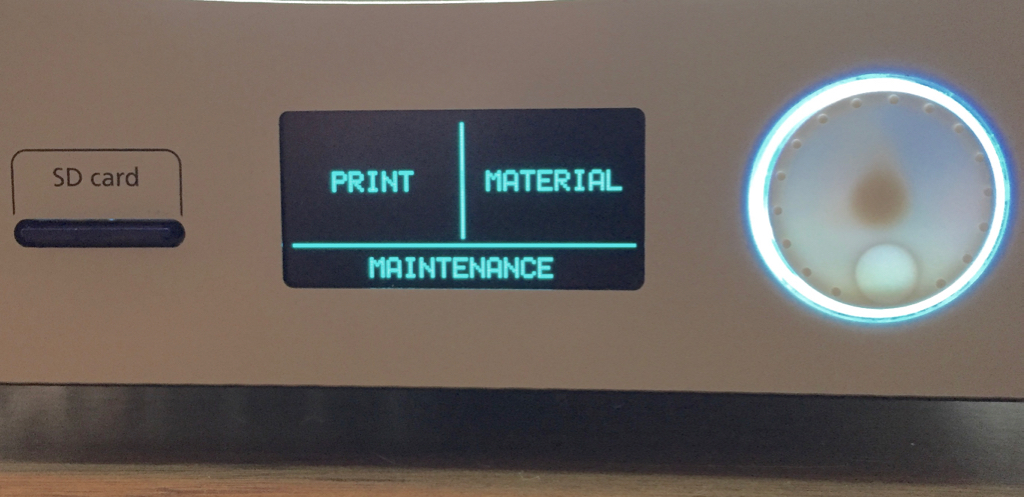
The single button rotates to provide an ability to select from options shown on the screen, making it pretty easy to navigate around the operational commands. There is a “Print” command and a high-level “Material” command that permits you to quickly change filament without having to burrow through a utility menu.
There’s an “Advanced” operational menu that permits you to perform any technical task, such as heating the nozzle for clearing jams.
Printing takes place on the wonderful glass print surface, which is of course, heated. For PLA it needs to be around 60C, at which point PLA sticks like it isn’t coming off.
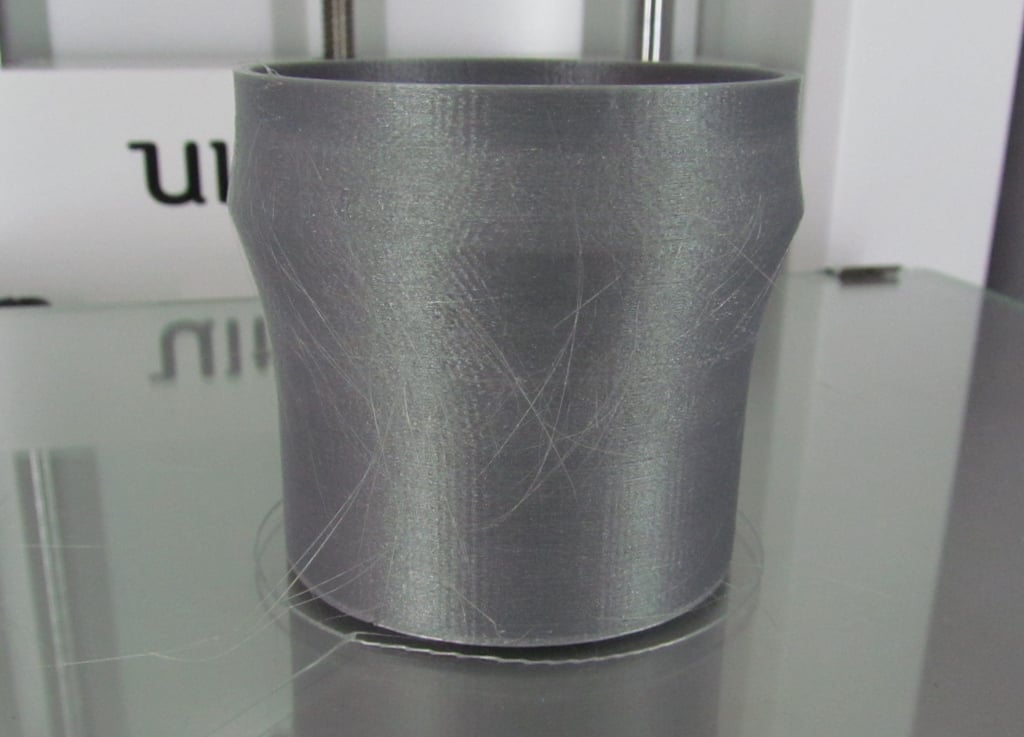
But it does! As soon as the heat dissipates after the print completes, the PLA shrinks ever so slightly, instantly freeing it from the glass. You can lift off the print as if it was just placed there and never know that it was actually 3D printed on that spot.
The glass surface, by the way, must be manually leveled. The process for doing so is quite straightforward and is quickly completed. We did it once and never had to do it again, perhaps due to the simple method of removing prints: there’s no wrestling with the bed here. Also, we strongly advise to NOT set the nozzle too close to the glass, as you’ll greatly increase the risk of stripping the filament in the extruder. We speak from experience here.
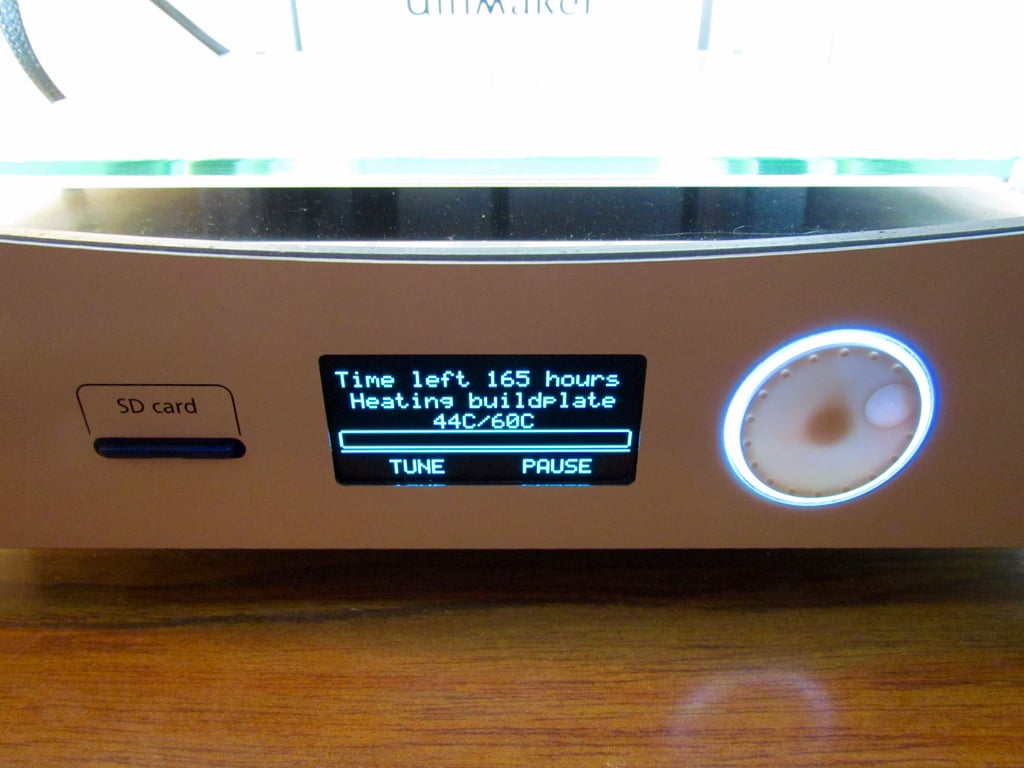
One bizarre effect we noticed during active was the estimated completion time, which is displayed on the panel. It appears to be computed on the fly and as a result you sometimes obtain goofy durations, particularly at the beginning of a print job before extrusion commences. When well into a print job, the estimates become much more accurate.
This machine also includes a safety guard: when you load a spool of filament, it asks you to confirm the type of plastic, be it PLA, ABS, or another material. The machine remembers this, and when you try to print something with parameters out of the normal range for said material, you get this message:
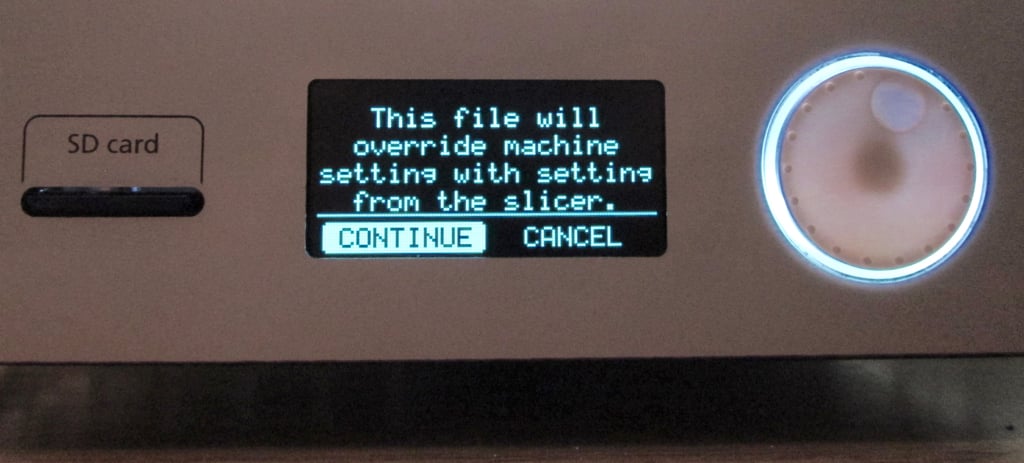
Typically this occurs when you don’t use Cura as your slicing program. We always received this message when using Simplify3D, but had no issues when continuing.
This brings us to print speed. The default speed for the Ultimaker 2 Extended is 60mm/second, which is decent, but not particularly speedy. You can raise the print speed somewhat, but you risk losing quality or even print failure, depending on the geometry of your object.
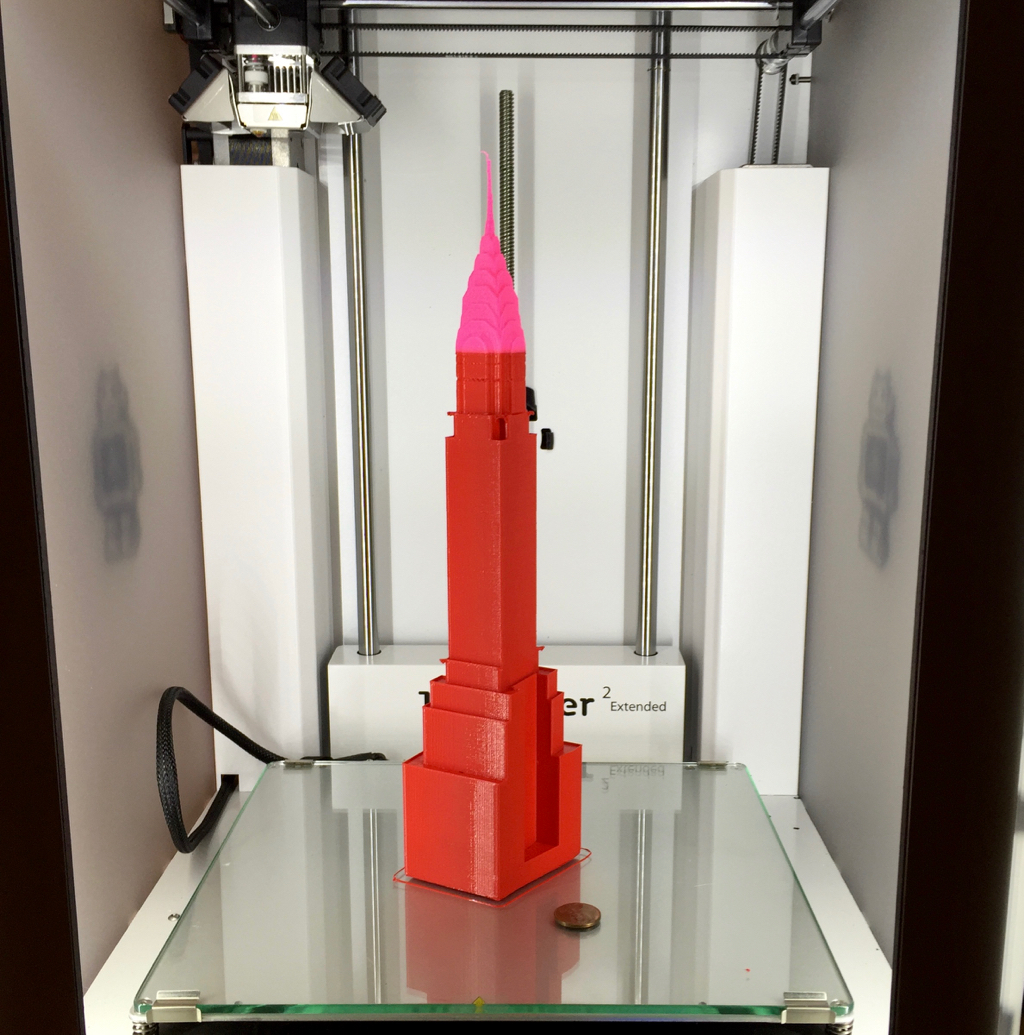
Print quality is excellent, provided you’re using quality materials, but more on that later. Here you can see a large sample test object that came out quite well. Yes, we ran out of filament part-way through the print. What did we tell you earlier? You need lots of material with the Ultimaker 2 Extended.
One very important aspect of the Ultimaker 2 Extended is its size. That’s the most fundamental aspect of the machine, as it is otherwise a regular Ultimaker 2 without the added build height.
The print volume is 223 x 223 x 305mm, pretty much twice the height of “normal” desktop 3D printers. Thus, you can print some very large objects.
But there are two very important things to know about printing large objects:
- You will require a lot of filament.
- Printing will take a long time.
Let’s repeat that: you will need a lot of filament. We’re talking half a spool at times. And if you have a print failure, which, let’s face it, is increasingly probable as the print time lengthens, you will need even more filament.
The Ultimaker 2 Extended is a pretty solid machine that can definitely survive such long print sessions. But we would be most concerned about the material quality instead of the machine itself.
We’ll explain more about use of materials in the Ultimaker 2 Extended in the next post in this series.
Other posts in this series: