
![We review the Prusa MMU2S multi-material upgrade [Source: Fabbaloo]](https://fabbaloo.com/wp-content/uploads/2020/05/image-asset_img_5eb08bc708767.jpg)
This is part 1 of a 3 part series on using the Prusa Research MMU2S multi-material upgrade. You can find part 2 here and part 3 here.
I’ve finally managed to successfully build a Prusa MMU2S multi-material system.
This review is a very long time coming, and the reasons for this lengthy delay will become evident as you read through the story. The entire upgrade process has been perhaps the most challenging, frustrating and at the same time rewarding experiences I’ve had using 3D printers in my now 13 years of use.
Prusa MMU2S Order
It began in September, 2018, when I ordered a MMU2 upgrade kit.
Previously I had very successfully operated an Original Prusa i3 MK2.5S desktop 3D printer in the lab, one of the finest 3D printers I’ve ever used. It produced tremendously good output and was extremely reliable, able to 3D print anything, even over the course of days.
When Prusa Research announced a multi-material upgrade I, like many others, was intrigued by the notion of converting this highly reliable device into one that could print many colors in the same 3D print job especially at the rock-bottom price of US$299. However, before I got around to ordering the upgrade kit, Prusa Research abruptly changed the MMU design completely to a much more simplified form, the MMU2.
I placed an order in September of 2018 and awaited delivery. However, Prusa Research again delayed shipping as they were once again redesigning the MMU, which eventually became the MMU2S. This is what I eventually received in April 2019, seven months after ordering.
Prusa MMU Concept
Before we get into the gory details of my experience, let’s understand the principles of the Prusa MMU2S.
The base 3D printers to which this upgrade can be applied are the current flagship 3D printer from the company, the Original Prusa MK3S and its predecessor, the Original Prusa MK2.5S. In either case the device is transformed into a different 3D printer; they require different slicing treatment and must be selected as such in the software. In other words, if you upgrade a MK2.5S with the MMU2 kit, you don’t have a MK2.5S anymore; you have a “MK2.5S MMU2”.
Both of the base 3D printers are filament-powered machines, and thus the idea here is to use different filaments within a print job to achieve multi-material capability. However, since there is only one nozzle on the device, it means there must be a mechanism to swap filaments on the fly. That is the core concept of the Prusa MMU upgrades.
Multi-Nozzle Extrusion
Most other multi-material 3D printers employ multiple nozzles, but there are many issues with them, aside from being more expensive due to multiple copies of the hardware. The major issue is that the nozzles must all have perfectly calibrated alignment, otherwise the multi-color sections will not be properly joined. It’s quite a pain to deal with this, I can attest. But there are no such issues when pushing it all through a single nozzle.
A single nozzle approach does introduce the problem of color mixing. If you switch filaments, there is a residual amount of the previous filament still in the hot end, and that must be purged to obtain a “clean” flow of new filament. In practice, this means the MMU2S systems must squirt out some waste material on each filament change, using up more material and dramatically increasing the print job duration.
MMU Filament Swapping
But how does the MMU2S swap filaments? Prusa Research has designed an ingenious and relatively simple mechanical system to do so.
The MMU2S unit sits atop the 3D printer, and up to five filaments are fed into it. The idea here is that a “selector” slides horizontally across the bank of filaments and engages the one filament that’s selected.
![Gears that drive filaments when engaged by the Prusa MMU2S multi-material selector [Source: Fabbaloo]](https://fabbaloo.com/wp-content/uploads/2020/05/image-asset_img_5eb08bc72f37c.jpg)
A motor pushes the engaged filament down a PTFE tube to the extruder that’s still mounted on the 3D printer’s toolhead, in a manner similar to what you’d see on a Bowden-style system.
The still-existing extruder motor and gears catches the filament as it arrives and then takes on the role of pushing it through the hot end as it would normally do.
3D printing then takes place normally, except that occasionally the filament must be swapped. When this happens the filament is pulled up and back to the “ready” state in the MMU2S, and the selector moves to engage another filament and the process repeats.
The number of filament swaps on a given 3D print job is quite variable. It could be as low as once, but in a large, complex multi-color object it might be a hundreds. Or a thousand. Or even more.
The concept I’ve just described seems fairly straightforward, and thus you would expect the upgrade process to proceed normally. However, for me — and many MMU2S upgraders — that was simply not the case.
Prusa MMU2S Assembly Instructions
![Just a few parts for the Prusa MMU2S multi-material upgrade [Source: Fabbaloo]](https://fabbaloo.com/wp-content/uploads/2020/05/image-asset_img_5eb08bc7578dd.jpg)
Excitedly, I opened the upgrade box I received from Prusa Research and quickly found bags of parts. Many, many parts. I wondered exactly how difficult this could be to perform the assembly.
I reviewed Prusa Research’s typically easy-to-follow online instructions. The first thing I realized is that Prusa Research now has several different machine models and you must be very careful to select the right documentation for your particular machine scenario. In my case, I used the “Original Prusa i3 MK3S/MK2.5S & MK3/MK2.5 to MMU2S” instructions, as opposed to any of these possibly relevant instruction, but similarly-named sets:
-
Original Prusa i3 MK2 MMU1 to MK2.5S MMU2S
-
Original Prusa i3 MK2/S to MMU1
-
Original Prusa i3 MK2/S to MMU1
-
Original Prusa i3 MK2S MMU1 to MK2.5 MMU2 v1.00
-
Original Prusa i3 MK2S MMU1 to MK2.5 MMU2 Original Prusa i3 MK3/MK2.5 to MMU2 v1.01
-
Original Prusa i3 MK3/MK2.5 to MMU2 v1.01
My advice is to be very aware of the specific machine models at all times when looking at Prusa Research documentation! Read every model and version number or else you could find yourself going down the wrong path.
The instructions seemed a little daunting to me, a part-time hardware person. For those accustomed to using pre-assembled equipment, the MMU2S upgrade is definitely not for you. You must have some experience building machines to have a hope of getting through to the end successfully.
The instructions are divided into eight major sections as follows:
-
MK3/MK2.5 extruder disassembly (Moderate difficultly, 16 steps)
-
MK3S/MK2.5S extruder disassembly (Moderate, 10 steps)
-
MK3/MK2.5 extruder upgrade (Moderate, 65 steps)
-
MK3S/MK2.5S extruder upgrade (Moderate, 19 steps)
-
Idler body assembly (Easy, 15 steps)
-
Pulley body assembly (Moderate, 36 steps)
-
Electronics and MMU2S unit assembly (Difficult, 32 steps)
-
Spool holder and buffer assembly (Easy, 22 steps)
-
Preflight check (Easy, 15 steps)
Note that the instructions have mixed in MK3 / MK3S / MK2.5 / MK2.5S machines, so it is critical you stay on the right path. Several times when I resumed working on the upgrade, I accidentally ended up in the wrong section and got terribly confused.
![Assembling the Prusa MMU2S multi-material upgrade [Source: Fabbaloo]](https://fabbaloo.com/wp-content/uploads/2020/05/mmu-assembly-inprogress-1_img_5eb08bc77b96e.jpg)
There’s a lot of steps here: for the MK3/MK2.5 it’s 201 steps in total, and for the MK3S/MK2.5S, it’s “only” 149 steps. You will spend many hours building this kit. The non-“S” models have more steps because you’re basically upgrading the extruder to the S level as part of the MMU2S upgrade.
Perhaps the trickiest stage was wiring up all the electronics, as was marked the most difficult step. Here we see the bundle of wires where you must very carefully plug the correct cable into the correct port on the controller board. Fortunately, the cables are properly labeled and it’s not that complicated.
![Electronics hookups on the Prusa MMU2S multi-material upgrade [Source: Fabbaloo]](https://fabbaloo.com/wp-content/uploads/2020/05/mmu-assembly-wiring-detail-1_img_5eb08bc79f53c.jpg)
Prusa MMU2S Initial Testing
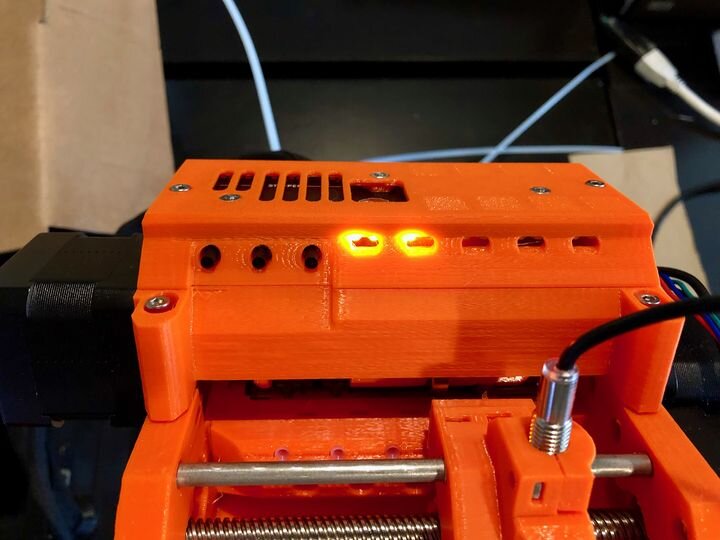
![Powering on the Prusa MMU2S multi-material upgrade [Source: Fabbaloo]](https://fabbaloo.com/wp-content/uploads/2020/05/image-asset_img_5eb08bc7c22d8.jpg)
I managed to struggle through the steps by taking my time, double-checking every step, re-reading and visualizing what to do. After far too many hours, I had completed the assembly of the MMU2S.
Now it was time to move on to power up and testing.
I had thought the lengthy and tedious assembly process would be the worst part of the upgrade.
I was wrong.
Very wrong. Assembly turns out to be the easiest part of the MMU journey.
This is part 1 of a 3 part series on using the Prusa Research MMU2S multi-material upgrade. You can find part 2 here and part 3 here.
Via Prusa Research