
![We review the Prusa MMU2S multi-material upgrade [Source: Fabbaloo]](https://fabbaloo.com/wp-content/uploads/2020/05/image-asset_img_5eb08bbe8082a.jpg)
This is part 3 of a 3 part series on using the Prusa Research MMU2S multi-material upgrade. You can find part 1 here and part 2 here.
MMU2S First Print
Surprisingly, the system seemed to work at first, although for some reason I had to manually push the filament down to the extruder to begin the print. I didn’t understand then that there are situations where the MMU2S doesn’t know the location of the filament, and instead of ramming it down to the extruder at full speed, it gradually pushes it in steps, waiting for the extruder sensor to trigger. For the uninitiated, it is horribly confusing as the machine seems to be doing very weird things.
Now the 3D print seemed to be working. After finishing with the first material, the filament was retracted, apparently successfully, and then the next filament was being pushed down. But then it stopped.
“MMU Failure”.
This was the first, but by no means the last time I received this error message.
It means that the attempt to feed the extruder somehow failed. Your response is to “open up” the MMU2S and figure out what went wrong, fix it, and resume the 3D print.
Recover From MMU2S Failure
![The annoying bolts on the Prusa MMU2S that tend to fall out half the time you open the unit [Source: Fabbaloo]](https://fabbaloo.com/wp-content/uploads/2020/05/image-asset_img_5eb08bbec6562.jpg)
Opening up the MMU2S soon became a frequent activity. It is easy, as it requires only to loosen two spring bolts on the top of the unit. However, the MMU2S is unfortunately designed so that when the MMU2S door is open, the bolts occasionally fall out, and you will inevitable lose the tiny spring. If only the door would open just a slight bit less, this would not occur!
Inside the MMU2S you must look at the filament to see if there’s something wrong with it. I had no idea what might be wrong, so I simply chopped off the end as one does when loading filament on any 3D printer and tried it again, after setting it up in the “ready” position.
But how do you “try it again”? I stared at the machine wondering how to trigger print resumption. The button on the printer’s control panel merely brought the hot end back up to temperature, but didn’t restart printing.
![Three control buttons on the left of the Prusa MMU2S multi-material unit [Source: Fabbaloo]](https://fabbaloo.com/wp-content/uploads/2020/05/image-asset_img_5eb08bbf0c398.jpg)
Eventually, I learned that of the three unnamed buttons on the MMU2S, the right-hand button is used to resume 3D prints. However, you can’t just touch it quickly. You must push it a specific length of time. If you push too short a time, nothing happens. If you push too long, it starts the resume but also starts to move the extruder to the right to the next filament, as it would do when things are normal.
MMU2S Trivia Knowledge
These are some of the mysterious trivia you must learn to successfully operate the MMU2S. Perhaps some of it is in the manuals, but somehow I either missed things or it didn’t register with me.
The purpose of the mysterious three buttons on the MMU2S is also unclear. If everything is normal, the left button moves the selector one spot to the left, and the right button moves the selector to the right. However, in other machine states it is quite confusing to know what the buttons are supposed to do as their functions seem to change.
There is a special calibration required for the MMU2S: determining the exact distance the MMU2S must push the filament to precisely hit the Bondtech gears in the extruder. If it’s too short, the extruder cannot grab the filament. If too long, that’s not good either. It’s an easy process to do, but tedious. It requires going into a special mode on the MMU2S to access the “special menu”, where the button functions change.
MMU2S Tip Quality
I got in the habit of quickly fixing these MMU failures by snipping the filament and restarting, which seemed to work. However, during testing it seemed that I had to do this MMU failure recovery procedure on EVERY filament swap. This was not fun.
![A “manually completed” multicolor 3D print on the Prusa MMU2S, where each filament swap required manual intervention [Source: Fabbaloo]](https://fabbaloo.com/wp-content/uploads/2020/05/image-asset_img_5eb08bbf6d8cb.jpg)
But why was the filament not inserting into the hot end properly?
After a bunch of reading, I learned of the concept of “tips”.
The “tip” is the shape of the end of the filament after it is pulled out of the extruder. During a filament swap, a filament is removed and then later it is re-inserted into the extruder, and the tip that came out of the extruder must then pass through all the filament path, including sensors and Bondtech gears, once again.
This is where much of the problem in MMU2S operation occurs. A “bad tip” is one that confuses the sensor. Imagine if the temperature was a bit too high, making the filament material sloppy. When you pull out that filament there will be a long “tail”.
Tails cause two different MMU2S issues:
-
A “robust” tail might confuse the sensors by making them think the filament is present when it hasn’t quite gotten far enough; or
-
The tails fall off, accumulate and gunk up the works eventually.
![Some of the dozens and dozens of filament tips used to tune the Prusa MMU2S multi-material upgrade [Source: Fabbaloo]](https://fabbaloo.com/wp-content/uploads/2020/05/image-asset_img_5eb08bbfaa67a.jpg)
The objective, then, is to tune the machine to have the best possible tail shapes. Ideally, they should be 45 degree conical shapes. How is this accomplished? Through a number of obscure settings in the slicing software. After reading dozens of posts about this matter, and trying out many variations of parameters, I finally arrived at the optimal tip shape!
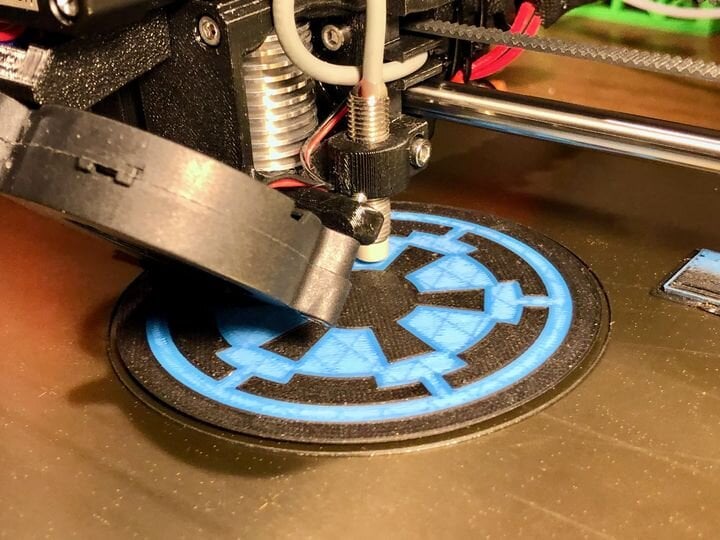
![A partially completed multicolor 3D print on the Prusa MMU2S multi-material upgrade [Source: Fabbaloo]](https://fabbaloo.com/wp-content/uploads/2020/05/image-asset_img_5eb08bbff3fd0.jpg)
But it didn’t help at all. My filament loads consistently failed, with “MMU Load Failure”. I still had to chop off the tips to make the prints proceed, and they did. One one occasion I sat by the machine chopping tips off on every filament swap for a very long time until I realized that was not a good thing to do.
But there was nothing I could do to make the swaps happen automatically, no matter what settings were used and regardless of the tip quality.
MMU2S Heatbreak Issue
![The Prusa Research MK3 heatbreak [Source: Fabbaloo]](https://fabbaloo.com/wp-content/uploads/2020/05/image-asset_img_5eb08bc03ed87.jpg)
Finally, after many weeks of reading I realized what was wrong. One obscure post I read described a scenario in which the 3D printer’s heatbreak was too large.
The post suggested that the old MK2.5S machines had a slightly different heatbreak than the current MK3S machines. The post said the MK3S heatbreak was a bit thinner in diameter and that it had allowed successful 3D printing. And in the MK2.5S to MMU2S upgrade instructions there was no step replacing the heatbreak. Thus I still was using the original MK2.5S heatbreak.
![Removing the MK2.5S heatbreak from the hot end [Source: Fabbaloo]](https://fabbaloo.com/wp-content/uploads/2020/05/mmu-testing-heatbreak-deinstall-1_img_5eb08bc0818ad.jpg)
Having nothing else to lose, I ordered a MK3S heatbreak from Prusa Research and received the tiny component. Replacing a heatbreak is a serious matter on a 3D printer, as it requires you to almost completely disassemble your hot end and extruder, and reassemble it again.
After extracting the old MK2.5S heatbreak, I compared it to the new heatbreak. This is what I saw:
![Comparing MK2.5S and MK3 Prusa heatbreak diameters. The MK2.5S is noticeably larger [Source: Fabbaloo]](https://fabbaloo.com/wp-content/uploads/2020/05/image-asset_img_5eb08bc0ad591.jpg)
As you can see, the new heatbreak is noticeably smaller. This means that when the soft filament is pulled out, the resulting diameter of the tip is thinner! The large heatbreak diameter was apparently creating thick tips that would not easily pass through the filament path!
Successful MMU2S Multi-material 3D Printing
I reassembled the machine, and after going through all the machine calibrations yet again, I attempted to 3D print a multi-color object.
It worked.
![First successful multicolor 3D print made on the Prusa MMU2S with no manual intervention [Source: Fabbaloo]](https://fabbaloo.com/wp-content/uploads/2020/05/image-asset_img_5eb08bc0e132d.jpg)
This is the very first successful 3D print I obtained on the devilish MMU2S, over a year after ordering the upgrade:
![My best 3D print, ever [Source: Fabbaloo]](https://fabbaloo.com/wp-content/uploads/2020/05/image-asset_img_5eb08bc13626d.jpg)
It may not look like much, but this was by far the most difficult 3D print I have ever attempted and achieved, and perhaps the 3D print I am most proud of making.
It turned out that most of my problems were due to the heatbreak issue. The tips after the heatbreak upgrade were noticeably thinner than those with the original heatbreak. Somehow this diameter change caused issues in the filament path. It’s possible that anyone upgrading to the MMU2S from a MK2.5S could encounter the same problem, but it is unlikely a MK3S operator would because those machines probably already have the thinner heatbreak.
MMU2S 3D Printer Tuning
After that it was simply a matter of tuning up the machine. Here is what I did next:
![The Sisyphus automatically rewinding spool holder [Source: Fabbaloo]](https://fabbaloo.com/wp-content/uploads/2020/05/image-asset_img_5eb08bc187456.jpg)
I replaced the roller-buckets with copies of this amazing self-rewinding spool holder. I can’t tell you how useful this is for the MMU2S, as it automatically rewinds by gravity alone, and it doesn’t take up much space either. It works perfectly.
![Modded part for the Prusa MMU2 allowing for quick-swap PTFE tubes [Source: Fabbaloo]](https://fabbaloo.com/wp-content/uploads/2020/05/mmu-assembly-modded-ports-1_img_5eb08bc1df41e.jpg)
![PTFE tube modification installed on the Prusa MMU2S [Source: Fabbaloo]](https://fabbaloo.com/wp-content/uploads/2020/05/image-asset_img_5eb08bc22f8c1.jpg)
I replaced the PTFE tube ports on the back of the MMU2S with an alternate part that allows push connectors to be installed. This makes swapping filaments far easier and is reduces friction on filaments significantly, as the PTFE tube is no longer pinched.
![A spool of fine Prusament 3D printer filament. Note how regular the windings appear [Source: Fabbaloo]](https://fabbaloo.com/wp-content/uploads/2020/05/image-asset_img_5eb08bc26a7b2.jpg)
I obtained a pile of high quality 3D printer filament (Prusa Research’s own Prusament, which I highly recommend using) to ensure the best possible filament situation. It seems that low quality or old filament will often cause problems. The PrusaSlicer software already has profiles for Prusament that are tuned for success in the MMU2S.
I re-tuned the rest of the 3D printer, including leveling the bed perfectly, setting the Z-gap, restoring the surface plate with IPA, etc. The machine must be tuned absolutely correctly in order for the MMU2S to work. For example, this is my first layer quality:
![A perfect first layer 3D print [Source: Fabbaloo]](https://fabbaloo.com/wp-content/uploads/2020/05/image-asset_img_5eb08bc2a1f75.jpg)
![Aligning the BondTech extruder gears after replacing the heatbreak [Source: Fabbaloo]](https://fabbaloo.com/wp-content/uploads/2020/05/mmu-testing-gear-misaligned-1_img_5eb08bc2e951c.jpg)
I realigned the Bondtech gears to perfectly match the filament path; somehow this had shifted during all the disassembly / assembly work. I should point out that when replacing the heatbreak, you potentially de-calibrate many things.
![A happy Prusa MMU2S 3D printing a multicolor object without error [Source: Fabbaloo]](https://fabbaloo.com/wp-content/uploads/2020/05/image-asset_img_5eb08bc334593.jpg)
After doing all this work, the MMU2S now can (reasonably) 3D print multi-color objects. It still fails intermittently with “MMU Failure”, but you can recover. I seem to get a load failure every 100 swaps or so. From my reading, this level of reliability sounds typical, although some have gone further to fine tune and modify their MMU2S configuration to achieve even greater reliability.
I learned a lot from this exercise, and it took a great deal of time from me.
Should you try the MMU2S? If you are considering this upgrade, think about these first:
Skills: You must have relatively good hardware building and debugging skills. You should have already successfully assembled a 3D printer or two at the least.
Patience: Building and testing the MMU2S is often fraught with multiple problems, and you must be patient to get through to the end. I have read countless posts where MMU2S users simply “gave up” and literally threw away their machine or downgraded it back to its original form. If that’s you, the MMU2S is definitely not for you.
Flexibility: From my own experience and it seems that of many others, to succeed with the MMU2S, you must deviate from the Prusa design and instructions in at least a few ways with some important modifications and alternative approaches. That said, you should also start with the standard Prusa approach and print parameters first, and adjust as required.
Perfection: In order for the MMU2S to succeed, virtually everything has to be near-perfect in your hardware and software. There are plenty of ways to go wrong, but if you get all of them right, the device should eventually work. Tune, tune and tune more.
Curiosity: The Prusa MMU2S operates in a way that doesn’t appear on other desktop 3D printers, and you must have a good level of curiosity to power your exploration of how the machine works. By understanding what the machine is actually doing, you have a much better chance of succeeding.
There was a point during the troubleshooting phase were I was “that close” to giving up, and honestly I think many people would have done so. I kept going somehow, and discovered the way out.
![Some completed multi-material 3D prints made on the Prusa MMU2S [Source: Fabbaloo]](https://fabbaloo.com/wp-content/uploads/2020/05/image-asset_img_5eb08bc376262.jpg)
Now I have a multi-material 3D printer that cost me only US$299 for the upgrade.
This is part 3 of a 3 part series on using the Prusa Research MMU2S multi-material upgrade. You can find part 1 here and part 2 here.
Via Prusa Research