
This week’s selection is the 3D Puzzle V2.0 by woodworker Ray Whitby.
Carpentry would seem to be an unusual profession to appear in a 3D print news site, but hear me out: Whitby has produced a fascinating puzzle made by combining both woodworking and 3D printing.
Whitby produces a range of wooden items, some of which are for sale on his Etsy site, while others are featured in his popular YouTube channel. The projects often involve turning, resin or other advanced woodworking techniques.
The 3D Puzzle V2.0, however, also involves 3D printing.
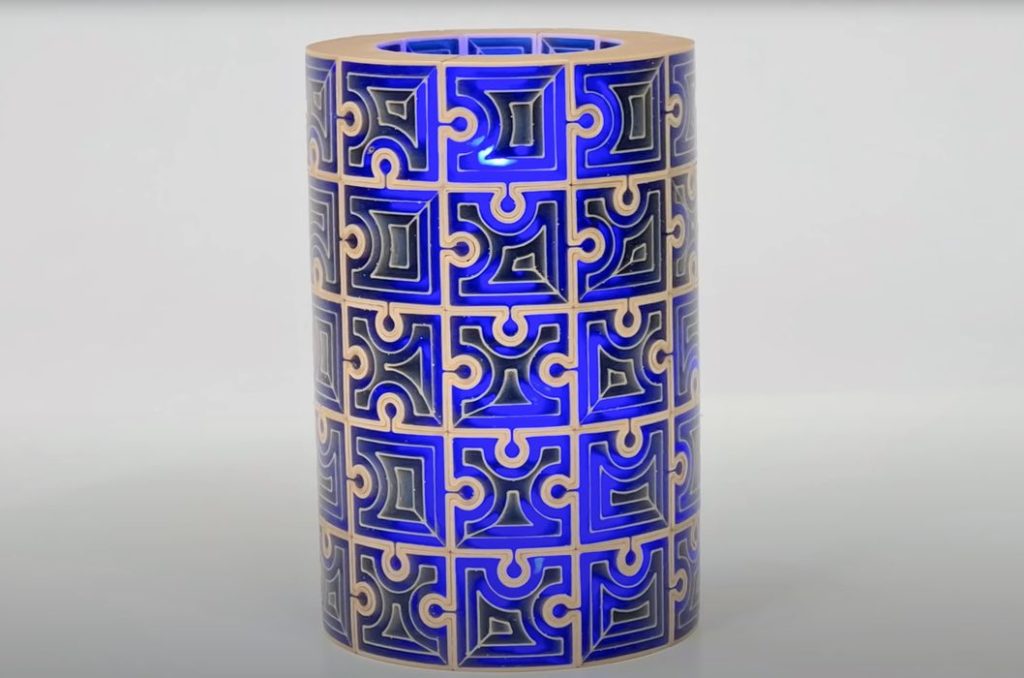
Let me first explain what exactly is a “3D Puzzle”. It’s like a jigsaw puzzle, but the pieces fit together in three dimensions, not two. In this project, Whitby has devised a cylindrical shape that decomposes into 50 interlocking pieces. Of course, they will only fit together in one configuration, like a jigsaw puzzle.
Whitby’s video is quite interesting because he comes at the project in woodworking mode. While he’s definitely 3D printing components, his steps attempt to convert them into “woodworkable” pieces, something not frequently seen by 3D printer operators.
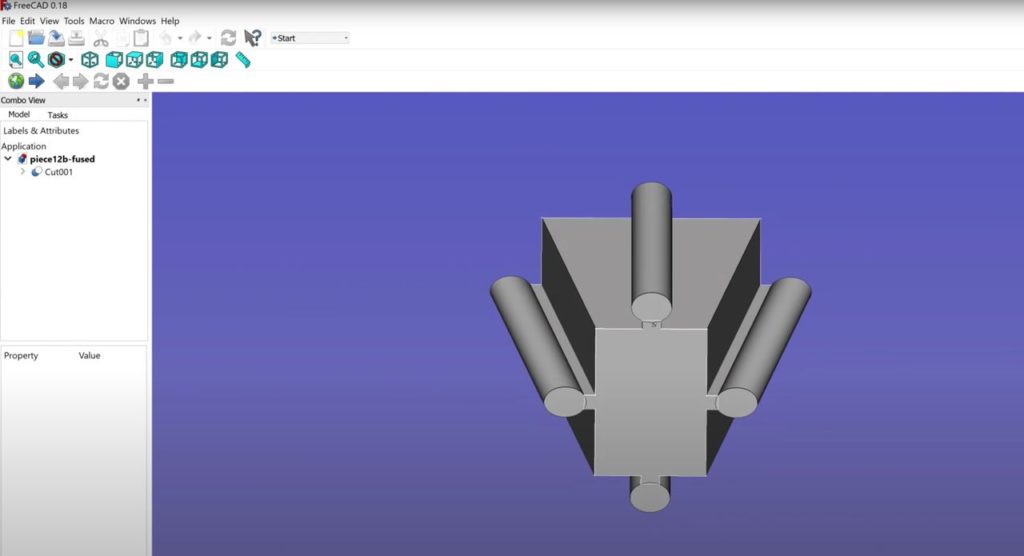
The first step was to design the pieces, which is non-trivial, as each piece is unique. While not shown, I suspect Whitby took a standard 2D jigsaw layout into FreeCAD and projected it on top of a cylinder. Then, this pattern could be extruded outwards to create the pieces.

Next the pieces had to be 3D printed, and Whitby used a wood filament on his Ender 3 desktop 3D printer.
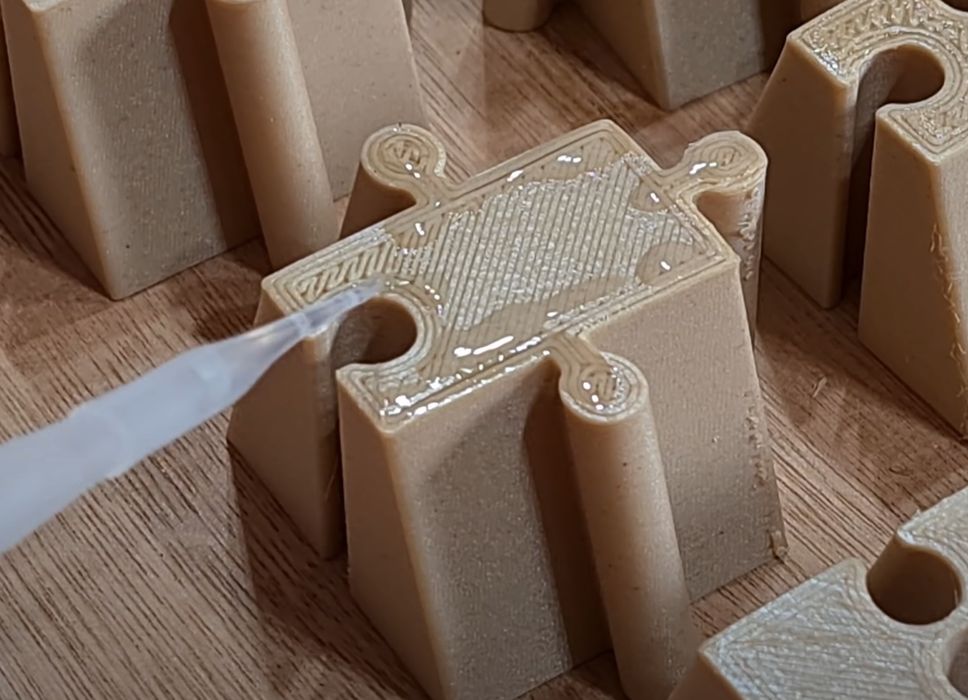
As the pieces would be holding liquid resin, at least before it hardened, they would have to be sealed to prevent leaks. Whitby used a two-part superglue application on the bottom of each to do so.

But it’s even more complex than that. When applying the resin to fill the geometric gaps in each piece, Whitby anticipated slops, which would adhere to the 3D prints. To counteract this, he applied a temporary latex coating.
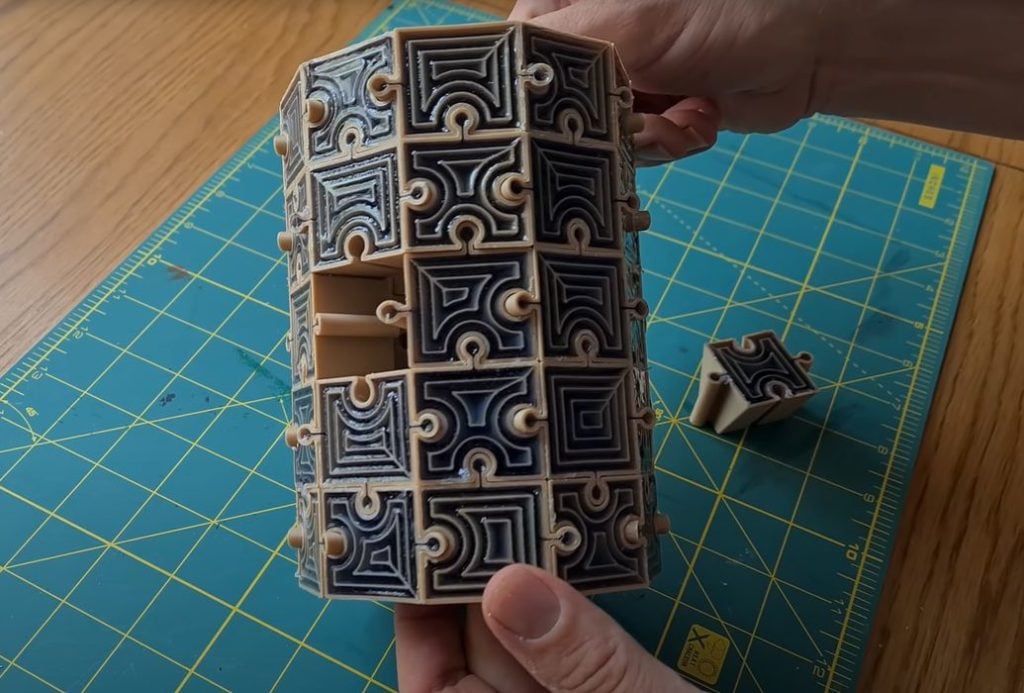
After the resin set, the pieces could be assembled into the completed configuration, as shown here. But there was yet more steps to complete.
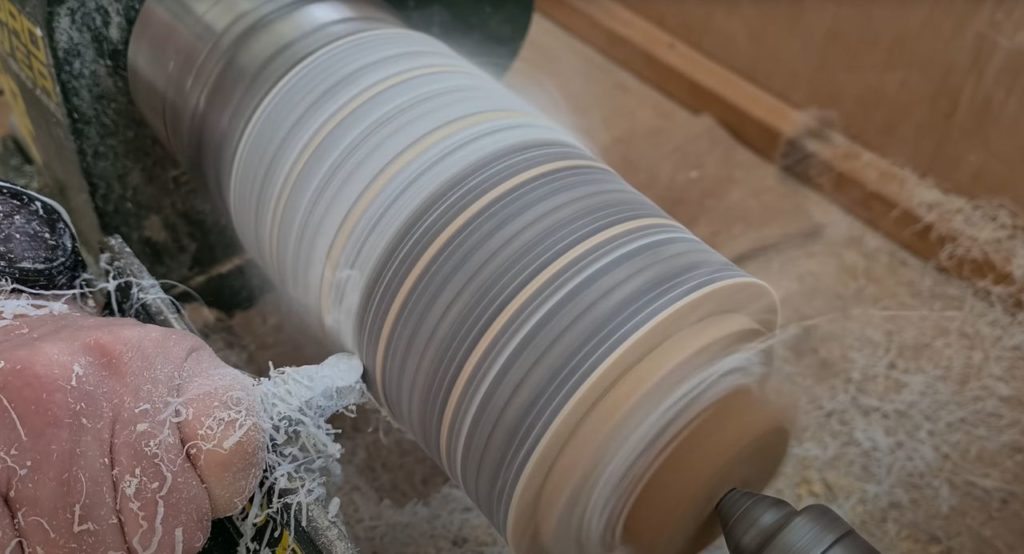
The assembly was then taken to a wood lathe, where it was cut down to a perfect cylinder. However, Whitby encountered an issue where the normal lathe tools would knock off larger chunks of the 3D prints. Instead a finer tool was used to more slowly eat away at the resin/3D print combination.
After some sanding and polishing, the result is an incredible 3D puzzle made from a combination of woodworking and 3D printing.

It’s a fascinating project that truly combines these two disciplines in an effective way I hadn’t seen previously. While 3D printing is a fantastic tool, it can be even better when combined with other making processes.
Watch the entire process here:
Via YouTube (Hat tip to Pete)