
There’s a new tool for printing very large objects: 3D Splitter.
The constant question from 3D print newbies is “how big can it print?” That’s really a misunderstanding because any 3D printer can print parts that can be assembled into something much larger than the build volume.
That’s the easy answer. But the details are more tricky: how, exactly, do you chop up a large 3D model into multiple parts? How do you do so in a way that allows you to practically assemble them later?
It’s relatively easy to chop a 3D model in several CAD systems by using a “Plane Cut” or similar tool. However, that produces parts with perfectly smooth surfaces. These are very challenging to line up accurately when assembling later.
PrusaSlicer offers the possibility of adding posts and holes to these surfaces during slicing. Then, when assembling, the posts and holes perfectly align the two parts together. But that is a process that works only for a few cuts — what if you had a really huge model where there were dozens of cuts to make?
Up to now the go-to tool for this was Luban. It’s a wonderful tool that not only can easily chop up big models into proper parts for assembly but also quite a number of other 3D model generation tools. Unfortunately, the makers of Luban have been raising the price for the tool over time, and as of this writing it is US$25 per month, US$125 per year, and US$625 perpetual. That’s quite expensive for a tool that you might use only occasionally, so many 3D printer operators avoid Luban.
An alternative appeared a few months ago: Split3r. It does similar functions, but is priced a bit lower: €60-95 (US$70-112), a one-time charge.
Now there’s another alternative, 3D Splitter, and it’s totally free to use.

It’s a web-based tool that accepts a 3D model as input, and provides the ability to resize, reorient and view in 3D. Once you’re happy with the desired size and orientation, you can then split the model into smaller pieces.
3D Splitter is very easy to use. You select your 3D printer model from a popup menu, and it includes all the latest devices. I chose a Bambu Lab H2S, for example.
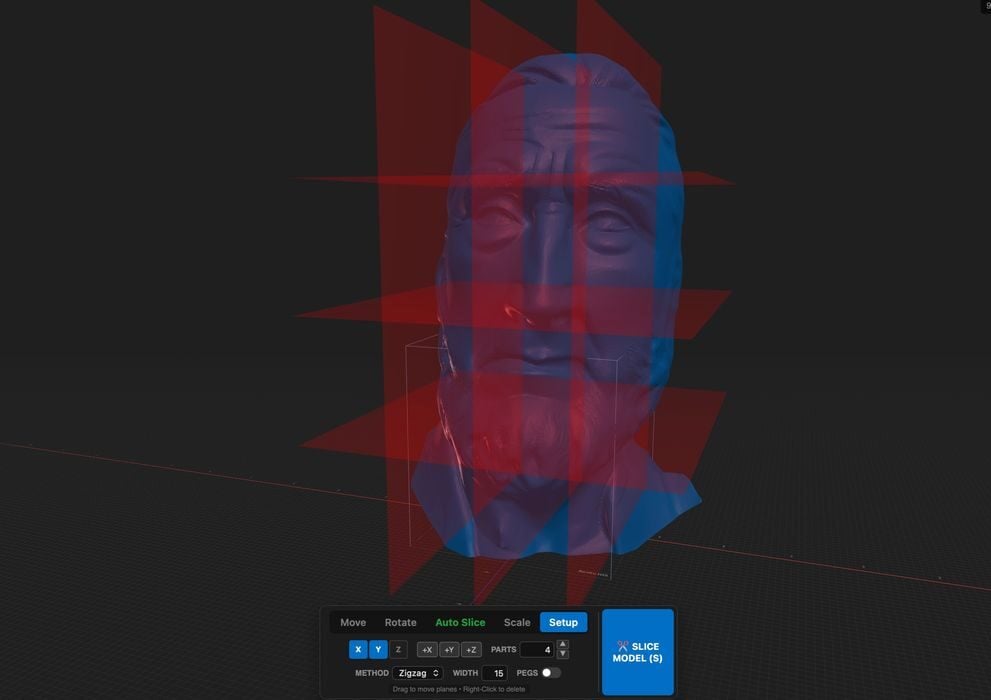
Then you must specify how many segments are required, and you do so on each axis. This allows you to maximize your build volume if you have a non-square build area.
Once you’ve finished configuring the axes, you hit the button and 3D Splitter very quickly produces a segmented version of your 3D model.
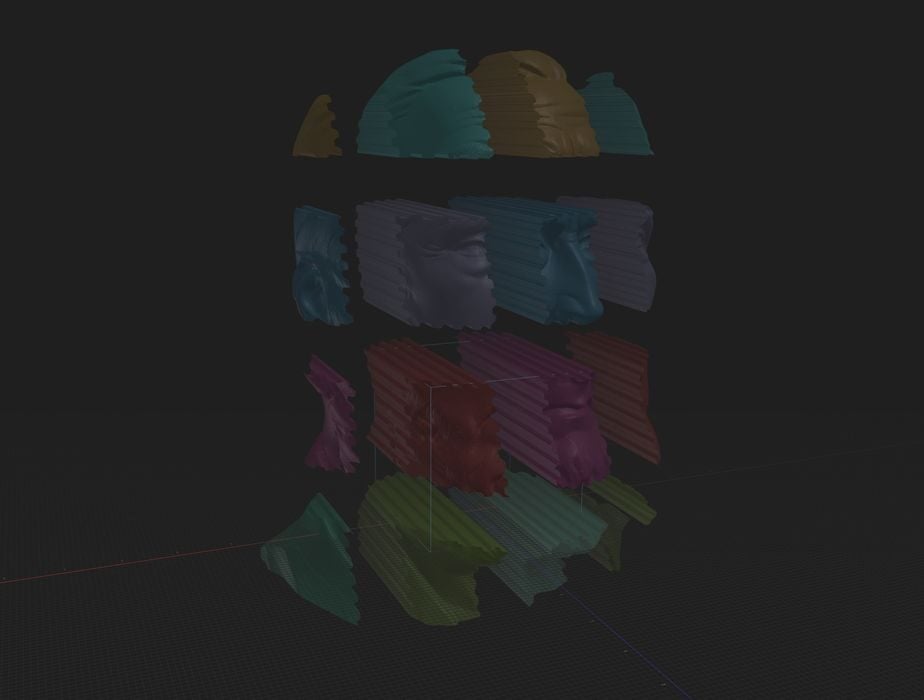
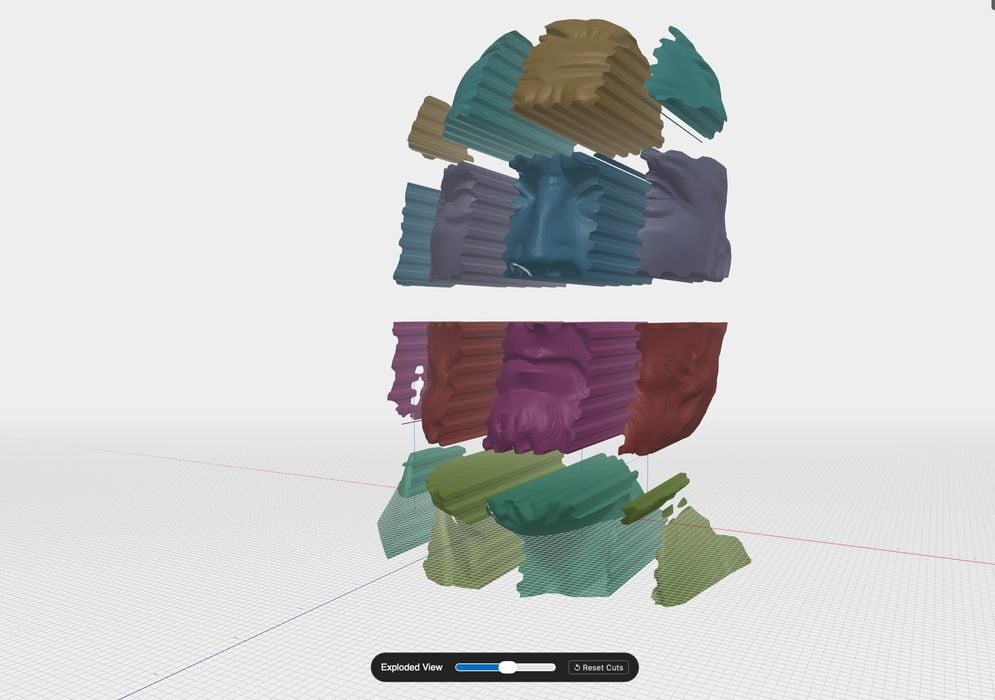
To check that it works, they provide an amazing exploded view of the parts.
As you can see in the images, they aren’t using posts and holes, but instead a unique wobbly pattern that should easily allow the parts to slide in beside each other. This is an essential feature, as posts and holes only work for a small number of parts: larger models with many parts won’t have room for posts when inserting an additional part.
After you’ve verified the segmentation is correct, you click on each part separately to download them. This is the one not-so-good part of 3D Splitter. If, for example, you were printing a life-sized 3D scan of your Mom, you’d end up with a hundred or so parts. It would be quite tedious to click on each part individually to capture them all. It would be a lot easier if 3D Splitter allowed a “download all” feature.
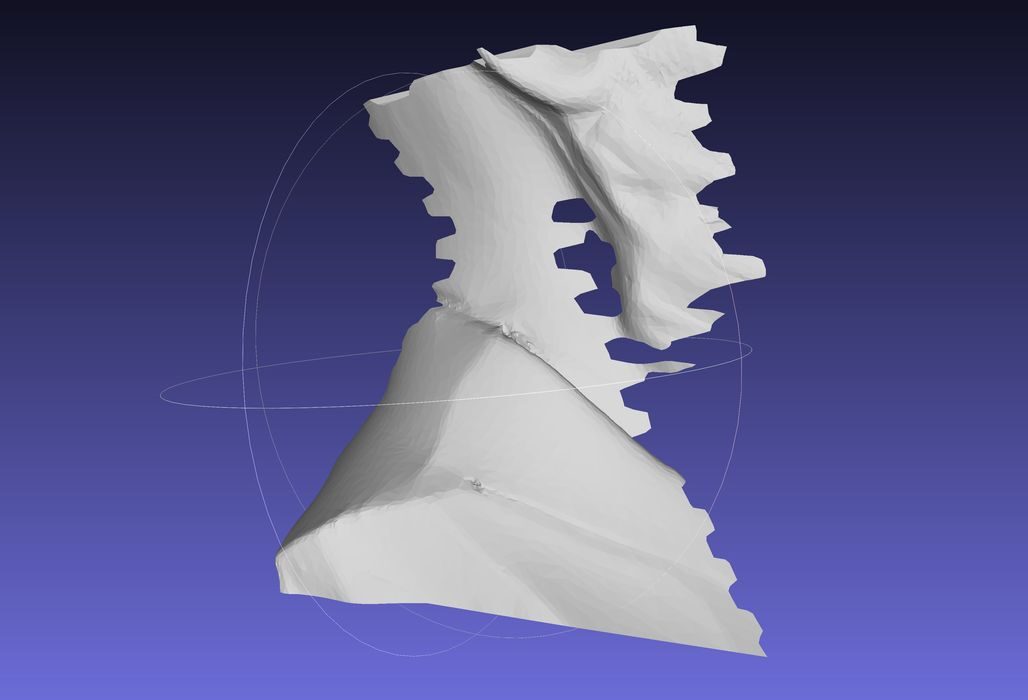
One other thing to note is that some of the resulting segments could have some dangly edges, as seen in this image. Be sure to print with supports if required.
I’m quite impressed with 3D Splitter, and will be making good use of it.
So should you.
Via 3D Splitter