
Our hands on review of the Anycubic Kobra desktop 3D printer continues with a look at operations, print results and conclusions.
This is part two of a two part series. Part one is here.
Kobra Operations
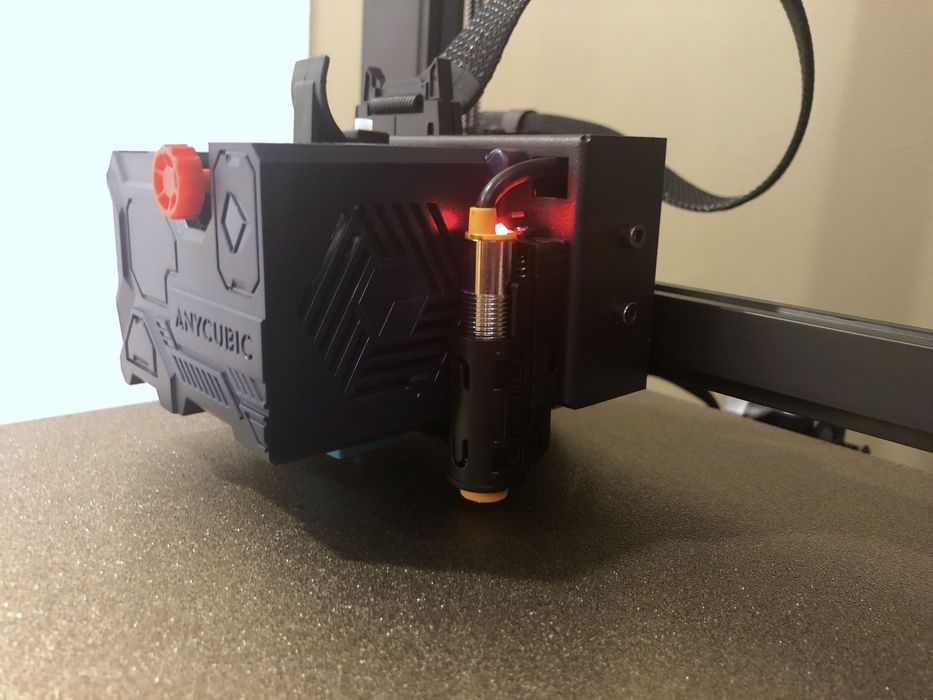
Before printing can begin, the first task is to level the machine, and the Kobra procedure to do so is a bit different from most FFF systems. The machine uses a metal-sensing proximity switch on the toolhead, which visibly lights up if close to a sufficient mass of metal.
Anycubic suggests using a metal tool to test it first to ensure it’s properly sensing metal, which we did with this wrench.
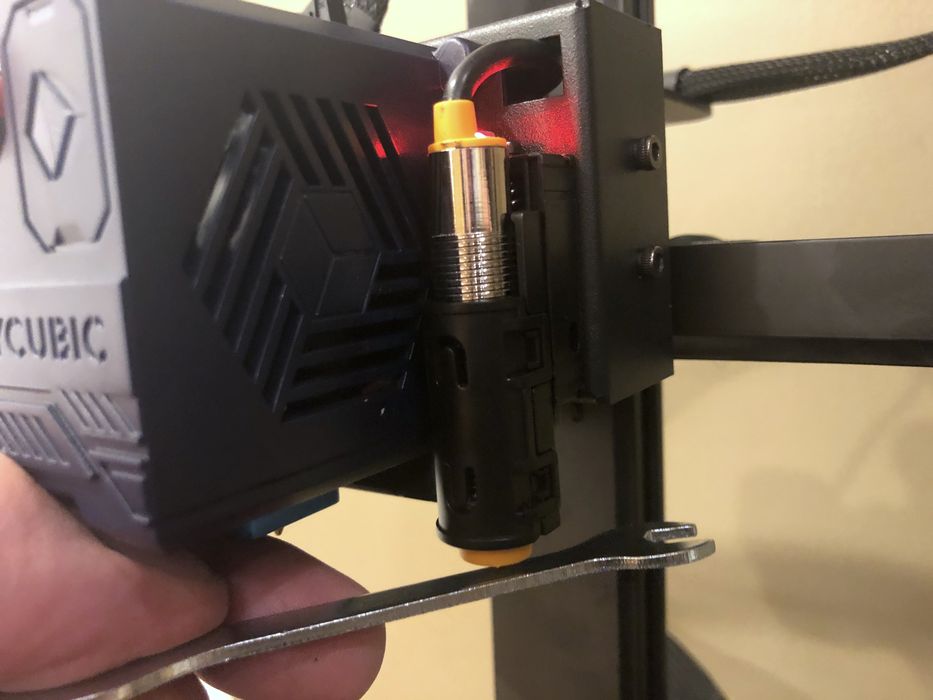
Although our machine’s sensor worked, there is a risk in attempting to use the machine without testing this sensor. If you do so, it is entirely possible you could wreck the print bed or worse by driving into the plate.
The Kobra uses a 25 point leveling procedure to detect the surface contour of the build plate. This is then stored and used to ensure first layer adhesion.
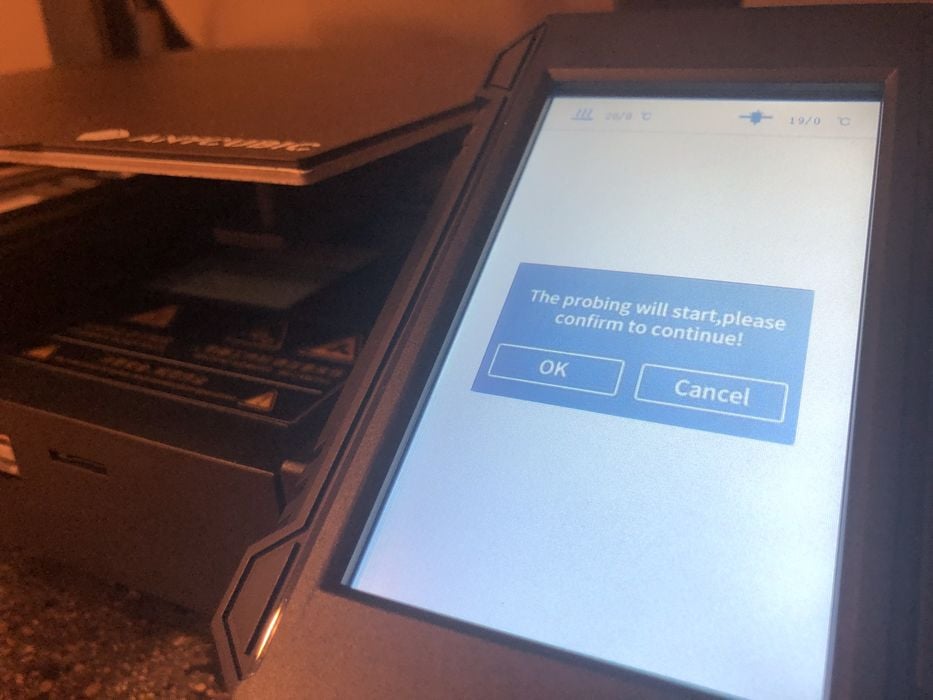
Sometimes the wording is a bit odd in the menus and documentation, but we found this message to be particularly interesting.
The next calibration to do is setting the Z-gap, the space between the nozzle’s tip and the build surface. This is done by by sliding a sheet of paper between the nozzle and bed and raising & lowering the nozzle until a slight drag was noticed.
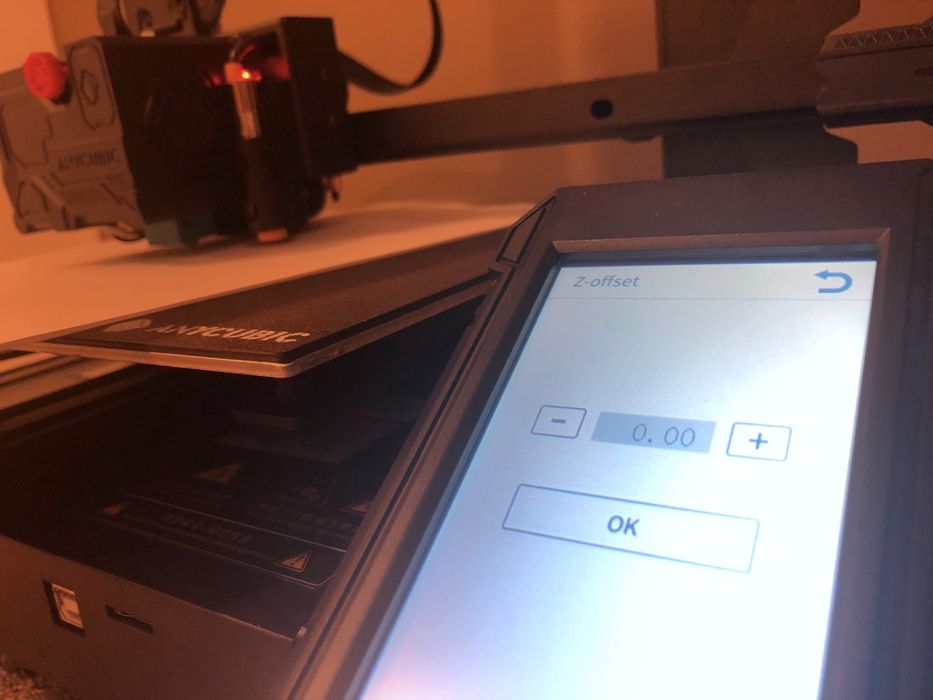
Even if you mess up the Z-gap setting, it is possible to easily adjust the Z-gap on the fly during printing, typically on the first layer. The first layer is critical, and it’s good practice to carefully watch it being laid down. If it’s not sticking sufficiently, you can tweak the Z-gap appropriately.
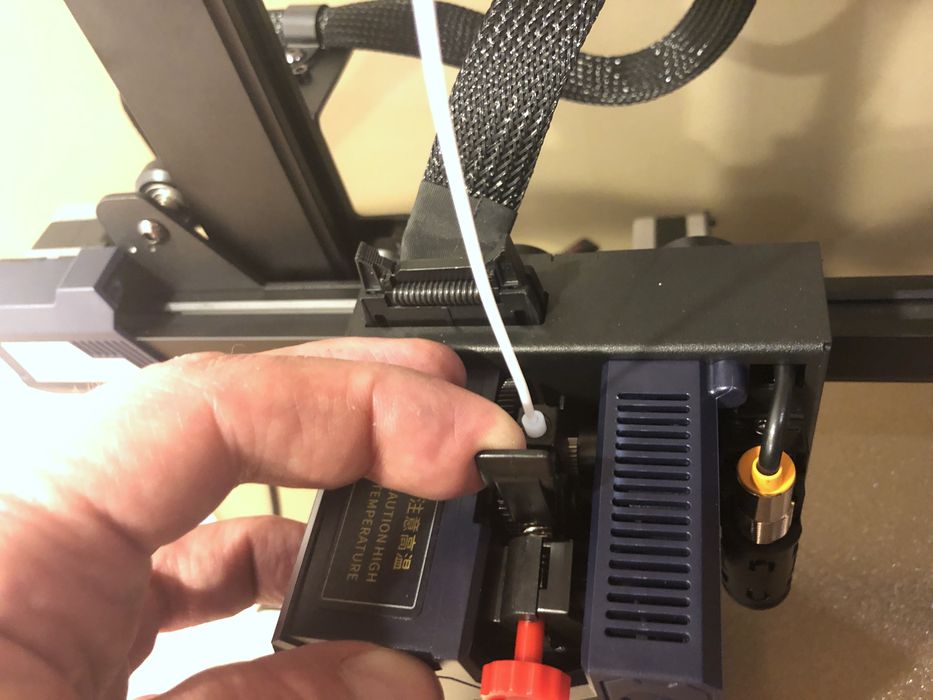
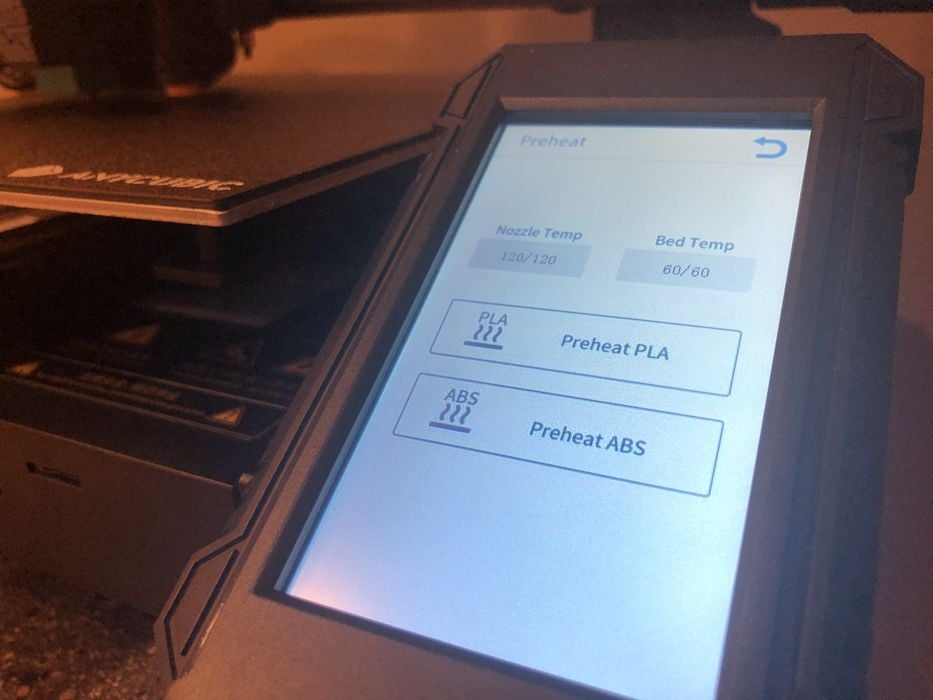
Filament loading was straightforward, and required pushing a tab to open up the extruder. You must pre-heat the nozzle, and this is easily found on the touchscreen’s panel, right beside the filament loading buttons.
However, we did notice there was no “Cooldown” function along with the pre-heat buttons. To cool things down you’d likely have to reset the machine.
One very useful feature on the Kobra’s extruder is a handy tensioner. This allows the operator to easily tweak the grip on the filament.
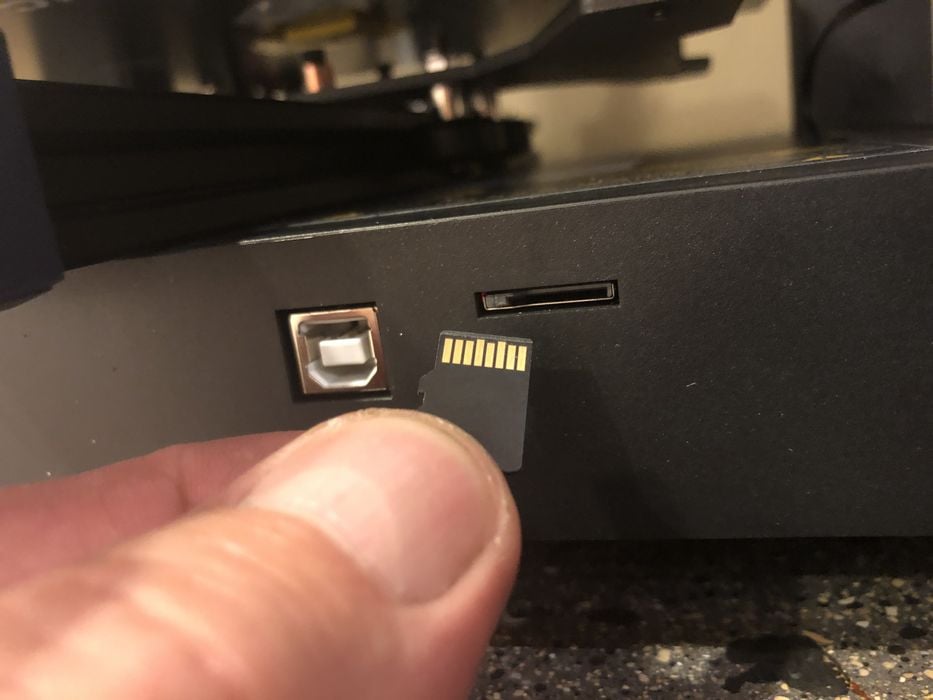
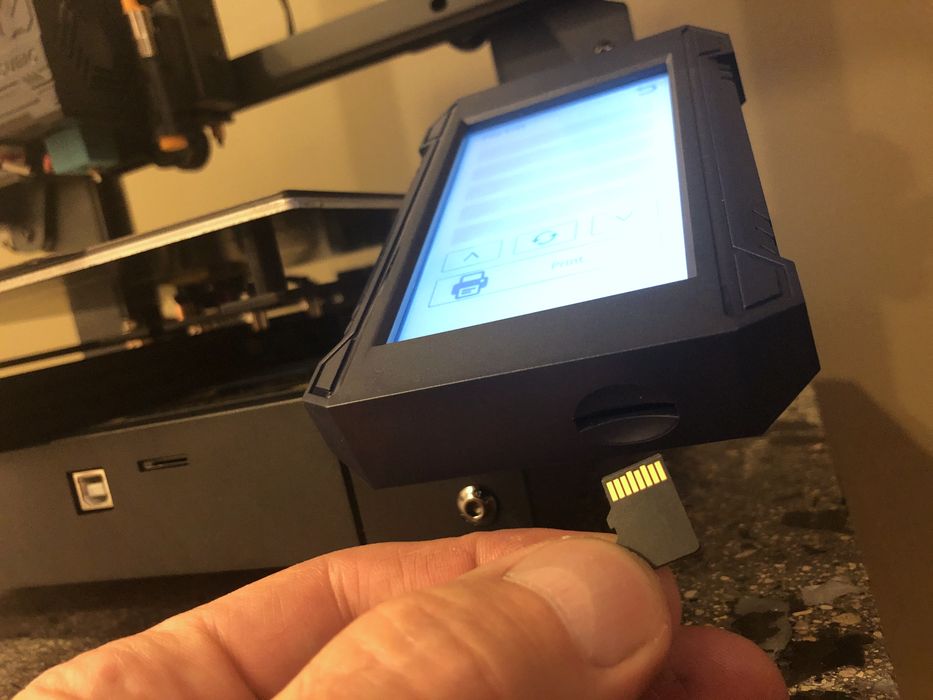
One strange feature on the Kobra is that there are two different SD card slots. Above you can see the one that is to be used on the side of the base, and below you see a secondary SD card slot at the base of the touchscreen. We found that the touchscreen slot would physically accept a card, but it was not recognized. [UPDATE: Anycubic informs us that this slot is designed to prepare for future upgrades to the user interface firmware.]
Kobra Print Results and Quality
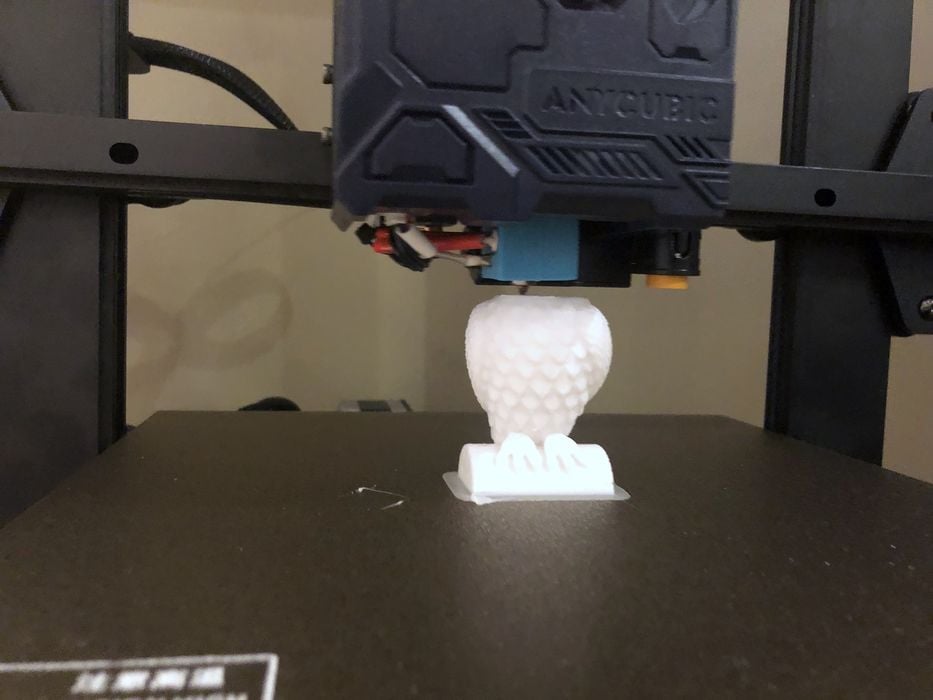
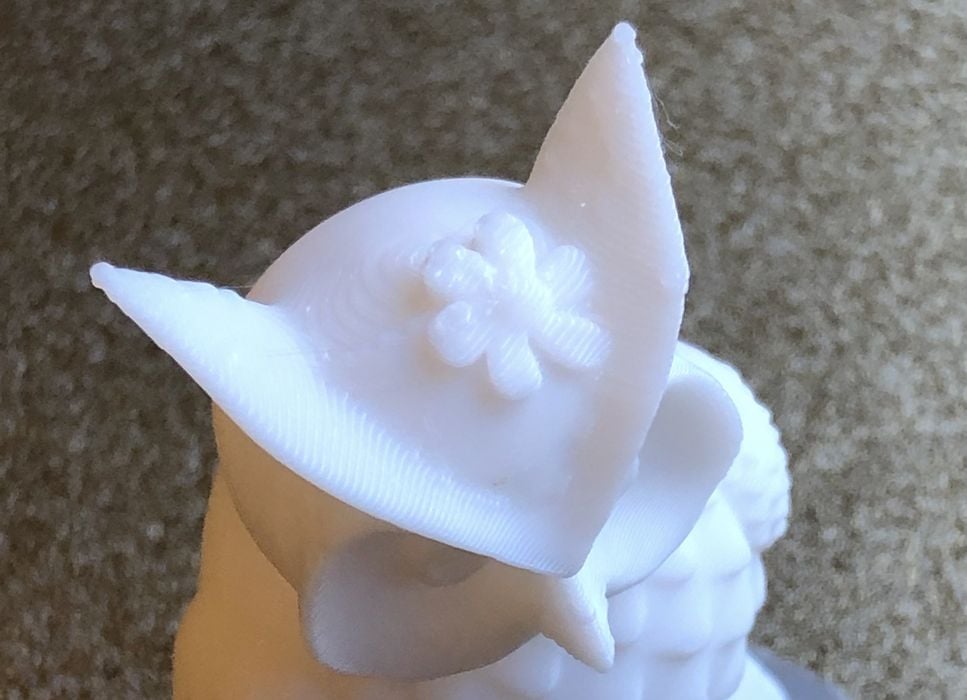
For our first print we chose the pre-sliced Owl 3D model provided on the memory stick by Anycubic. This is a good practice, as these pre-sliced files are usually perfectly tuned and allow the operator to see if the machine is physically set up correctly without worrying about wrong print parameters.
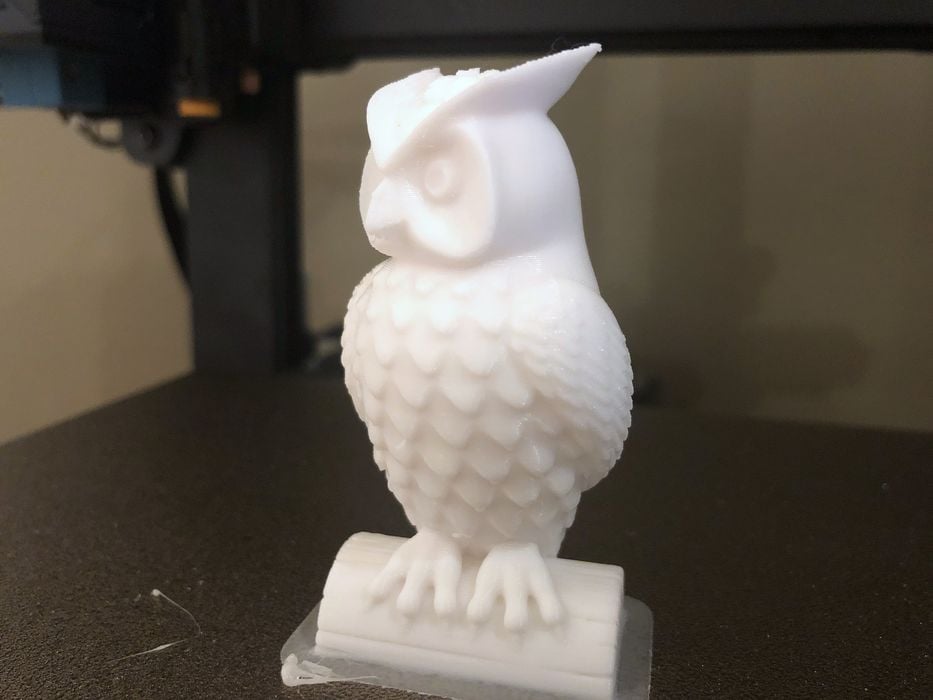
When operating, the Kobra had the typical loud sounding cooling fans like that of other 3D printers in a similar price range, but really it was not too loud when operating in a large room like we did. The first print came out looking fantastic with great surface finish and
good detail in hard to print areas.
For preparation of our own 3D models, we need to use a version of Ultimaker Cura provided by Anycubic, which has been pre-configured with the Kobra machine and certain filament profiles.
When we went to install Ultimaker Cura from the provided memory stick to slice our own files, we found a small hiccup. We found an issue using the Anycubic instructions for installing on a MAC that wasn’t present when installing on a PC, but it was quickly sorted out.
Our first slice with Ultimaker Cura had a glitch where the “Layer Height” slider was not adjustable. We noticed the same problem shows up in the Kobra’s user manual. This was quickly remedied by clicking the small refresh arrow button located directly beside layer height, which made the slider functional.
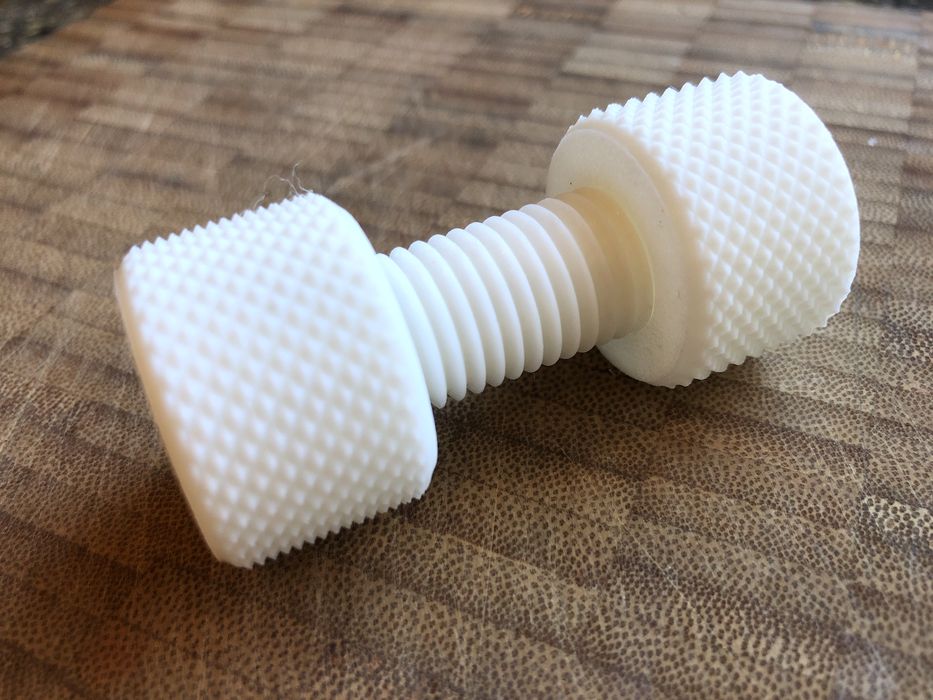
We ran a selection of test prints using white PLA and found the printer to be a bit slower than expected, but always delivering quality prints.
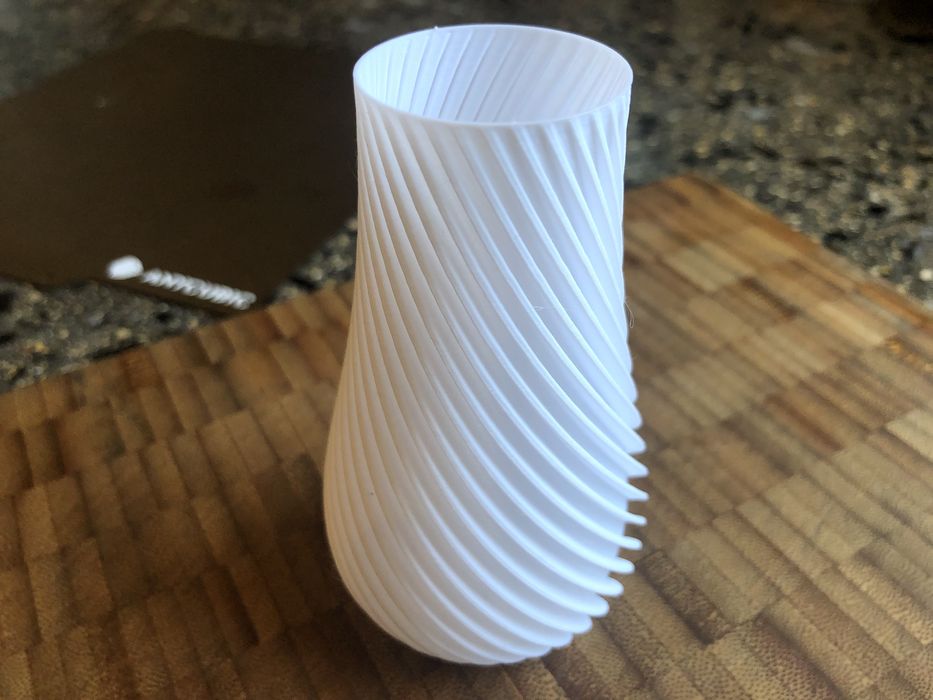
We also observed that Ultimaker Cura’s estimated print times were off quite a bit when compared to actual print times. Our Voronoi Tower print, for example, was estimated by Ultimaker Cura to be 3H24M, but the actual print time was a much longer 5H11M. This is not a big deal, if you are not in a hurry.
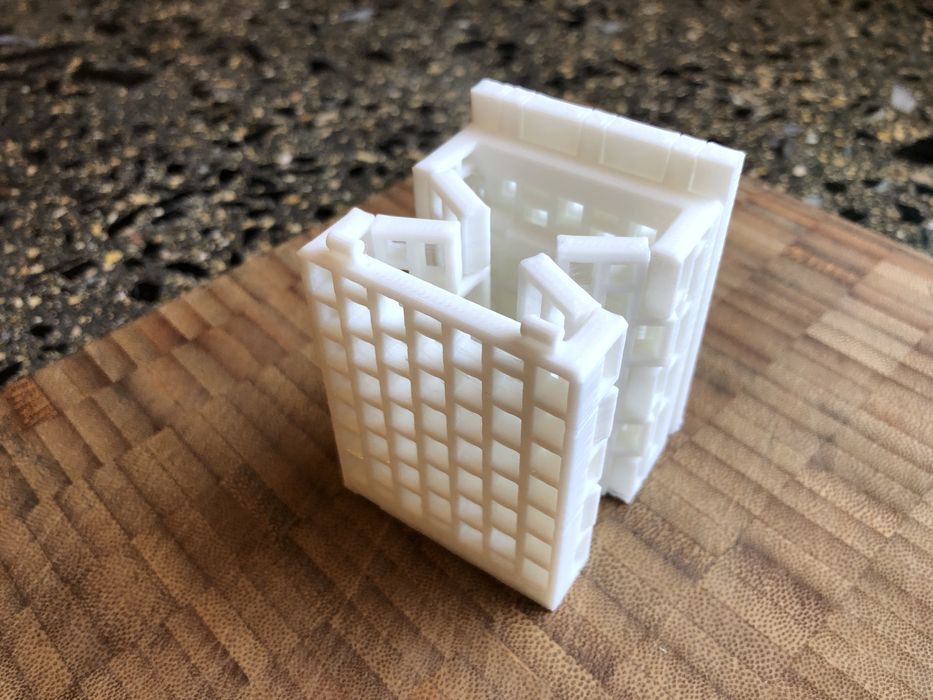
That particular print, along with the Foldabox and a few others with busy geometry, made us aware of a noticeable audible click sound when the extruder was performing multiple retractions in quick succession. Again, not a big deal in our large room, but something that would be harder to ignore in a more restricted area.
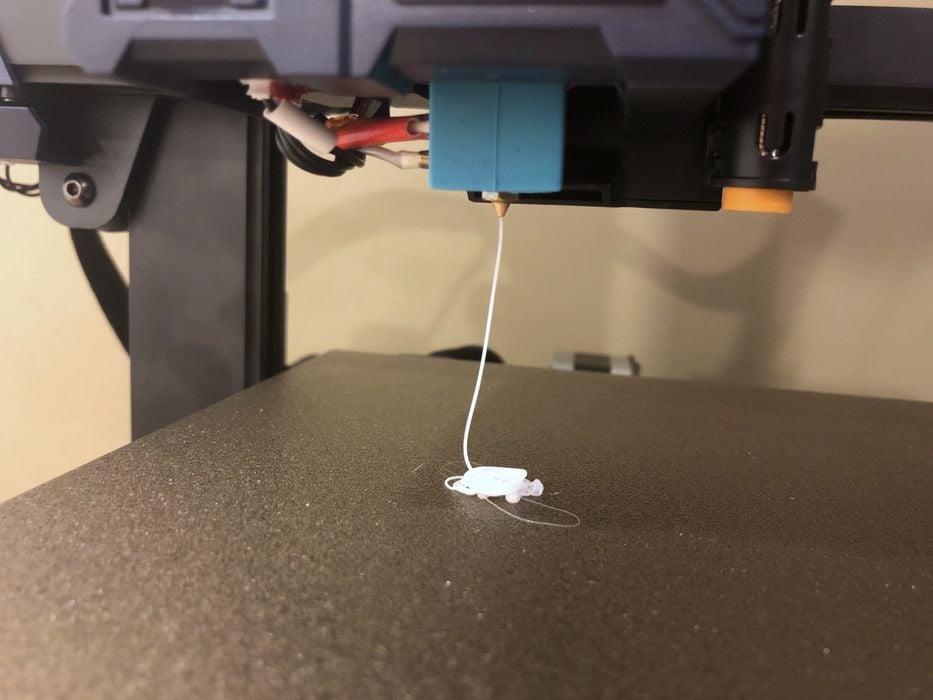
When we swapped over to some red ABS filament we had a bit of trouble getting the new filament to load properly and had to increase the extruder tensioner to coax the filament in. Most likely this was due to a bit of stringing that occurred when removing the previous PLA filament, as the unload routine had pulled the filament out of the extruder at a rather slow pace.
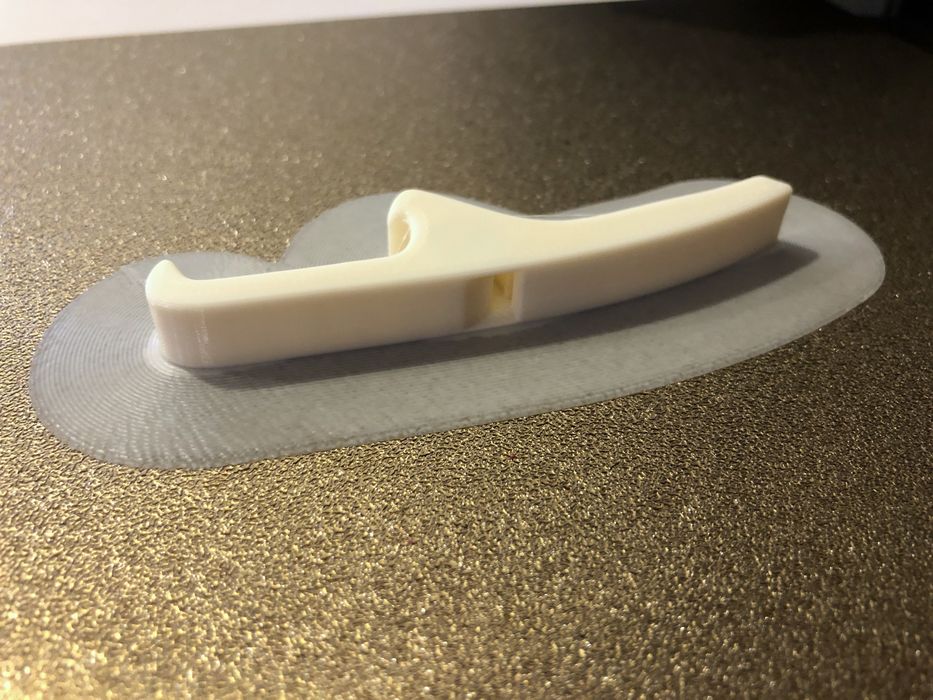
Our bottle-opener-whistle ABS print ended up warping a little bit, which is expected in an open air printer, but it hung on like a champ and finished. We noticed the default ABS settings from the custom print profile were 230C for the hot end and only 80C for the build plate. We thought this was unusual because most systems suggest using 100C as the bed temperature for ABS material.
We decided to give it another try and swapped out the red ABS for a different brand of white ABS and reran the print with a larger brim and a build plate temp of 100C. The print completed successfully with no issues. It seems that the Kobra can indeed print ABS successfully, at least on objects the size of our tests.
We were not able to test out TPU filament, as we didn’t have any handy and none was included with the printer shipment. However, we did have some white PETG of our own to run our final test using vase mode.
We ran into the same issue again where the retraction speed of the remove filament procedure was too slow and a nozzle blob ended up cooling before entering the PFTE tube. Once this actually pulled out the PTFE tube with it when we removed the filament out of the extruder.
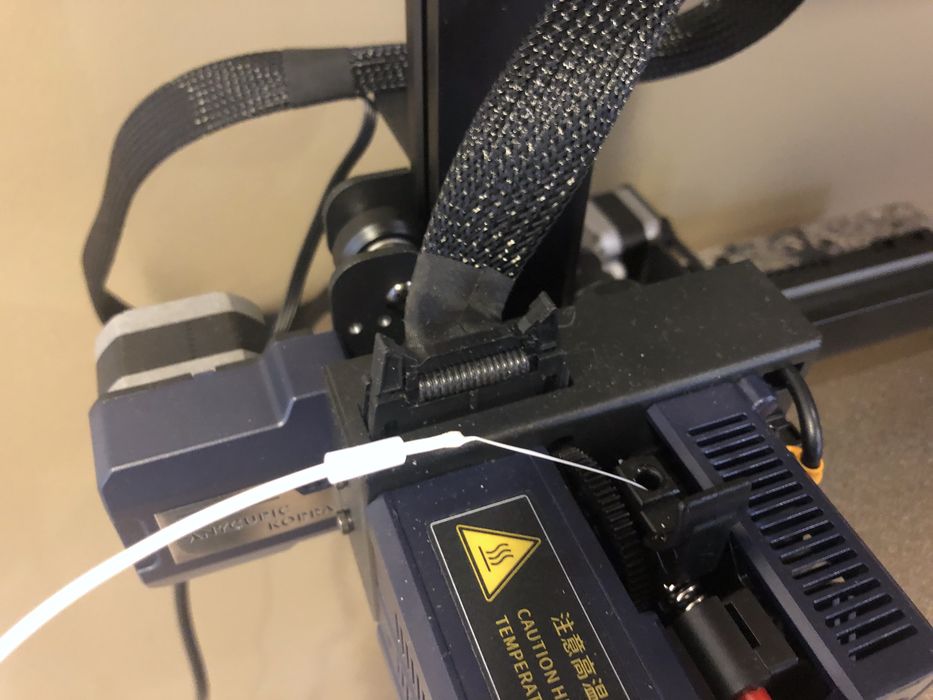
Although a bit alarming, this was not really a big issue, as we just clipped the filament free and popped the PTFE tube back into place in a few seconds.
We suspect a small tweak to the Anycubic firmware for the retraction speed in the remove filament procedure would likely fix this issue. That said, the PETG filament loaded properly and our test print turned out great!
Kobra Final Thoughts
We really liked the Kobra! It was well packaged for shipping and came with a lot of goodies, including a PLA sample to be able to start printing right away.
But given the printer is aimed at the beginner, it would have been nice to have included filament samples for PLA, ABS, TPU & PETG to help with the learning process.
Instructions were spot on and assembly was a breeze, especially given that the connection points for the frame were milled right into the aluminium base, taking away any guesswork and giving a perfect alignment of base to frame, which is so critical.
The sensor leveling for the bed worked great, as did the live adjustment of the z-gap — both very important features for a novice printer to include. We loved the touch screen’s layout,
brightness & responsiveness, and the magnetic spring steel print plate made detaching prints easy.
The Kobra isn’t the quietest printer with its cooling fans and the quirky clicking sound that can occur from multiple retractions, and its print speed might not be the fastest, but it was certainly very reliable, and the print quality was quite superb.
The only real print quality issue we encountered was ABS print warping, which was to be totally expected in an open air printer.
Given the price point of the Kobra 3D printer there was no WiFi network access, but files could be sent directly to the printer via USB or walked over on microSD.
As for slicing, Ultimaker Cura might be a bit advanced for the beginner, where Prusa Slicer
might have been a better choice given its simplicity, but that’s something operators could try themselves later.
It would have been nice for the print profile’s GCODE to include a purge line prior to each print to rid the nozzle of any oozy blobs before laying down the first layer of the print, but then that’s just us being picky.
For a US$299 desktop 3D printer, the Anycubic Kobra is a pretty good choice.
This is part two of a two part series. Part one is here.