
Our look at the Creality K2 Combo 3D printer continues with print results.
This is part three of a four part series, please read parts one, two and four.
Creality K2 Combo Print Results
We loaded up several of our typical test files as a single large print job – 3D_Test_V3, CTRL–V, Cube_V1, Knurling Nut & Bolt, Cylindricity Test, and QuBenchy and chose a layer height of 0.2mm with its standard settings of 2 walls, 15% infill, 3 bottom and 5 top layers, getting an estimated print time of 3:23 using a total of 84g of filament.
We sent the file to the printer, making sure to choose the Spool Holder as the filament device and clicked Start Print. We promptly got an onscreen warning saying, “Please make sure that there are no models on the printing platform, otherwise it will cause fatal damage to the device after startup“. This is a very important check to consider when printing remotely.
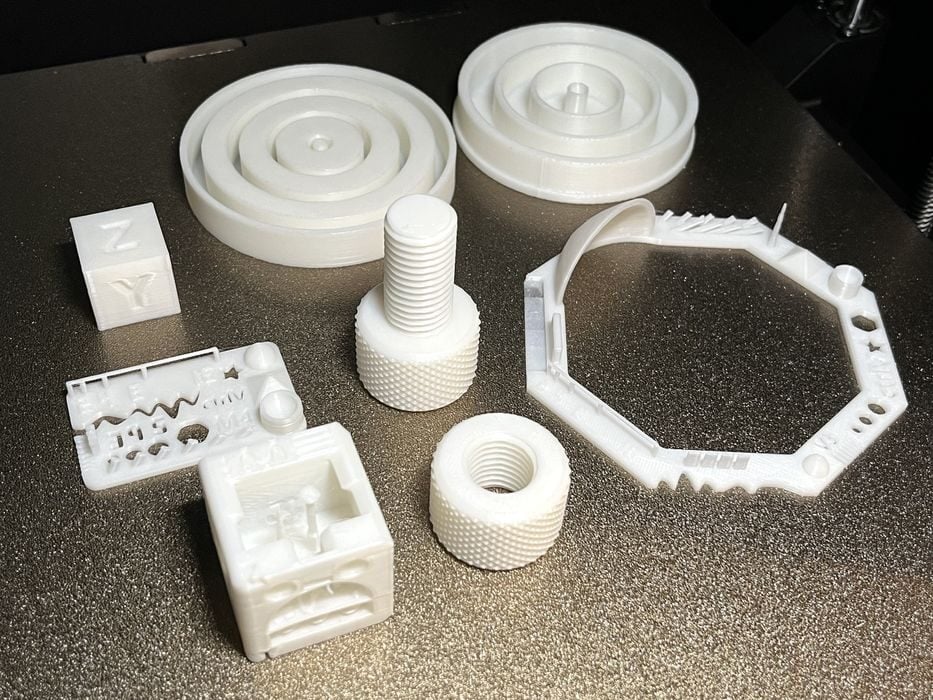
The job completed in 3:29 with all of the models being successful and looking quite good. The cylindricity test fit together perfectly as did the knurling nut and bolt. The calibration models looked great with the cubes showing no ghosting.
Note that we’ve started printing a batch of test models all at once, rather than printing them one at a time as we have been doing in reviews. It seems that today’s machines are so reliable — and so large — that it’s easy to print many parts at once.
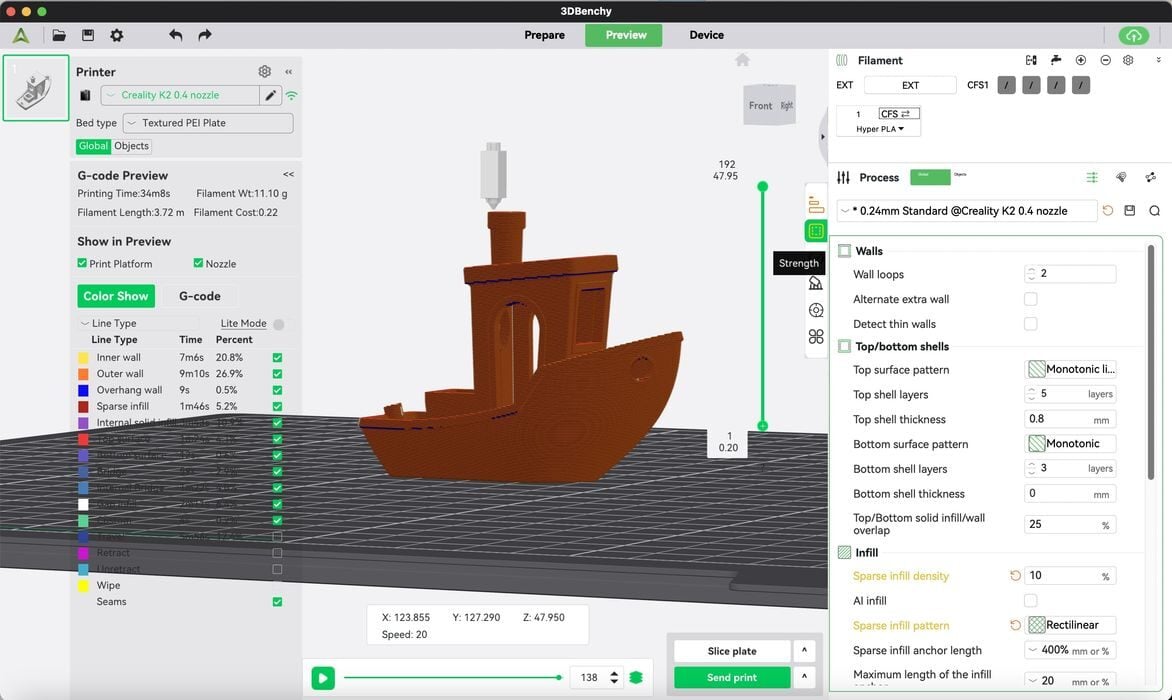
We sliced a #3DBenchy with standard “speedboat settings” to see how it compared with the pre-sliced model for print speed and quality, getting an estimated build time of 0:32 using a total of 11.1g filament. Apart from using the speed boat settings, we made no other adjustments to the settings in the slicer. The print completed in 0:35 and looked slightly better than the pre-sliced print provided by Creality — but at a slower speed.
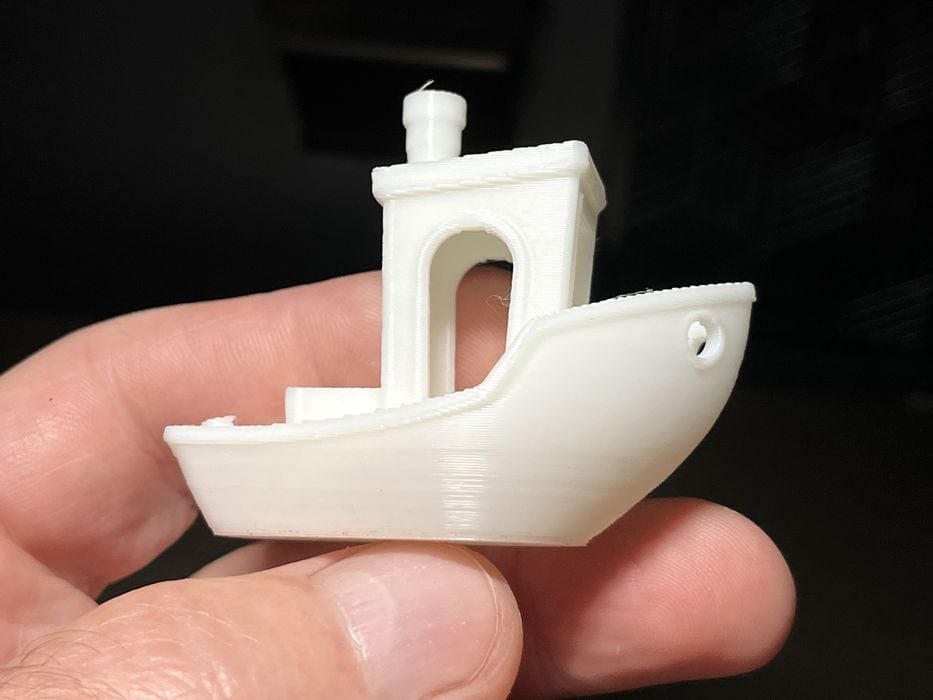
Since our print took so much longer than the supplied pre-sliced print, we decided to rerun the job and select “Ultrafast 125%” printing speed under the device tab and then compare the two prints. The job completed in 0:31 and the finished product looked just as good as our first test.
We made a few more slicer adjustments to increase the overall print speed, getting an estimated print time of 0:25 that completed in 0:27 with great surface finish. As one last test we reprinted the same sliced file in Ultrafast 125% mode to drop the time down even more. It completed in 0:26 and looked great, too. We called that close enough to that of the pre-sliced #3DBenchy and considered our speed testing completed. We would go back to using the slicer’s default filament profiles moving forward.
Now it was time to try some multicolored prints.
We began by unloading the current filament from the spool holder, removed the spool holder PTFE tube from the rear filament port on the K2 and then reconnected the PTFE tube from the CFS back onto the same rear port. This required a bit of juggling, but it was not terribly difficult.
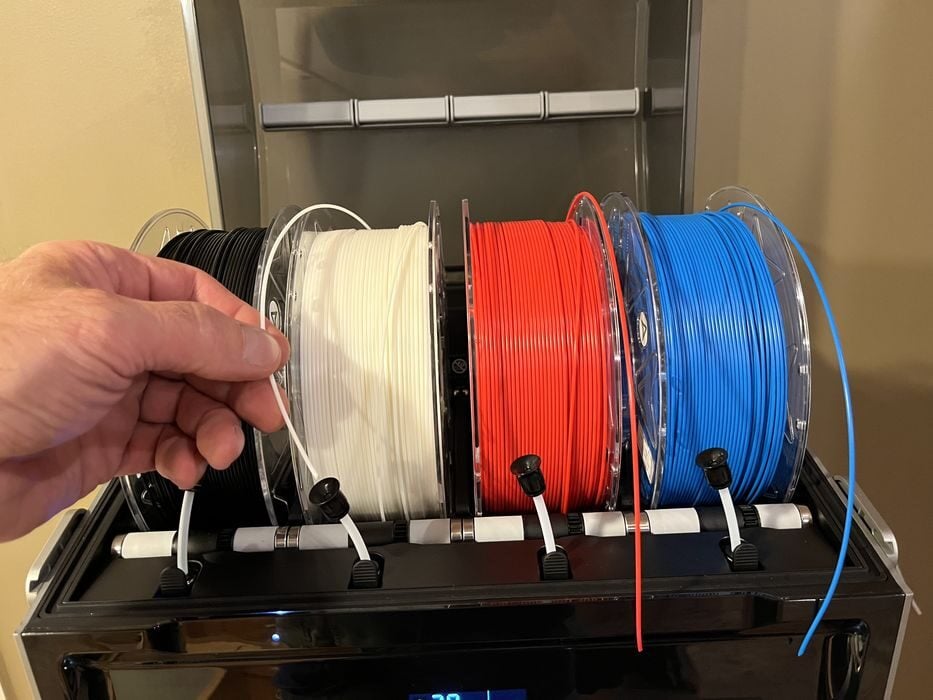
We placed a roll of Creality brand, RFID-chipped, Hyper PLA filament into each of the 4 CFS bays, taking turns loading the filament individually into each feeder tube until it was pulled from our fingers and into the unit.
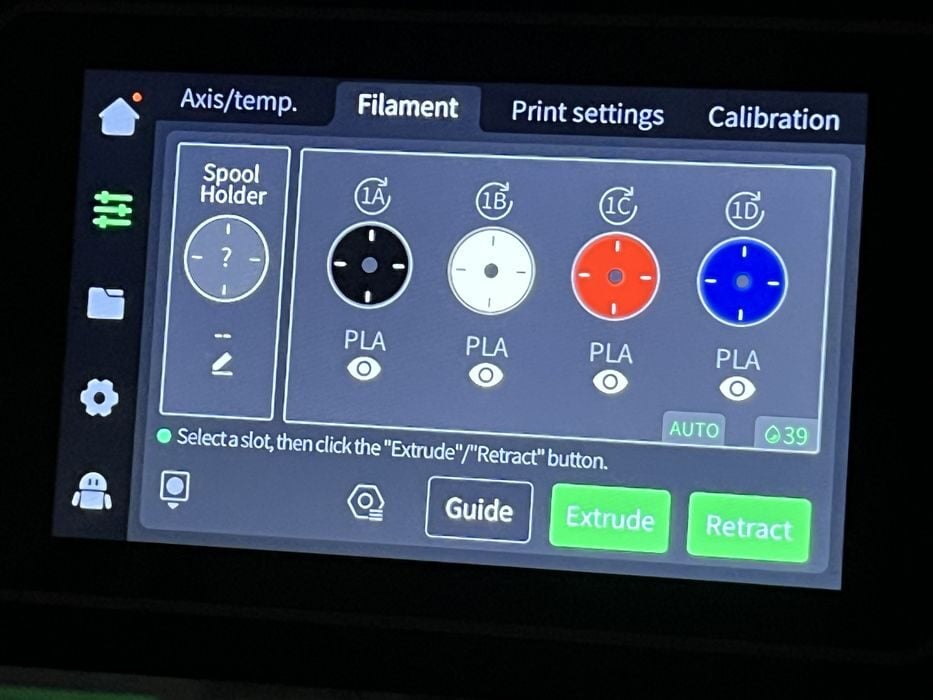
The printer automatically registered the filament type and color, thanks to the RFID readers inside the CFS.
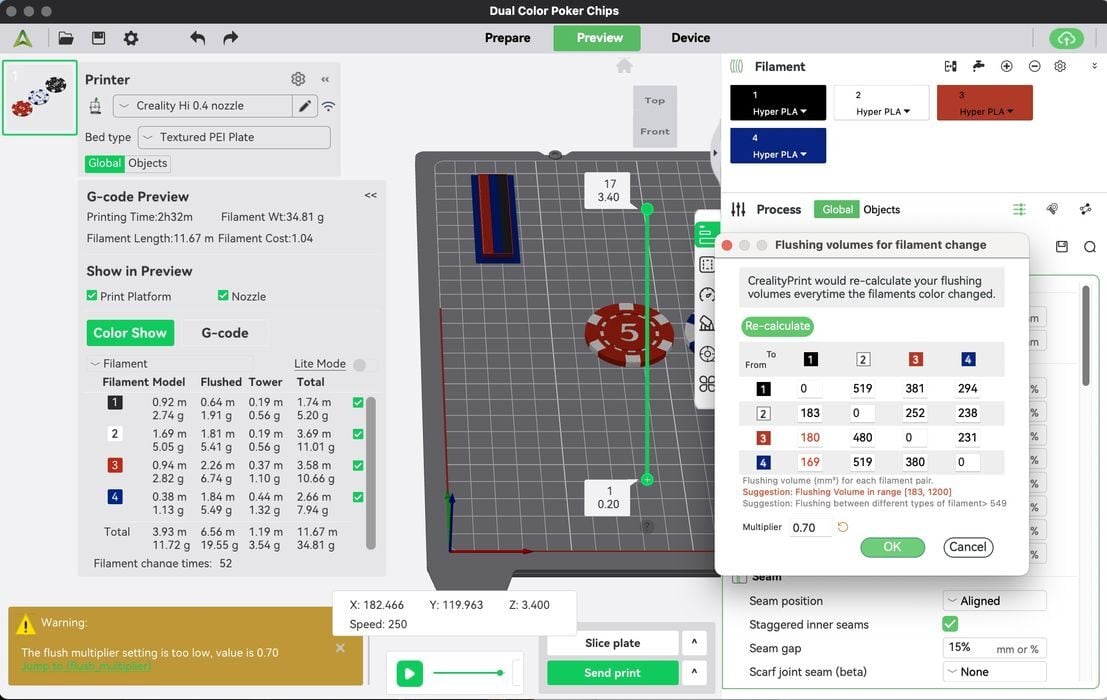
We launched Creality Print and loaded up some Dual Colour Poker Chips – red/white, white/blue and white/black. When all the corresponding filaments had been properly mapped and our file sliced, we were given the warning, “The flush multiplier setting is too low, value is 0.50”. Note: the flush multiplier determines how much material is purged when colors are switched. When there is high color contrast between colors (like, say, black and white), the multiplier should be higher to ensure the colors are pure.
We opened the multiplier and clicked Calculate, getting a new multiplier setting of 1.30. This setting would obviously need to be recalculated for each print, given the various color combinations in play in any particular model. What was too much multiplier for one scenario might not be enough for another. It’s actually good that Creality warns operators of this issue, rather than just going with whatever the setting is present.
We sliced the file getting an estimated print time of 2:09, using a total of 15g of filament – 11.65G for model and 3.68g for prime tower.
We saw that there was no flush amount specified in the slicer results. The purge tower would be the only filament waste? Would that be enough to guarantee clean colors? What was the flush multiplier even doing? So many questions.
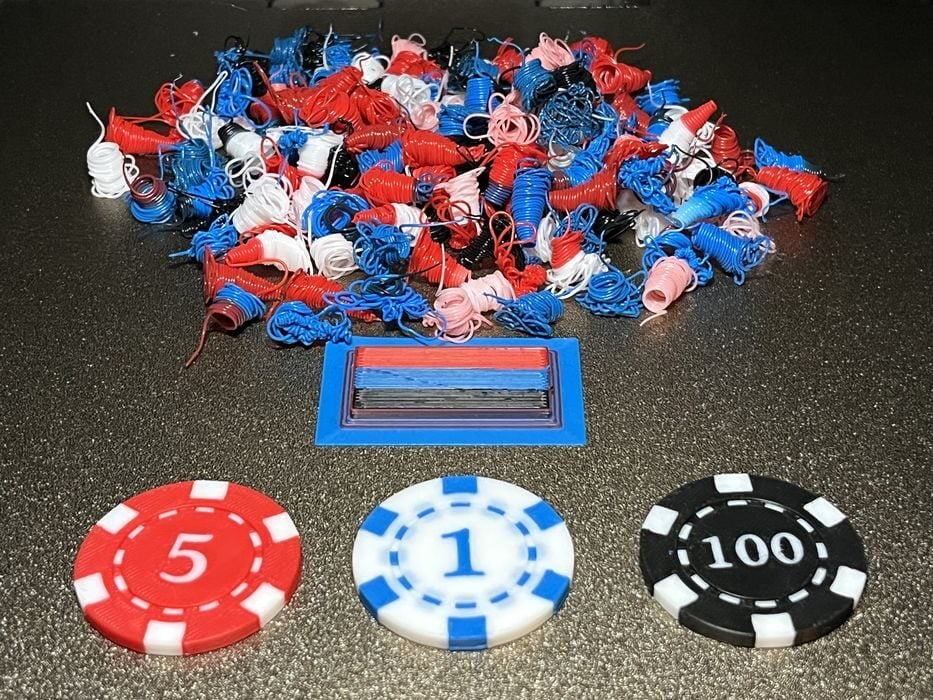
We sent the file to the printer and when we checked on print progress we found that filament flushing was indeed happening with each color change and when the print was completed the amount of poop was sizable.
Assuming that this was just some bug in the latest version of the slicer, we opened up an older version of Creality Print and sliced the same file. This time we saw a flush amount totalling 36.39g of filament. It was three times as much as what was needed to build the model!
With the flushed amount missing from the slicer, we were unable to determine the proper multiplier to use for each job. Using an older slicer on a newer printer is never a great idea, as software is usually updated to correct any machine issues that arise with new machines. So instead we just used the old slicers generated values as a guide, playing with the multiplier setting until we were happy with the results and then using that value in the new slicer. The finished print took 2:22 and seemed to produce the same amount of poop as our first print attempt.
Perplexed, we decided to check Creality’s website and found there was an updated CrealityPrint-6.3.0.3420, that once downloaded and installed, the missing flush volume was now displaying. We re-sliced and sent the file again to see if this would make a difference but saw what looked like to be the same amount of flushed poop.
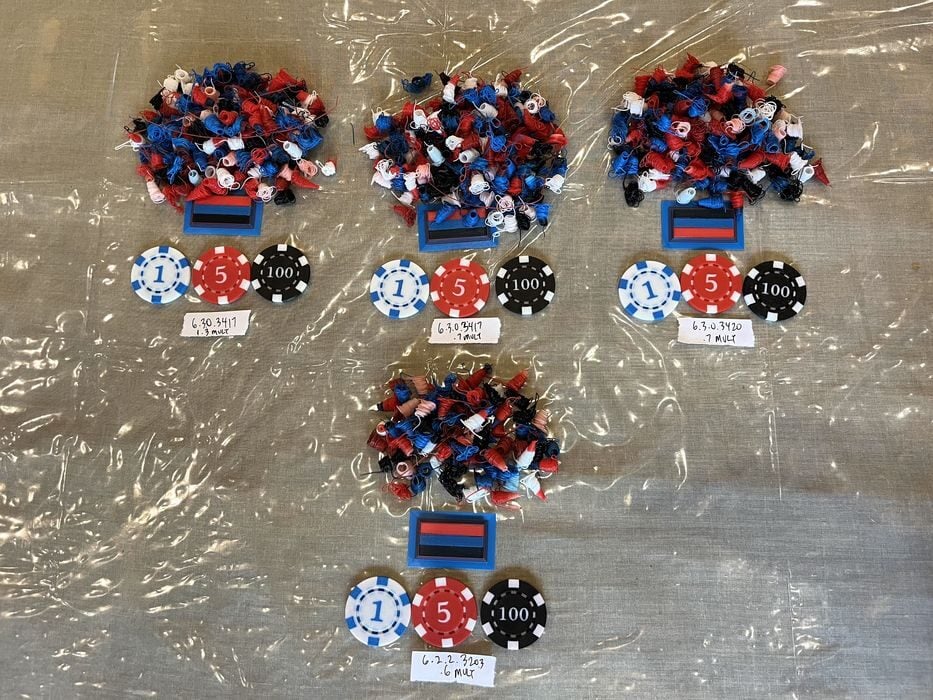
We ran a final flush test with a 0.6 multiplier using the much older CrealityPrint-6.1.2.2458 slicer from our previous review of the Creality Hi Combo, just to see what would happen. The printed results showed that less filament was indeed being purged, as there was now a slight bleed in colors. So it would appear that we were experiencing a software glitch with the new slicer version.
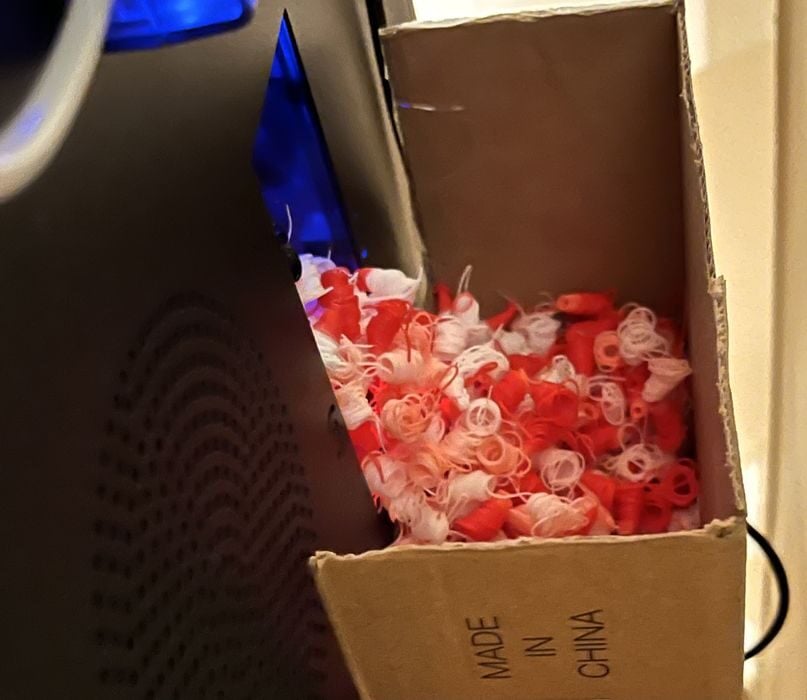
But what about all that poop that was collecting, you ask? With no supplied poop chute it was all just falling into a bin under our work table, well mostly. So we grabbed a small cardboard box from a previous Creality review and with a few snips, a bit of tape and a small magnet, we made a handy detachable bin to catch all the poops! Missed opportunity Creality? Every combo 3D printer should come with a poop box, or a pre-sliced version that can immediately be printed.
We tried a taller multicolor model next, “Cute Dino Short Legs No Spots”, which we printed with a 0.7 multiplier. The estimated build time was 13:58 using 280g of filament, done over a whopping 477 filament changes. Quite a lot the material used was purged, with the model itself using only 26.5g.
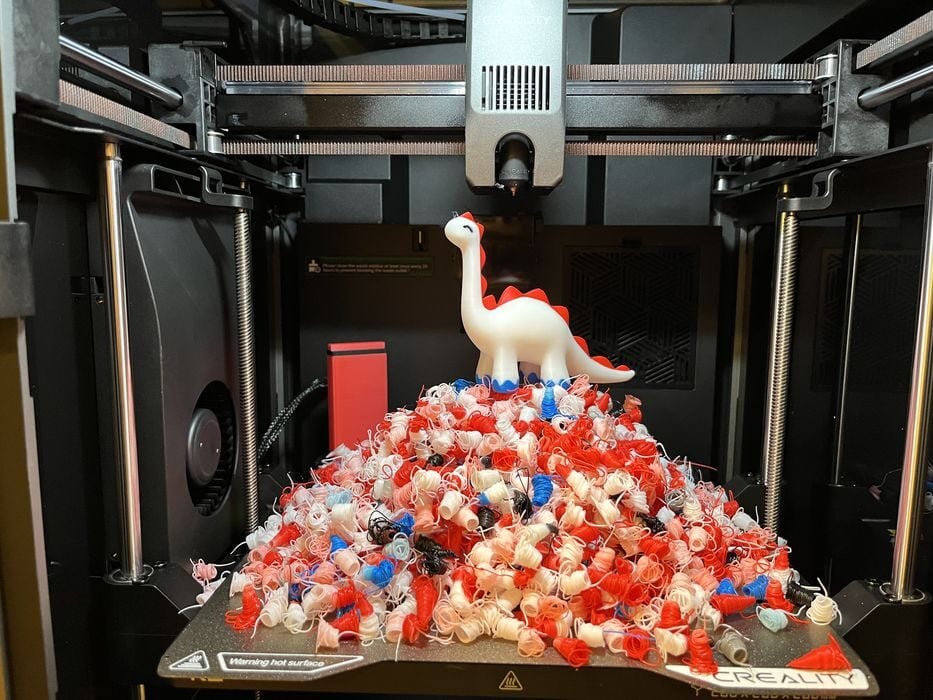
The print completed in 17:14, with the purged volume higher than anticipated. In fact, the purging overflowed our new poop bin and backed up into the waste chute, almost interfering with the print in progress. Given the possible software issue with flushing volumes we decided to leave multicolor printing for now and return to it later.
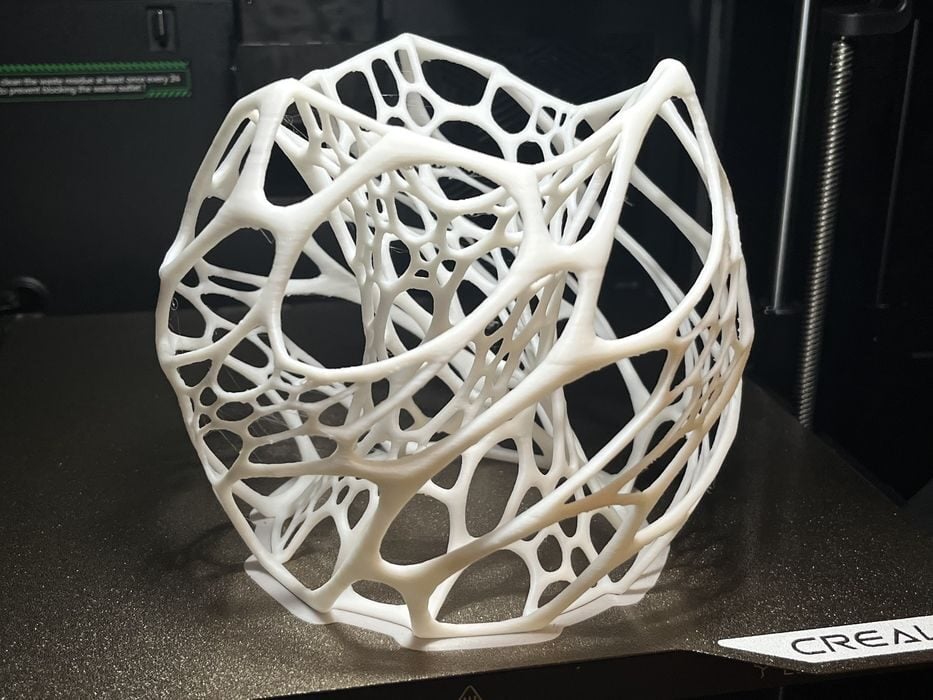
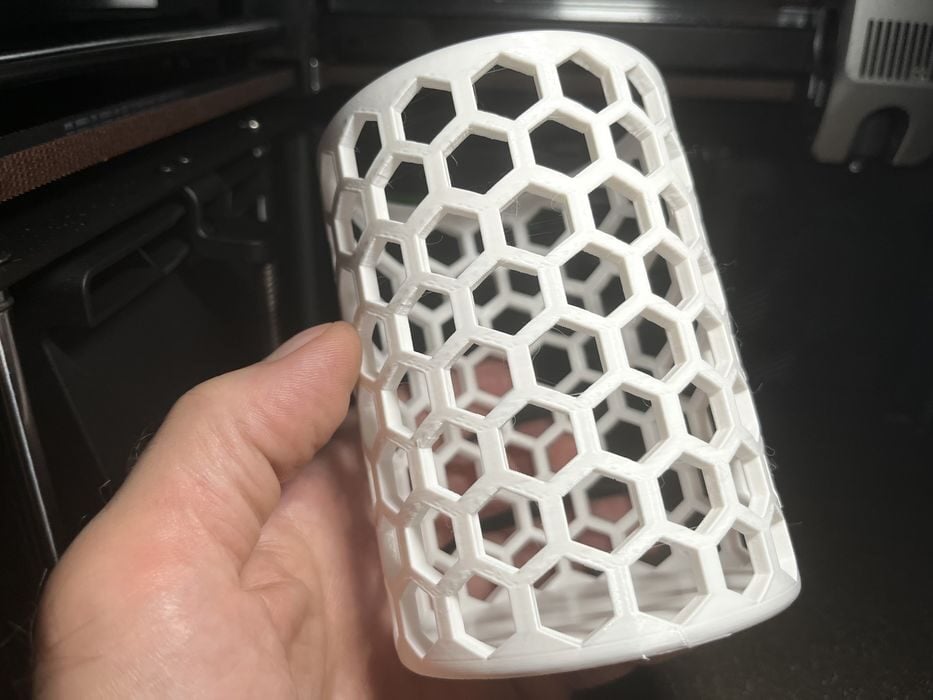
It was now time to challenge the printer with some more complicated geometry. We chose the Nervous Lamp model and paired it with the white roll of PLA loaded in the CFS. The slicer gave us an estimated build time of 5:17 using 54g of filament, which completed in 5:42, and the finished print looked quite good.
We switched back to the spool holder with some Elegoo Rapid PETG material. Since there wasn’t a generic profile for faster PETG on the LCD screen, we went with Creality Hyper PETG and sliced a Kelimekoi1 vase with standard 0.20mm profile, getting an estimated build time of 3:58 and using 55g filament. The print completed in 4:04 and looked good.
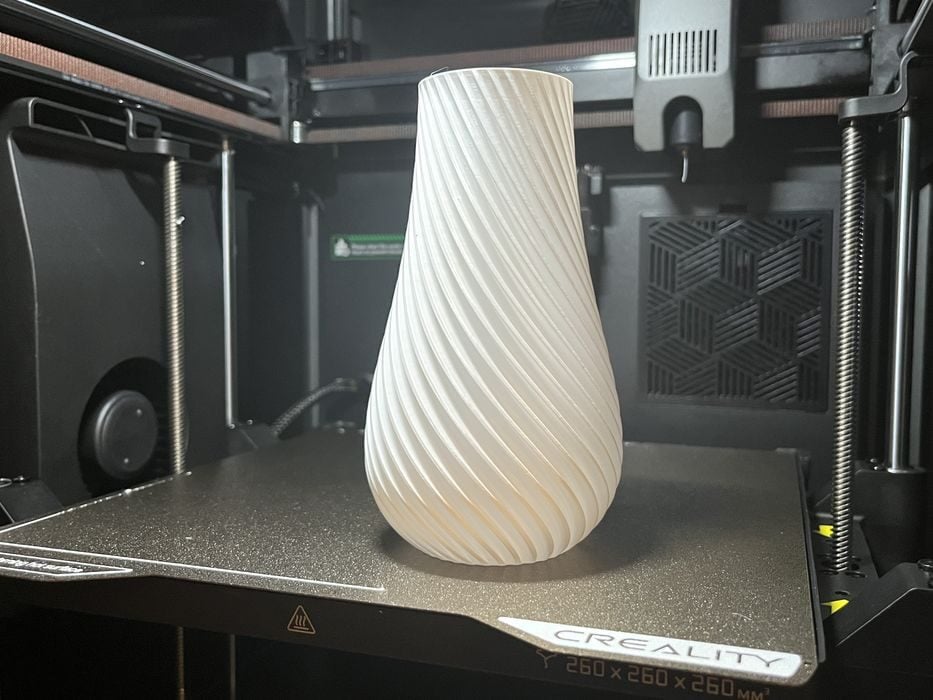
We also printed a Spiral Vase in spiral vase mode, getting an estimated build time of 2:04, using a total of 32g of filament that completed in 1:53 with excellent surface finish.

We switched over to ABS material to print a Bottle Opener Whistle, making sure to add a brim so it didn’t warp, as the K2 does not have an actively heated build chamber. Total print time was 0:26, using 4.45g of filament, with the print completing in 0:15 and looking very good. Of course, it would have failed without the brim, but printing ABS is possible on the K2 if you want to give it a try.
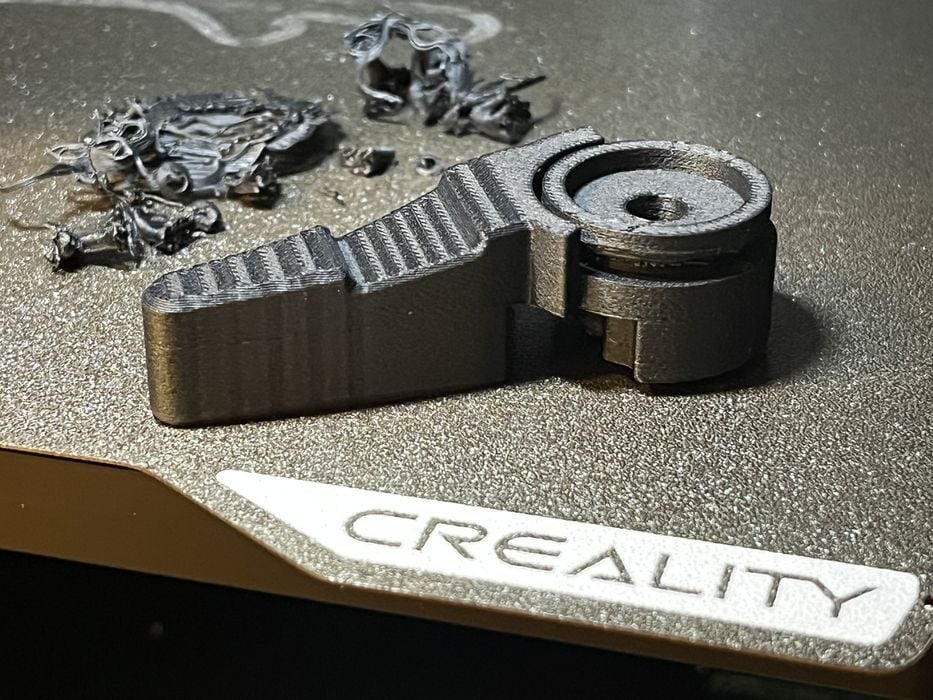
The K2 specifications show that the printer is capable of printing PLA-CF filament, so we loaded some up and sliced a small engineering model, Shifting Lever, getting an estimated print time of 0:43 using a total of 20g filament. The print completed in 0:45 and looked fantastic.
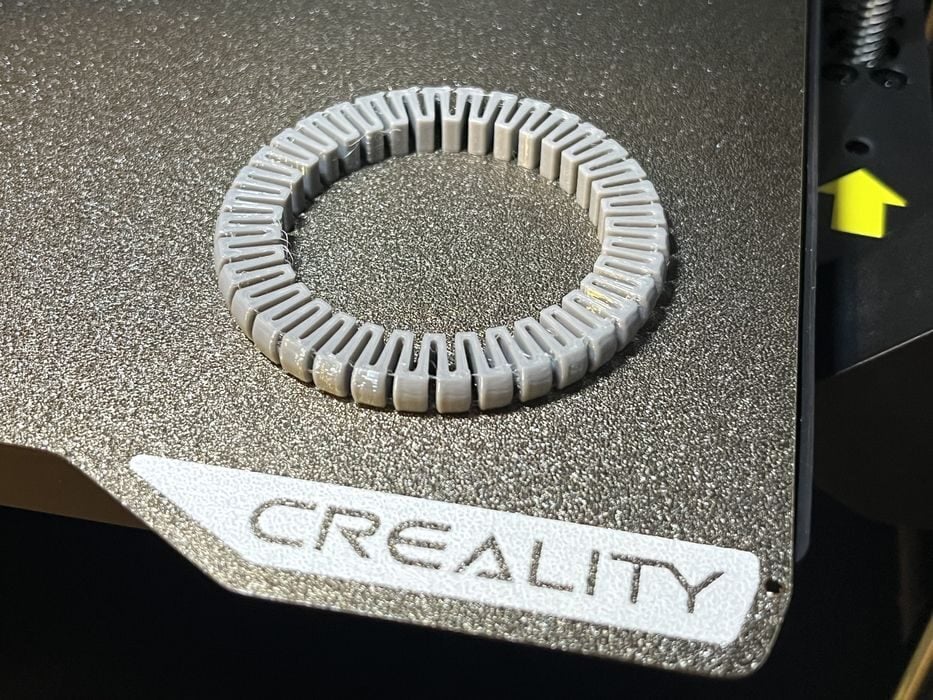
While the specifications for the K2 Combo do not mention TPU, we found a choice for it in the spool holder filament screen, so we decided to give it a try and sliced a Bracelet, getting an estimated build time of 0:36 and using 6g of filament. The print completed in 0:40 with just a tiny bit of stringing, but otherwise perfect.
We flipped back over to the CFS to do some more multicolor PLA printing, but this time attempted scenarios that didn’t waste so much with filament purging.
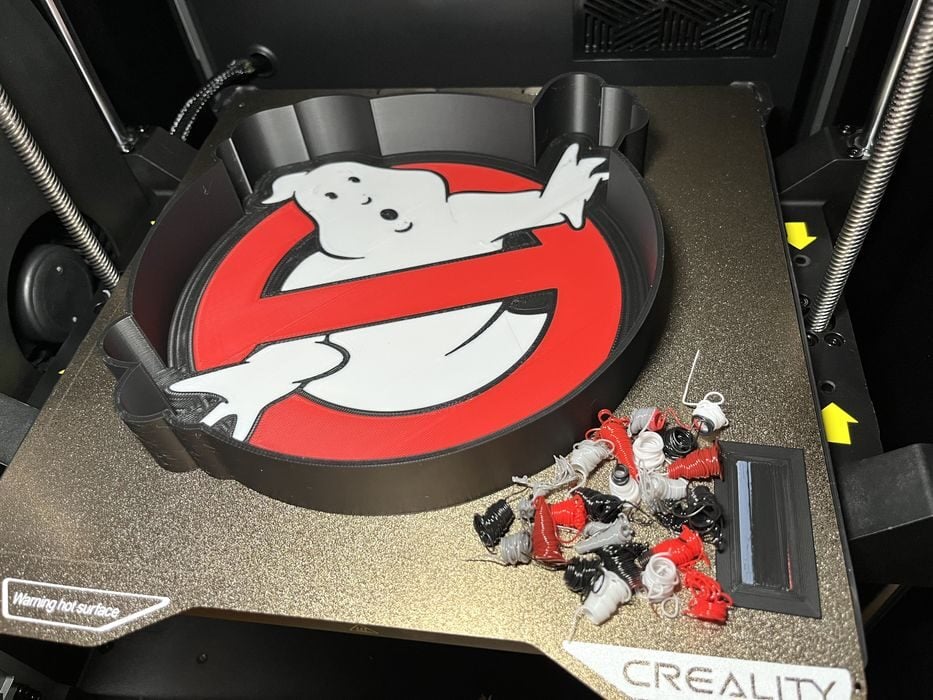
The Ghostbusters light box had an estimated build time 2:18, using 73g of filament with 3g for flush and 1g for the prime tower. When we sent the file to the printer we were greeted with some beeps from the machine and the LCD screen alert, “Spool holder filament in use. To print with CFS, unload spool holder filament and reload CFS filament before printing.” This was a very polite way of telling us that we didn’t change the PTFE tube from spool holder to CFS. So always double check that the correct PTFE tube is installed before printing. The job took 2:12 and had great surface finish. More importantly, only a small handful of filament was wasted by purging.
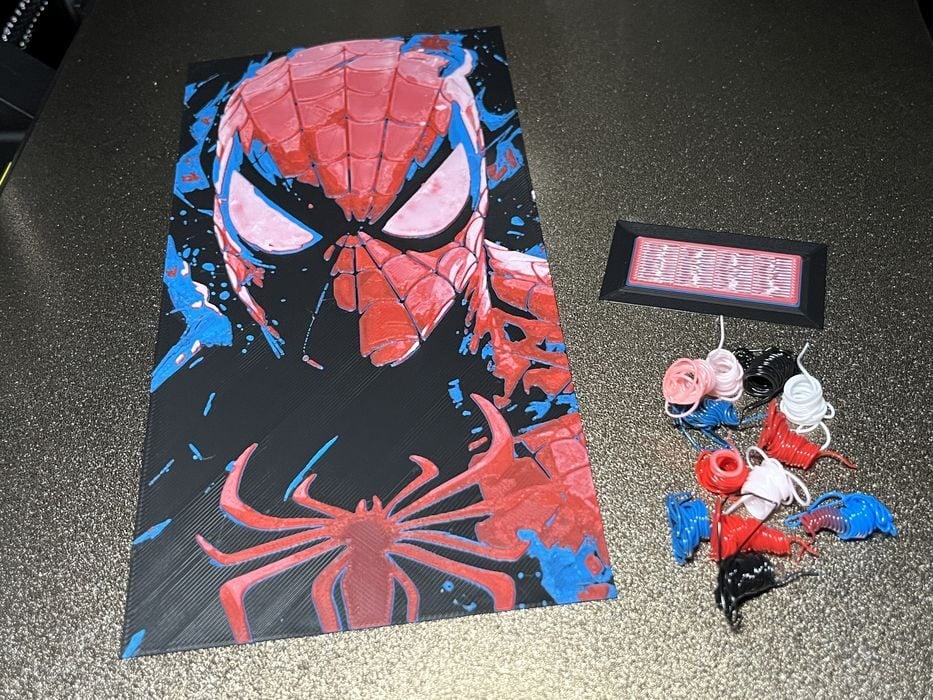
Our final print was Spiderman HueForge – a multicolor print that is only 19 layers high with the following filament changes: five initial layers of black, changing to cyan on layer six, changing to red on layer nine, changing to white on layer 15. The print had an estimated build time of 2:12 and used a total of 23g of filament, with only a paltry 2g flushed and 1g tower. The print completed in 2:19 and all the stacked visual color blends looked pretty impressive.
This is part three of a four part series, please read parts one, two and four.
Via Creality