

Our review of the Drywise in-line filament dryer continues with a look at operations.
This is part two of a three part series, please read parts one and three.
Drywise Operations
Powering up the Drywise is done with two switches, rather than one. There’s a main power supply switch at the back, and a push button at the front.
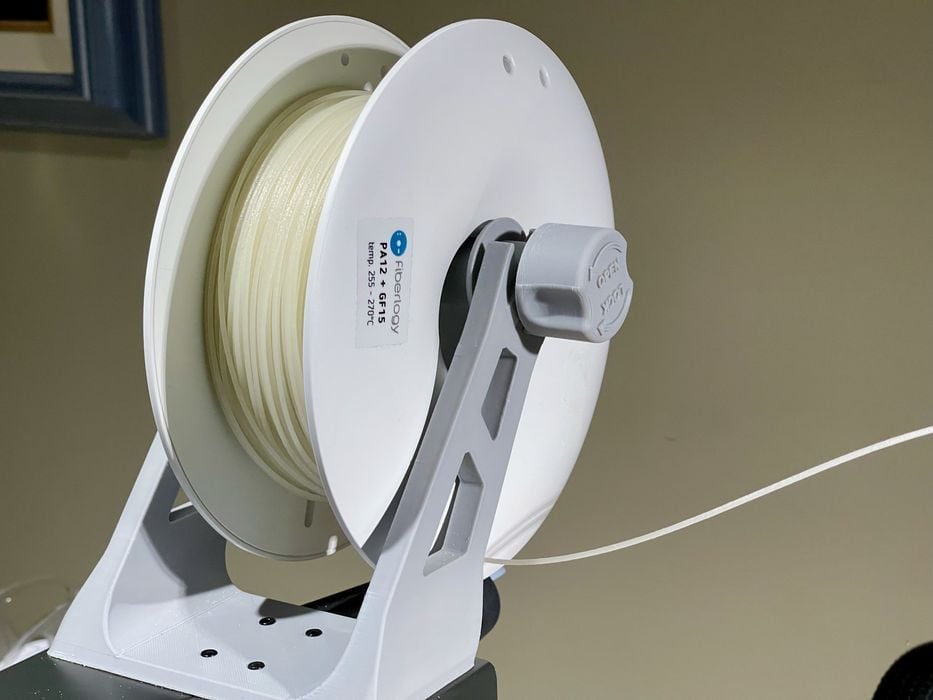
I mounted a spool on the holder in anticipation of loading. For my first test I used a spool of Fiberlogy’s excellent PA12-GF material.
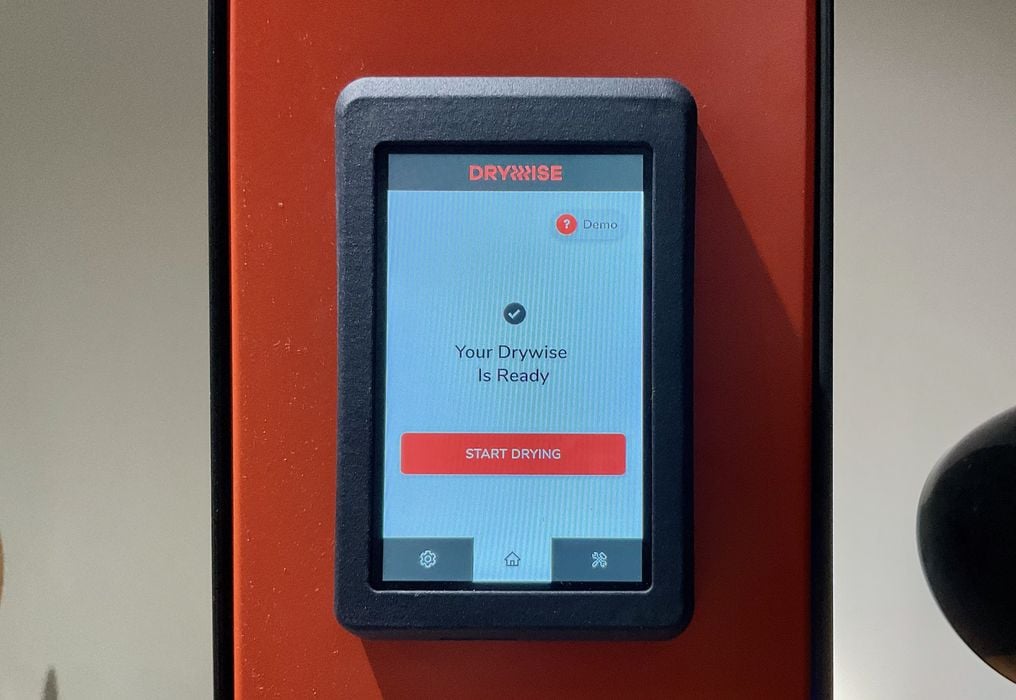
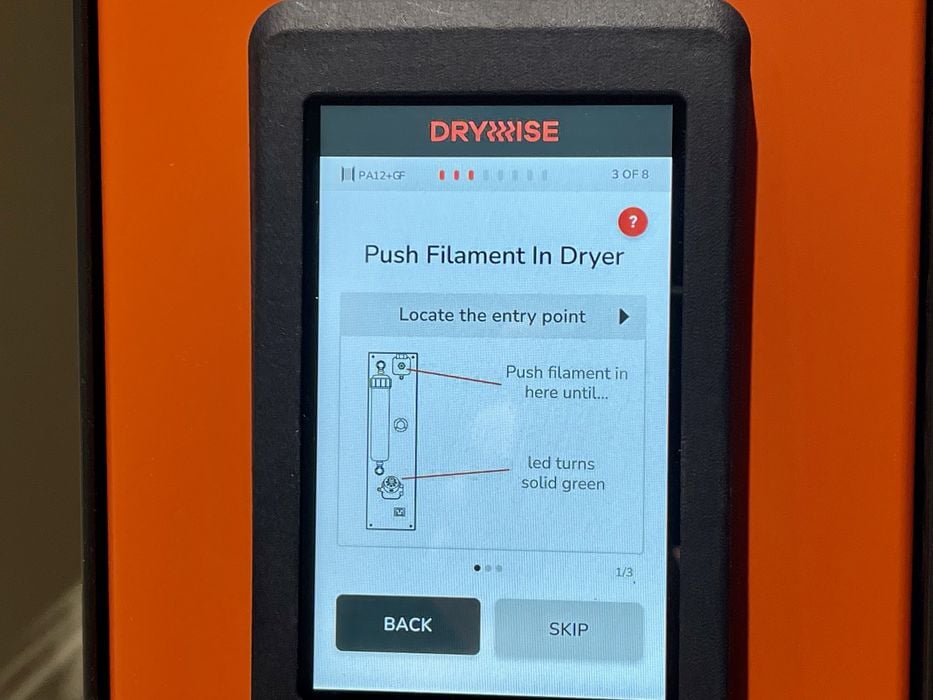
Drywise presents a detailed set of on screen instructions to walk you through the set of steps needed to fire up the machine. I had initially thought it would simply involve sticking the end of the filament in the device and pressing “go”, but that’s not how it works.
It turns out that the Drywise includes NO motors to push or pull filament. Instead the 3D printer will pull the filament through the Drywise.
However, this also means that before the 3D printer is loaded, the filament must be pushed through the machine by hand. That means all the way through until it shows up at the output port.
Drywise instructs you to perform a pre-check to ensure everything is in good order before engaging. This is important to follow carefully, because if there is a leak, for example, the filament won’t dry properly.
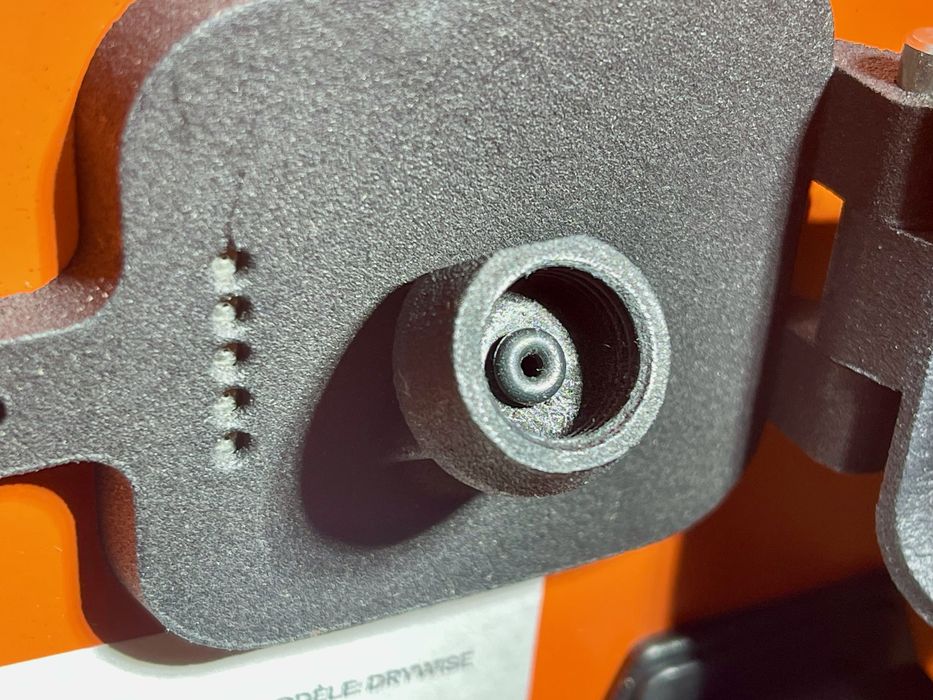
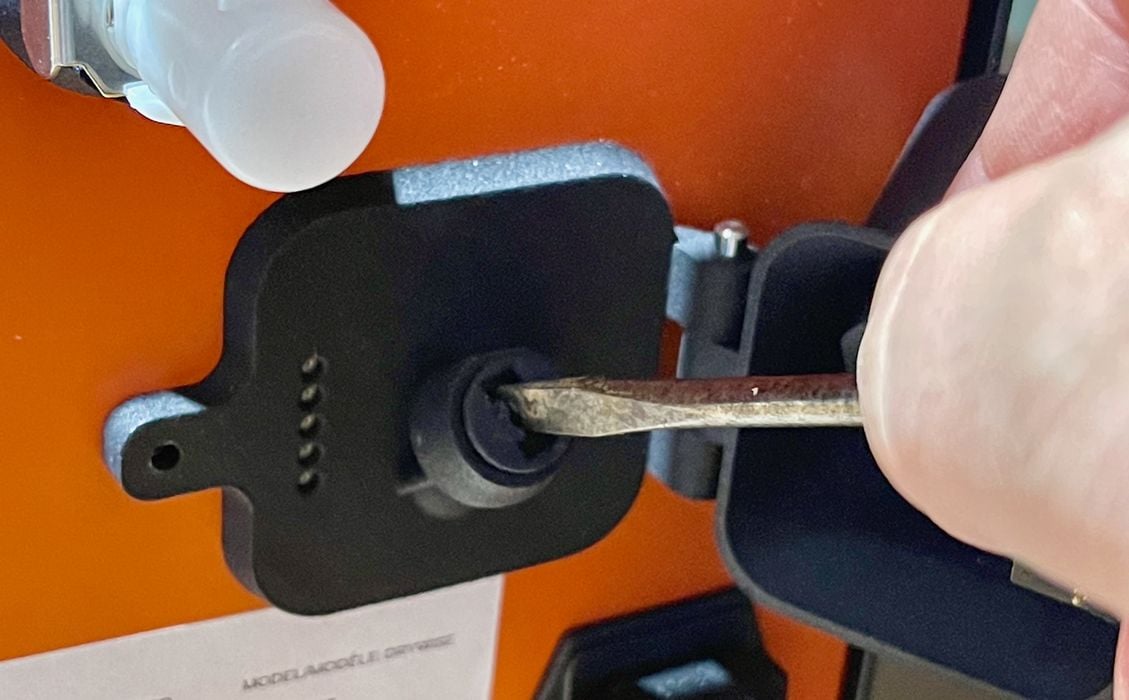
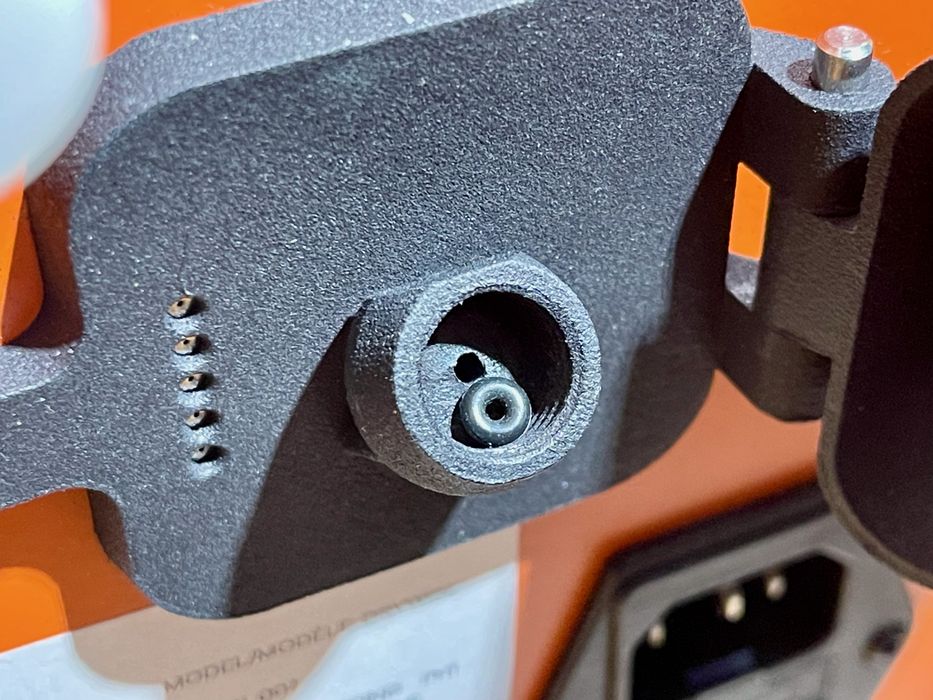
One of the steps is to check that the o-rings are present. This is done by opening the doors on both input and output ports and taking a look. Here’s the lower o-ring in place. By the way, these o-rings are really small. The inner diameter is less than 1.75mm so that it is tight against the filament.
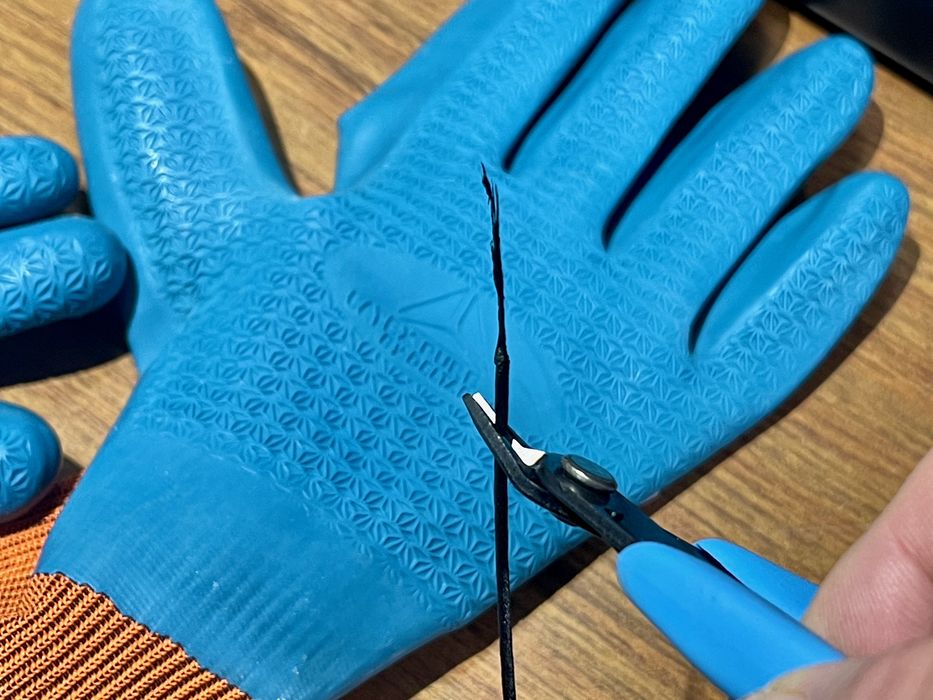
The filament must pass through the unit smoothly, and Drywise asks the operator to cut the filament into a cone so that it will pass through properly.
This turns out to be much more difficult than you’d imagine. Normally I use side cutters to cut the tip at an angle, and that’s good enough for most 3D printers. Here that’s not the case. Imagine having a sharp angled tip trying to plunge through that o-ring’s hole. You really, really want the sharp tip in the middle of the filament, not the side.
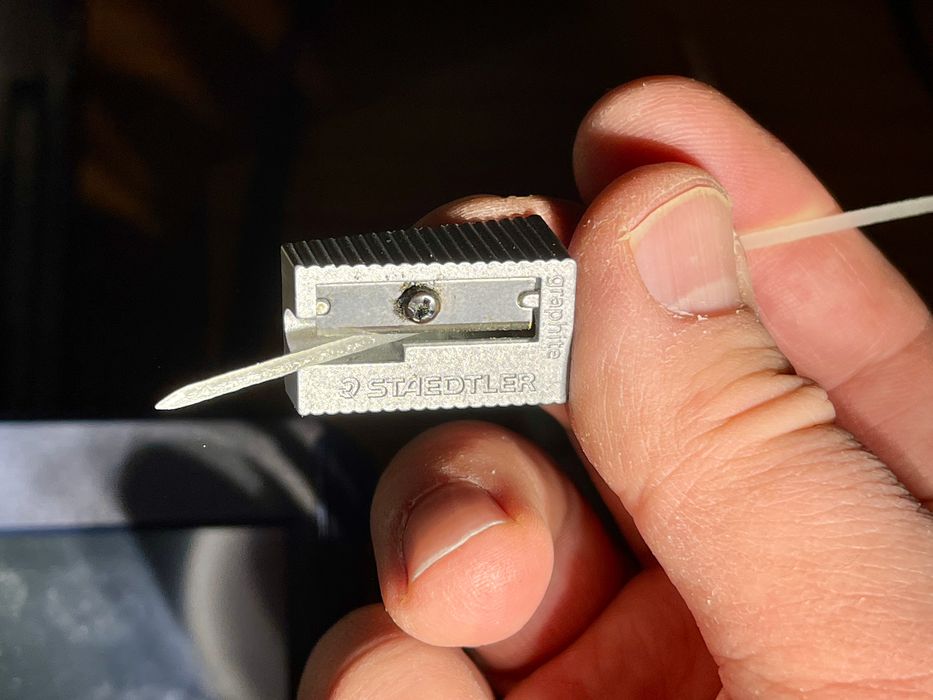
Drywise recommends using a pencil sharpener to create a suitable tip, so that’s what I tried to do. Unfortunately, I think you need the right kind of sharpener, because mine — which is a pricey metal model — didn’t work at all. The filament simply passes through. The sharpener assumes the input is pencil-diameter, which the filament most certainly is not.
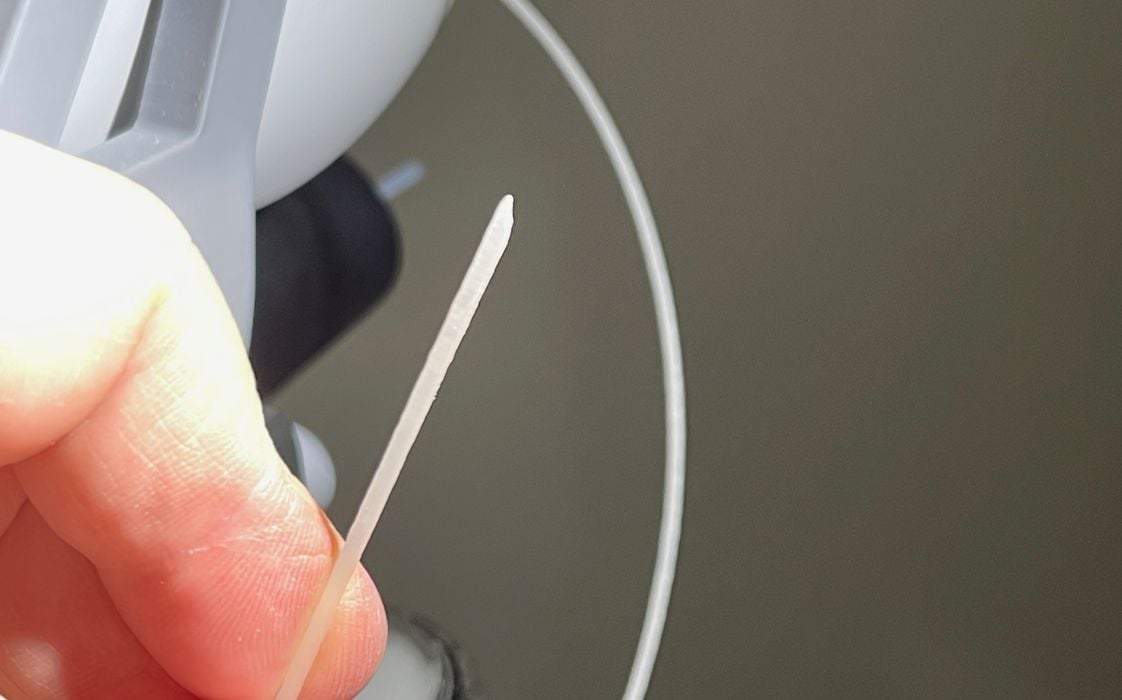
Instead I had to resort to doing dual side cutter slices on the tip, which is not easy to do, and the results are not great.
I’m thinking that Thought3D might consider including some kind of sharpening gadget with the Drywise to more easily sharpen the filament. As a matter of fact, why doesn’t every FFF 3D printer manufacturer do this already?
I then pushed the filament through the Drywise as instructed. It required a bit of force, but nothing too strong. You can’t see what kind of twisty path the filament takes inside the Drywise, but it was quite long, perhaps a meter or so.
Suddenly the filament wouldn’t go any further forward no matter what I tried. I had no idea where it was getting snagged, but it was deep into the machine. After many attempts and resharpenings, I decided to flip open the lower door to see what was happening.
I discovered that indeed the filament was at the end and was getting hung up on the final o-ring. My filament was sharp, so it seems that the location of the o-ring might have shifted during the inspection. I decided to replace the o-ring to ensure it was centered.
This was a big mistake because there is nothing for the o-ring to sit on, so it just slides down. This was quite problematic. I tried a number of ways to place the o-ring, but nothing worked for me.
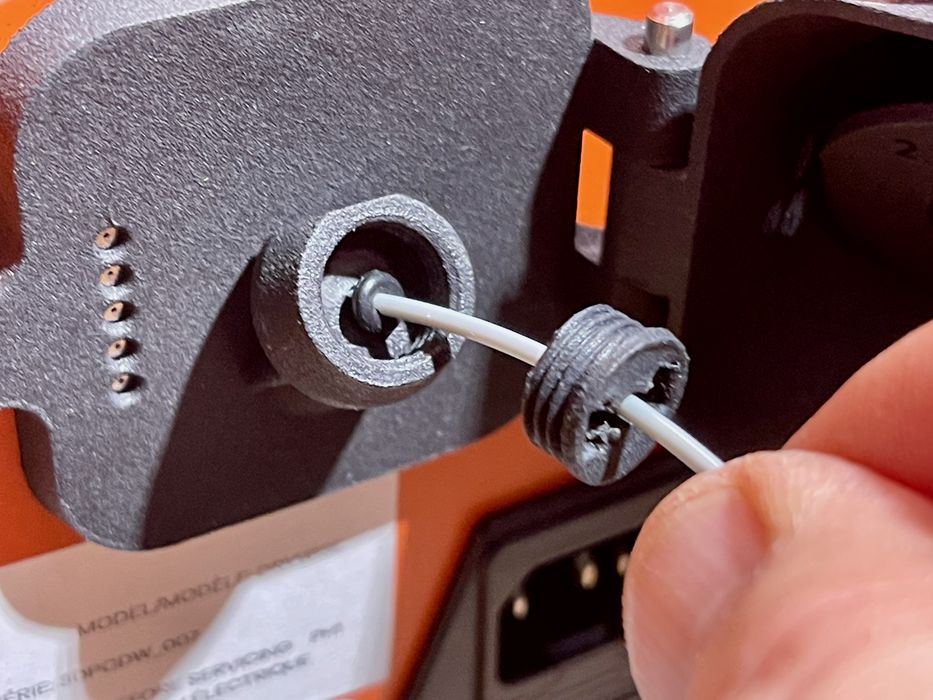
Maybe there is a proper way to do this, but what I developed is shown above. Put the o-ring on a short piece of leftover filament along with the cover. Then insert this filament into the port, which automatically centers the filament. Then just screw in the cover and pull out the filament.
In retrospect, perhaps I was supposed to put the o-ring in the cover and then just close it? In any case, none of this was explained.
Finally, when I re-fed the filament through, it went through perfectly and emerged at the output port.
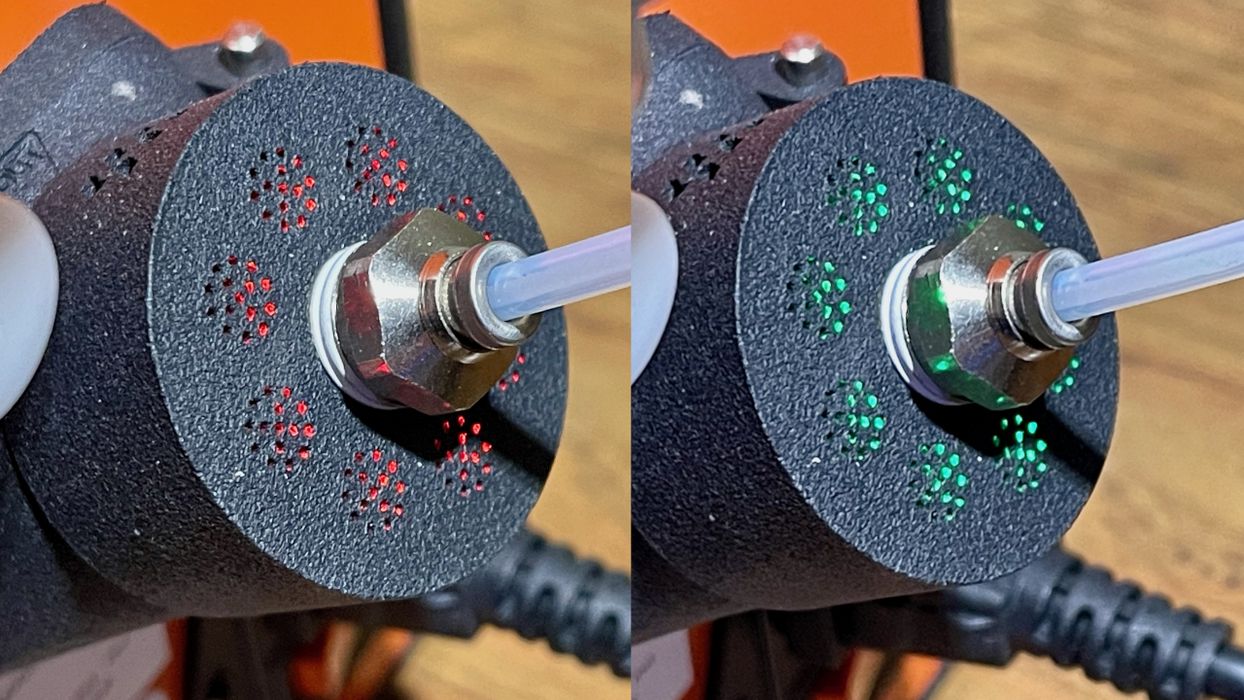
When the filament emerges it has to be set at a specific position by hand. Drywise tells you when it’s correct when the light is solid green. If you go too far it turns red and you must pull it back a bit until you get the green. Evidently Drywise has a filament odometer to keep track of where the filament is, even though it does not push the filament itself.
Why is all this positioning required? It’s because the first length of the filament must be pre-dried before you get printing.
At this point I realized that every point on the filament must remain in the drying chamber for some minimum amount of time. If you just pull the filament through, the first length won’t be properly dried. That is rectified with the first drying cycle.
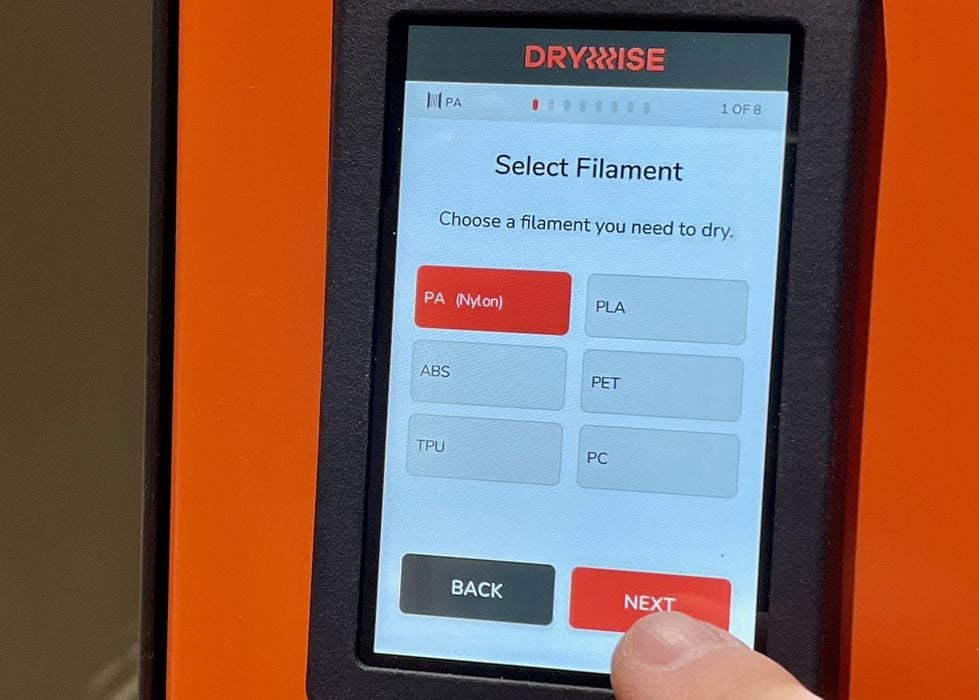
Drywise contains a number of “recipes” for drying specific brands of filament. Currently there are about 70 on the list, and it’s easy to browse through to find what you need.
Unfortunately, in my stock of dozens of spools I had only two that were on the Drywise list: Fiberlogy’s PA12-GF and PA12-CF, which were used for some of the testing.
There are profiles for generic PLA, ABS and TPU, but not for generic PA or any other material. This means that you either have to buy only Drywise-certified materials or “guess” which brand might be similar to your spool. I’m hoping that Thought3D figures out a way to more easily use non-certified material, as that is going to be a very common situation.
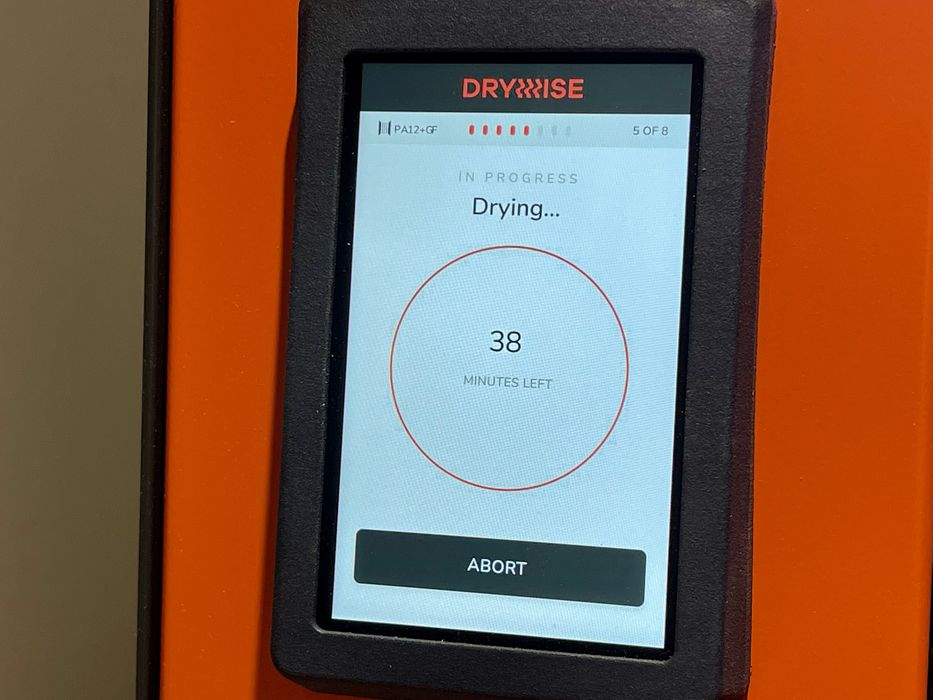
Once the first segment of filament is in the Drywise, the first drying cycle begins to prime the sequence. Surprisingly, this takes about 40 minutes to complete. This means there is a significant delay before you can get going.
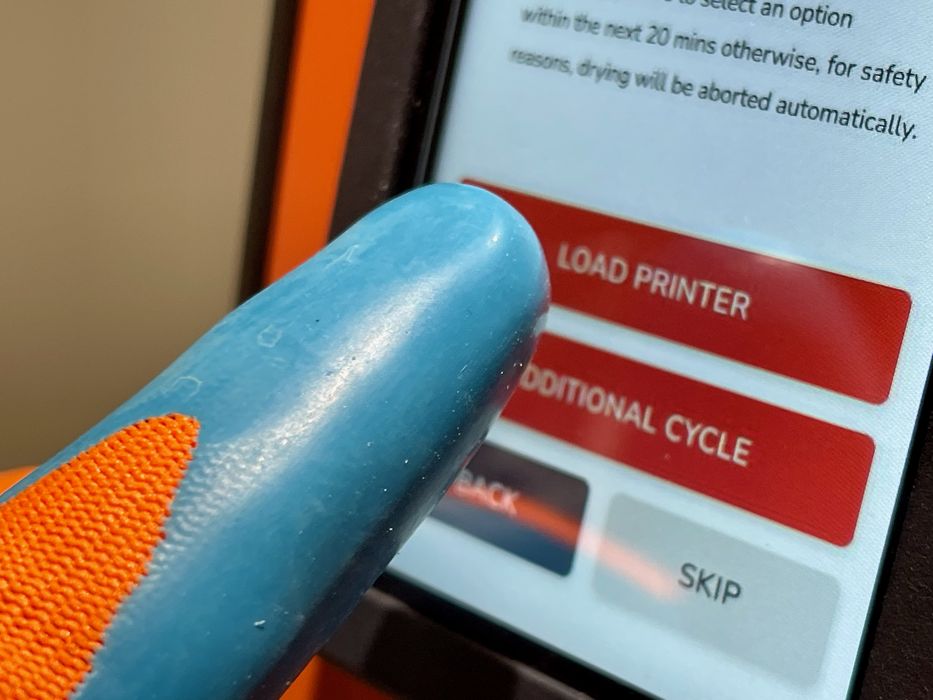
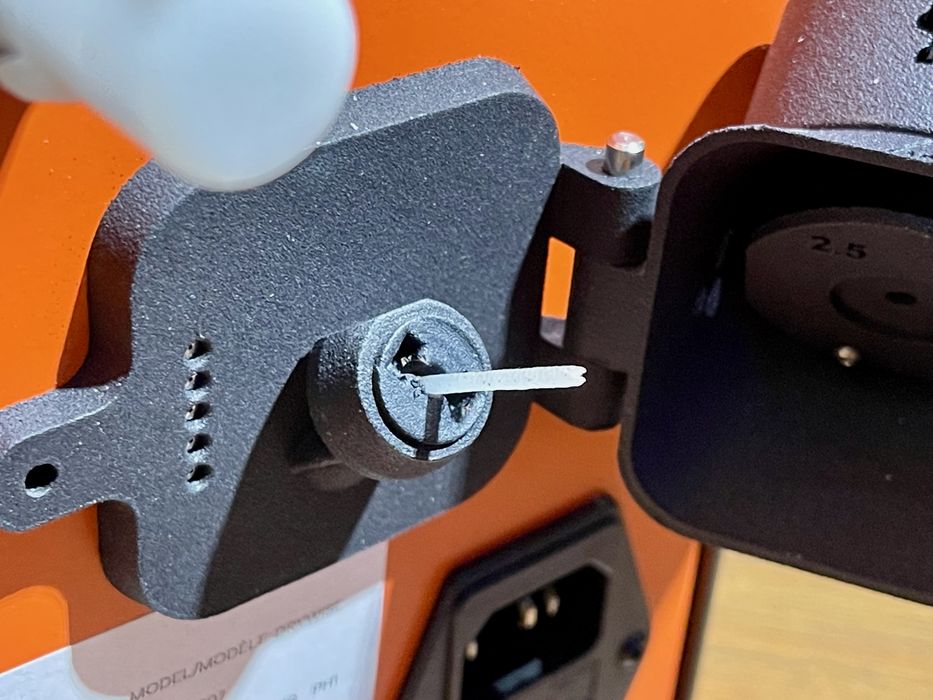
When that’s complete you can then move on to the “load printer” step, but at this point I discovered that the heat resistant gloves don’t work on the touchscreen. The gloves were also handy when dealing with the GF filament, which tends to shed glass fibers on your skin.
There’s yet another drying cycle to take place, typically about 15 minutes at this stage. All of these cycles must take place to ensure the entire length of filament in the machine and through to the printer is dried before starting the print.
Finally, after the cycles are complete and the filament actually loaded on the printer, it’s all done. The printer pulls the filament as required during printing, and it passes through the Drywise. The speed of the pull is such that the filament remains for a suitable time in the drying chamber.
It’s recommended that the Drywise be adjacent to the printer, and they even suggest an additional drying cycle if the length is more than a meter. That’s wasn’t the case in my situation, as the Drywise was right beside my Kodak Portrait 3D printer.
The output filament has to travel through a path to get to the input of the 3D printer. This path is very different from printer to printer, and sometimes there is a sharp angle. That was the case on my configuration.
I found that the combination of filament path angle and pull strength actually broke a filament once. This wasn’t ideal, but it shows the risks of aggressive filament paths.
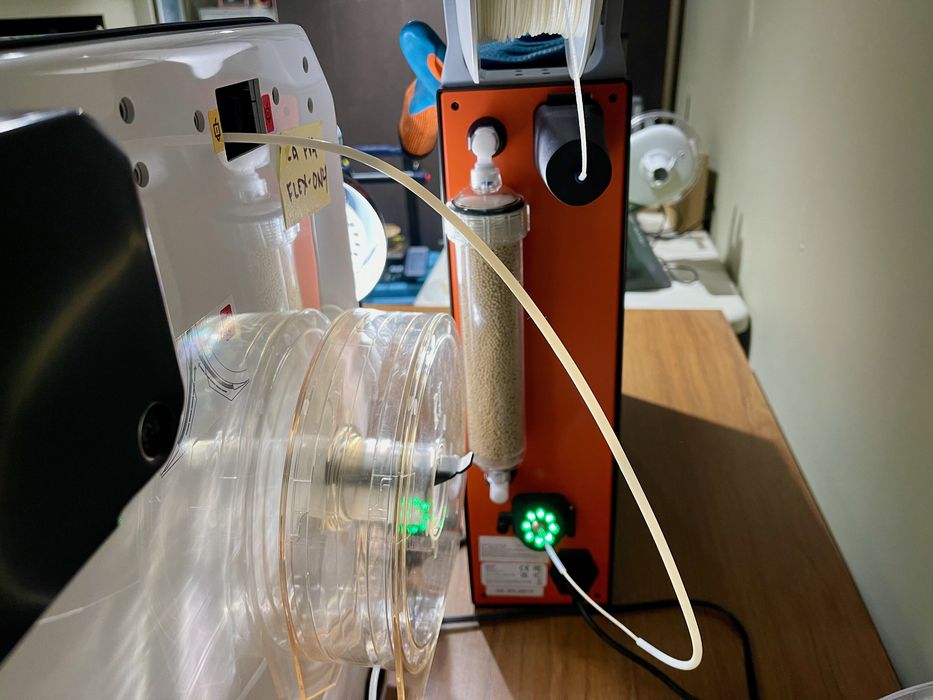
My solution was to use a separate spare PTFE tube to lead between the Drywise output and the 3D printer. This solved this issue easily, and I’m now thinking that each Drywise should include a PTFE tube for this purpose.
This is a challenging issue for any filament dryer to solve: 3D printers come in many sizes and shapes, with filament input ports appearing in many positions.
This is part two of a three part series, please read parts one and three.
Via Drywise