

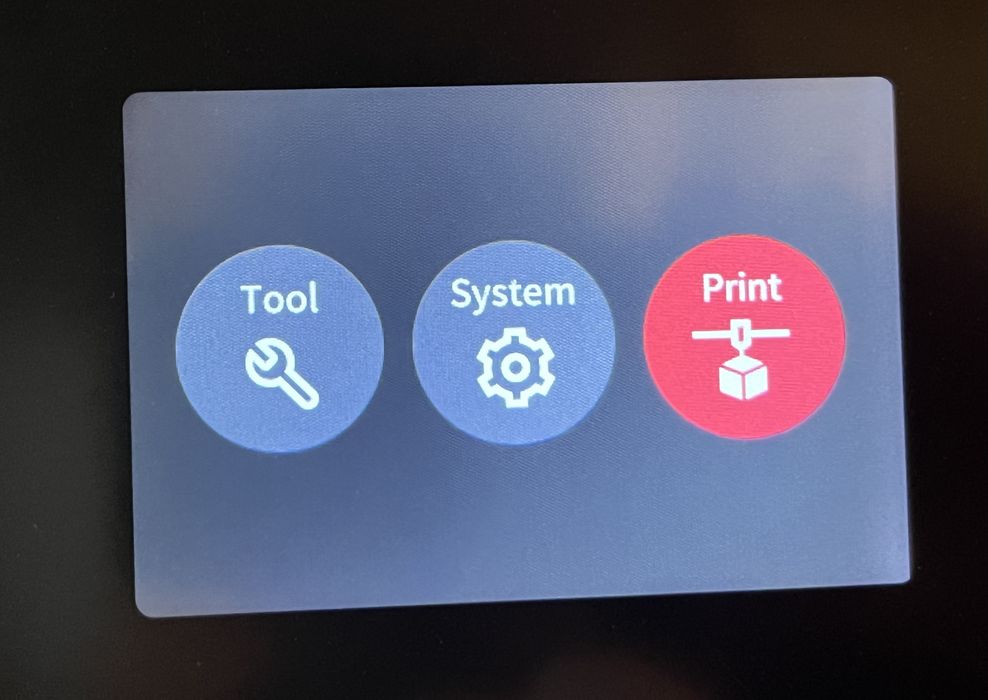
Our review of the Elegoo Jupiter SE continues with a look at Setup & Calibration and Operations.
This is part two of a three part series, please read parts one and three.
Elegoo Jupiter SE Setup and Calibration
Correct alignment of the optical window and tank with the build plate is crucial in setting up a new resin printer like the Jupiter SE. Elegoo’s first step in the calibration process involved this essential leveling procedure.
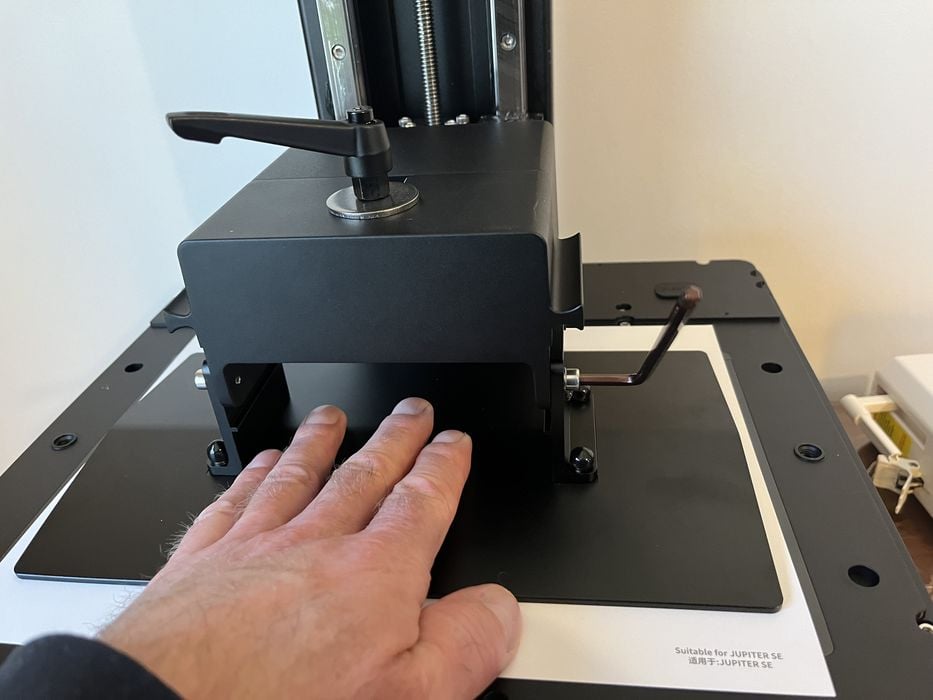
We started by installing the build plate and placing the leveling card on the optical window. Then, we loosened the four fixing screws on the build plate mount and gently lowered the build plate to meet the leveling card.
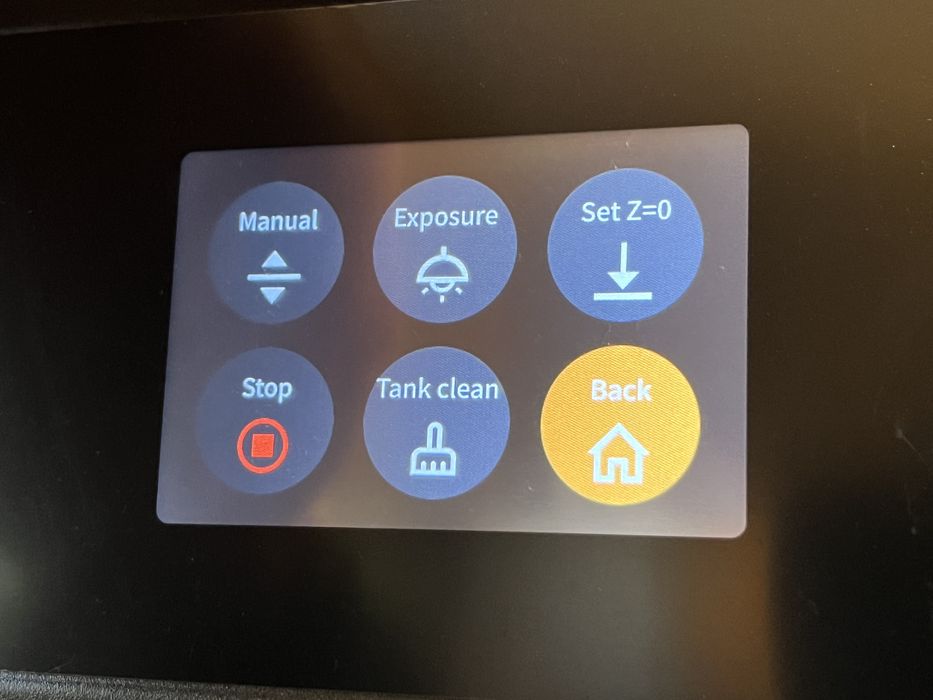
While firmly pressing down on the build plate with one hand, we retightened the screws. Elegoo’s instructions were clear: there should be slight resistance when pulling the leveling card out from between the optical window and build plate. If we experienced no resistance or too much, adjustments were necessary. Once satisfied with the leveling, we finalized the process by setting the new initial height for the first layer, clicking Set Z=zero.
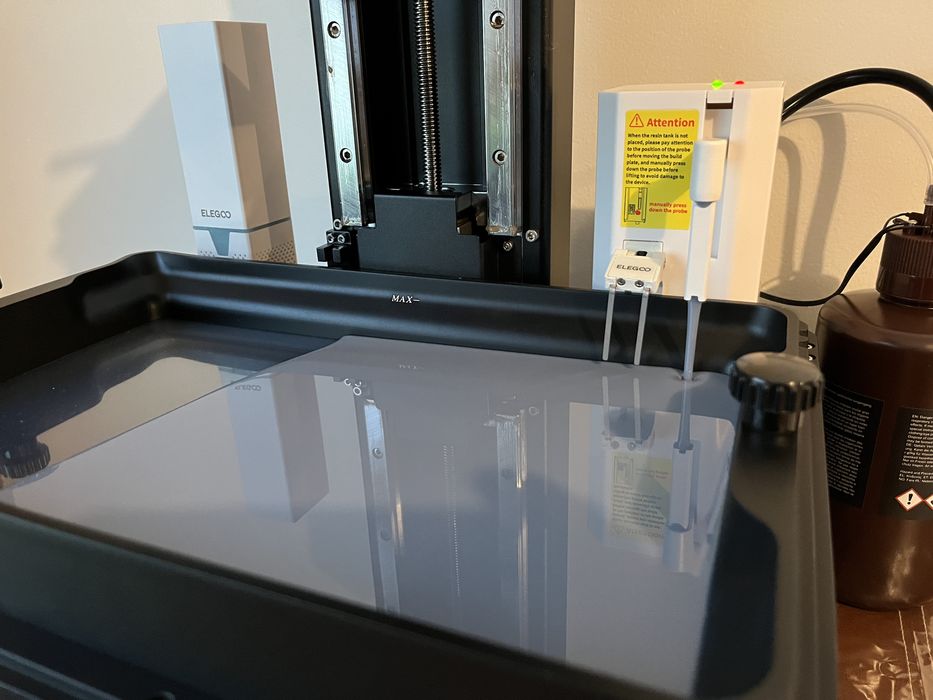
An essential caution highlighted in the manual was about the automatic resin feeding probe. It warned to “pay attention to the position of the probe when moving the build plate, please manually press down the probe before lifting to avoid damage to the device.” This instruction suggested a potential risk of the build plate contacting the probe, especially when the tank is absent. The probe and tank usually work in tandem to position the probe correctly. We made a mental note to always be vigilant when raising the build plate without the tank in place.

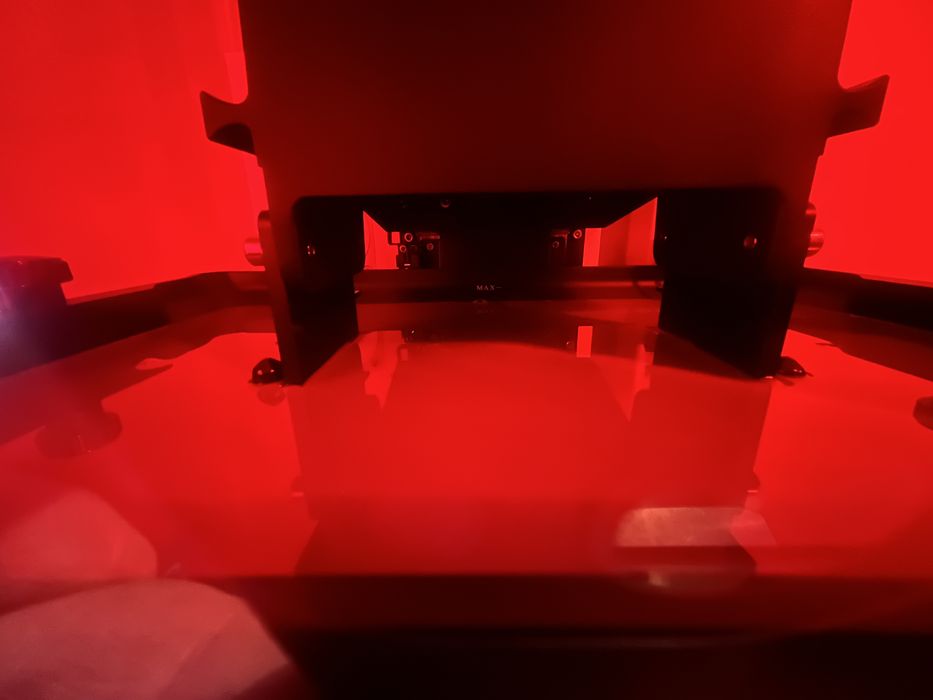
Once the leveling card was removed, we proceeded to test the LCD screen and LED light source. We navigated to “tool – exposure” and were gratified to see “ELEGOO TECHNOLOGY www.elegoo.com” displayed clearly on the optical window, indicating a successful test.
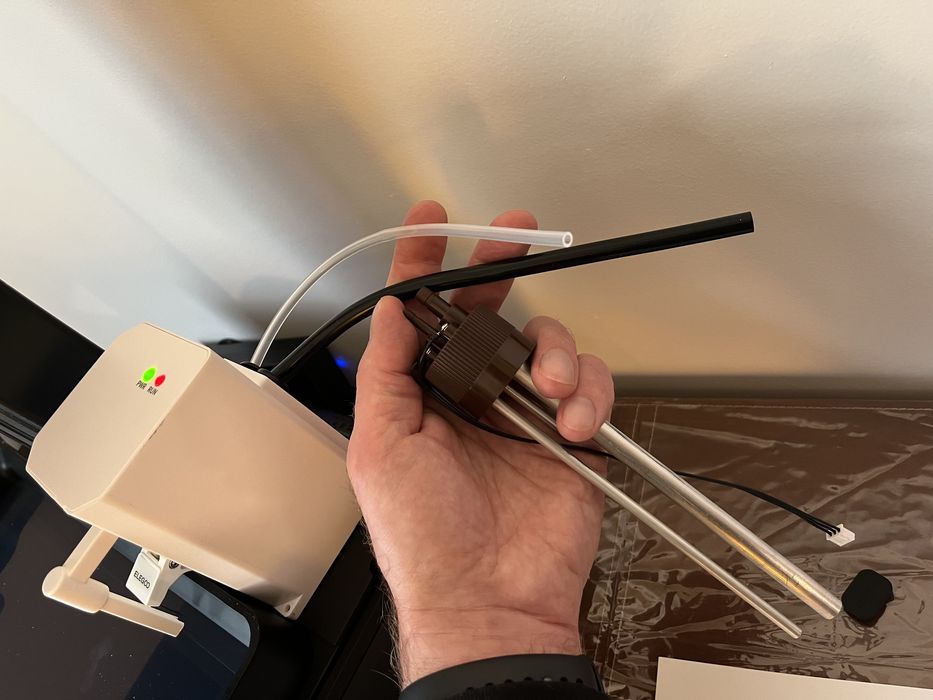
With the initial setup complete, we proceeded to install the automatic resin feeder. This involved attaching it securely with a few screws. Next, we prepared our resin: shaking the bottle of grey Rapid Standard Resin and then fitting the bottle cap module onto it.
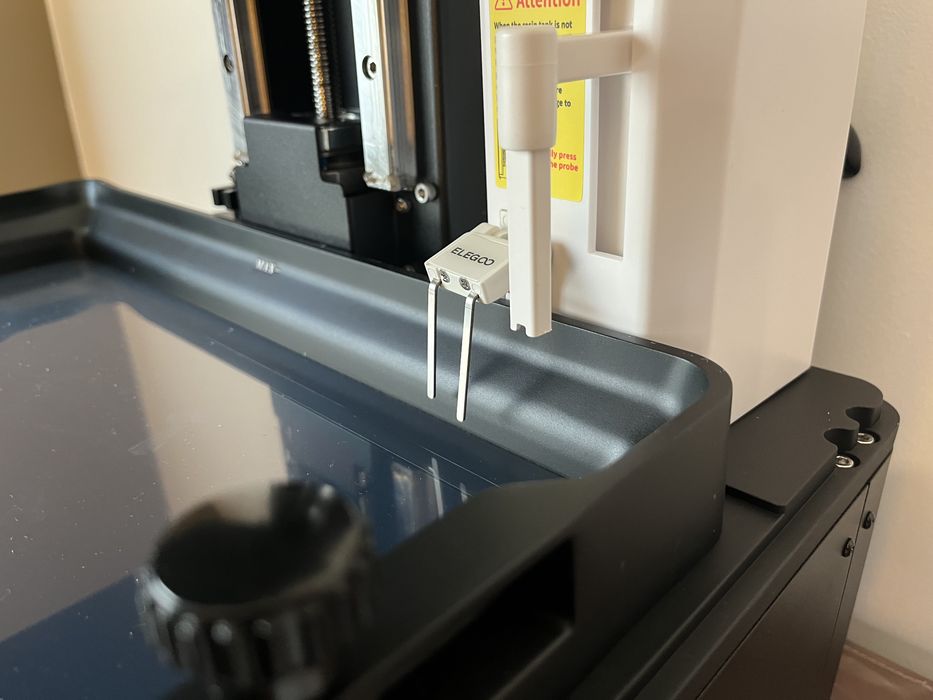
After this, we installed the empty tank onto the optical window. This step required a bit of maneuvering – tilting and gently positioning the tank to ensure the resin probe could rotate and settle into its correct position. Once aligned, we secured the tank with the thumb screws, making sure they were tight.
Before closing up, we didn’t forget to install the USB air purifier. This was plugged into the top left USB port of the printer’s base. With everything in place, including the lid on the printer, we were all set to start printing!
Elegoo Jupiter SE Operations
Printer manufacturers often include pre-sliced GCODE files on the storage device they provide, serving both as a test for the printer and a demonstration of its capabilities. Following this standard practice, we transferred the contents of the supplied USB stick to our computer. This allowed us to multitask, installing the provided slicer software while initiating our first print.
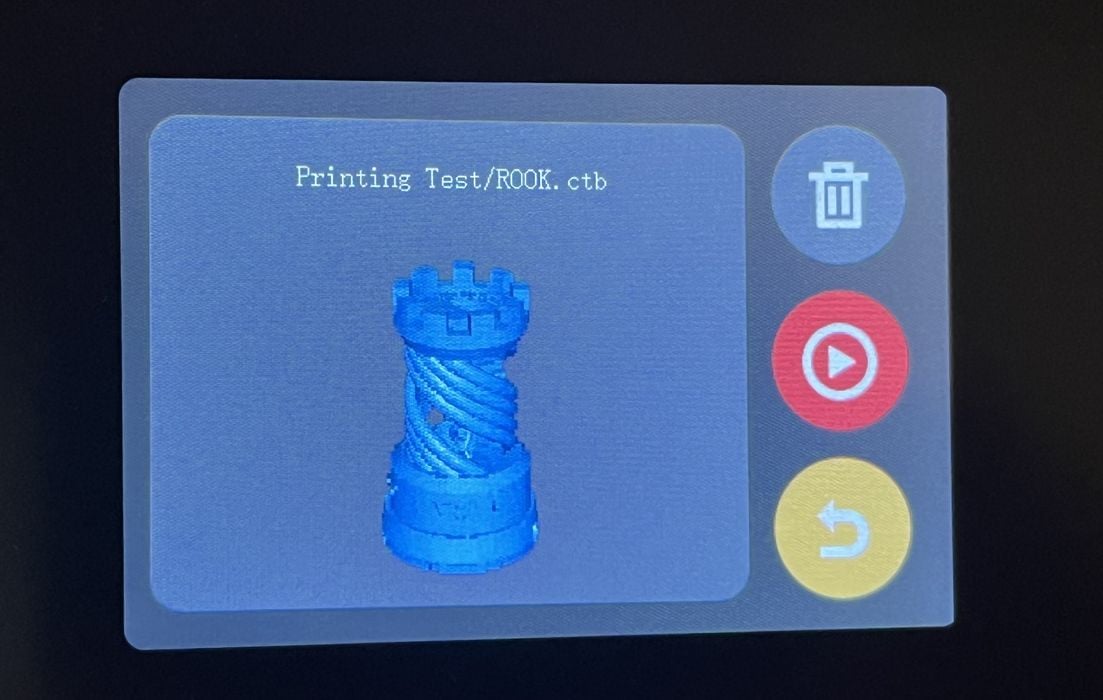
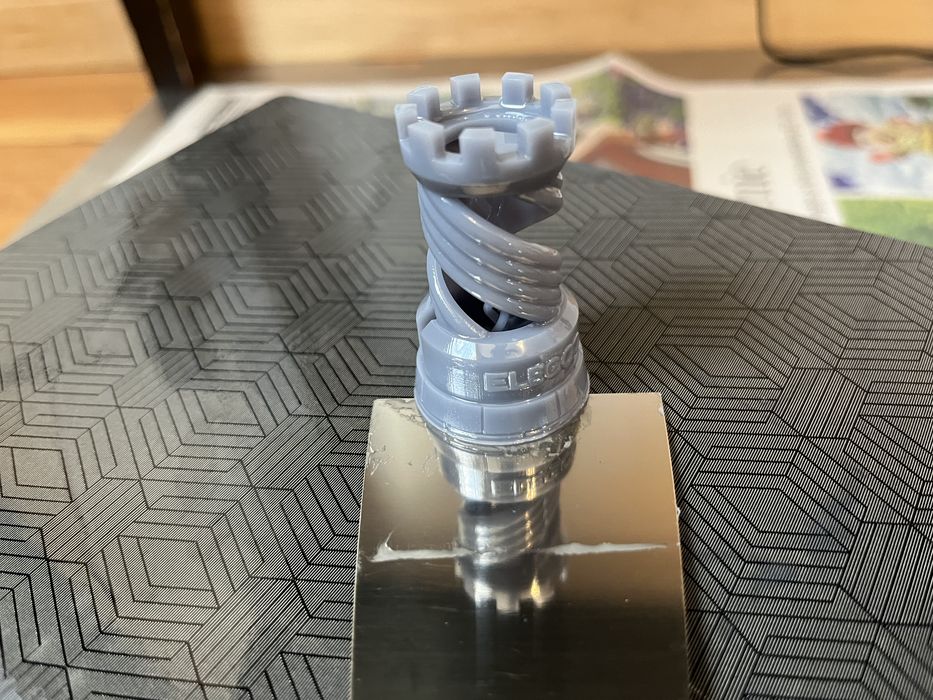
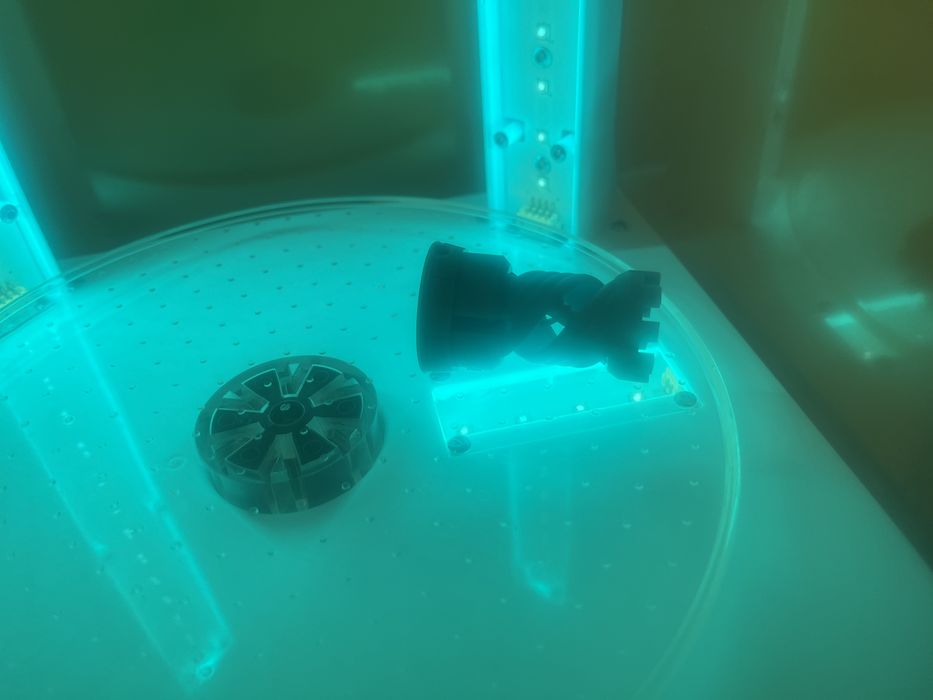
We then reinserted the USB stick into the Jupiter SE, used the touchscreen to select ‘Print’, and chose our first model, aptly named ‘ROOK’. As soon as we started, the automatic resin feeding module sprang into action, filling the tank with resin. It stopped precisely when the resin level reached the probe contacts.
As the build plate descended into the resin, our first print commenced. The LCD touchscreen displayed helpful information: the print consisted of 1000 layers and the estimated build time was 3 hours and 25 minutes.
With the printer now in operation, we decided to use this time to unbox and set up the wash and cure stations, completing our 3D printing setup.
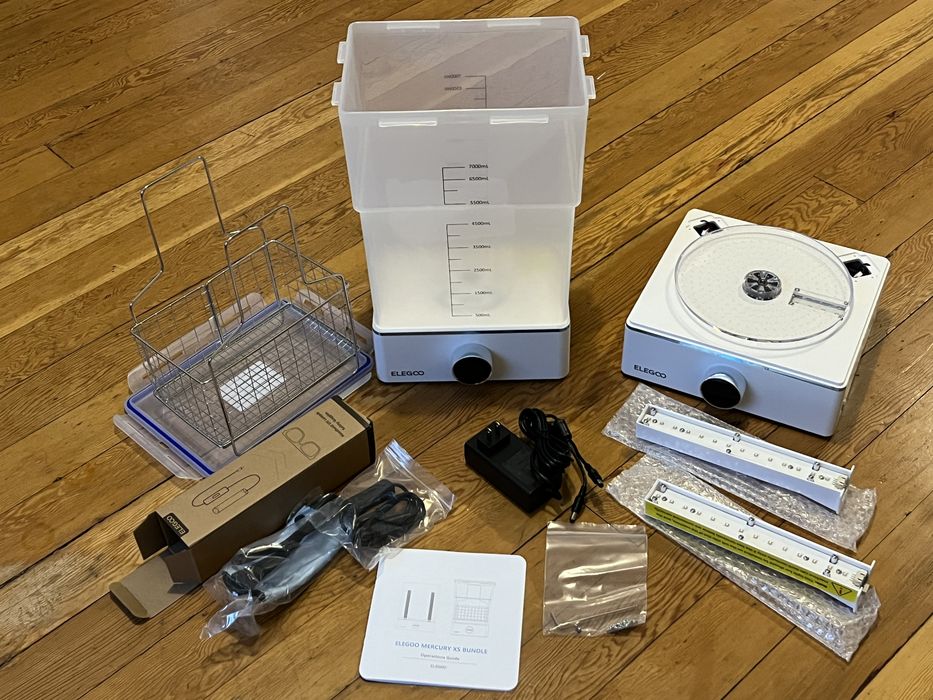
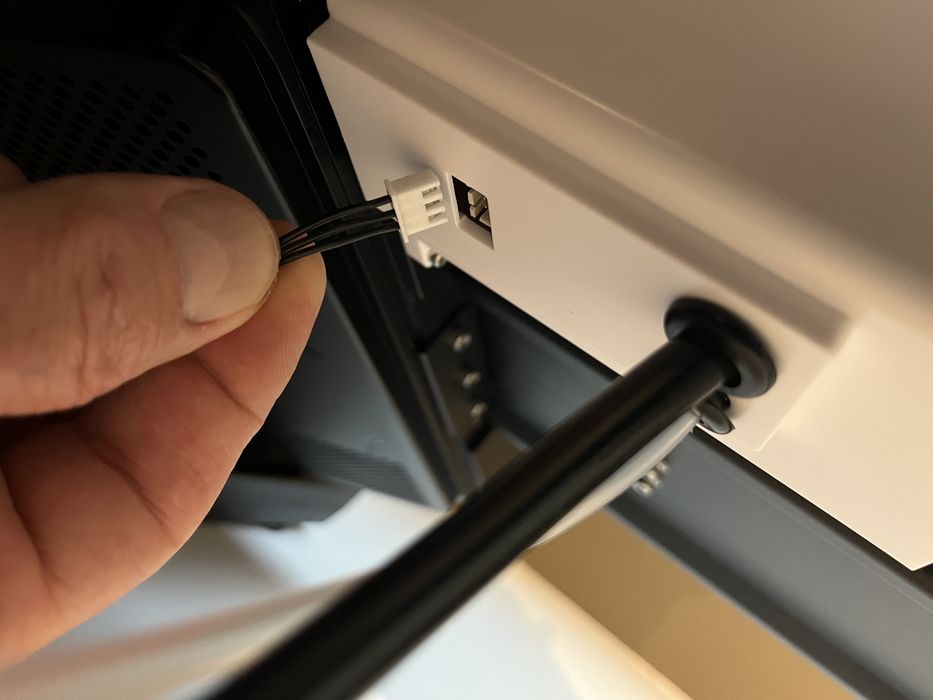
Assembling the wash and cure stations turned out to be a simple task. For the cure station, our primary job was to attach two UV light assemblies. The left unit had two data cables, while the right had just one.
Additionally, there was a handheld UV lamp, designed for curing hard-to-reach areas, which plugged into the side of the unit. It’s important to use this lamp with the UV safety glasses provided for protection.

A crucial detail was a sticker on the cure station’s lid, marked for UV protection cover detection. This sticker needed to be aligned with the photoelectric sensor behind the lamp board to ensure proper functioning, so we were careful not to remove it.
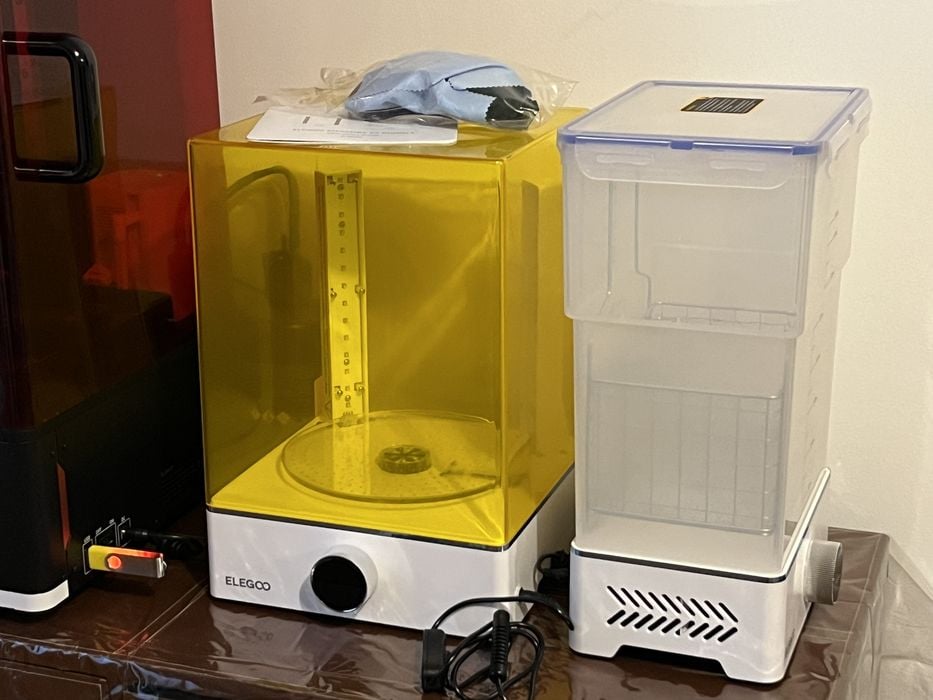
Setting up the wash station was even more straightforward. We simply placed the basket in the bin, set the bin on the wash base, and filled it with IPA (Isopropyl Alcohol). The station featured a tightly sealed lid, effectively preventing alcohol evaporation and containing any fumes.
Conveniently, both wash and cure stations connected to a single power adapter equipped with dual outputs. This allowed us to operate both units simultaneously while avoiding the clutter of two separate power supplies.
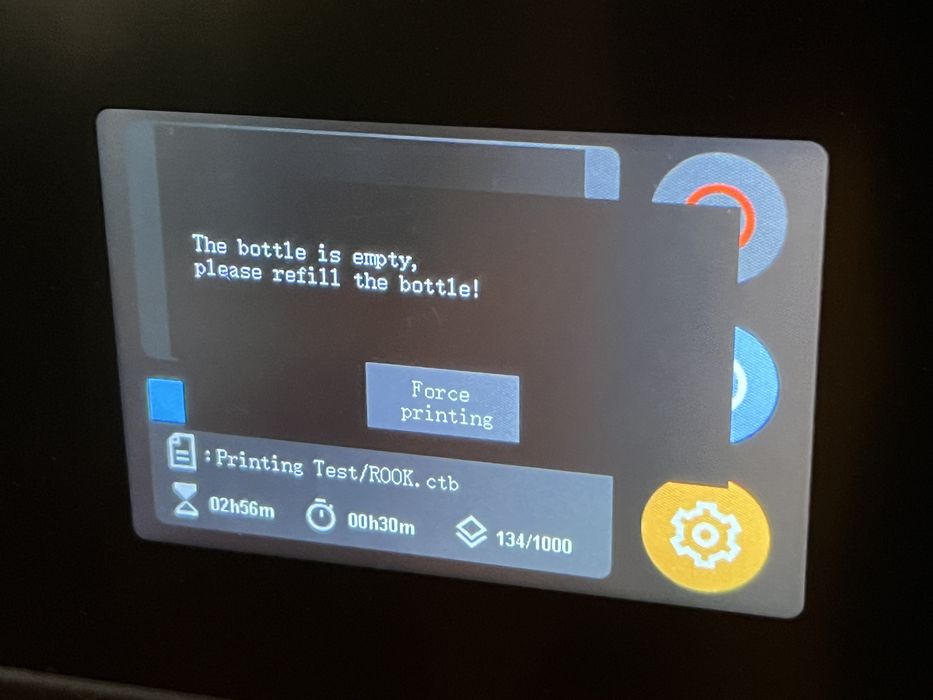
During our first print, we encountered an unexpected situation. The touchscreen displayed a warning message indicating that the resin bottle was empty. Surprisingly, most of the 1000g bottle had been consumed in filling the tank. However, we assessed that there was sufficient resin in the tank to complete the small ROOK print, so we opted not to intervene for the remainder of the printing process.
This experience led us to an important realization. Given that nearly an entire bottle of resin is required to start the printer, future purchases should involve at least two bottles, especially for more extensive printing projects. The large build volume of the Jupiter SE certainly has its resin consumption implications.
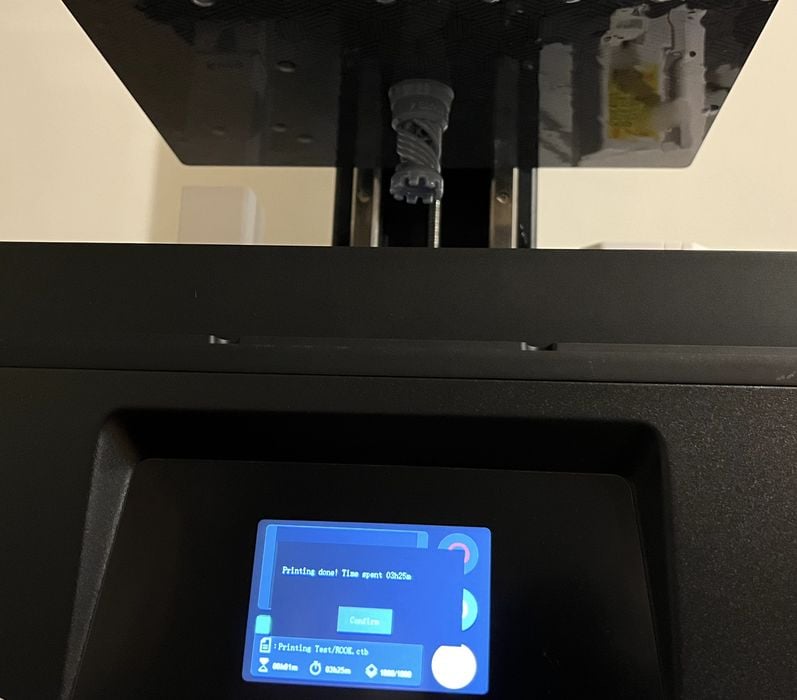
Once the ROOK print was finished, taking exactly 3 hours and 25 minutes as estimated, we decided to allow it and the platform a few extra hours to drip dry. This approach was intended to simplify the cleanup process by minimizing the amount of excess resin entering the wash station, thereby prolonging the life of our IPA.
Maintaining a clean and organized workflow is crucial when handling the inherent messiness of resin printing. With this in mind, we donned our protective gloves and breathing mask, and got to work. We removed the lids from both the printer and the wash and cure stations, then unlocked and carefully took off the printer’s build plate. Holding it above the tank, we allowed the excess resin to drip off, using the metal spatula to scrape any remaining resin back into the tank.
Once we were confident that the build plate was sufficiently clean, we moved it to our designated processing area. Laying down disposable paper for cleanliness, we used the spatula again to gently pry the completed print off the build plate.
While keeping one hand steady and dry on the spatula, the other hand, already coated in resin from handling the build plate, was used to handle the print. We then placed the print directly into the IPA wash. With our dry hand, we closed the wash station and started the cleaning cycle.
Finally, we picked up the build plate by its clean top bracket with our dry hand and reattached it to the printer, securing it in place. This careful process allowed us to remove the print and initiate the washing process without spreading sticky resin residue.
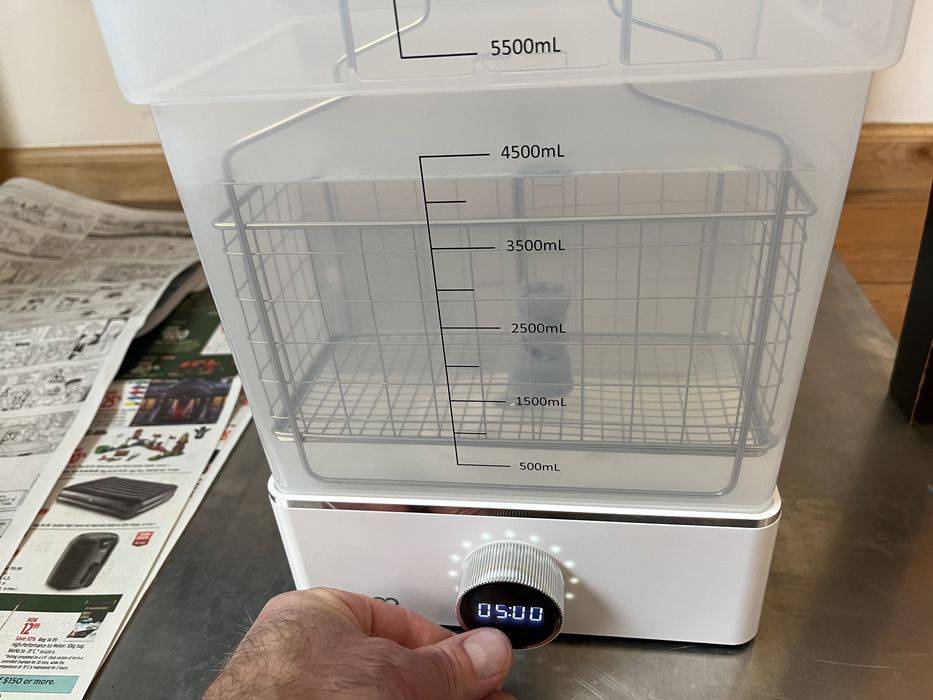
For the washing phase, we adhered closely to the instructions. Given that our model had a diameter of less than 30mm but featured a complex surface, we set the cleaning duration to five minutes. After the cycle concluded, we carefully lifted the wash basket using our resin-coated hand and, with our other clean hand, transferred the ROOK to the curing station’s rotating platform. We then disposed of the gloves and replaced the lids on both the printer and the cure station.
Following the manual’s recommendation, we set the curing time to two minutes, considering the model’s size. To ensure thorough curing, we used the handheld UV lamp, wearing the UV safety glasses for protection. We directed the UV light into the model’s intricate areas, covering any spots potentially missed during the initial curing.
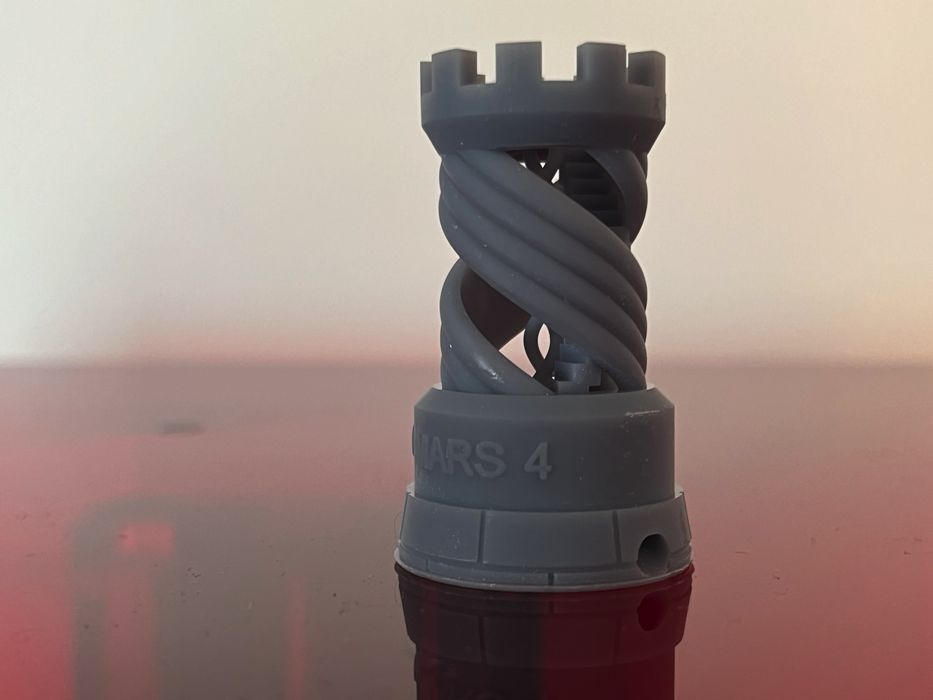
Upon completing the curing process, we inspected the ROOK and were thoroughly impressed. The print turned out fantastic, showcasing the printer’s capabilities. Additionally, our careful workflow paid off, as we managed to avoid creating a mess or getting everything sticky with resin.
This is part two of a three part series, please read parts one and three.
Via Elegoo