
We’ve been busy testing the new huge 3D printer from Elegoo, the Jupiter SE.
This is part one of a three part series, please read parts two and three.
Elegoo Jupiter SE Background
Founded in Shenzhen, China’s tech hub, in 2015, Elegoo specializes in creating resin and FFF printers. Their journey began with the Mars resin printer in 2018, followed by the Neptune FFF printer in 2019. Elegoo expanded their resin printer lineup with the Saturn in 2020 and the Jupiter in 2021, the latter’s SE model being the most recent. The Jupiter SE stands out as Elegoo’s largest resin printer, featuring a 12.8” 6K Mono LCD. We’re thrilled test the Elegoo Jupiter SE!
Elegoo Jupiter SE Specifications and Features
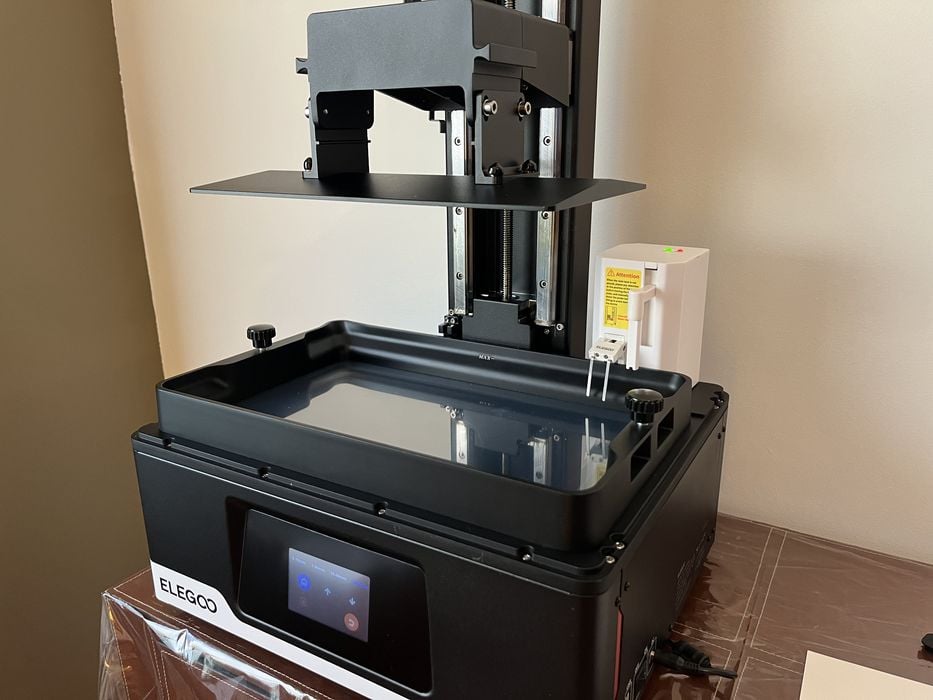
The Jupiter SE is a robust MSLA stereo lithography resin printer, tipping the scales at 19.5kg. Its dimensions are substantial, measuring 479.9mm in length, 377.4mm in width, and 657.5mm in height.
The highlight of this printer is its 12.8-inch 6K monochrome LCD, featuring a high resolution of 5448×3064 pixels and an XY resolution of 51 microns. Additionally, it offers a generous build volume of 278 x 157 x 300 mm.
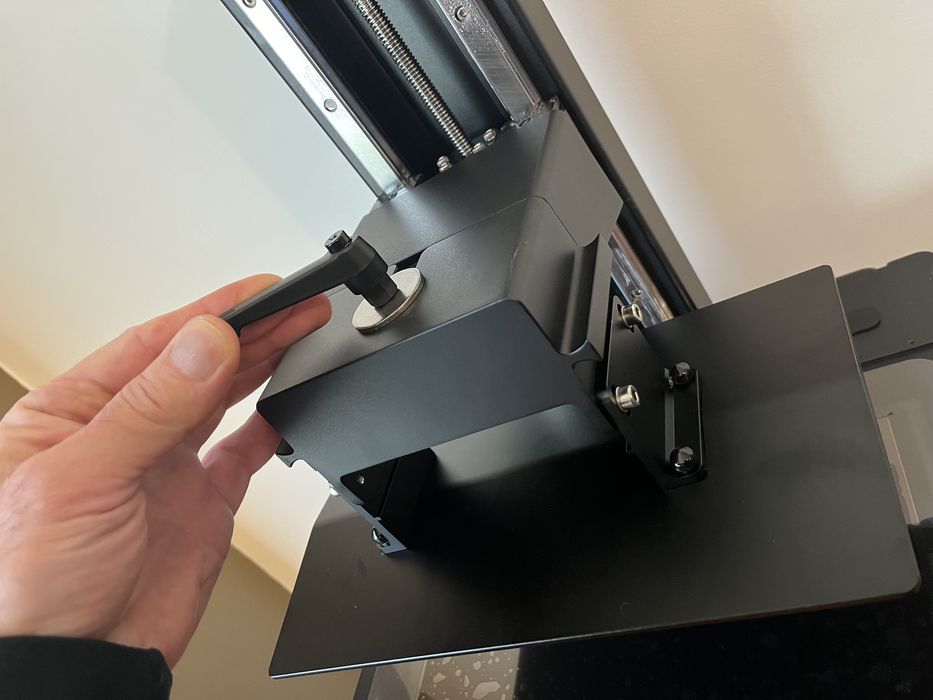
For enhanced stability and precision, the Jupiter SE integrates dual linear rails on its Z-axis. This design contributes to an impressive accuracy of 0.02mm and enables the printer to achieve top speeds of 70mm/hr.
The build plate is designed with a 4-point leveling system and boasts a laser-carved surface, ensuring reliable adhesion during printing.
The printer uses a sophisticated COB (chip on board) + refractive LED light source for consistent exposure, operating at a wavelength of 405nm. This system is capable of producing layer thicknesses ranging from 0.01 to 0.2mm. To maintain optimal operating temperatures, the printer is equipped with cooling fans and heat-conducting copper tubes beside the COB light source.
Rounding out its features, the Jupiter SE includes an automatic resin feeding/recycling system for hassle-free resin management. An added bonus is the USB-powered air purifier under the lid, designed to reduce toxic emissions during printing.
For slicing models, users can choose between the free version of ChituBox or the trial version of Voxeldance Tango. Model transfer is facilitated via USB stick, and printing is controlled through a 3.5-inch touchscreen interface.
Elegoo provided us with their Mercury XS Bundle, a convenient solution for post-processing 3D prints. This bundle includes separate wash and curing stations, essential for cleaning and curing any residual uncured resin on newly printed items.
The wash station is notably large, accommodating up to 7000ml of liquid solvent in its detachable and resealable bucket. It features a metal cleaning basket and a magnetically driven impeller for effective agitation.
The curing station is well-equipped with dual UV light bars, a 360° rotating platform, and a protective anti-UV lid.
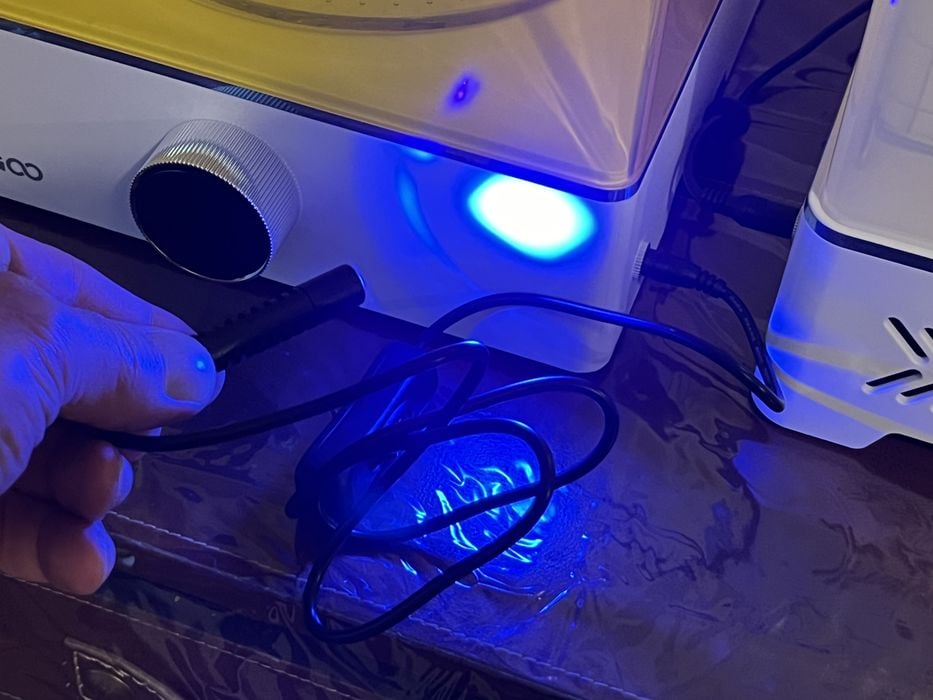
For detailed curing, there’s a small handheld UV lamp that connects to the side of the machine. This can be used alongside UV safety goggles to target hard-to-reach areas during the curing process. Both stations operate with an easy-to-use 30-minute timer.
We observed in the documentation that the Mercury XS Bundle is also an ideal match for the Mars 3 Pro and Saturn 2 3D Printers. However, it’s important to remove the build plate’s handle before washing Saturn 2 prints. This is a crucial consideration, especially since the Jupiter SE has a larger build volume than the Saturn. Ensuring that prints fit in the wash station is vital. For the curing station, space constraints are less of a concern post-support removal.
Elegoo Jupiter SE Unboxing and Assembly
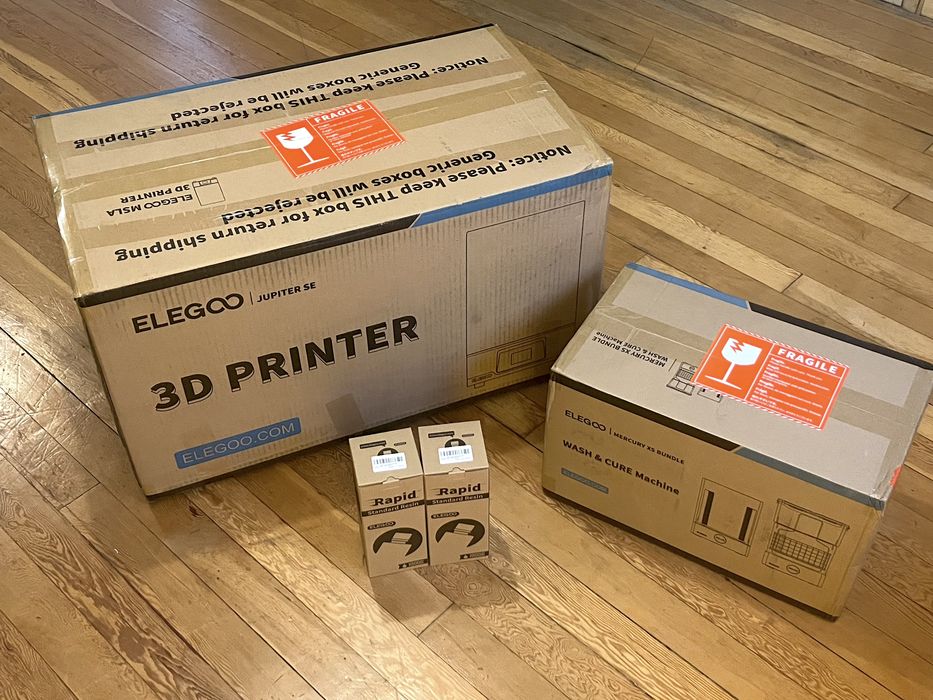
The Jupiter SE’s arrival was in a substantial double-walled cardboard box. Upon opening, we found the printer carefully wrapped in a poly bag, surrounded by soft packing foam.
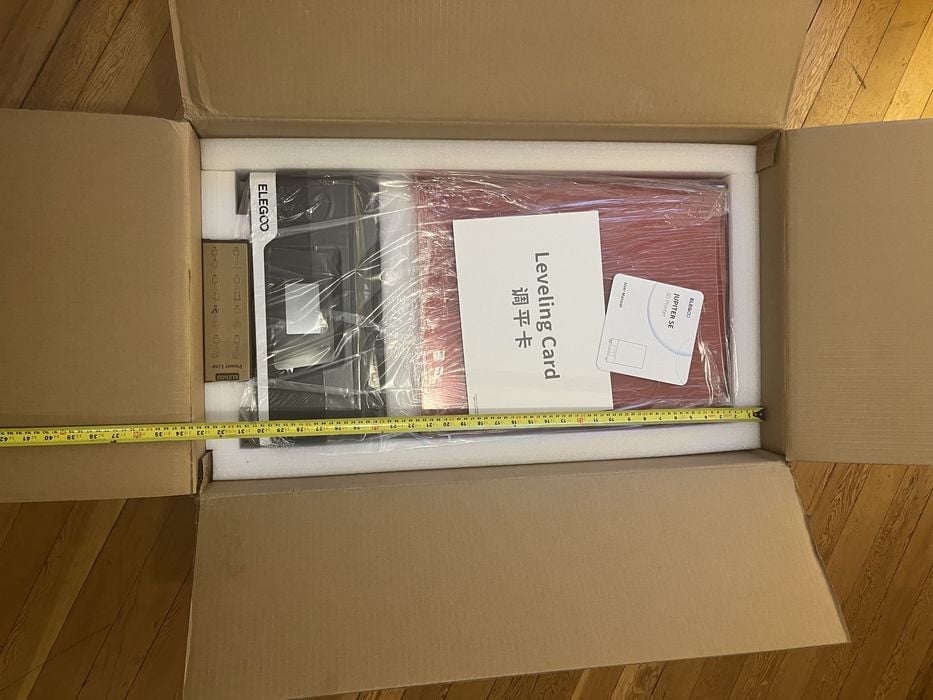
Its considerable size meant we couldn’t just lift it out of the box as usual. Instead, we stood the box upright and slid the printer out in one fluid motion.
Elegoo’s packaging efficiency was notable. Removing the printer’s lid revealed multiple foam layers, each holding crucial printer components.
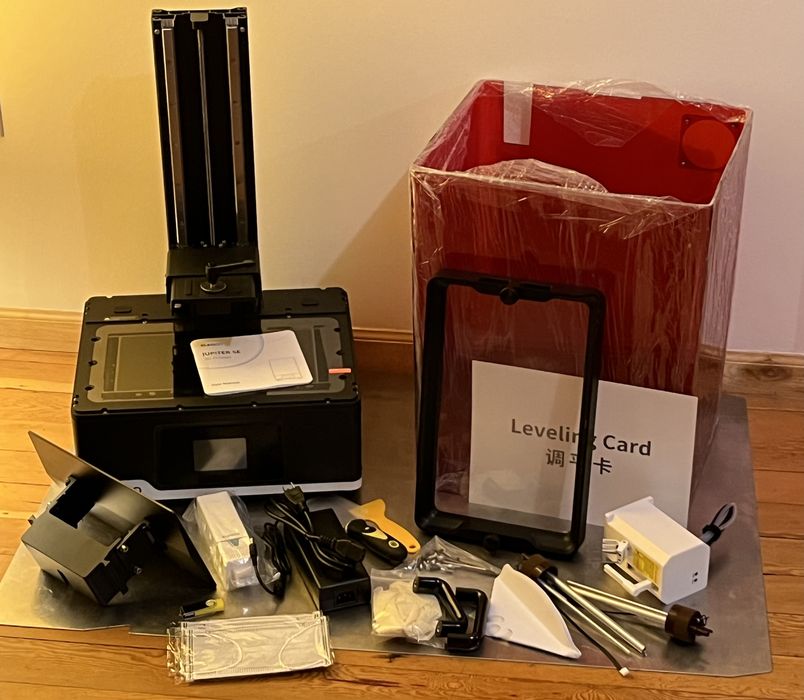
Once everything was unpacked, we assessed the contents: a printed user manual, the printer’s base with an attached tank, a removable build plate, the printer’s lid, handles, various screws and socket wrenches for assembly, an auto resin feeding module for the tank, two bottle cap modules for resin bottles, a USB-powered air purifier, a USB stick, and the printer’s power supply. Additional items for the printing process included gloves, masks, metal and plastic spatulas, and resin filters.
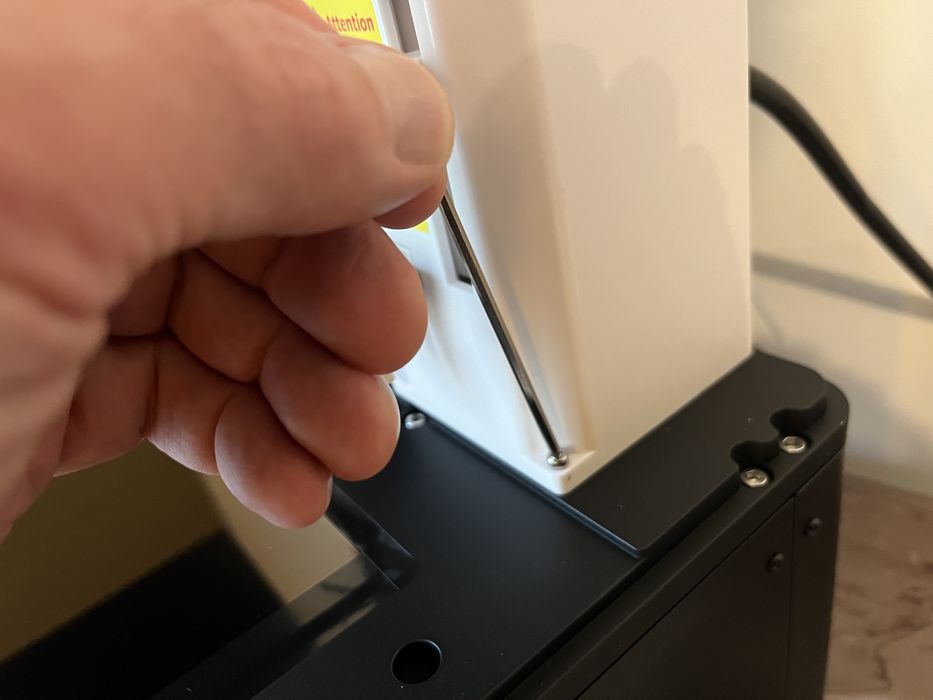
Assembling resin printers like the Jupiter SE is generally less complex than their filament-based counterparts. These printers usually come fully assembled due to the precision required in their construction. However, we did encounter a few setup steps.
The user manual, although not sequentially organized, started with details on the automatic resin feeding and recycling system. This system includes a motorized dispenser and sensor in the tank, along with a detection terminal in the resin bottle.
These components work in tandem to monitor the levels in both the tank and bottle, facilitating automatic dispensing or recycling of resin. This feature is particularly useful for long prints where manual resin addition isn’t feasible, and especially on such a large machine as the Jupiter SE.
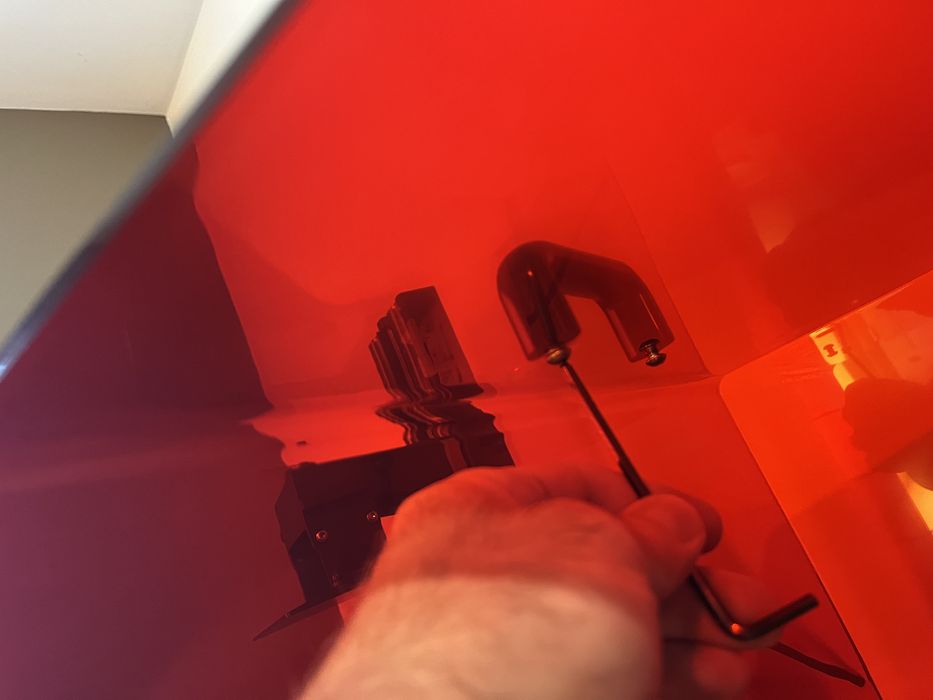
Setting up the resin feeding system of the Jupiter SE involved some specific steps. First, the main resin feeding module had to be connected to the printer’s base via the top right USB port and secured with screws.

The bottle cap resin feeding module was then attached to a resin bottle, also screwed in place.
These two units were interconnected using hoses and a data cable, enabling the system to automatically feed resin into the tank during printing and drain it back into the bottle after printing for efficient storage.
The instructions highlighted several key precautions. It’s crucial to avoid shaking or inverting the resin bottle once the bottle cap module is installed, as this could lead to blockages or damage the resin feeding module.
Additionally, if using non-Elegoo resin, it’s advised to test the compatibility with both modules. A useful tip for resin recycling is to remove a tank screw knob and use it to tilt the tank. This allows the remaining resin to pool on one side, making it easier to be suctioned out.
We decided to postpone installing the resin feeding system until after completing the printer’s z-calibration, as this would necessitate removing the tank.
Next, we focused on the other items in the shipment, unboxing two 1kg jugs of Elegoo-branded Rapid Standard Grey Resin. Opting for the manufacturer’s own materials often ensures immediate compatibility with the machine, which is why we prefer using them for our prints.
The unboxing of the wash and cure stations, also included in our shipment, was set aside for the moment. We planned to delve into these additional components once we initiated our first print with the Jupiter SE.
This is part one of a three part series, please read parts two and three.
Via Elegoo