
jupiterse-cover4.jpg
Our review of the Elegoo Jupiter SE concludes with software, print results and final thoughts.
This is part three of a three part series, please read parts one and two.
Elegoo Jupiter SE Software
jupiterse-software-cover.jpg
With our successful first print behind us, we shifted focus to slicing our own models. The next step was installing the software provided on the USB stick. We opted for Chitubox 1.9.6 Beta01, as the alternative, Voxeldance Tango, was only a demo version.
jupiterse-software-chitbox-setup.jpg
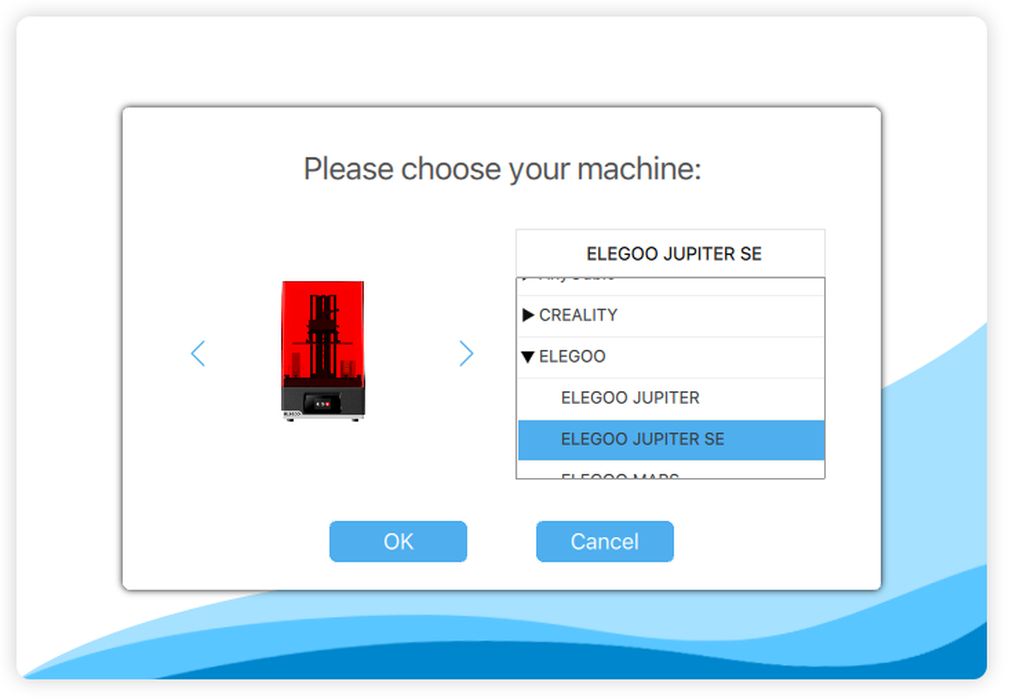
The installation process for Chitubox was smooth, and fortunately, it included a preset profile for the Jupiter SE, which we promptly set as our default printer.
The Elegoo manual didn’t offer much guidance on using the slicer, but our familiarity with Chitubox made this a non-issue. The software is user-friendly and straightforward. The primary task was to load a model and, if necessary, adjust its orientation. This is important to minimize large flat areas on the print, as these can be challenging to peel off from the tank’s bottom.
jupiterse-software-large.jpg
Next, we navigated to the Supports tab to generate the necessary support structures for complex objects. Chitubox’s auto-support feature is quite useful for creating the majority of the support structure. However, it’s always a good practice to manually add extra supports. This ensures the model is adequately supported and any areas missed by the auto-support algorithm are covered. This approach helps in achieving the best printing results, especially for intricate designs.
jupiterse-operations-resin-tuning-matrix.jpg
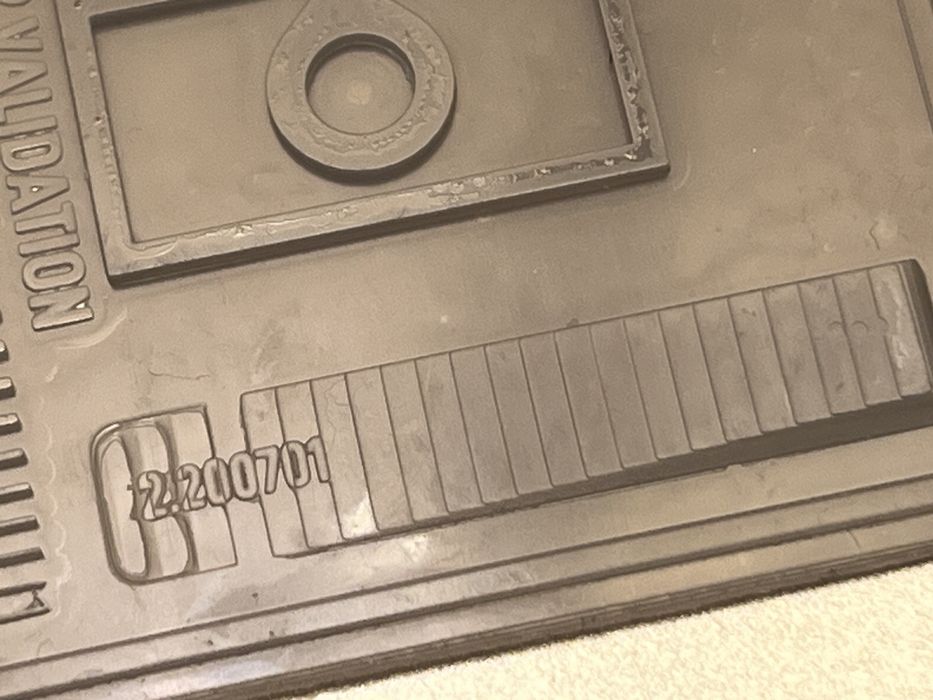
Our first self-sliced model was the calibration print “validation_matrix_V2.200701.” This particular model is designed to be printed directly on the build plate without any supports, using the default slicer settings as a baseline. We quickly sliced the model, saved it to the USB stick, and started the print on the Jupiter SE. The print didn’t take long to complete, and we were delighted to see it finished with a high level of detail—a promising start!
jupiterse-operations-resin-tuning-cones.jpg
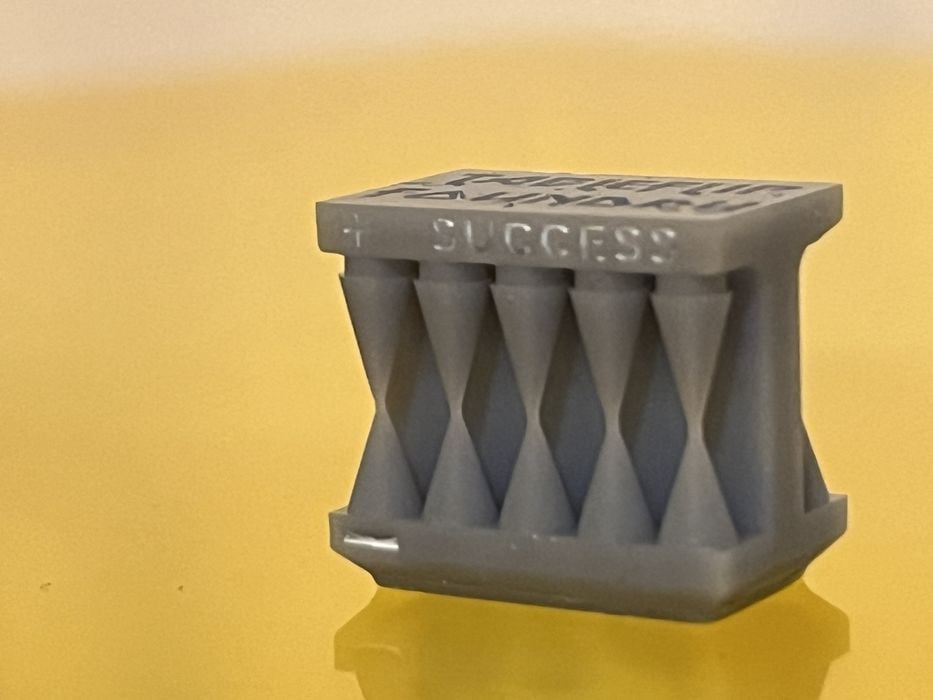
Next up was the “cones of calibration” print. This straightforward test is crucial for determining the correct exposure time for the resin. If under-exposed, the cones on the ‘success’ side would fail to meet; if over-exposed, the cones on the ‘fail’ side would touch when they shouldn’t.
Upon examining our completed print, we noticed that the cones were appropriately touching only on the success side. This indicated that our exposure settings were spot-on from the start, highlighting the advantage of using the manufacturer’s own resin.
jupiterse-results-ameralabs.jpg
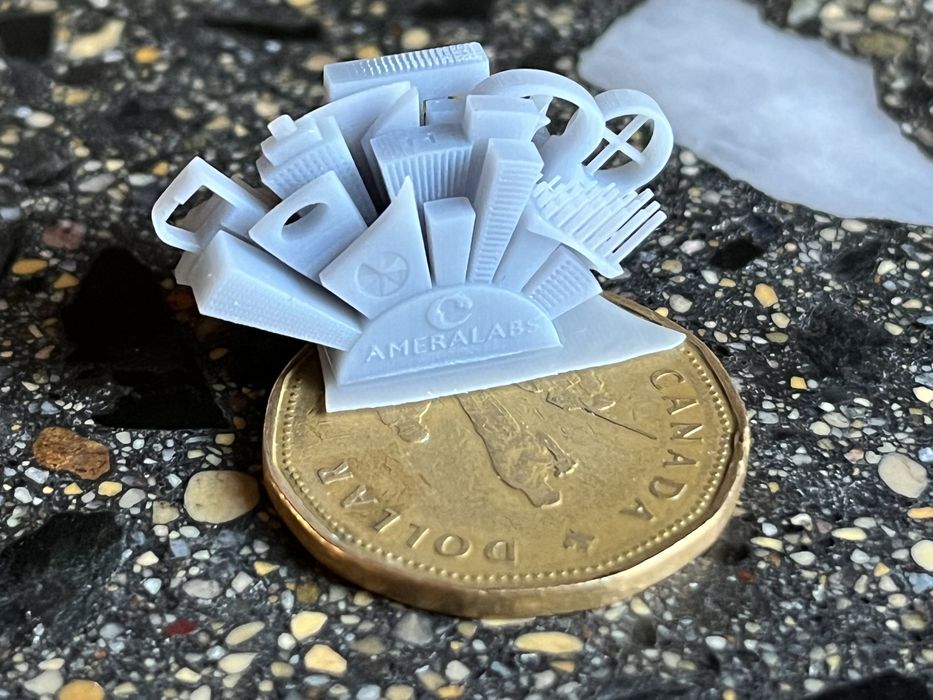
Our final calibration print was “Amerilabs_town_V2.” The result was exceptional, showcasing a high level of detail. This confirmed that the printer was accurately calibrated. With these tests successfully completed, we were now fully prepared to embark on more ambitious and real printing projects.
Elegoo Jupiter SE Print Results
jupiterse-results-all-prints.jpg
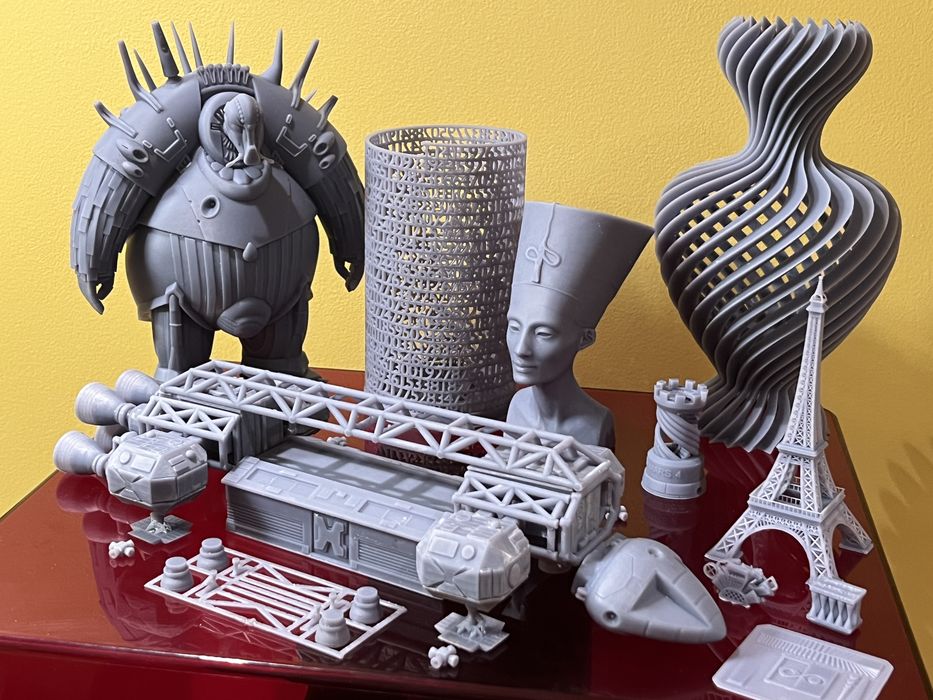
Throughout our review of the Jupiter SE, we set the layer height to 0.05mm to thoroughly assess its capabilities. Our first ambitious project was an Eiffel Tower model. The estimated print time was 7 hours and 16 minutes for 2420 layers, but it actually took 8 hours and 11 minutes to complete.
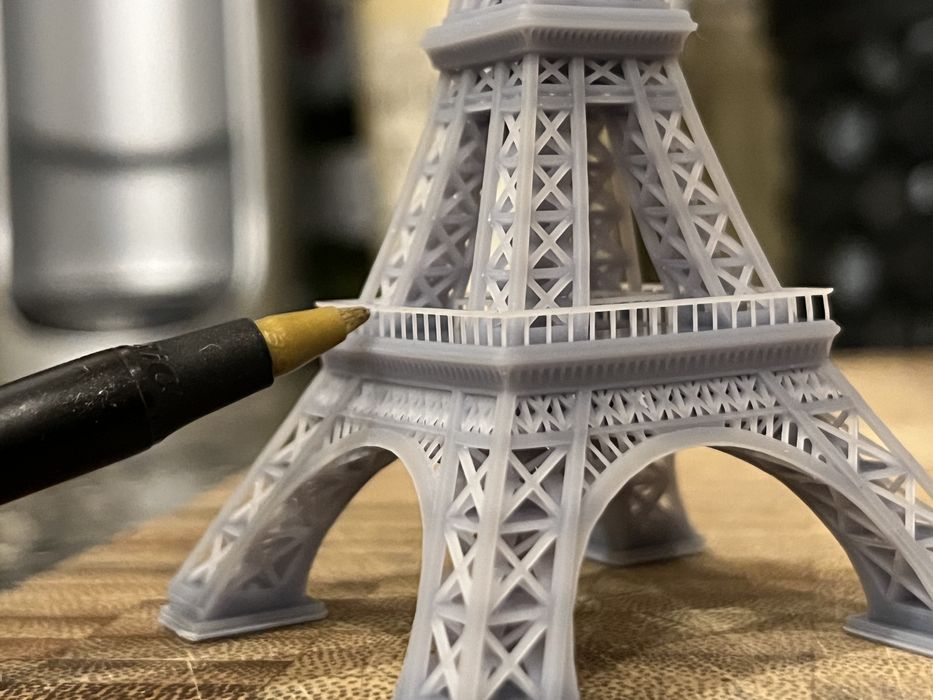
jupiterse-results-eiffel2.jpg
The final print showcased incredible detail with no sagging, presenting a near-perfect replica. The only minor issue was slight chipping at the base feet, which occurred during removal from the build plate. This indicated that our first layer exposure setting was effective.
jupiterse-results-nefertiri.jpg
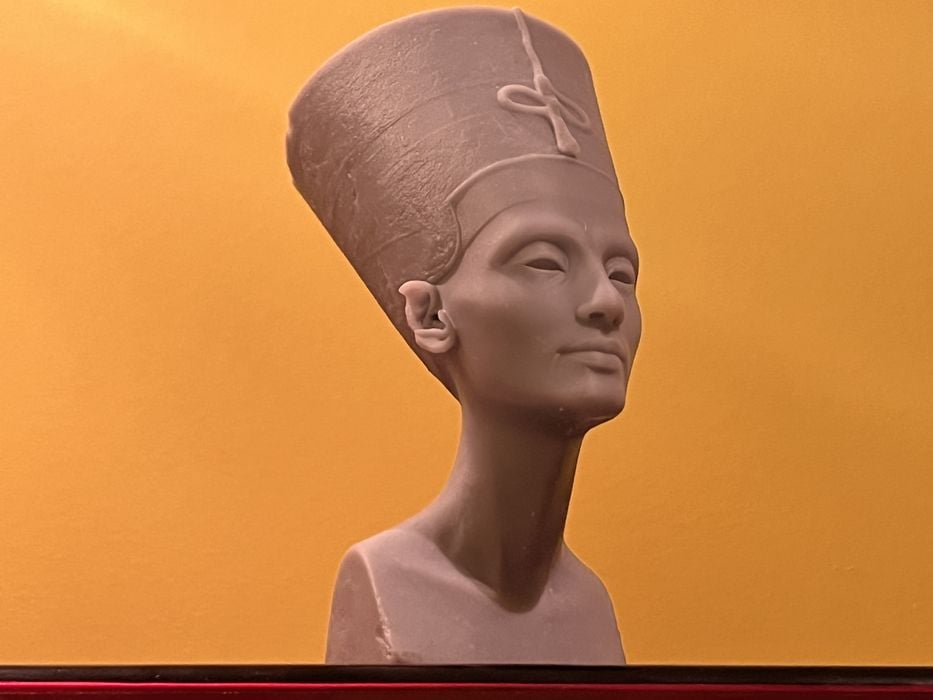
Our next model was a replica of Nefertiti, which required support structures. We rotated the model, created drainage holes to prevent suction, and generated auto-supports, fine-tuning them manually to ensure a successful print. The estimated build time was 8 hours and 31 minutes, but it took 9 hours and 38 minutes. We noticed that the longer the print, the greater the discrepancy between estimated and actual print times.
This wasn’t a major concern, though it did affect our printing schedule slightly. The completed Nefertiti print impressed us with its amazing detail. The 0.30mm sphere-tipped supports held the model firmly during printing and detached easily, leaving minimal marks on the surface.
jupiterse-results-mondo.jpg
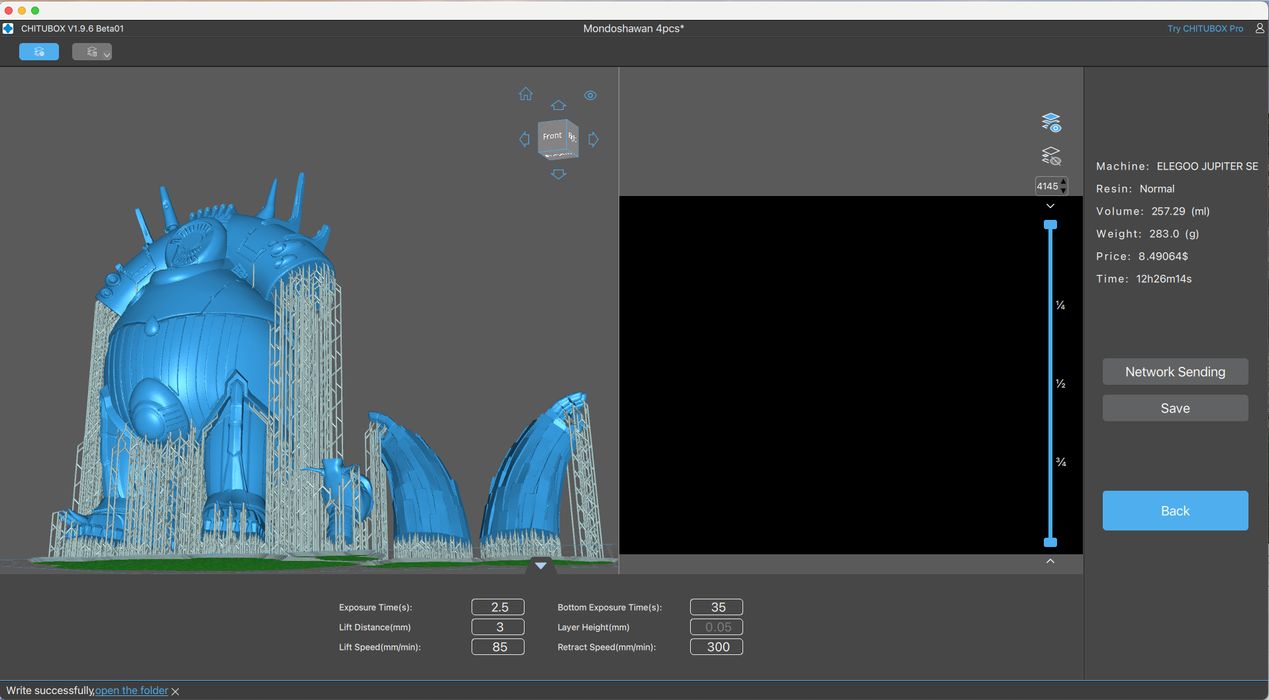
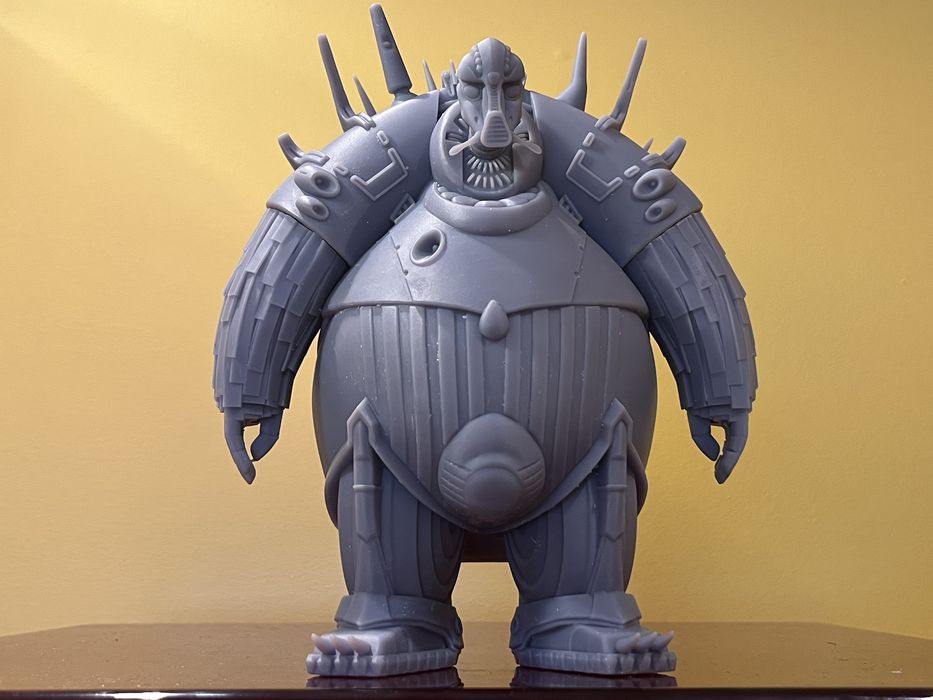
The Mondoshawan model was more substantial, consuming 283g of resin and taking 14 hours and 10 minutes to print. The quality was exceptional, and despite being a multi-part print, we experienced no failures. The supports were again easy to remove, requiring minimal cleanup. All four pieces were seamlessly assembled using super glue.
Our exploration of the Jupiter SE’s capabilities continued with the Tower of Pi, a more delicate model. This print turned out to be flawless, impressively executed directly on the platform without any supports.
jupiterse-results-vase.jpg
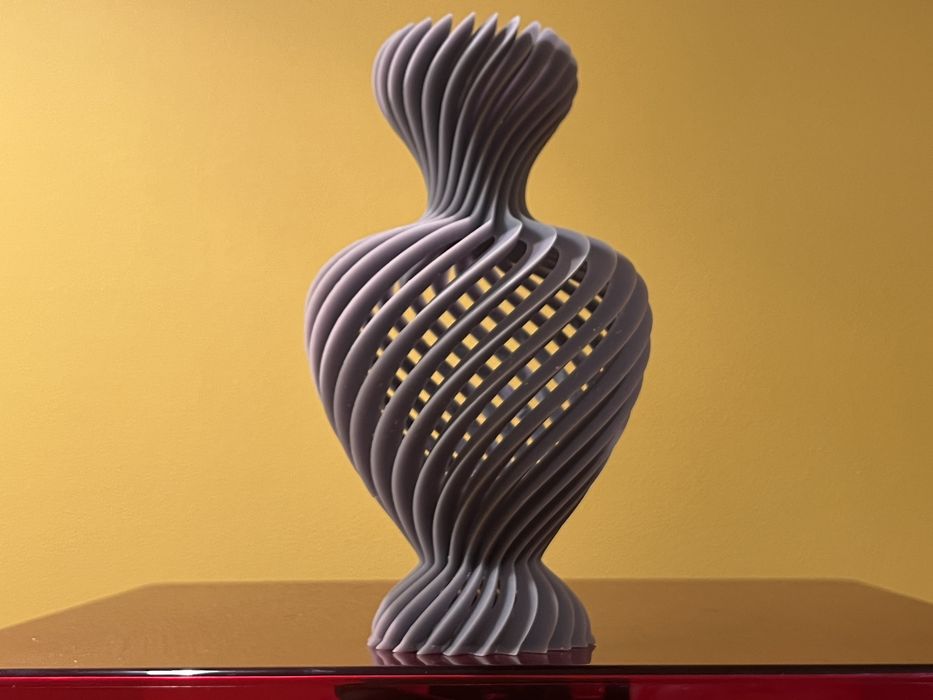
The next model we attempted was the Fan Vase, which, unfortunately, resulted in our only failure during the review. This was not due to the printer’s performance, but rather an issue with the model’s geometry. What appeared to be a solid base was actually a single layer over an empty space, rendering our carefully placed supports ineffective. This experience served as a valuable lesson to thoroughly inspect models before printing.
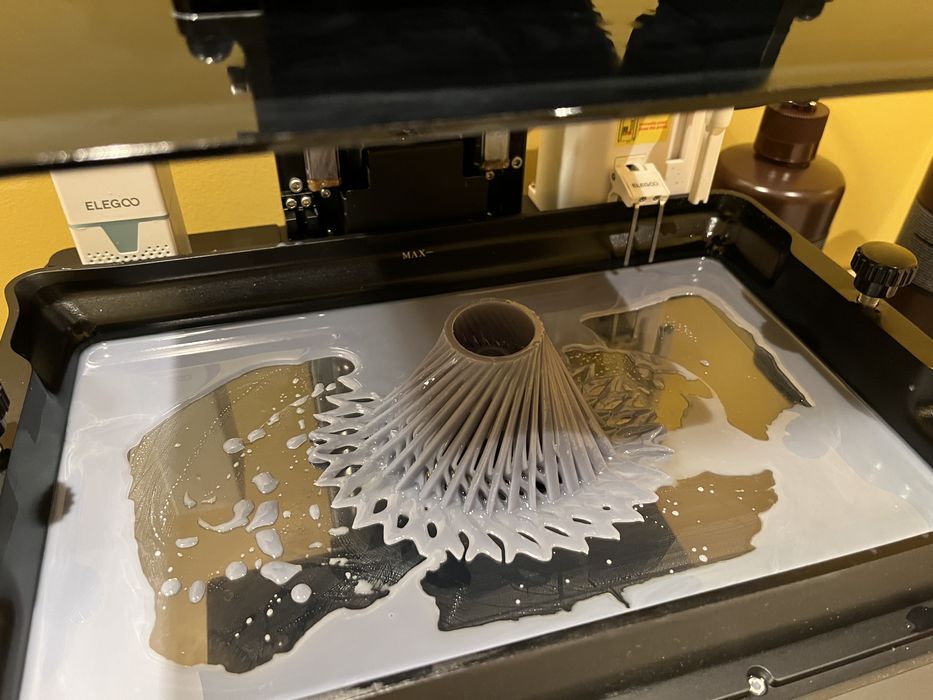
jupiterse-operations-unload.jpg
However, this mishap provided an opportunity to test the printer’s Automatic Resin Recycle feature. We observed the feeder tube as it descended to the bottom of the tank, efficiently extracting all the resin and pumping it back into the bottle. This feature greatly simplified the process of clearing the failed print from the tank membrane, showcasing the convenience and efficiency of this system.
jupiterse-operations-repair.jpg
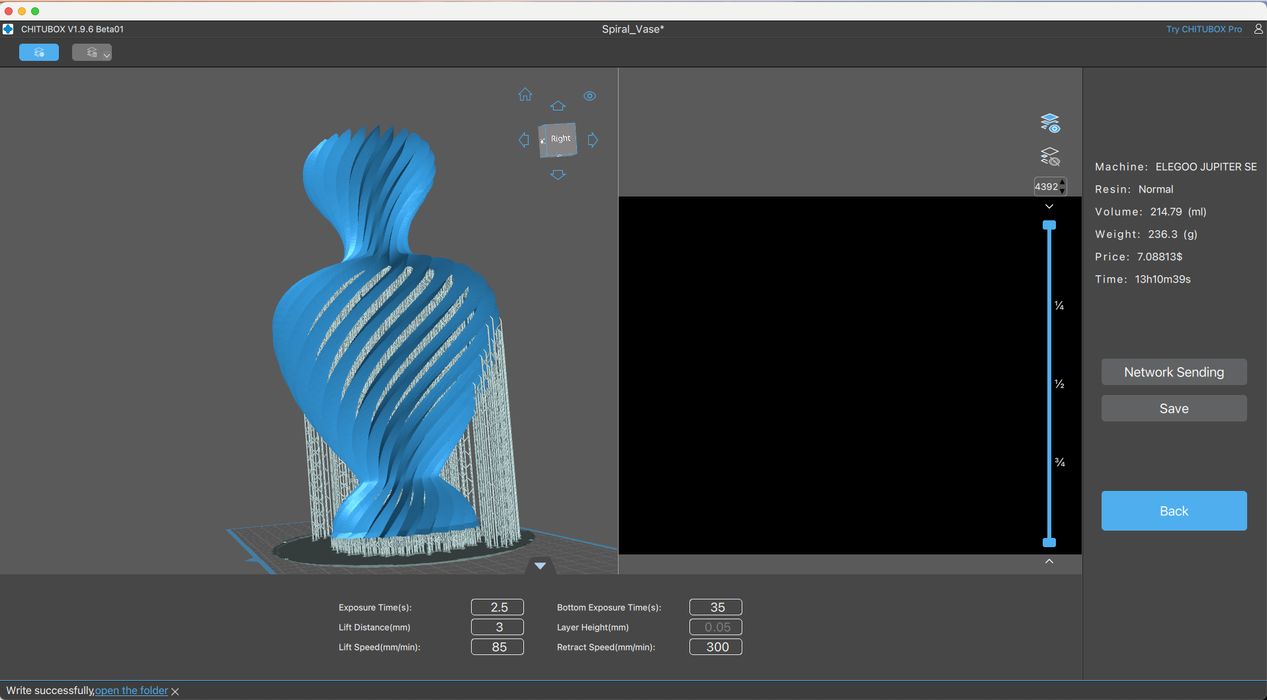
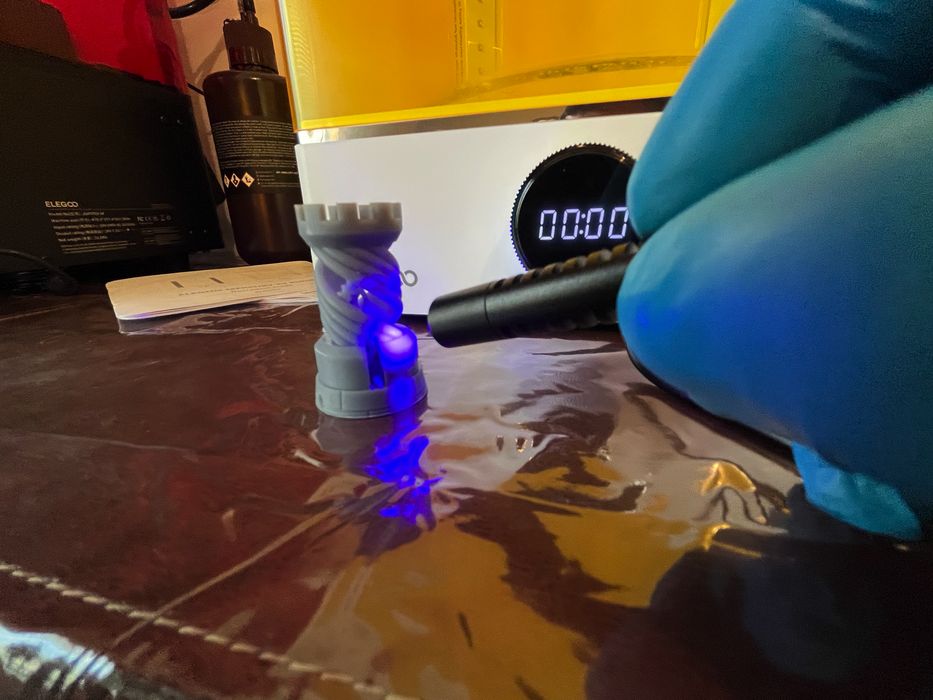
Continuing with our review, we proceeded to print a Spiral Vase. Given the delicate nature of the structure, we decided against making the tines hollow. This model’s design posed a challenge in removing internal supports, resulting in a cracked tine. Fortunately, the cure station’s handheld UV light came to the rescue. We applied a drop of uncured resin to the damaged area and used the handheld UV light to effectively “weld” the tine back together—a nifty fix!

jupiterse-operations-many-parts2.jpg
To conclude our review, we embarked on several full bed print tests, involving multiple parts of varying sizes. One notable project was the Space 1999 Eagle model. This model consumed a total of 335g of resin across two separate printing sessions. Impressively, we experienced no failures and the quality of each component was superb.
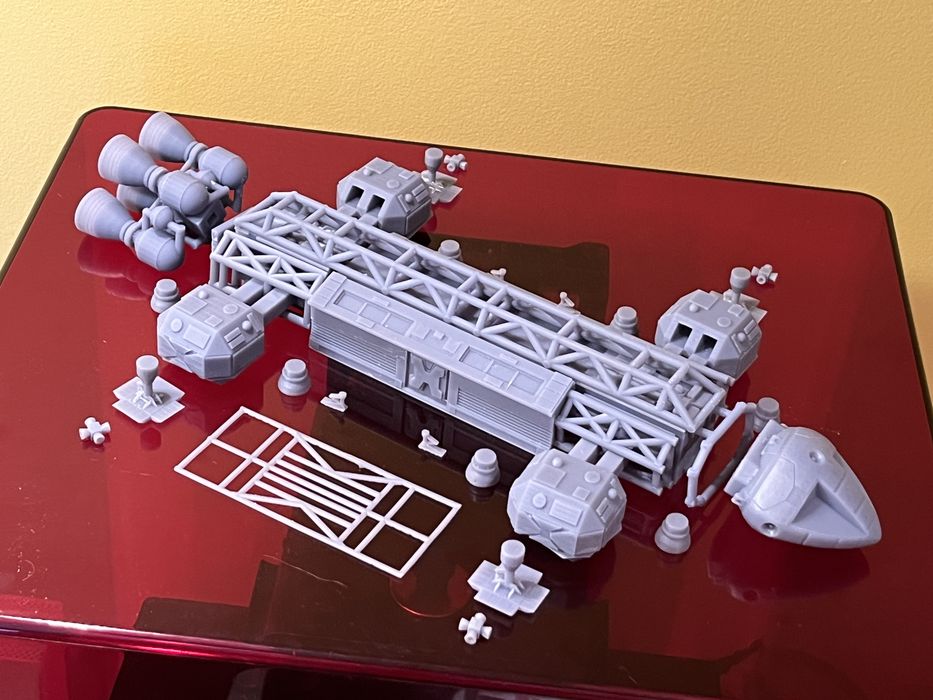
jupiterse-results-1999.jpg
We assembled part of the model to showcase it in the review, but planned a full assembly and painting session at a later time when we could dedicate more attention to it.
Elegoo Jupiter SE Final Thoughts
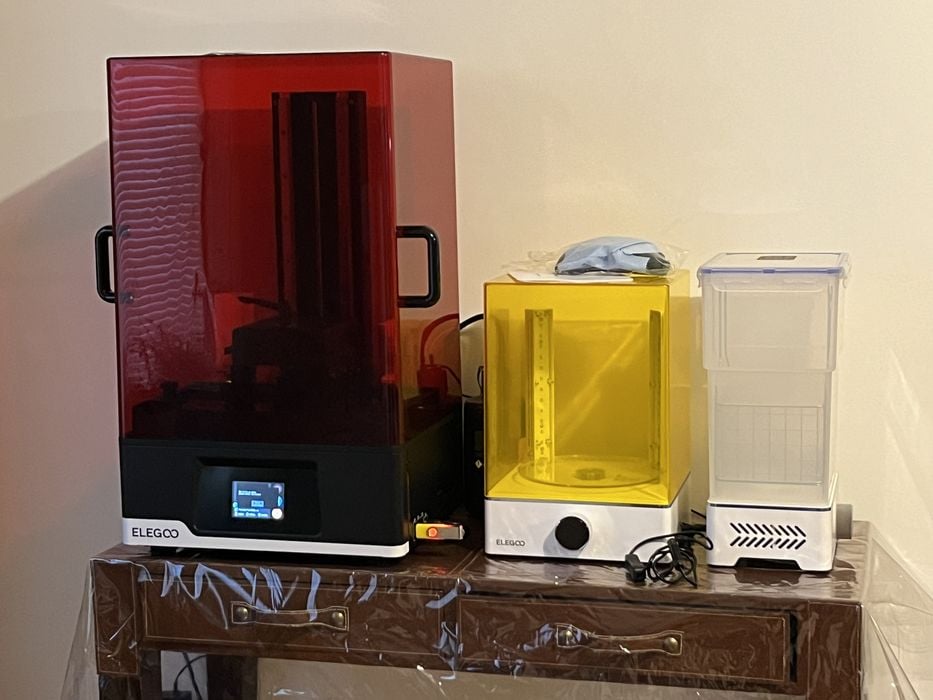
The Jupiter SE printer and Mercury XS Bundle arrived in excellent packaging, efficiently designed and well-protected with ample foam padding. While the assembly instructions deviated from traditional step-by-step formats and were somewhat vague, potentially confusing for beginners, we found the assembly process straightforward and quick.
The Jupiter SE stood out with its responsive touchscreen and intuitive menu. The display of detailed print-progress information was a particularly useful feature. We were impressed with the automatic resin feeding system, which not only streamlined the printing process but also facilitated easy tank draining – a feature often absent in resin printers, yet vital for maintenance and storage.
Using Elegoo’s branded resin simplified the exposure calibration, with the default printer profile settings proving accurate. Elegoo bundled the printer with the free versions of Chitubox and Voxeldance Tango. We primarily used Chitubox 1.9.6 Beta01, which offered sufficient functionality for our needs. The quality of prints from the Jupiter SE was remarkable, with our sole failure attributed to overlooked model geometry rather than the printer’s performance.
The USB air purifier, while a thoughtful inclusion, only partially mitigated resin odors and fumes, necessitating well-ventilated operating conditions. Handling the large and heavy lid required careful workflow planning to prevent resin contamination. A notable omission was the lack of a spare FEP sheet, commonly included with resin printers for maintenance. Elegoo promptly responded to our feedback on this by sending a spare sheet.
The Mercury XS Bundle excelled in its performance. The handheld UV attachment on the cure station was particularly useful. The wash station, though effective, was not sized to directly accommodate the Jupiter SE’s build plate, requiring prints to be removed before washing. This wasn’t a significant drawback, as pre-wash support removal helped extend the IPA’s lifespan.
Overall, the Jupiter SE impressed us with its print quality, features, and ease of use. Elegoo has done a commendable job with this printer, and we’re eagerly anticipating future printing projects. Good job, Elegoo!
ELEGOO
JUPITER SE 3D PRINTER
★ BEGINNER 6/10
★ ENTHUSIAST 9/10
★ PRODUCTION 8/10
BEST FEATURES
✔︎ Resin system
✔︎ On screen workflow
✔︎ Quality & Reliability
QUESTIONS
✖︎ Assembly instructions
✖︎ Full slicer version
✖︎ Awkward detachable lid
This is part three of a three part series, please read parts one and two.
Via Elegoo