
Recently, our friends at Kingroon announced the release of their new KLP1.
This high-speed Core XY printer is powered by Klipper OS. They piqued our interest further by offering one for us to review!
This is part one of a three-part series. We invite you to read parts two and three.
Kingroon KLP1 3D Printer Background
Kingroon, a familiar name in the 3D printing industry, has been around long enough to produce a series of Cartesian-style 3D printers. With each new release, they’ve introduced significant enhancements. We’ve previously reviewed models like the KPL5 and KP3S Pro S1. Each time, we were impressed by the quality and performance, especially considering the affordable pricing of Kingroon’s offerings.
Our attention grew when we learned that they had ventured into the realm of Klipper-based Core XY printers. Printers using Klipper can often boast speeds up to 500mm/s! While such speeds might be reserved for PLA and yield a more draft-like quality, we were curious about the results at 350mm/s.
This is a substantial leap from the typical 60-100mm/s speeds we’re accustomed to. The integration of Klipper firmware offers the potential to refine print quality using features like Input Shaper, reducing ringing or ghosting, and Pressure Advance for consistent extrusion.
Kingroon KLP1 3D Printer Specifications and Features
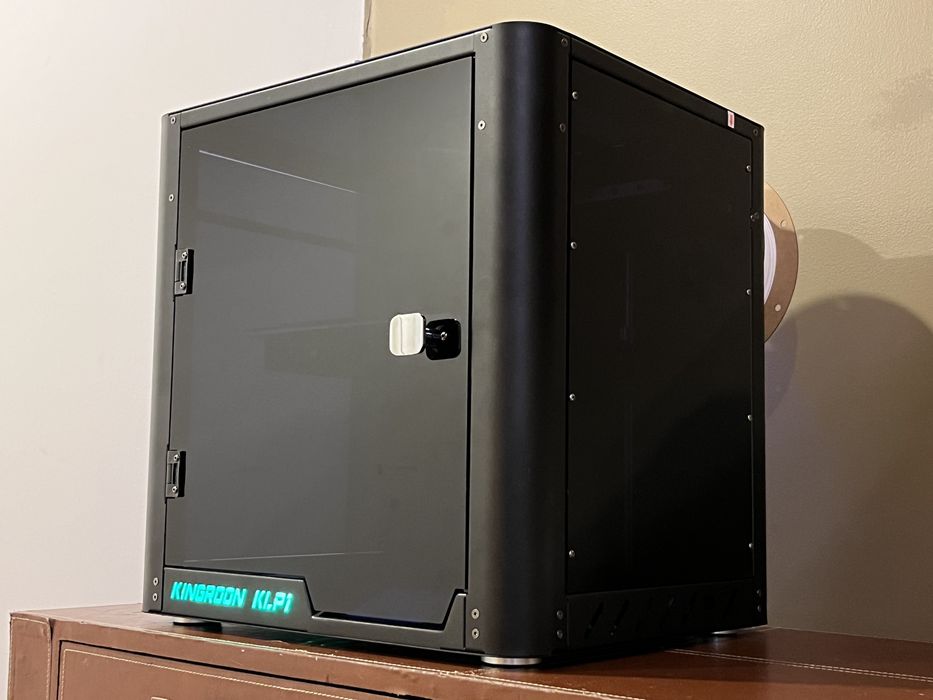
The KLP1 signifies Kingroon’s debut in the Core XY arena and their first fully enclosed printer. While it doesn’t have a dedicated heating system, the enclosure can retain the heat generated during printing. This design aids in printing structures and filaments that are more susceptible to warping.
The KLP1 sports a footprint of 400 x 420 x 420 mm and weighs a sturdy 15.72 kg. The specifications indicate a 300°C CHC (ceramic heating core) all-metal hotend, equipped with a 0.4mm hardened steel nozzle.
Additionally, it features a 5:1 dual-gear direct drive extruder that supports 1.75mm filaments. The build size is a reasonable 210 x 210 x 210 mm, supplemented with a heated print bed and a magnetically secured double-sided textured PEI build plate.
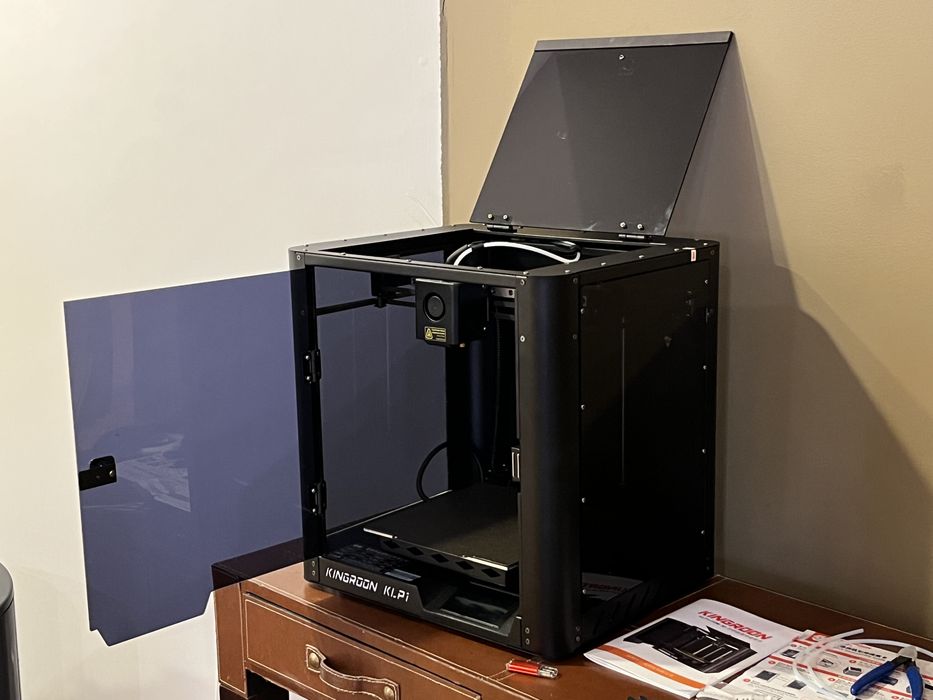
Ensuring precision even at high speeds, the CoreXY motion system uses linear rails. The sensor-based auto bed leveling ensures a consistent gap between the nozzle and the build plate, translating to optimal first layer adhesion across the build area.
The KLP1 is controlled via an integrated Klipper mainboard, eliminating the need for a separate Raspberry Pi, as is the case on certain other high speed implementations. Additional features like Input Shaping are accessible with an adxl345 accelerometer.
For connectivity, options range from short-range WiFi to direct Ethernet, turning nearly any networked screen into your printer interface.
For users who prefer a tactile experience, an optional 75 x 50 mm touchscreen with a stylus is available directly on the printer. This is the first machine we’ve tested that can use a stylus on the control panel.
Kingroon KLP1 3D Printer Unboxing and Assembly
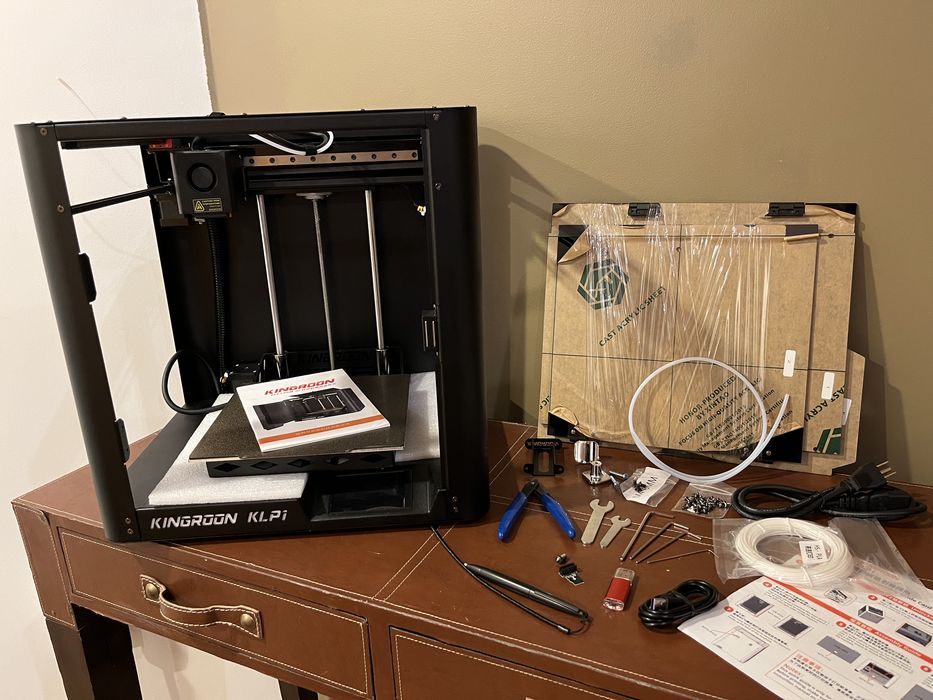
The KLP1 arrived in a robust cardboard box. The box had extra tape reinforcing its outer corners, and inside, formed cardboard inserts guarded the inner corners. Additionally, the printer chassis nestled into form-fitting foam inserts designed to absorb shipping impacts.

At the top layer of the box, we found the user manual and quick assembly instructions. This placement is excellent since, in some other machines, their instructions are buried much deeper, sometimes leading to missed steps. Directly beneath these instructions was another foam insert containing assembly components and accessories.
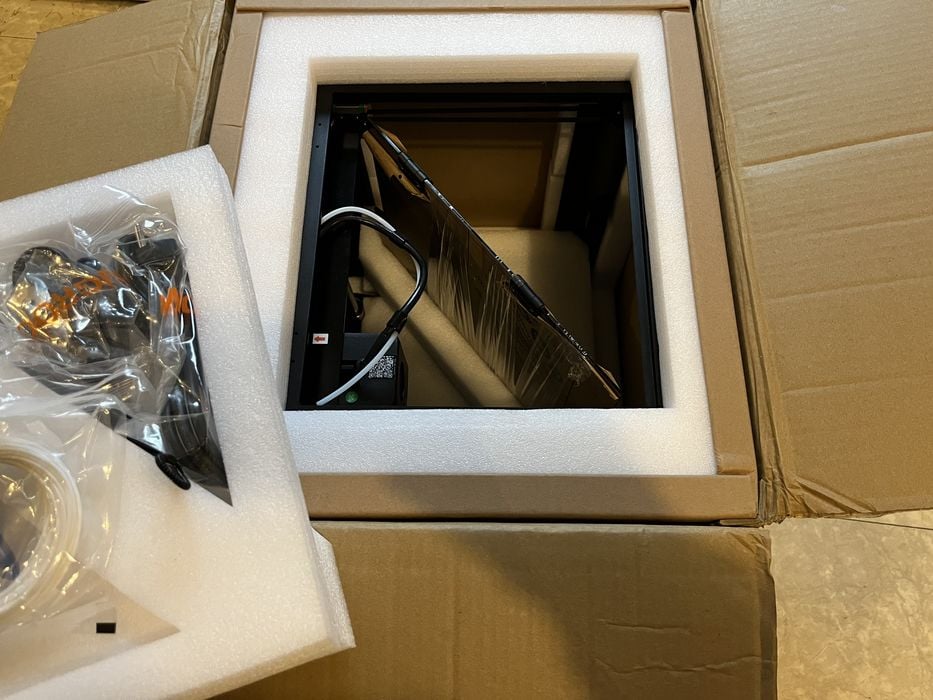
Lifting the printer from the box was straightforward. We just grabbed the sturdy chassis and lifted it out. Inside the open printer frame, there was another foam insert housing acrylic side panels. These panels would later be assembled onto the printer frame to form an enclosure.
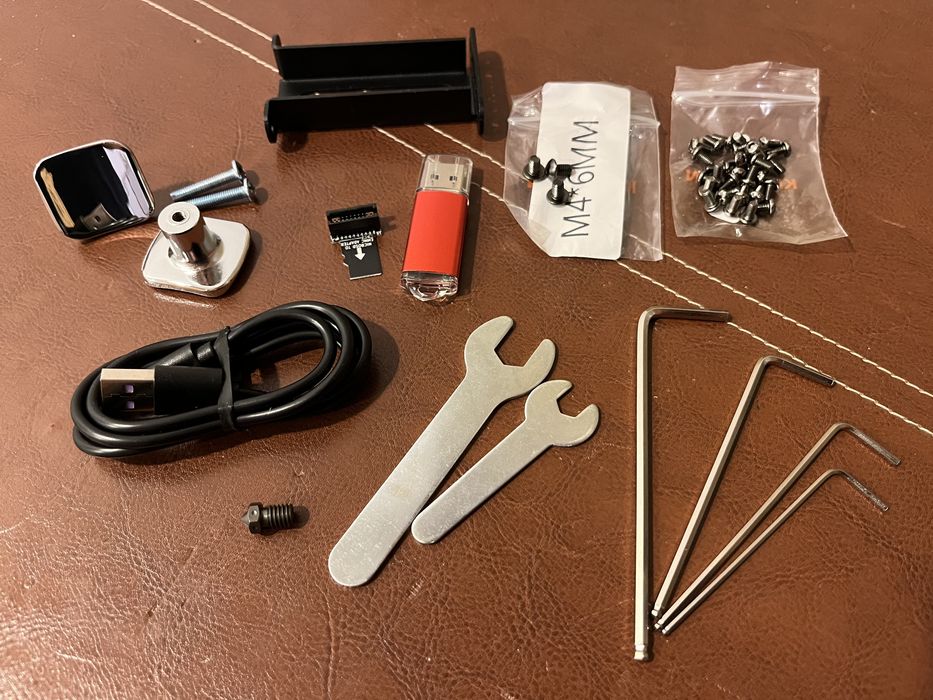
Shipping can be hard on a 3D printer’s delicate parts. To prevent movement, the XYZ axes were secured with clearly labeled removable screws. The quick assembly guide provided comprehensive steps for removing these screws and installing the side panels and filament holder. These instructions were reiterated in the user manual, available in both Chinese and English, and on a memory stick.
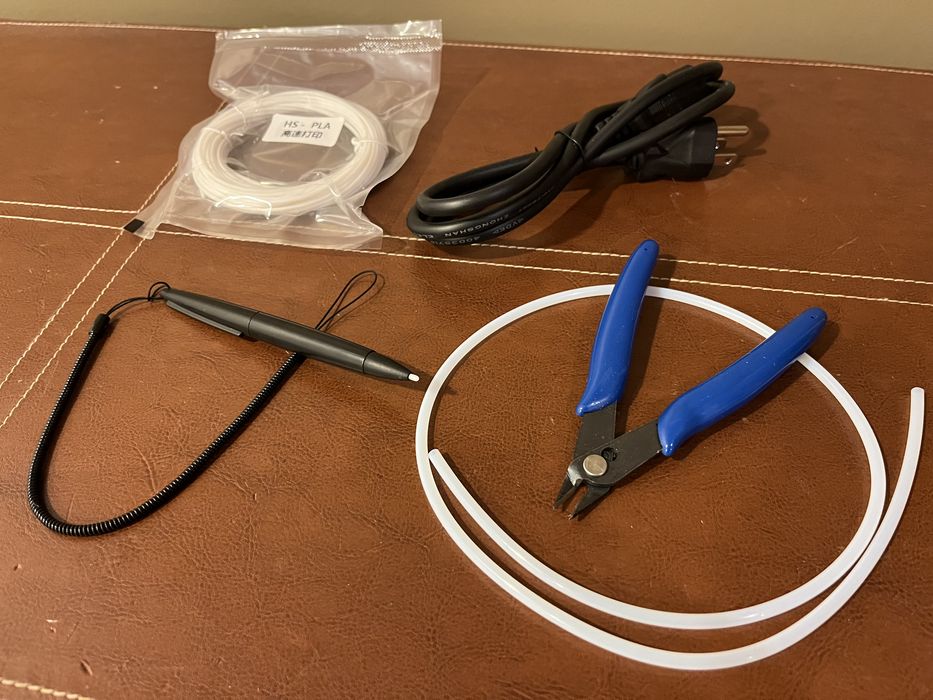
Upon assessing the included items, we noticed various assembly hardware like screws, lid knobs, a filament spool holder, and a spare nozzle. The toolset comprised open-end wrenches, socket wrenches, and small cutters. For connectivity, the package had power and USB cables, a USB memory stick, an EMMC Adapter, and a stylus for the printer’s touchscreen. There was also a sample coil of HS-PLA, material designed for high speed 3D printing.
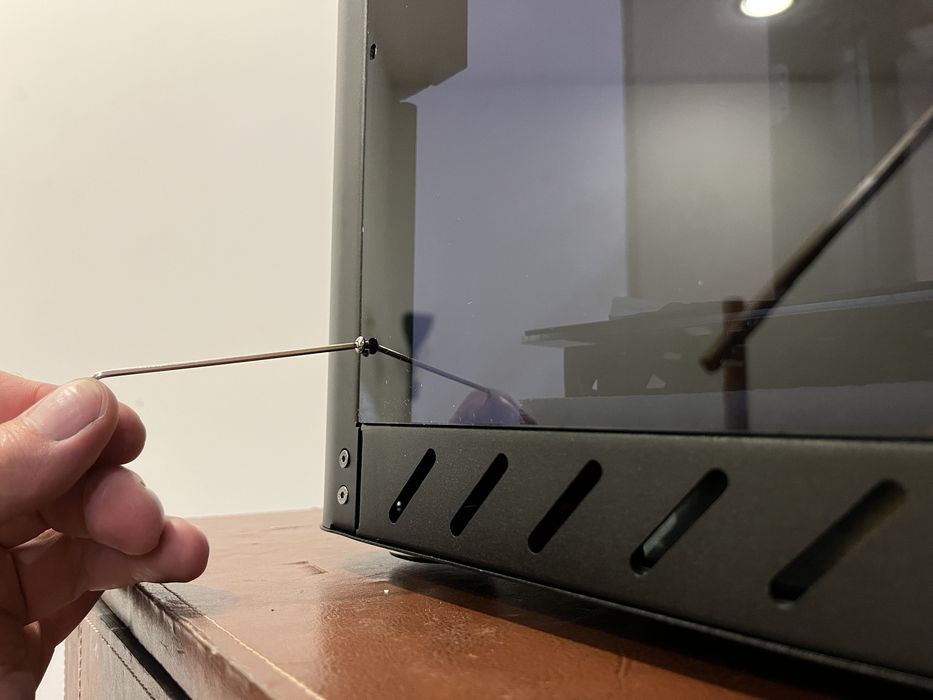
Assembling the side panels was simple. The hinges were pre-installed, so we only needed to remove the protective paper and fasten the hinges to the chassis.
While attaching the door handles, confusion arose due to mismatched screw lengths, but we soon located the correct screws.
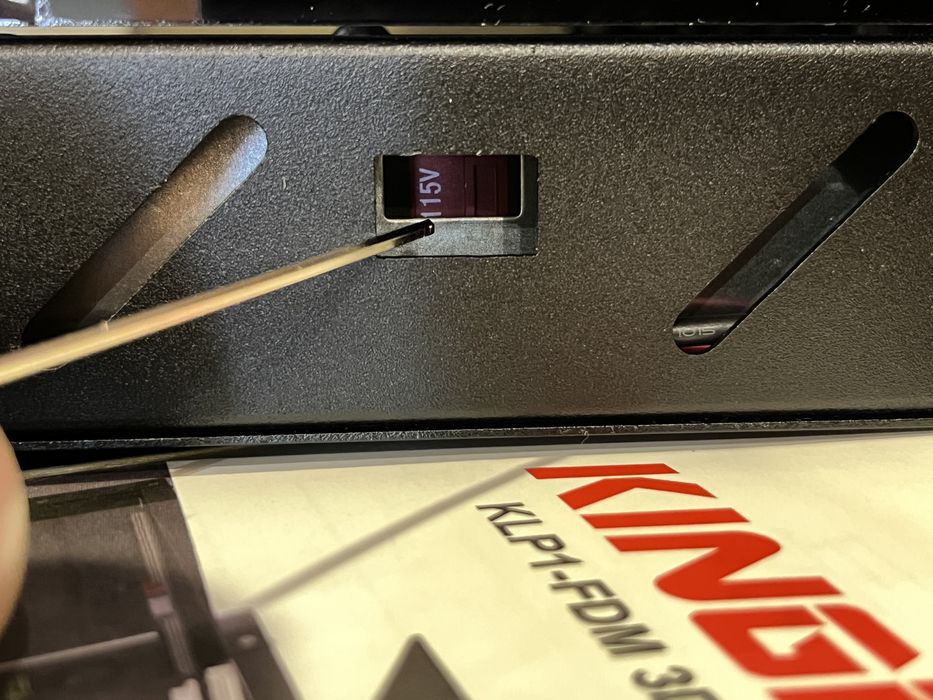
After assembling the filament spool holder and conducting a final check, we confirmed the correct voltage setting on the power supply before powering up.
This is part one of a three-part series. We invite you to read parts two and three.